
gridinlux 50070
gridinlux Cosmos Galaxy Robot Vacuum and Mop Instruction Manual
Model: Cosmos Galaxy (50070)
1. Introduction
Thank you for choosing the gridinlux Cosmos Galaxy Robot Vacuum and Mop. This manual provides essential information for the safe operation, maintenance, and troubleshooting of your device. Please read it thoroughly before first use and retain it for future reference.
Important Safety Instructions
- This appliance is for household use only.
- Do not allow children to operate the robot. Supervise children and pets when the robot is operating.
- Ensure the charging base is placed against a wall on a level surface, free from obstacles.
- Do not use the robot in wet environments or near liquids.
- Remove any loose cables, small objects, or fragile items from the floor before operation to prevent entanglement or damage.
- Do not use the robot to pick up large debris, sharp objects, or burning materials.
- Only use the original power adapter and charging base provided with the robot.
2. Package Contents
Verify that all components are present in the package:
- gridinlux Cosmos Galaxy Robot Vacuum and Mop
- Dust Tank
- Water Tank Accessory
- 2 Mopping Pads
- 4 Side Brushes (Propeller Brushes)
- 2 Central Brushes
- Cleaning Brush
- Remote Control
- Charging Base
- Charger (Power Adapter)
- User Manual

Image: Detachable dustbin and water tank components of the gridinlux Cosmos Galaxy robot.
3. Product Overview
Familiarize yourself with the main components of your robot vacuum.
Top View

Image: Top view of the robot, showing the power button, 'DOCK', 'SPEED', and 'AUTO' buttons, and the brand logo.
Bottom View

Image: Underside of the robot, displaying the two side brushes, main roller brush, and the attached mopping pad.
The robot features dual side brushes, a central roller brush, and a mopping attachment for comprehensive cleaning.
4. Setup
4.1 Initial Charging
- Place the charging base against a wall in an open area, ensuring there are no obstacles within 1 meter (3 feet) to the sides and 2 meters (6 feet) in front.
- Connect the power adapter to the charging base and plug it into a wall outlet.
- Place the robot onto the charging base, ensuring the charging contacts align. The indicator light on the robot will illuminate to confirm charging.
- Fully charge the robot for at least 6 hours before first use.
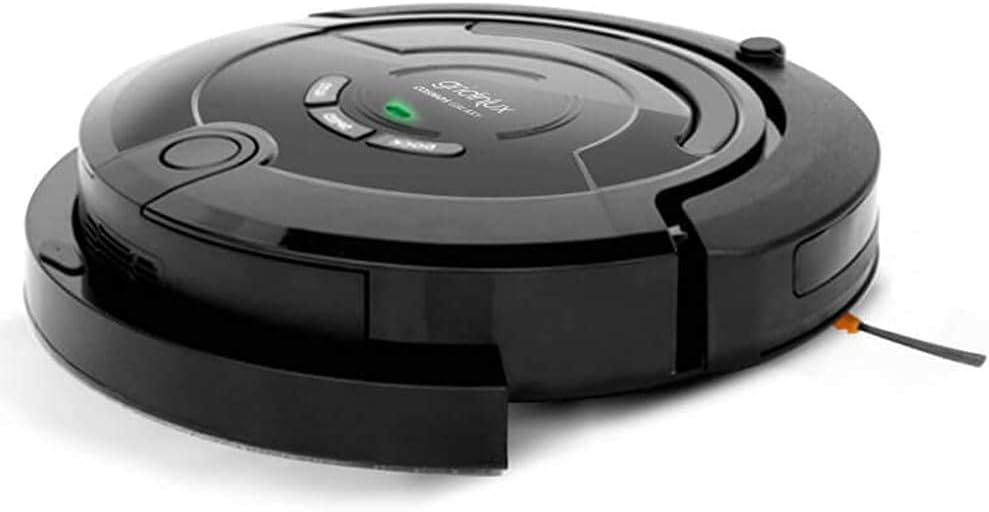
Image: The robot vacuum positioned next to its charging base, illustrating the charging process.
4.2 Installing Side Brushes
Attach the side brushes by pressing them onto the designated posts on the underside of the robot until they click into place. Ensure they are securely fastened.
4.3 Installing the Mopping Pad and Water Tank
If using the mopping function, fill the water tank with clean water. Attach the mopping pad to the water tank accessory. Slide the filled water tank accessory into the designated slot at the rear of the robot until it locks securely.
5. Operating Instructions
5.1 Power On/Off
Press and hold the power button on the robot or the remote control to turn the robot on or off.
5.2 Cleaning Modes
The robot offers 4 cleaning modes:
- Auto Mode: The robot automatically navigates and cleans the entire area.
- Spot Mode: The robot cleans a specific concentrated area in a spiral pattern.
- Corners Mode: The robot focuses on cleaning along walls and corners.
- Program Mode: Allows you to schedule cleaning times for daily operation.
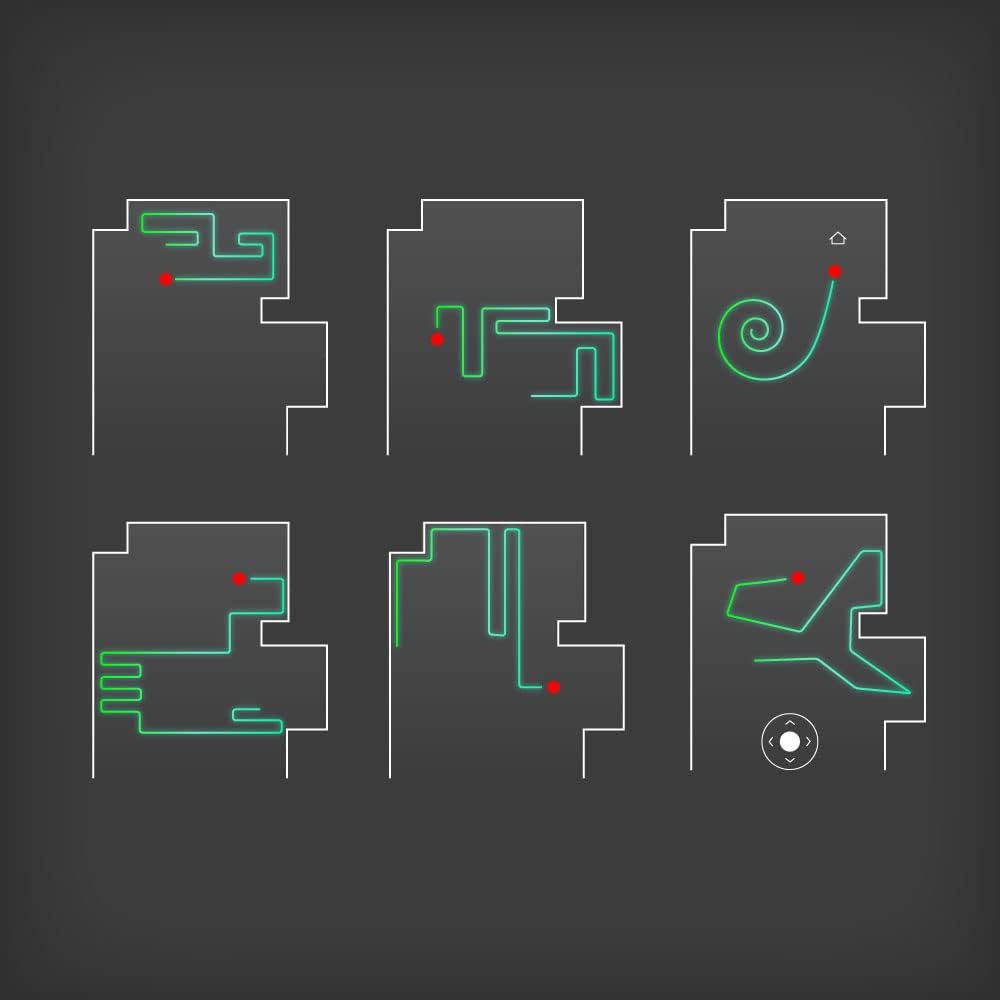
Image: Visual representation of various cleaning patterns, including edge cleaning, spiral cleaning, and zigzag paths.
5.3 Cleaning Speeds
Select between two cleaning speeds: Normal or Fast, depending on your cleaning needs.
5.4 Using the Remote Control
The remote control allows you to:
- Start/Pause cleaning.
- Select cleaning modes.
- Adjust cleaning speed.
- Manually control the robot's direction.
- Send the robot back to the charging base.
- Set cleaning schedules (24h/7 days a week).

Image: A hand holding the remote control, demonstrating its use to operate the robot vacuum.
5.5 Anti-Fall and Anti-Collision Sensors
The GEOSITE infrared sensors prevent the robot from falling down stairs and reduce collisions with furniture. However, it is recommended to clear the path of excessive clutter for optimal performance.
5.6 Carpet Climbing Capability
The robot is designed to climb over carpets up to 20mm in height. For best mopping results, remove the water tank and mopping pad when cleaning carpets.

Image: The robot vacuum operating on a blue carpet, demonstrating its ability to traverse different floor types.
6. Maintenance
Regular maintenance ensures optimal performance and extends the lifespan of your robot.
6.1 Emptying the Dust Tank
After each cleaning cycle, or when the dust tank is full, remove it from the robot and empty its contents into a waste bin. Clean the filter inside the dust tank as needed.
6.2 Cleaning Filters
The robot uses sponge, fabric, foam, and cartridge filters. Regularly tap out dust from the filters. Filters can be rinsed with water, but ensure they are completely dry before re-inserting them into the dust tank.
6.3 Cleaning Brushes
- Side Brushes: Periodically remove hair and debris tangled around the side brushes. If brushes are worn or damaged, replace them.
- Central Roller Brush: Remove the central brush cover and lift out the roller brush. Use the provided cleaning tool to cut and remove tangled hair and debris.
6.4 Mopping Pad Care
After each mopping session, remove the mopping pad from the water tank accessory. Rinse it thoroughly with water and allow it to air dry completely before storing or reusing.
6.5 Cleaning Sensors and Charging Contacts
Wipe the anti-fall sensors, anti-collision sensors, and charging contacts on both the robot and the charging base with a clean, dry cloth to ensure proper function.
7. Troubleshooting
If you encounter issues with your robot, refer to the following table for common problems and solutions:
| Problem | Possible Cause | Solution |
|---|---|---|
| Robot does not turn on. | Low battery or not charged. | Place the robot on the charging base and ensure it is fully charged. |
| Robot stops unexpectedly. | Brushes or wheels are tangled; dustbin is full; sensor is dirty. | Clean brushes and wheels. Empty dustbin. Clean sensors. |
| Robot does not return to charging base. | Charging base is obstructed or out of range. | Ensure the charging base is clear of obstacles and the robot is within range. Manually place the robot on the base. |
| Poor cleaning performance. | Dustbin full; filters dirty; brushes worn or tangled. | Empty dustbin. Clean or replace filters. Clean or replace brushes. |
| Mopping function is ineffective. | Water tank empty; mopping pad dirty or dry. | Refill water tank. Clean or moisten mopping pad. |
8. Specifications
| Feature | Detail |
|---|---|
| Brand | gridinlux |
| Model Name | Cosmos Galaxy |
| Model Number | 50070 |
| Color | Black |
| Dimensions (L x W x H) | 32 x 32 x 8.5 cm |
| Item Weight | 4 Kilograms |
| Power | 26 Watts |
| Battery Type | 1 Lithium-ion (included) |
| Material | ABS + Polypropylene |
| Special Feature | Cordless |
| Surface Recommendation | Carpet, Hard Floors |
| Controller Type | Remote Control |
| Filter Type | Sponge, Fabric, Foam, Cartridge |
9. Warranty and Support
This product comes with a manufacturer's warranty. Please refer to the warranty card included in your package for specific terms and conditions. For technical support, spare parts, or any inquiries, please contact gridinlux customer service through their official website or the contact information provided with your purchase documentation.
Ask a question about this manual
Ask about setup, troubleshooting, compatibility, parts, safety, or missing instructions. Manuals+ will review the question and use this page’s manual context to help answer it.