Introduction
The ThermoPro TP22S is a digital wireless meat thermometer designed to help you monitor the internal temperature of your food and the ambient temperature of your grill, smoker, or oven. Its dual probe system and remote receiver allow for convenient and precise cooking, ensuring perfectly cooked meals every time. This manual provides detailed instructions for setting up, operating, maintaining, and troubleshooting your TP22S thermometer.
Package Contents
Upon unboxing your ThermoPro TP22S, please ensure all the following components are present:
- 1 x Wireless Receiver Unit
- 1 x Wireless Transmitter Unit
- 2 x Food Grade Stainless Steel Probes
- 1 x Grill Clip (for ambient temperature monitoring)
- 4 x AAA Batteries (2 for receiver, 2 for transmitter)
- 1 x Instruction Manual (this document)
Below is an image illustrating the main components included in the package:

Image: The ThermoPro TP22S wireless receiver, transmitter, two probes, and grill clip.
Setup & Synchronization
Follow these steps to set up and synchronize your ThermoPro TP22S thermometer:
- Install Batteries: Open the battery compartments on both the receiver and transmitter units. Insert the provided AAA batteries, ensuring correct polarity (+/-). The units will automatically power on once batteries are inserted.
- Automatic Synchronization: The receiver and transmitter units are pre-synchronized at the factory. Once both units are powered on, they should automatically connect. The display on the receiver will show temperature readings from the probes (or dashes if probes are not connected).
- Connect Probes: Carefully insert the stainless steel probes into the designated ports on the transmitter unit. You will hear a click and feel a snap when they are securely connected. The receiver will immediately display the current temperature readings from the probes.
For a visual guide on setup and synchronization, please watch the official setup video:
Video: Official ThermoPro TP22 Meat Thermometer Setup Guide. This video demonstrates battery installation, unit synchronization, and probe connection.
Operating Instructions
Powering On/Off
- To turn on: Press the POWER button on both the receiver and transmitter.
- To turn off: Press and hold the POWER button on both units for 3 seconds.
Changing Temperature Units (°F/°C)
On the receiver unit, press the °F/°C button located on the back of the unit to switch between Fahrenheit and Celsius temperature displays.
Backlight Activation
To activate the backlight on the receiver unit, press the LIGHT button. The backlight will illuminate for a few seconds.
Selecting Meat Types and Doneness Levels
The TP22S comes with USDA-recommended preset temperatures for various meat types and doneness levels. This feature is ideal for beginners.
- Press the MEAT button to cycle through different meat types (e.g., Ground Beef, Ground Poultry, Beef, Veal, Chicken, Pork, Poultry, Lamb, Fish, Ham, Oven).
- Once a meat type is selected, press the TASTE button to cycle through the desired doneness levels (e.g., Rare, Medium Rare, Medium, Medium Well, Well Done). Note: Not all meat types have adjustable doneness levels.
- You can also manually set your desired target temperature by pressing the UP or DOWN arrow buttons.

Image: Visual representation of USDA preset temperatures and doneness levels available on the ThermoPro TP22S.
Using Dual Probes
The TP22S features two probes, allowing you to monitor two different items simultaneously:
- Probe 1: Typically used for monitoring the internal temperature of your main food item.
- Probe 2: Can be used for a second food item or, with the included grill clip, to monitor the ambient temperature inside your grill, smoker, or oven.

Image: Two probes inserted into different meat cuts on a grill, demonstrating dual monitoring capability.

Image: One probe in a turkey for food temperature and another with a clip for oven temperature, illustrating versatile usage.
Timer Function
The receiver unit includes a built-in timer that can function as both a count-up and count-down timer.
- To access the timer: Press the MODE button until 'TIMER' is displayed.
- Count-down Timer: Use the UP or DOWN arrow buttons to set the desired time in hours and minutes. Press the START/STOP button to begin the countdown.
- Count-up Timer: With the timer set to 00:00, press the START/STOP button to begin counting up.
- To pause/resume: Press the START/STOP button.
- To clear: Press and hold the CLEAR button.

Image: The ThermoPro TP22S receiver displaying both temperature readings and the timer simultaneously.
Alarm Function
The TP22S will alert you when your food reaches the set target temperature or when the timer expires.
- When the target temperature is reached, the receiver will beep and flash.
- When the countdown timer reaches zero, the receiver will also beep and flash.
- To silence the alarm, press any button on the receiver.
Placement & Usage Tips
- Probe Insertion: Insert the probe into the thickest part of the meat, avoiding bones or gristle, as these can affect temperature accuracy.
- Probe Safety: The stainless steel probes are designed for high temperatures (32°F to 572°F / 0°C to 300°C). However, do not expose the probe's wire directly to flames or heating elements.
- Remote Range: The wireless receiver allows you to monitor your food from up to 300 feet away. Keep the transmitter unit as close as possible to the receiver for optimal signal strength. Obstacles like thick walls or metal structures can reduce the range.
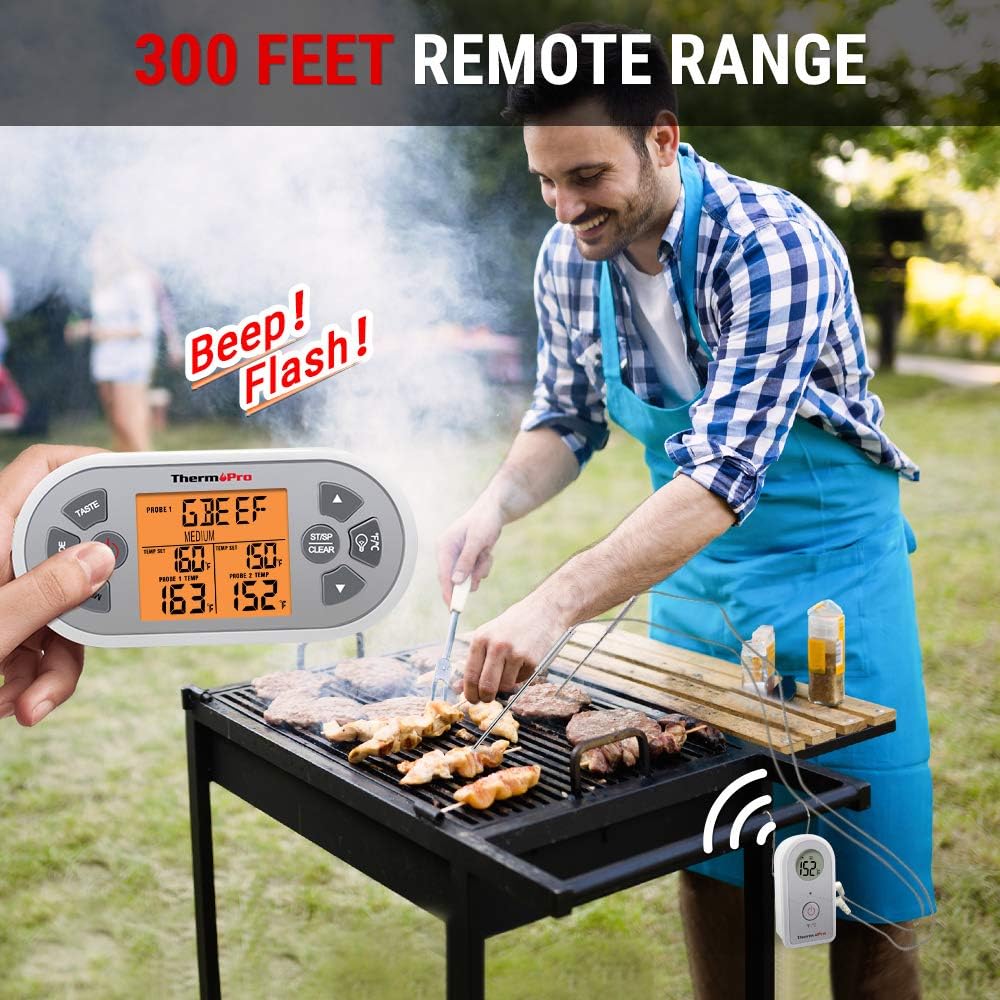
Image: A user monitoring their grill from a distance, highlighting the 300-foot remote range capability.
Care & Maintenance
- Cleaning Probes: Always clean the stainless steel probes thoroughly after each use with hot soapy water. Rinse and dry completely. Do not immerse the probe connectors or the main units in water.
- Cleaning Units: Wipe the receiver and transmitter units with a damp cloth. Do not use abrasive cleaners or immerse them in water.
- Storage: Store the thermometer in a dry place at room temperature when not in use. Remove batteries if storing for extended periods to prevent leakage.

Image: Close-up of the food-grade stainless steel probe, emphasizing its durability and heat resistance.
Troubleshooting
- No Display/Low Battery: Check battery polarity. Replace batteries if the display is dim or non-existent.
- No Signal/Synchronization Issues: Ensure both units are within range and powered on. Move the receiver closer to the transmitter. Avoid placing the transmitter directly on metal surfaces, which can interfere with the signal.
- Inaccurate Temperature Readings: Ensure the probe is inserted correctly into the thickest part of the meat, away from bones. Verify the probe connection to the transmitter. Test the probe in boiling water (212°F/100°C) or ice water (32°F/0°C) for accuracy.
- Probe Error (---): If the display shows '---', the probe may be damaged or not properly connected. Try reconnecting the probe or using a different probe if available.
Specifications
| Temperature Range | 32°F to 572°F (0°C to 300°C) |
| Probe Type | Food Grade Stainless Steel |
| Probe Accuracy | ±1.8°F (±1°C) |
| Wireless Range | Up to 300 feet (90 meters) |
| Power Source | 4 x AAA Batteries (included) |
| Display Type | Digital LCD with Backlight |
| Special Features | Dual Probe, USDA Presets, Timer, Alarm Function |
Warranty & Support
ThermoPro provides a warranty for this product against defects in materials and workmanship. For detailed warranty information, product registration, or technical support, please visit the official ThermoPro website or contact customer service.
Customer Service: 1-877-515-7797 (Monday-Friday, 8:00 AM - 6:00 PM EST)


