
1. Introduction
The PWAY PW-HT239 HDMI Extender is designed to transmit HDMI video and audio signals over long distances using a single Cat5e/Cat6/Cat7 cable. This extender supports high-resolution video up to 4K@60Hz, including YUV 4:4:4 and RGB 4:4:4 color formats, and HDR functionality. It is ideal for applications requiring extended HDMI signal transmission without compromising video quality.
Key Features:
- 4K@60Hz Transmission: Extends HDMI video and audio signals up to 50 meters (165 feet) over a single Cat6/7 cable. Distances vary by cable type: Cat5 up to 30m (100ft), Cat5e up to 40m (130ft), Cat6/7 up to 50m (165ft).
- High Configuration Support: Compatible with YUV 4:4:4 and RGB 4:4:4 image formats.
- HDMI 2.0 & HDCP 2.2: Supports HDMI 2.0 with an 18Gbps transmission rate and HDCP 2.2 protocol, allowing connection to Blu-ray DVD players and other protected content sources.
- HDR Functionality: Provides enhanced dynamic range and image detail compared to standard images.
- EDID Pass-through: Supports EDID penetration function for compatibility with various display devices.
- HDMI Loop Out: The transmitter unit includes an HDMI loop-out port for connecting a local display.
2. Package Contents
Please verify that all items are included in your package:
- 1x HDMI Extender Transmitter (TX)
- 1x HDMI Extender Receiver (RX)
- 2x Power Adapters (DC 5V)
- 1x User Manual
- 1x After-sale Card

Image: Package contents including the transmitter, receiver, power adapters, user manual, and after-sale card.
3. Product Overview
The PWAY PW-HT239 consists of two main units: a Transmitter (TX) and a Receiver (RX).
Transmitter (TX) Unit
- HDMI IN: Connects to the HDMI source device (e.g., PC, DVD player).
- HDMI OUT (Loop Out): Connects to a local display for monitoring the source signal.
- UTP: RJ45 port for connecting to the Receiver unit via Cat5e/Cat6/Cat7 cable.
- DC 5V: Power input port.
- PWR LED: Indicates power status.
- STA LED: Indicates signal status.
Receiver (RX) Unit
- HDMI OUT: Connects to the HDMI display device (e.g., TV, monitor, projector).
- UTP: RJ45 port for connecting to the Transmitter unit via Cat5e/Cat6/Cat7 cable.
- DC 5V: Power input port.
- PWR LED: Indicates power status.
- STA LED: Indicates signal status.

Image: Diagram illustrating typical connections for the PWAY HDMI Extender, showing source devices connected to the transmitter and display devices connected to the receiver.
4. Specifications
| Feature | Specification |
|---|---|
| Brand | PWAY |
| Model Number | PW-HT239 |
| Connector Type | HDMI |
| Cable Type | HDMI, Cat5e/Cat6/Cat7 |
| Compatible Devices | DVD-Player, PC, Laptop, TV Box, Monitor, Projector |
| Data Transfer Rate | 18 Gigabit per Second |
| Max Resolution | 4K@60Hz |
| Color Formats | YUV 4:4:4, RGB 4:4:4 |
| HDCP Version | HDCP 2.2 |
| Max Transmission Distance | 50m (165ft) over Cat6/7, 40m (130ft) over Cat5e, 30m (100ft) over Cat5 |
| Power Supply | DC 5V (Power Adapter included) |
| Color | Black |
5. Setup Instructions
Follow these steps to set up your PWAY HDMI Extender:
- Prepare Cables: Ensure you have a high-quality Cat5e, Cat6, or Cat7 Ethernet cable of appropriate length (up to 50m for Cat6/7) and two HDMI cables.
- Connect Source to Transmitter (TX): Connect one end of an HDMI cable to the HDMI output of your source device (e.g., PC, DVD player) and the other end to the HDMI IN port on the Transmitter (TX) unit.
- (Optional) Connect Local Display: If you wish to monitor the source signal locally, connect a second HDMI cable from the HDMI OUT (Loop Out) port on the TX unit to a local display.
- Connect Transmitter to Receiver: Connect one end of the Cat5e/Cat6/Cat7 Ethernet cable to the UTP port on the Transmitter (TX) unit and the other end to the UTP port on the Receiver (RX) unit. Ensure the cable is securely plugged in.
- Connect Receiver to Display: Connect one end of an HDMI cable to the HDMI OUT port on the Receiver (RX) unit and the other end to the HDMI input of your remote display device (e.g., TV, monitor, projector).
- Power On: Connect the two provided DC 5V power adapters to the DC 5V ports on both the Transmitter (TX) and Receiver (RX) units, then plug them into power outlets. The PWR LED on both units should illuminate.
- Verify Connection: Power on all connected devices (source and displays). The STA LED on both extender units should light up, indicating a stable signal connection. The image should appear on your remote display.

Image: Connection diagram showing the setup flow from source to transmitter, through the Cat cable to the receiver, and finally to the display.

Image: An example setup demonstrating the extender's capability to transmit signals over a long distance to a remote display.
6. Operating Instructions
Once the setup is complete and all devices are powered on, the PWAY HDMI Extender operates automatically. No additional configuration is typically required.
- Signal Transmission: The extender will automatically detect and transmit the HDMI signal from the source to the remote display.
- Resolution and Color: The extender supports resolutions up to 4K@60Hz with YUV 4:4:4 and RGB 4:4:4 color spaces. Ensure your source and display devices are also configured to support these settings for optimal performance.
- HDR Support: If your source and display support HDR, the extender will pass through the HDR signal, providing enhanced contrast and color.
- EDID Management: The EDID pass-through function ensures compatibility between the source and display by relaying the display's capabilities to the source.
- Loop Out Function: The HDMI OUT port on the TX unit provides a convenient way to connect a local display, allowing you to view the source content near the transmitter.
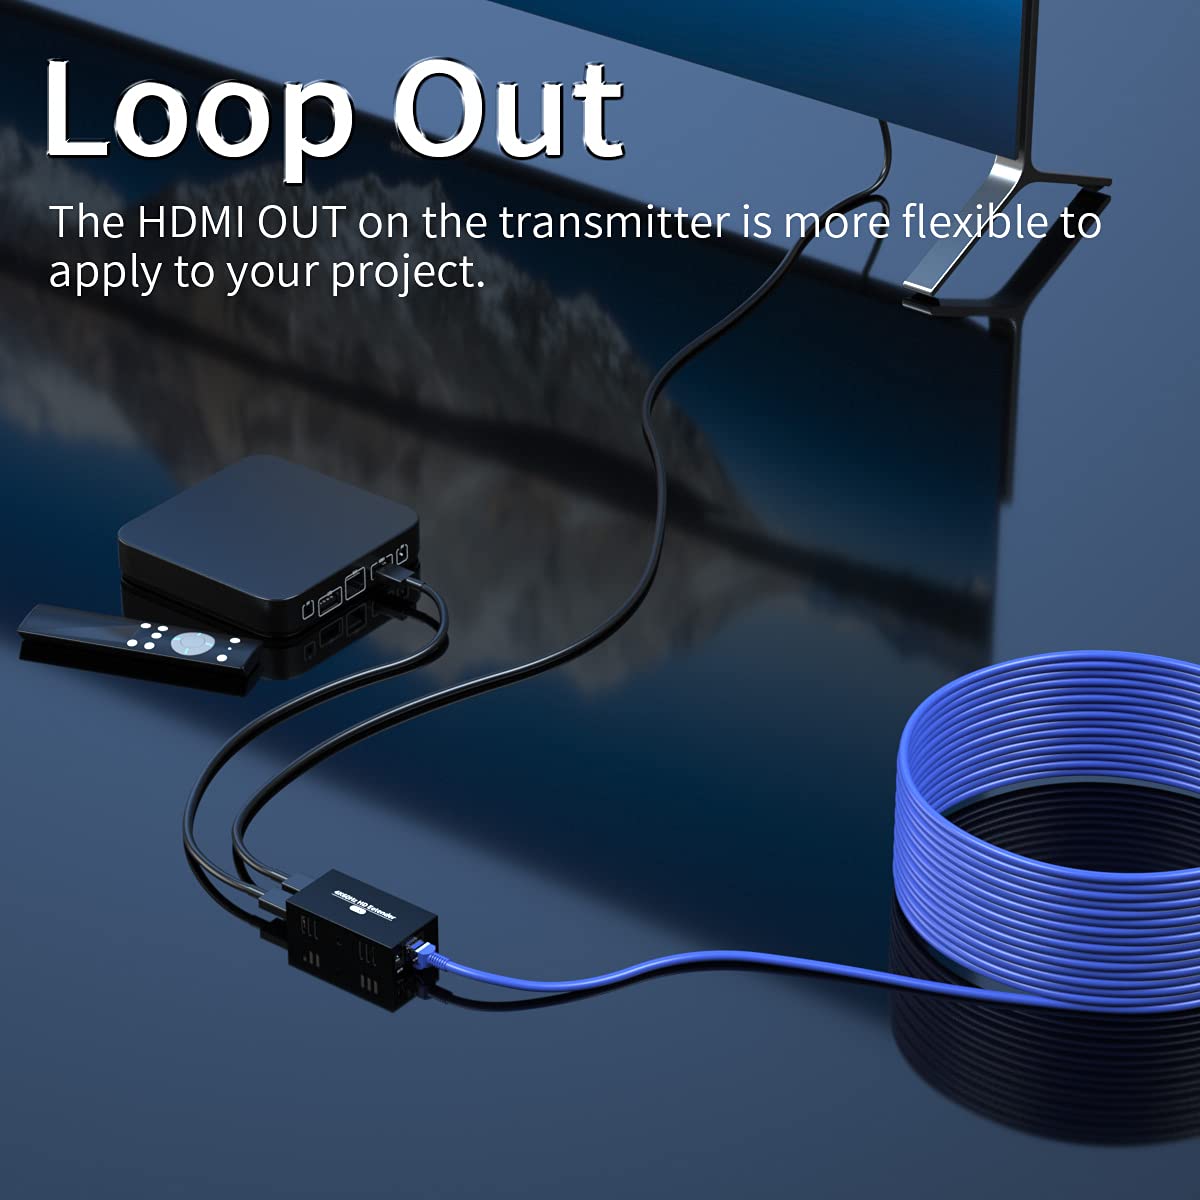
Image: Visual representation of the clarity achieved with 4K@60Hz resolution compared to lower resolutions.

Image: Illustration of the HDMI loop-out port on the transmitter unit, enabling a local display connection.
7. Maintenance
To ensure the longevity and optimal performance of your HDMI extender, please follow these maintenance guidelines:
- Cleaning: Use a soft, dry cloth to clean the units. Avoid using liquid or aerosol cleaners, as they may damage the device.
- Environment: Operate the device in a well-ventilated area. Avoid exposing the units to extreme temperatures, humidity, or direct sunlight.
- Power: Use only the provided power adapters. Disconnect power when the device is not in use for extended periods.
- Cables: Ensure all cables are securely connected and not bent or crimped, which can lead to signal loss or damage.

Image: The extender unit featuring ventilation slots for proper heat dissipation.
8. Troubleshooting
If you encounter issues with your PWAY HDMI Extender, refer to the following common problems and solutions:
| Problem | Possible Cause | Solution |
|---|---|---|
| No video or audio signal |
|
|
| Poor video quality (flickering, distortion) |
|
|
| Sound issues (skipping, no audio) |
|
|
| No HDR or YUV 4:4:4 at 4K@60Hz |
|
|
| Units feel warm | Normal operation | It is normal for the units to generate some heat during operation. Ensure adequate ventilation around the devices. |
9. Warranty and Support
PWAY products are designed for reliability and performance. For specific warranty information, please refer to the warranty card included in your package or visit the official PWAY website. If you require technical assistance or have questions not covered in this manual, please contact PWAY customer support through their official channels.
Please retain your proof of purchase for warranty claims.