
1. Introduction
Thank you for choosing the DOKIO Solar Charge Controller. This device is designed to automatically manage the battery operation within your solar panel and solar system setup. It ensures efficient charging and discharging, protecting your battery and extending its lifespan. This manual provides essential information for the safe and effective use of your controller.
The controller features a clear LCD display and user-friendly controls, making it suitable for various small solar energy systems, including home, industrial, and commercial applications.

Figure 1: DOKIO Solar Charge Controller and included accessories.
2. Product Features
- Automatically manages solar panel and battery operations.
- Built-in comprehensive protection: overload protection, short-circuit protection, open-circuit protection, reverse protection, and lightning protection.
- Extends battery life and ensures stable load operation.
- Easy setup and operation with a visual LCD graphic symbol display.
- Supports OPEN, AGM, and GEL lead-acid batteries, as well as Lithium-ion and Lithium Iron Phosphate batteries (selectable via menu).
- Equipped with dual USB ports (5V/2A max output, 1A when only one port is used).
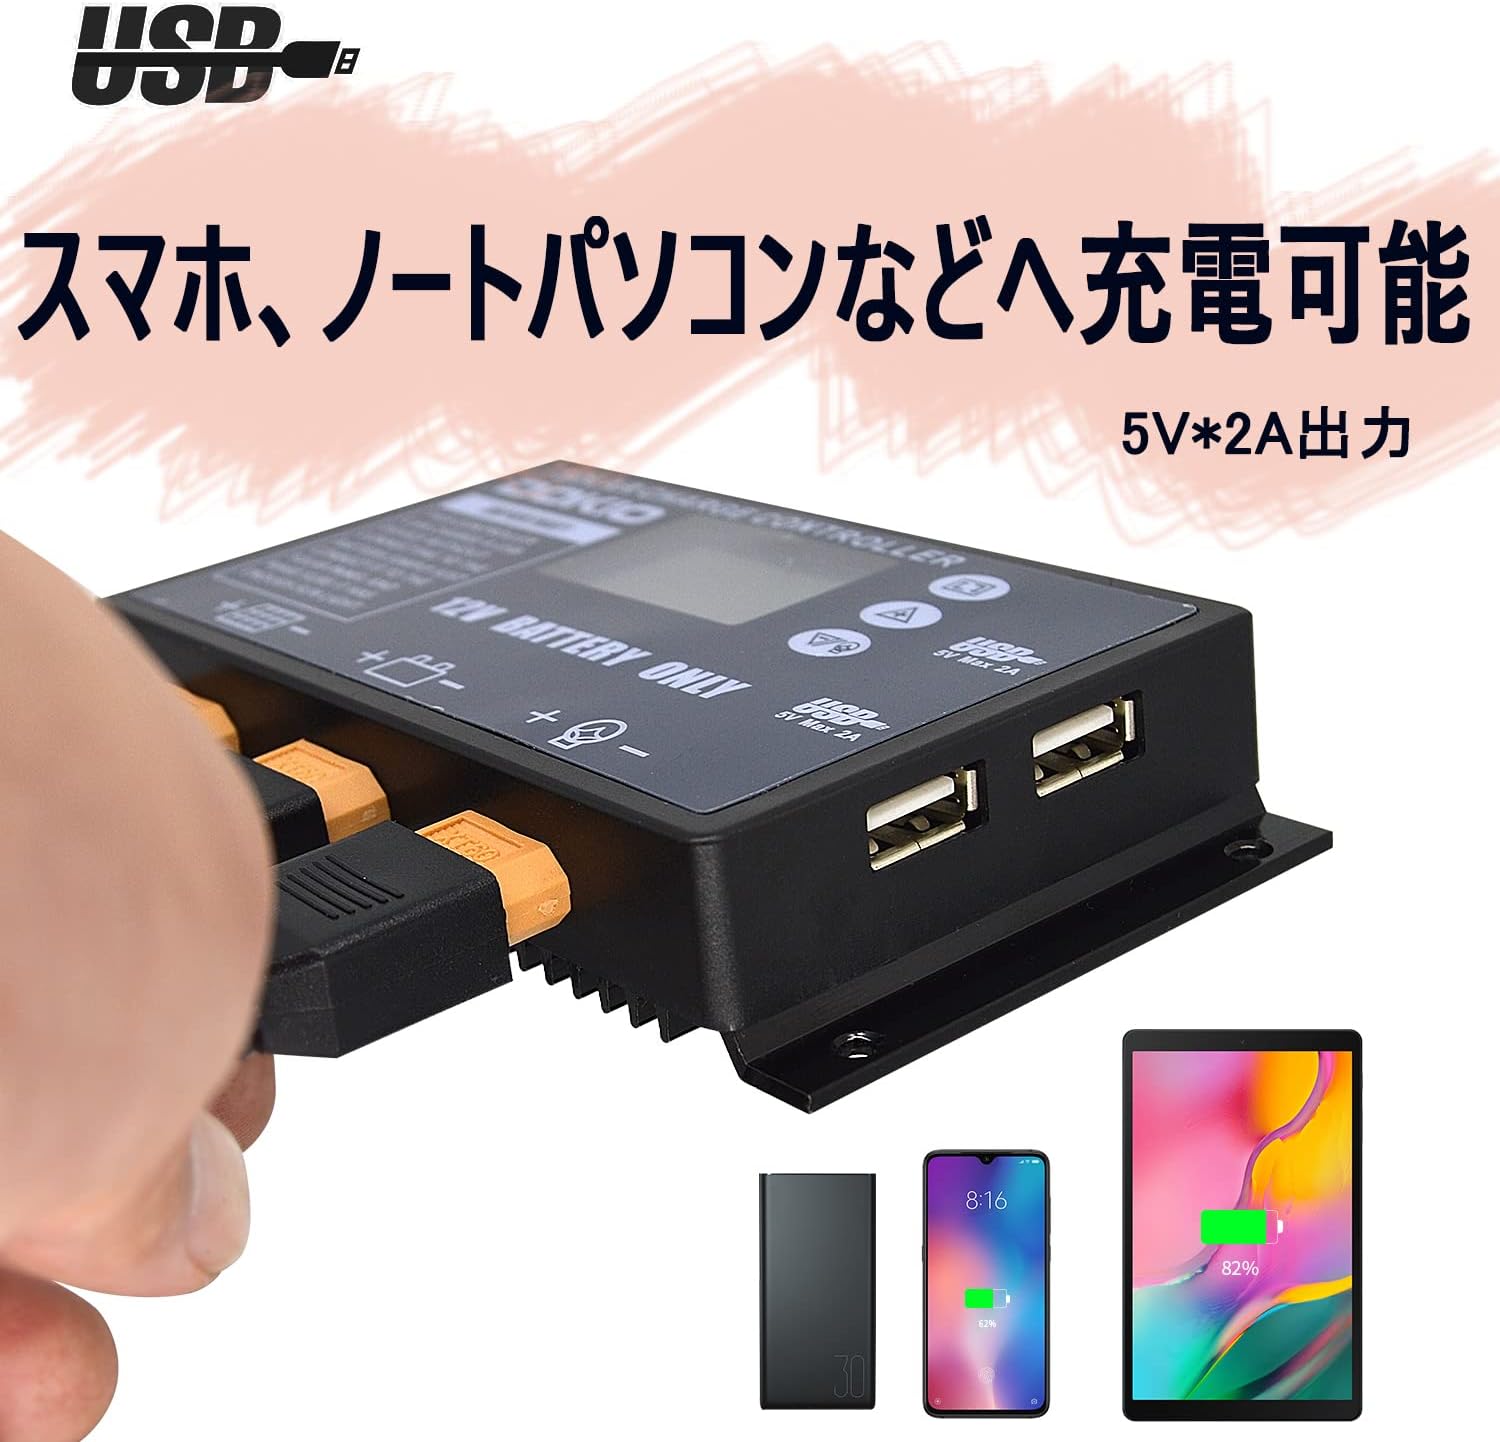
Figure 2: The controller features dual USB ports for charging various devices.
3. Product Specifications
| Parameter | Value |
|---|---|
| Color | Black |
| Material | Plastic |
| Rated Voltage | 12V |
| Rated Charge Current | 20A |
| Rated Load Current | 20A |
| Operating Temperature | -35℃ to +60℃ |
| Size | 13.3 x 7 x 3.3 cm |
| Weight | 150 g |
| Overcharge Protection | 14.4V / 28.8V |
| Overcharge Float Charge | 13.7V / 27.4V |
| Charge Recovery Voltage | 12.6V / 25.2V |
| Over-discharge Protection | 10.7V / 21.4V |
| Over-discharge Recovery Voltage | 12.6V / 25.2V |
| USB Output | 5V / 2A (Max) |

Figure 3: Detailed technical parameters of the controller.
4. Setup and Installation
Follow the connection order below carefully to ensure proper and safe operation of the solar charge controller. Always connect the battery first.
- Connect the Battery: Connect the battery to the controller. Ensure the battery has sufficient voltage for the controller to recognize it before proceeding with other connections.
- Connect the Solar Panel: Connect the solar panel to the controller.
- Connect the Load: Connect your DC load (e.g., lights, USB devices) to the controller.
Important Note: Disconnect in the reverse order: first the load, then the solar panel, and finally the battery.

Figure 4: Connection diagram showing the proper sequence for battery, solar panel, and load.
5. Operation
The controller features an LCD display and three buttons for easy navigation and setting adjustments.
- LCD Display: Shows various parameters such as voltage, temperature, time, and current.
- MENU Button: Press to switch between different interfaces. Long press to enter/exit setting mode.
- UP Button: Press to increase values in setting mode.
- DOWN Button: Press to decrease values in setting mode.
To select the appropriate battery type (default is lead-acid battery), navigate through the menu using the buttons and confirm your selection.

Figure 5: LCD display details and button functions for operation.
6. Maintenance and Safety Precautions
- Store the battery and controller out of reach of children.
- To maintain good heat dissipation, store the controller in a dry and well-ventilated place.
- Avoid operating the controller for extended periods under strong direct sunlight, as the maximum operating temperature is 80℃. High temperatures (above 40℃) may activate protection circuits, stopping current flow. Ensure the unit is not exposed to high temperatures.
- Do not use in highly humid environments, as condensation may cause malfunctions.

Figure 6: The controller is suitable for various applications, requiring proper placement for optimal performance.
7. Troubleshooting
If you encounter any issues with the product, please review the following common problems and solutions:
- Controller not turning on/displaying: Ensure the battery is connected first and has sufficient voltage. Check all connections for proper polarity and tightness.
- Battery not charging: Verify that the solar panel is connected correctly and receiving adequate sunlight. Check the solar panel's voltage. Ensure the correct battery type is selected in the controller's settings.
- Load not receiving power: Check the load connection and ensure the load is within the controller's rated current. Verify that the battery has sufficient charge.
- Overheating: Ensure the controller is placed in a well-ventilated area, away from direct strong sunlight.
8. Warranty and Support
DOKIO is committed to providing high-quality products and excellent customer service. If you experience any problems with this product or our service, please do not hesitate to contact us. We will respond to your inquiry as soon as possible to provide assistance and resolve any issues.
For support, please refer to the contact information provided with your purchase or visit the official DOKIO brand store on Amazon.
Link to DOKIO Brand Store: DOKIO Store


