
1. Introduction
This manual provides detailed instructions for the assembly, operation, maintenance, and troubleshooting of your Tribesigns HOGA-C0173 Industrial L-Shaped Desk. Please read this manual thoroughly before assembly and use to ensure proper function and longevity of your product. Keep this manual for future reference.
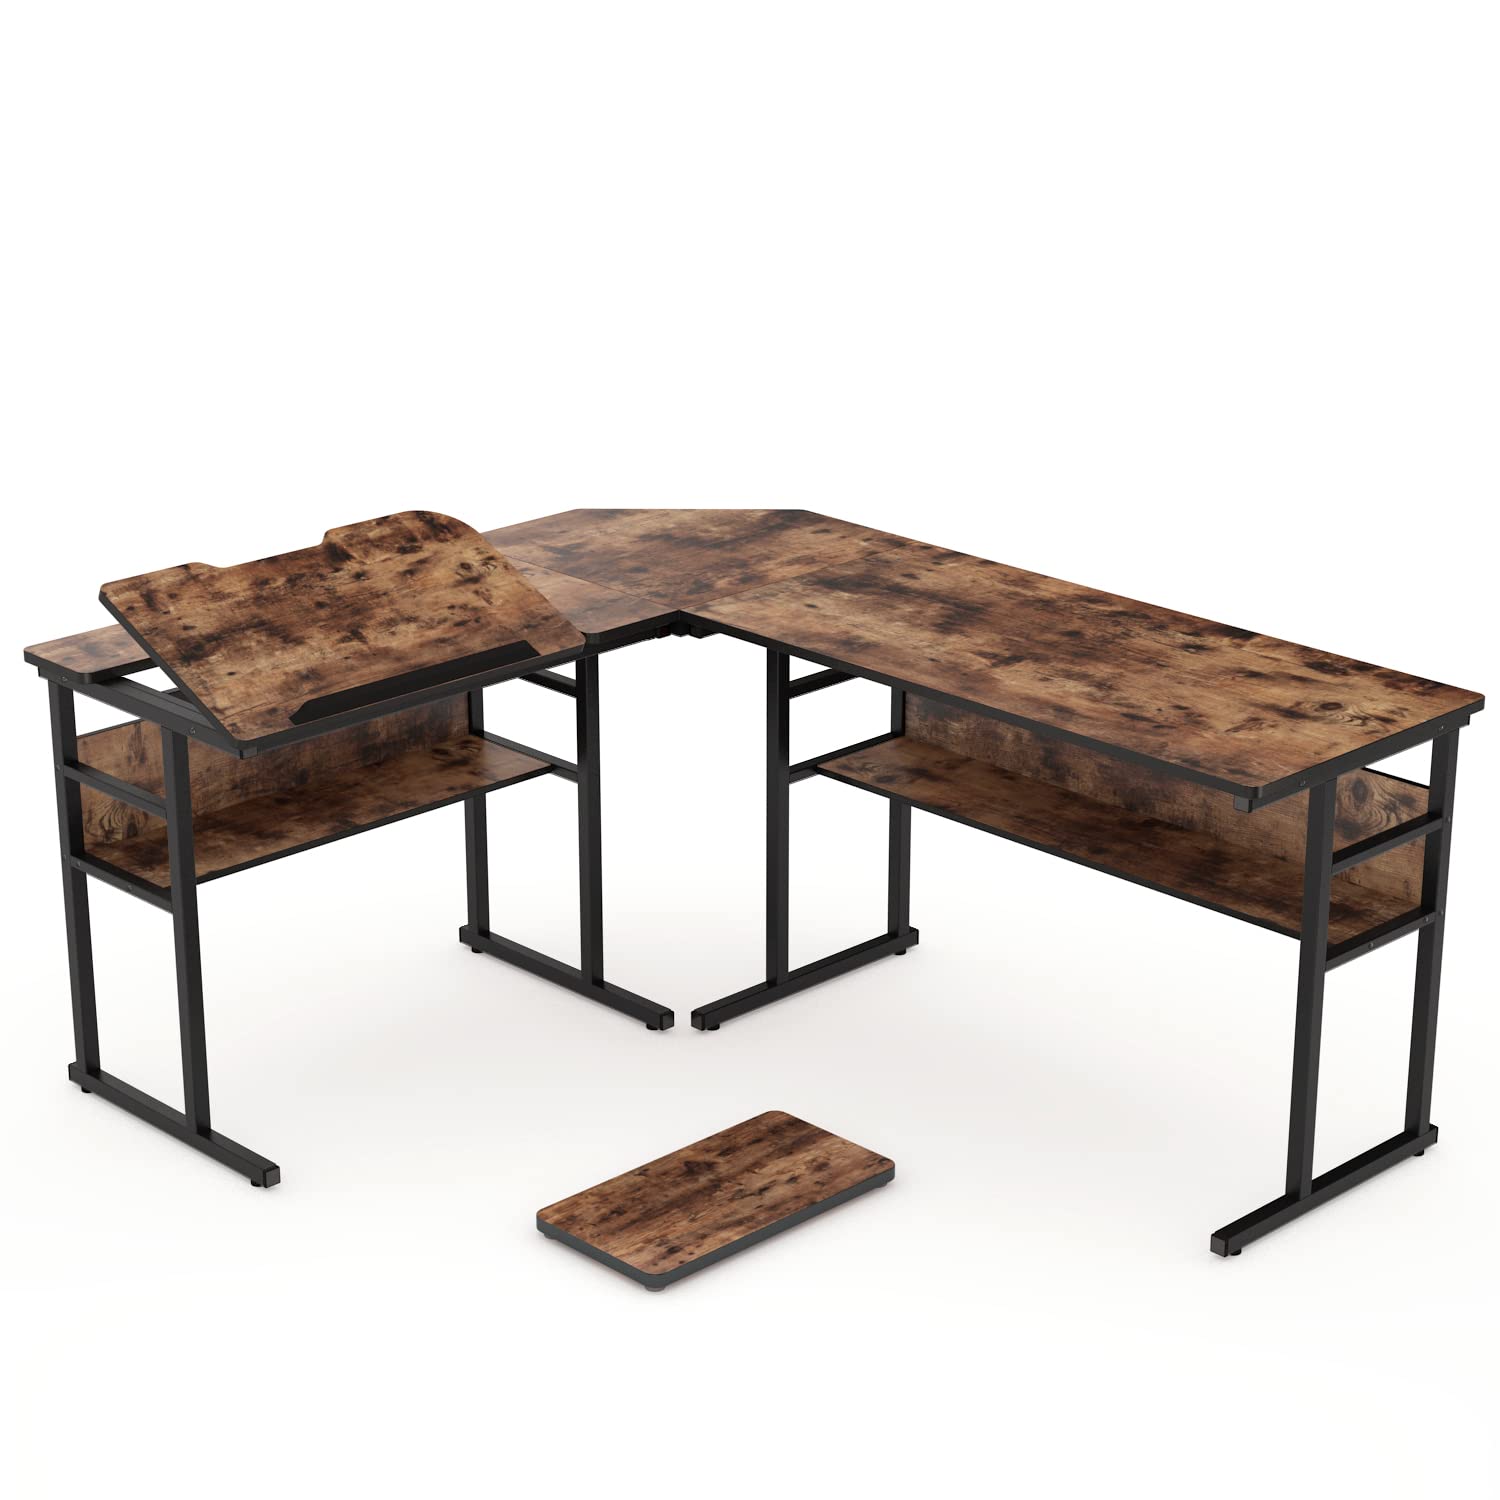
Figure 1: Tribesigns Industrial L-Shaped Desk with Bookshelf
2. Safety Information
- Ensure all parts are present and undamaged before beginning assembly. Do not use if any parts are missing or damaged.
- Assemble the desk on a soft, clean surface to prevent scratches.
- Do not overtighten screws during assembly, as this may damage the material. Tighten all fasteners only after the desk is fully assembled and standing.
- It is recommended that two people assemble this desk for safety and ease.
- Do not stand or sit on the desk.
- Keep small parts away from children to prevent choking hazards.
- Place the desk on a level surface to ensure stability. Use the adjustable foot pads to compensate for uneven floors.
3. Package Contents
Verify that all components listed in the included assembly guide are present. The package typically includes:
- Desktop panels (L-shaped sections, tiltable board)
- Steel frame components (legs, support bars)
- Bookshelf panels
- CPU stand
- Hardware kit (screws, bolts, Allen key, wrench)
- Adjustable foot pads
- Assembly instruction manual
4. Assembly Instructions
Follow the step-by-step diagrams provided in the separate assembly instruction manual included with your product. The general process involves:
- Unpack all components and verify against the parts list.
- Assemble the steel frame sections according to the diagrams.
- Attach the desktop panels to the assembled frame. Ensure the corner pieces align properly.
- Install the bookshelf panels into their designated slots.
- Attach the tiltable drawing board mechanism.
- Once all parts are loosely assembled, place the desk in its desired location and then gradually tighten all screws and bolts.
- Adjust the foot pads to ensure the desk is level and stable.
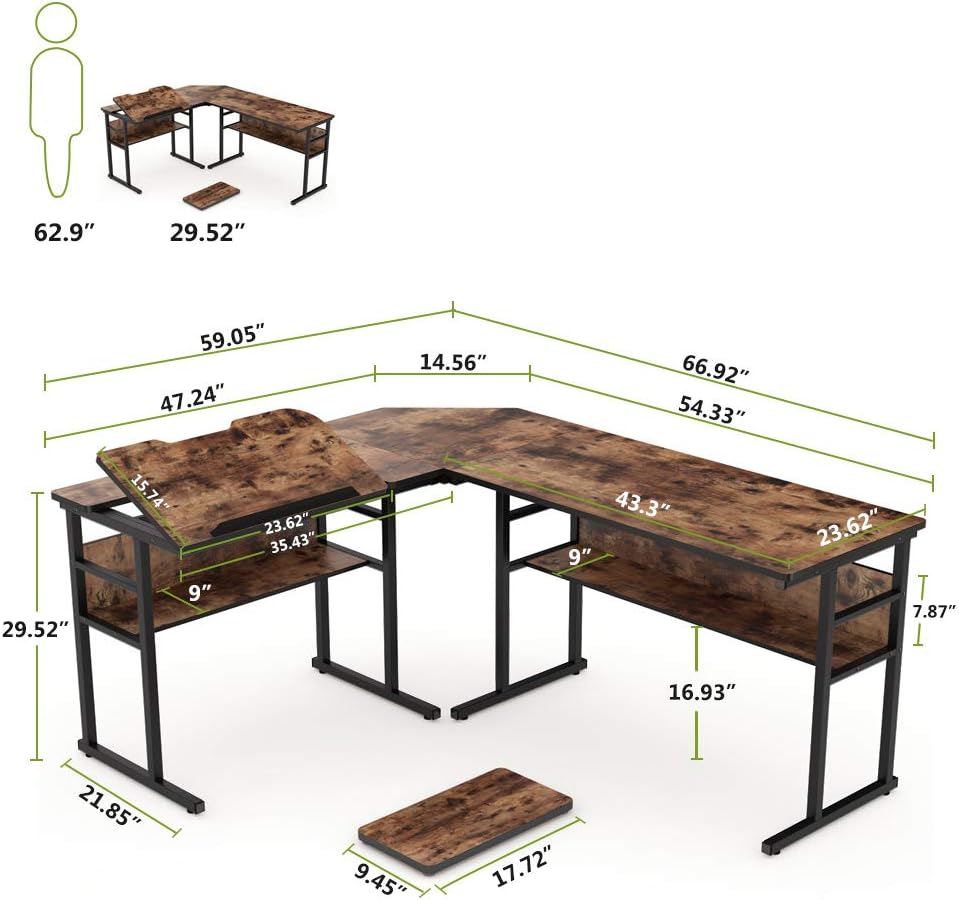
Figure 2: Product Dimensions for Assembly Planning

Figure 3: Flexible Detachable Desk Configuration
5. Operating Instructions
5.1. Using the Tiltable Drawing Board
The desk features a tiltable drawing board section designed for comfortable drafting or drawing. To adjust the angle:
- Gently lift the edge of the tiltable board.
- Locate the adjustment mechanism underneath the board.
- Select one of the 12 available angle settings by engaging the support arm into the desired notch.
- Ensure the board is securely locked in place before applying pressure.
- A sheet stopper is integrated at the bottom edge of the board to prevent papers or tools from sliding off.

Figure 4: Tiltable Drawing Board Mechanism
5.2. Utilizing Storage
The desk includes open bookshelves for convenient storage of books, documents, and office supplies. The free-standing CPU stand can be positioned as needed to keep your computer tower off the floor.

Figure 5: Open Bookshelf Storage Design
6. Maintenance
- Cleaning: Wipe the desk surfaces with a soft, damp cloth. Avoid harsh chemicals or abrasive cleaners that may damage the finish.
- Dusting: Regularly dust the desk to prevent buildup.
- Inspection: Periodically check all screws and bolts to ensure they remain tight. Retighten if necessary.
- Protection: Use coasters for drinks and placemats for hot items to protect the desktop surface.

Figure 6: Key Design Features for Durability and Stability
7. Troubleshooting
- Desk is wobbly: Ensure all screws are tightened. Check that the desk is on a level surface and adjust the foot pads as needed.
- Parts do not fit: Double-check the assembly guide to ensure you are using the correct parts for each step and that they are oriented correctly. Do not force parts together.
- Missing parts: Refer to the package contents list. If parts are missing, contact customer support immediately.
- Tiltable board not holding position: Ensure the support arm is fully engaged in one of the adjustment notches.
8. Specifications
| Feature | Detail |
|---|---|
| Brand | Tribesigns |
| Model Number | HOGA-C0173 |
| Desk Design | L-Shape Computer Desk with Bookshelf |
| Product Dimensions (D x W x H) | 66.92" x 59.05" x 29.52" |
| Material Type | Engineered Wood, Metal (Heavy Duty Steel Frame) |
| Color | Rustic Brown |
| Special Feature | Tiltable Drawing Board, CPU Storage, Open Bookshelves |
| Item Weight | 83.8 Pounds |
| Maximum Weight Recommendation | 500 Pounds |
| Required Assembly | Yes |
| Recommended Number of People for Assembly | 2 |
9. Warranty Information
The Tribesigns HOGA-C0173 Industrial L-Shaped Desk comes with a limited warranty. Please refer to the following terms:
- Parts Warranty: 6 Months
- Labor Warranty: 1 Year
This warranty covers manufacturing defects under normal use. It does not cover damage resulting from improper assembly, misuse, accidents, or unauthorized modifications. Please retain your proof of purchase for warranty claims.
10. Customer Support
For any questions regarding assembly, missing parts, product issues, or warranty claims, please contact Tribesigns customer support. Refer to the contact information provided with your purchase or visit the official Tribesigns website for assistance.
When contacting support, please have your model number (HOGA-C0173) and proof of purchase readily available.


