1. Introduction and Overview
The rockspace 1200Mbps WiFi Repeater (AC1200) is designed to extend your existing Wi-Fi network coverage, eliminating dead zones and providing a stable, high-speed internet connection throughout your home or office. This dual-band extender supports both 2.4GHz and 5GHz frequencies, offering versatile connectivity for various devices.
This manual provides detailed instructions for setting up, operating, maintaining, and troubleshooting your rockspace WiFi Repeater to ensure optimal performance.

Image: Front view of the rockspace AC1200 WiFi Repeater, highlighting its 1200Mbps dual-band capability (2.4G/5G) and LED indicators for Signal, WPS, and Power.
2. Product Features
- Eliminate WiFi Dead Zone: Extends Wi-Fi coverage up to 2640 sq ft, ensuring signal strength even through walls, covering bedrooms, floors, restrooms, garages, basements, and gardens.
- Super High Speed & Stable Signal: Features dual-band technology (300Mbps for 2.4GHz, 867Mbps for 5GHz) for higher penetration and high-speed networking, ideal for smart homes, large file transfers, HD videos, and online gaming.
- Gigabit Ethernet Port: Provides a stable wired connection to your router, preventing Wi-Fi speed drops and delivering seamless internet speed. Note: Extenders improve coverage, not direct speed.
- One-Press Setup: Simplifies network extension with a WPS button for instant setup (within 8 seconds) or via a web browser on your smart devices.
- Safety Network Accessory: Supports WPA and WPA2 security protocols to maximize network security, protect personal Wi-Fi, and prevent unauthorized access.

Image: Illustration demonstrating how the rockspace WiFi Extender expands coverage throughout a home, eliminating dead zones.
3. Package Contents
Please ensure all items are present in your package:
- 1 x rockspace 1200Mbps WiFi Repeater (AC1200)
- Integrated Antennas
- Quick Installation Guide (refer to this manual for detailed steps)
4. Setup Instructions
4.1. Setup via WPS Button (Recommended for quick setup)
- Plug In: Plug the rockspace WiFi Repeater into a power outlet near your existing router. Wait for the PWR indicator light to turn solid blue.
- Press WPS on Extender: Press the WPS button on the rockspace WiFi Repeater. The WPS indicator light will start blinking.
- Press WPS on Router: Within two minutes, press the WPS button on your existing Wi-Fi router.
- Connect: The WPS and Signal indicator lights on the repeater will turn solid blue, indicating a successful connection.

Image: Visual guide for one-click WPS setup, showing pressing the WPS button on the router and then on the extender.
Official Setup Video (WPS Method)
Video: A step-by-step guide demonstrating the WPS setup process for the rockspace WiFi Repeater. This video shows how to plug in the device, press the WPS button on both the extender and the router, and confirm successful connection.
4.2. Setup via Web Browser (Alternative Method)
- Plug In: Plug the rockspace WiFi Repeater into a power outlet. Wait for the PWR indicator light to turn solid blue.
- Connect to Extender's Wi-Fi: On your computer or smartphone, connect to the Wi-Fi network named "rockspace_EXT". Do not connect to your main router's Wi-Fi at this step.
- Open Web Browser: Open a web browser (e.g., Chrome, Firefox, Safari) and type
re.rockspace.localor192.168.0.254into the address bar. - Login: Create a new login password for the extender when prompted.
- Select Network: The extender will scan for available Wi-Fi networks. Select your existing home Wi-Fi network (your router's network) from the list.
- Enter Password: Enter the password for your existing home Wi-Fi network.
- Confirm: The extender will now extend your network. You may see new Wi-Fi networks with "_EXT" or "_5GEXT" appended to your original network name.

Image: A hand holding a smartphone displaying Wi-Fi settings, showing how to connect to the extender's default network for web-based setup.
4.3. Optimal Placement After Setup
After successful setup, relocate the extender to an optimal location. The ideal spot is halfway between your main router and the Wi-Fi dead zone. Ensure the Signal LED light on the extender is solid blue, indicating a strong connection to your main router.
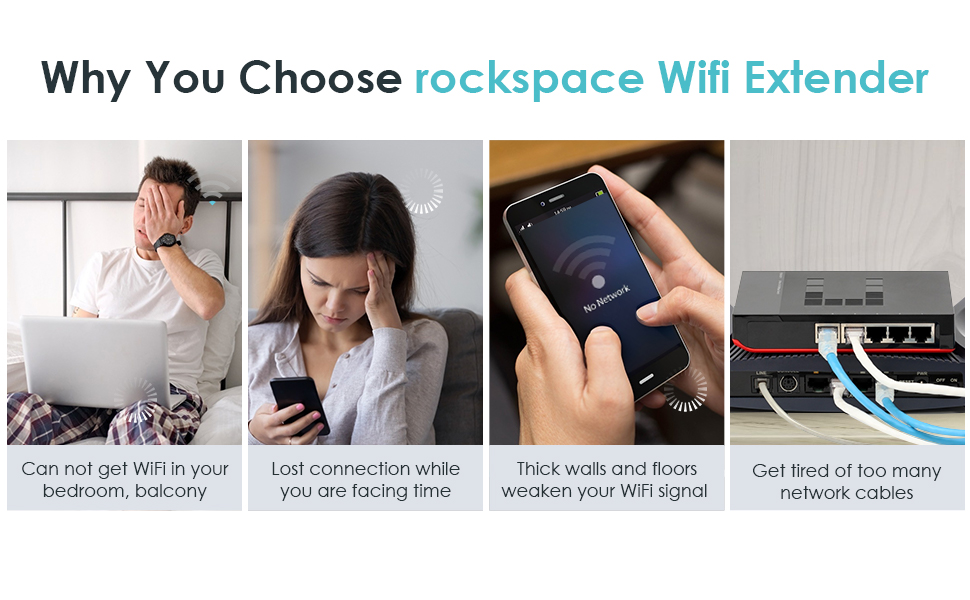
Image: A visual guide on how to properly relocate the extender for maximum coverage, showing correct and incorrect placements relative to the router and dead zones.
5. Operating Instructions
Once the rockspace WiFi Repeater is set up, it will automatically extend your Wi-Fi network. Your devices can now connect to the extended network for improved signal strength and coverage.
- Connecting Devices: On your Wi-Fi enabled devices (smartphones, tablets, laptops, smart TVs), scan for available Wi-Fi networks. You will see your original network name, and new networks ending with "_EXT" or "_5GEXT". Connect to these extended networks using your original Wi-Fi password.
- Ethernet Port Usage: The Gigabit Ethernet port allows you to connect a wired device (e.g., gaming console, smart TV, desktop computer) to the extender for a stable, high-speed connection. This is particularly useful for devices that require consistent bandwidth or are not Wi-Fi enabled.
- Antenna Adjustment: The two external antennas can be adjusted to optimize signal reception and transmission. Experiment with different angles to find the best coverage for your specific environment.

Image: Illustration of the dual-band Wi-Fi extender providing stable connections to various devices like laptops, tablets, and smartphones.
6. Maintenance and Best Practices
- Optimal Placement: As mentioned in setup, ensure the extender is placed where it receives a strong signal from your main router (solid blue Signal LED) and can effectively cover the desired area. Avoid placing it in corners or behind large obstructions.
- Avoid Interference: Important: Please avoid putting the extender near Bluetooth devices and large electrical appliances such as microwave ovens or refrigerators. The Wi-Fi signal can be easily interfered with by these devices.
- Regular Reboots: Periodically restarting your extender (unplugging it for 10 seconds and plugging it back in) can help clear its memory and improve performance.
- Firmware Updates: Check the rockspace official website for any available firmware updates. Keeping your device's firmware up-to-date ensures optimal performance, security, and compatibility.
- Cleaning: Keep the device clean and free from dust. Use a soft, dry cloth for cleaning. Do not use liquid cleaners or aerosols.
Understanding Wi-Fi Interference
Video: An animated explanation of common factors that cause weak Wi-Fi signals, including distance, physical obstructions like walls, and electromagnetic interference from other electronic devices. This helps users understand why proper placement and avoiding interference are crucial.
7. Troubleshooting
Common Issues and Solutions:
- No Power / Indicator Lights Off:
- Ensure the extender is securely plugged into a working power outlet. Try a different outlet to rule out power supply issues.
- Signal LED is Red or Off:
- This indicates a weak or no connection to your main router. Relocate the extender closer to your main router. Ensure there are no major obstructions (thick walls, large appliances) between the extender and the router. Re-run the setup process if necessary.
- Cannot Connect to "rockspace_EXT" during Web Setup:
- Make sure your mobile data is turned off on your smartphone. Ensure you are connecting directly to the extender's default Wi-Fi network. Try restarting the extender and your device.
- Extended Network Not Visible or Slow:
- Verify the extender is successfully connected to your main router (solid blue Signal LED). Ensure optimal placement. Check for interference from other electronic devices. Try restarting both your router and the extender.
- WPS Setup Fails:
- Ensure you press the WPS button on both the extender and the router within the two-minute window. Some routers may have a different WPS activation method or a longer delay. If WPS continues to fail, use the web browser setup method.
- Forgot Login Password for Web Management:
- You will need to perform a factory reset on the extender. See the "Resetting the Extender" section below.
Resetting the Extender:
If you encounter persistent issues or forget your login password, you can perform a factory reset:
- With the extender powered on, locate the "RESET" pinhole button on the device (usually near the Ethernet port).
- Use a paperclip or a needle-shape object to press and hold the "RESET" button for approximately 8-10 seconds.
- Release the button when all indicator lights blink. The extender will reboot with factory default settings.
- After resetting, you will need to reconfigure the extender using either the WPS or web browser setup method.
Official Reset Video
Video: This video, also used for setup, demonstrates the process of resetting the rockspace WiFi Repeater to its factory default settings by pressing the reset button.
8. Specifications
| Feature | Detail |
|---|---|
| Model Number | AC1200 |
| Wireless Communication Standard | 802.11n, 802.11a/b/g/n, 802.11ac |
| Data Transfer Rate | 1200 Megabits Per Second |
| Frequency Band Class | Dual-Band (2.4GHz & 5GHz) |
| Connector Type | RJ45 (Gigabit Ethernet Port) |
| Item Weight | 9.1 ounces |
| Package Dimensions | 4.88 x 3.94 x 3.43 inches |
9. Warranty and Support
For warranty information and technical support, please refer to the official rockspace website or contact their customer service directly. Keep your purchase receipt as proof of purchase for warranty claims.
Online Support: Visit the rockspace official website for FAQs, troubleshooting guides, and firmware downloads.
Customer Service: Refer to your product packaging or the official website for contact details (phone, email, live chat).


