
Total TH1153236
Total TH1153236 Rotary Hammer User Manual
Model: TH1153236
Introduction
This user manual provides essential information for the safe and effective operation, maintenance, and troubleshooting of your Total TH1153236 Rotary Hammer. Please read this manual thoroughly before using the tool to ensure proper handling and to prevent injury or damage.
The Total TH1153236 is a high-performance rotary hammer designed for drilling, hammer drilling, and light chiseling in various materials such as concrete, masonry, wood, and metal. Its robust construction and ergonomic design ensure durability and user comfort.
Safety Instructions
WARNING: Read all safety warnings, instructions, illustrations, and specifications provided with this power tool. Failure to follow all instructions listed below may result in electric shock, fire, and/or serious injury.
- Work Area Safety: Keep the work area clean and well-lit. Cluttered or dark areas invite accidents. Do not operate power tools in explosive atmospheres, such as in the presence of flammable liquids, gases, or dust.
- Electrical Safety: Power tool plugs must match the outlet. Never modify the plug in any way. Do not expose power tools to rain or wet conditions. Water entering a power tool will increase the risk of electric shock.
- Personal Safety: Always wear eye protection. Use hearing protection when operating the tool for extended periods. Wear a dust mask if operations create dust. Dress properly; do not wear loose clothing or jewelry. Keep hair and clothing away from moving parts.
- Power Tool Use and Care: Do not force the power tool. Use the correct power tool for your application. Disconnect the plug from the power source before making any adjustments, changing accessories, or storing power tools.
- Service: Have your power tool serviced by a qualified repair person using only identical replacement parts. This will ensure that the safety of the power tool is maintained.
- Vibration: This tool is equipped with an anti-vibration system. However, prolonged use can still cause vibration-related injuries. Take regular breaks and use appropriate gloves.
Components Overview
Familiarize yourself with the various parts of your Total TH1153236 Rotary Hammer for safe and efficient operation.

Figure 1: Overall view of the Total TH1153236 Rotary Hammer, showing the main body, chuck, side handle, and power cord connection.
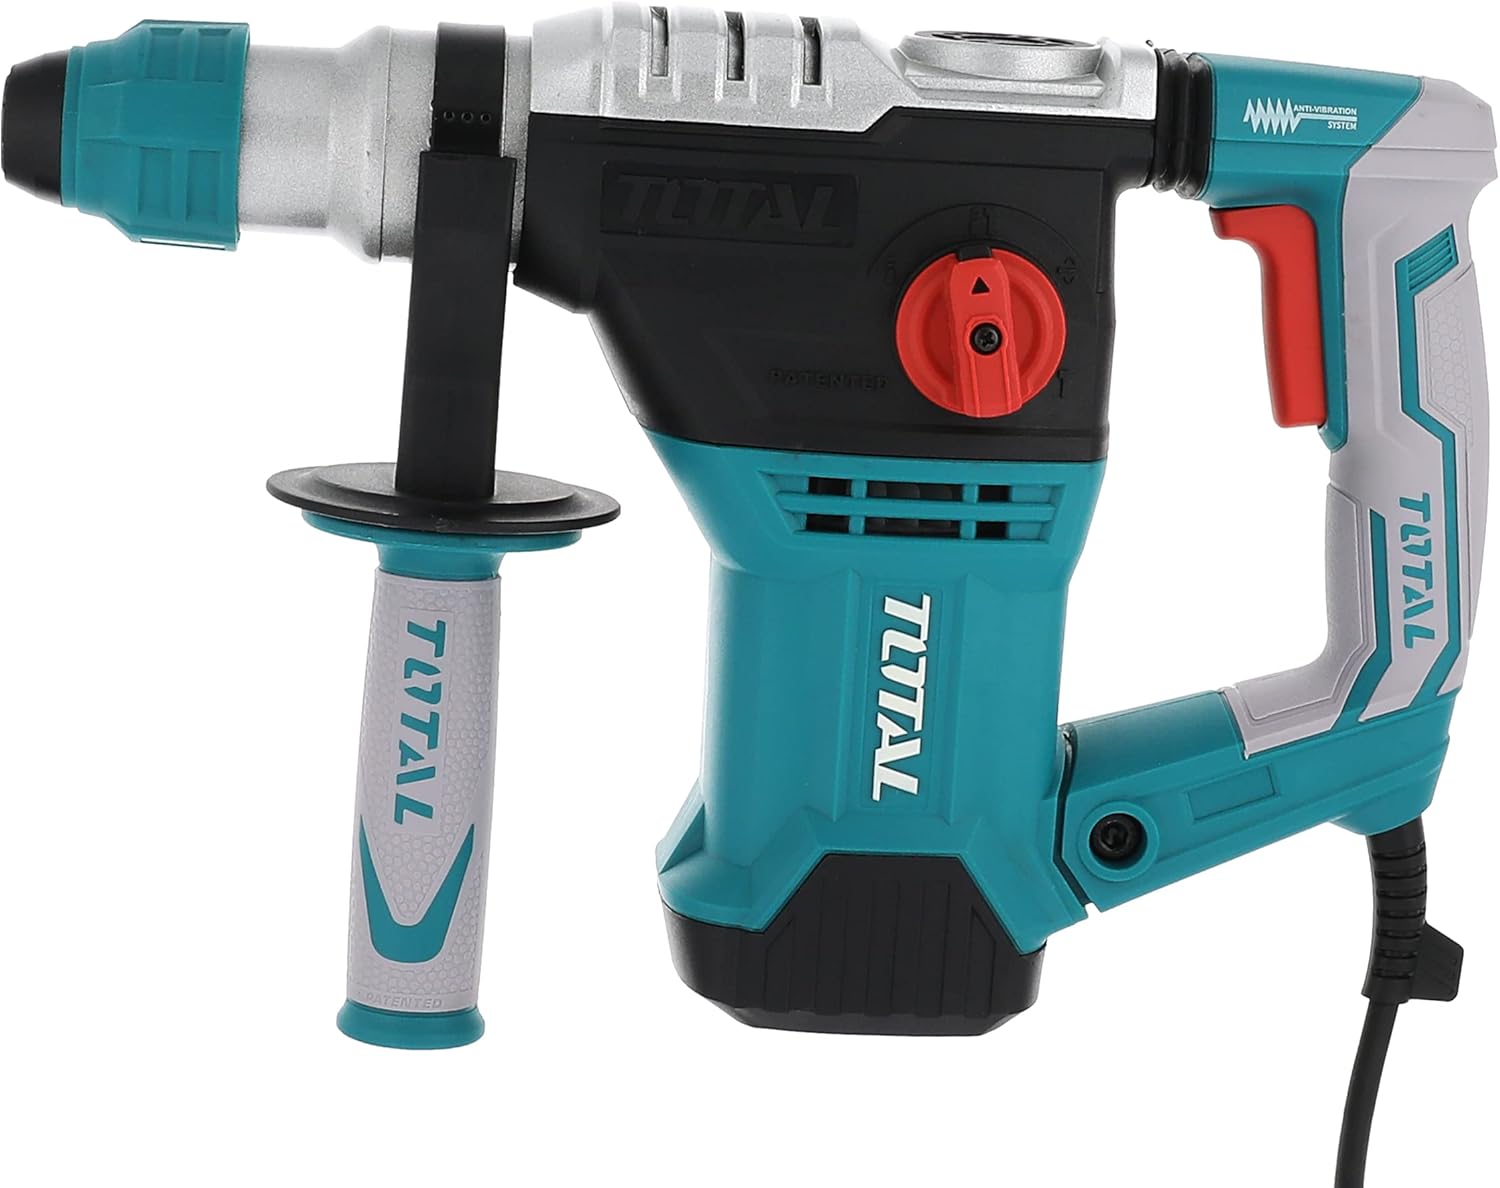
Figure 2: Detailed view highlighting the mode selector switch (red dial), trigger, and ergonomic handle with anti-vibration system.
- Chuck: For inserting drill bits or chisels.
- Mode Selector Switch: Allows selection between drilling, hammer drilling, and chiseling functions.
- Auxiliary Handle: Provides additional grip and control.
- Depth Gauge: For precise drilling depth control.
- Trigger Switch: Activates the tool.
- Lock-on Button: For continuous operation.
- Ventilation Openings: For motor cooling.
- Power Cord: Connects to the power supply.
Setup
- Attaching the Auxiliary Handle: Loosen the auxiliary handle clamp, slide the handle onto the tool's neck, and rotate it to the desired position. Tighten the clamp securely.
- Inserting the Depth Gauge: Insert the depth gauge into the hole on the auxiliary handle. Adjust its position to set the desired drilling depth.
- Inserting Drill Bits/Chisels:
- Clean the shank of the drill bit or chisel.
- Pull back the chuck sleeve.
- Insert the bit into the chuck until it clicks into place.
- Release the chuck sleeve. Pull on the bit to ensure it is securely locked.
- Connecting to Power: Ensure the tool's switch is in the "OFF" position before plugging the power cord into a suitable power outlet.
Operating Instructions
Always wear appropriate personal protective equipment (PPE) including safety glasses, hearing protection, and gloves during operation.
Selecting Operating Mode:
Rotate the mode selector switch (red dial) to choose the desired function:
- Drilling Mode (Drill icon): For drilling in wood, metal, and plastic without hammer action.
- Hammer Drilling Mode (Hammer and Drill icon): For drilling in concrete, brick, and masonry with hammer action.
- Chiseling Mode (Chisel icon): For light chiseling, chipping, or demolition work. The chisel can be rotated to different angles in this mode.
Starting and Stopping:
- To start the tool, press the trigger switch.
- For continuous operation, press the lock-on button while the trigger is depressed. Release the trigger to disengage the lock-on button.
- To stop the tool, release the trigger switch. If the lock-on button is engaged, press the trigger again briefly to release it.
General Operation Tips:
- Apply steady, firm pressure. Do not force the tool.
- For hammer drilling, allow the tool's hammer action to do the work.
- When drilling deep holes, periodically withdraw the bit to clear debris.
- Always secure your workpiece to prevent movement during operation.
Maintenance
Regular maintenance ensures the longevity and optimal performance of your rotary hammer.
- Cleaning: After each use, clean the tool's ventilation openings and housing with a soft brush or compressed air. Do not use water or chemical cleaners.
- Chuck Maintenance: Keep the chuck clean and free of dust and debris. Periodically apply a small amount of grease to the chuck mechanism to ensure smooth operation.
- Carbon Brushes: The carbon brushes are wear parts. If the motor sparks excessively or the tool loses power, have the carbon brushes checked and replaced by a qualified service technician.
- Power Cord: Regularly inspect the power cord for damage. If damaged, have it replaced by an authorized service center to avoid electrical hazards.
- Storage: Store the tool in a dry, secure place, out of reach of children.
Troubleshooting
Before attempting any repairs, ensure the tool is disconnected from the power supply.
| Problem | Possible Cause | Solution |
|---|---|---|
| Tool does not start. | No power supply; faulty power cord; faulty switch. | Check power outlet and cord. If still no power, contact service center. |
| Loss of power during operation. | Worn carbon brushes; motor overload. | Have carbon brushes checked/replaced. Reduce load on the tool. |
| Excessive sparking from motor. | Worn carbon brushes; dirty commutator. | Have carbon brushes and commutator checked by service center. |
| Bit not locking in chuck. | Chuck mechanism dirty or damaged; incorrect bit shank. | Clean chuck. Ensure bit has SDS-Plus shank. If problem persists, contact service. |
Specifications
Technical data for the Total TH1153236 Rotary Hammer.

Figure 3: Dimensions of the Total TH1153236 Rotary Hammer, indicating a height of approximately 12 inches (30 cm).
| Feature | Detail |
|---|---|
| Model | TH1153236 |
| Brand | Total |
| Power Source | hand_powered |
| Voltage | 4 Volts |
| Wattage | 1500 Watts |
| Item Weight | 300 g |
| Product Dimensions | 10 x 20 x 37 cm |
| Material | Metal |
| Special Features | Built-In LED Working Light, Anti-Vibration System |
| Chuck Type | SDS-Plus |
Warranty and Support
Total products are manufactured to high-quality standards. This product comes with a standard manufacturer's warranty against defects in materials and workmanship.
- Warranty Period: Please refer to your purchase receipt or the warranty card included with your product for specific warranty terms and duration.
- Claiming Warranty: In case of a defect, please contact the retailer where you purchased the product or an authorized Total service center. You will typically need your proof of purchase.
- Exclusions: The warranty typically does not cover damage caused by normal wear and tear, misuse, abuse, unauthorized repairs, or failure to follow the instructions in this manual.
- Customer Support: For technical assistance, spare parts, or service inquiries, please visit the official Total website or contact their customer service hotline. Contact details can usually be found on the product packaging or the Total website.
Note: Extended warranty options may be available from third-party providers. These are separate from the manufacturer's warranty.
Related documentsTH1153236


Ask a question about this manual
Ask about setup, troubleshooting, compatibility, parts, safety, or missing instructions. Manuals+ will review the question and use this page’s manual context to help answer it.