1. Introduction
This manual provides essential information for the safe and efficient operation of your Neo Electric High-Pressure Washer. Please read these instructions carefully before use and retain them for future reference. This high-pressure washer is designed for cleaning various outdoor surfaces such as patios, driveways, vehicles, and garden equipment.
2. Safety Information
WARNING: Always follow basic safety precautions when using electrical appliances to reduce the risk of fire, electric shock, and personal injury.
- Electrical Safety: Ensure the power supply matches the voltage specified on the product label. Always use a properly grounded outlet. Do not operate the pressure washer with a damaged cord or plug. Keep all connections dry and off the ground.
- Water Pressure: The high-pressure jet can be dangerous if misused. Never direct the water jet at people, pets, electrical equipment, or the unit itself.
- Personal Protective Equipment: Always wear appropriate eye protection (safety glasses) and protective clothing when operating the pressure washer.
- Stability: Operate the pressure washer on a stable, level surface.
- Children and Pets: Keep children and pets away from the operating area.
- Chemicals: Use only detergents recommended for pressure washers. Follow detergent manufacturer's instructions for use and disposal.
- Before Use: Inspect the unit, hose, and accessories for any damage before each use. Do not use if any part is damaged.
3. Package Contents
Verify that all items are present and in good condition:
- Neo Electric High-Pressure Washer Unit
- High-Pressure Gun
- Lance
- Adjustable Twist Nozzle
- 5-meter High-Pressure Hose
- Foam Tank (Detergent Bottle)
- Cleaning Brush Attachment
- 5-meter Power Cord (integrated)
- Wheels (pre-attached for mobility)

4. Assembly and Setup
Follow these steps to assemble and prepare your pressure washer for use:
- Connect the High-Pressure Hose: Securely attach one end of the 5-meter high-pressure hose to the outlet on the main pressure washer unit and the other end to the high-pressure gun. Ensure connections are tight to prevent leaks.
- Attach the Lance and Nozzle: Connect the lance to the high-pressure gun. Then, attach the adjustable twist nozzle to the end of the lance. For specific cleaning tasks, you may attach the brush attachment or the foam tank instead of the twist nozzle.
- Connect Water Supply: Connect a standard garden hose (not included) to the water inlet on the pressure washer unit. Ensure the water supply hose is free of kinks and has a steady flow. Turn on the water tap fully.
- Connect Power: Plug the 5-meter power cord into a grounded electrical outlet.
- Prime the Pump: Before turning on the power, squeeze the trigger on the high-pressure gun to allow water to flow through the system and expel any air. Continue until a steady stream of water emerges from the nozzle.

5. Operating Instructions
Once assembled and primed, you can begin operating your pressure washer:
- Turn On: Flip the power switch on the pressure washer unit to the 'ON' position. The motor will start, and the unit will build pressure.
- Start Cleaning: Aim the nozzle at the surface to be cleaned, keeping a safe distance. Squeeze the trigger on the high-pressure gun to start the water flow. Release the trigger to stop the flow.
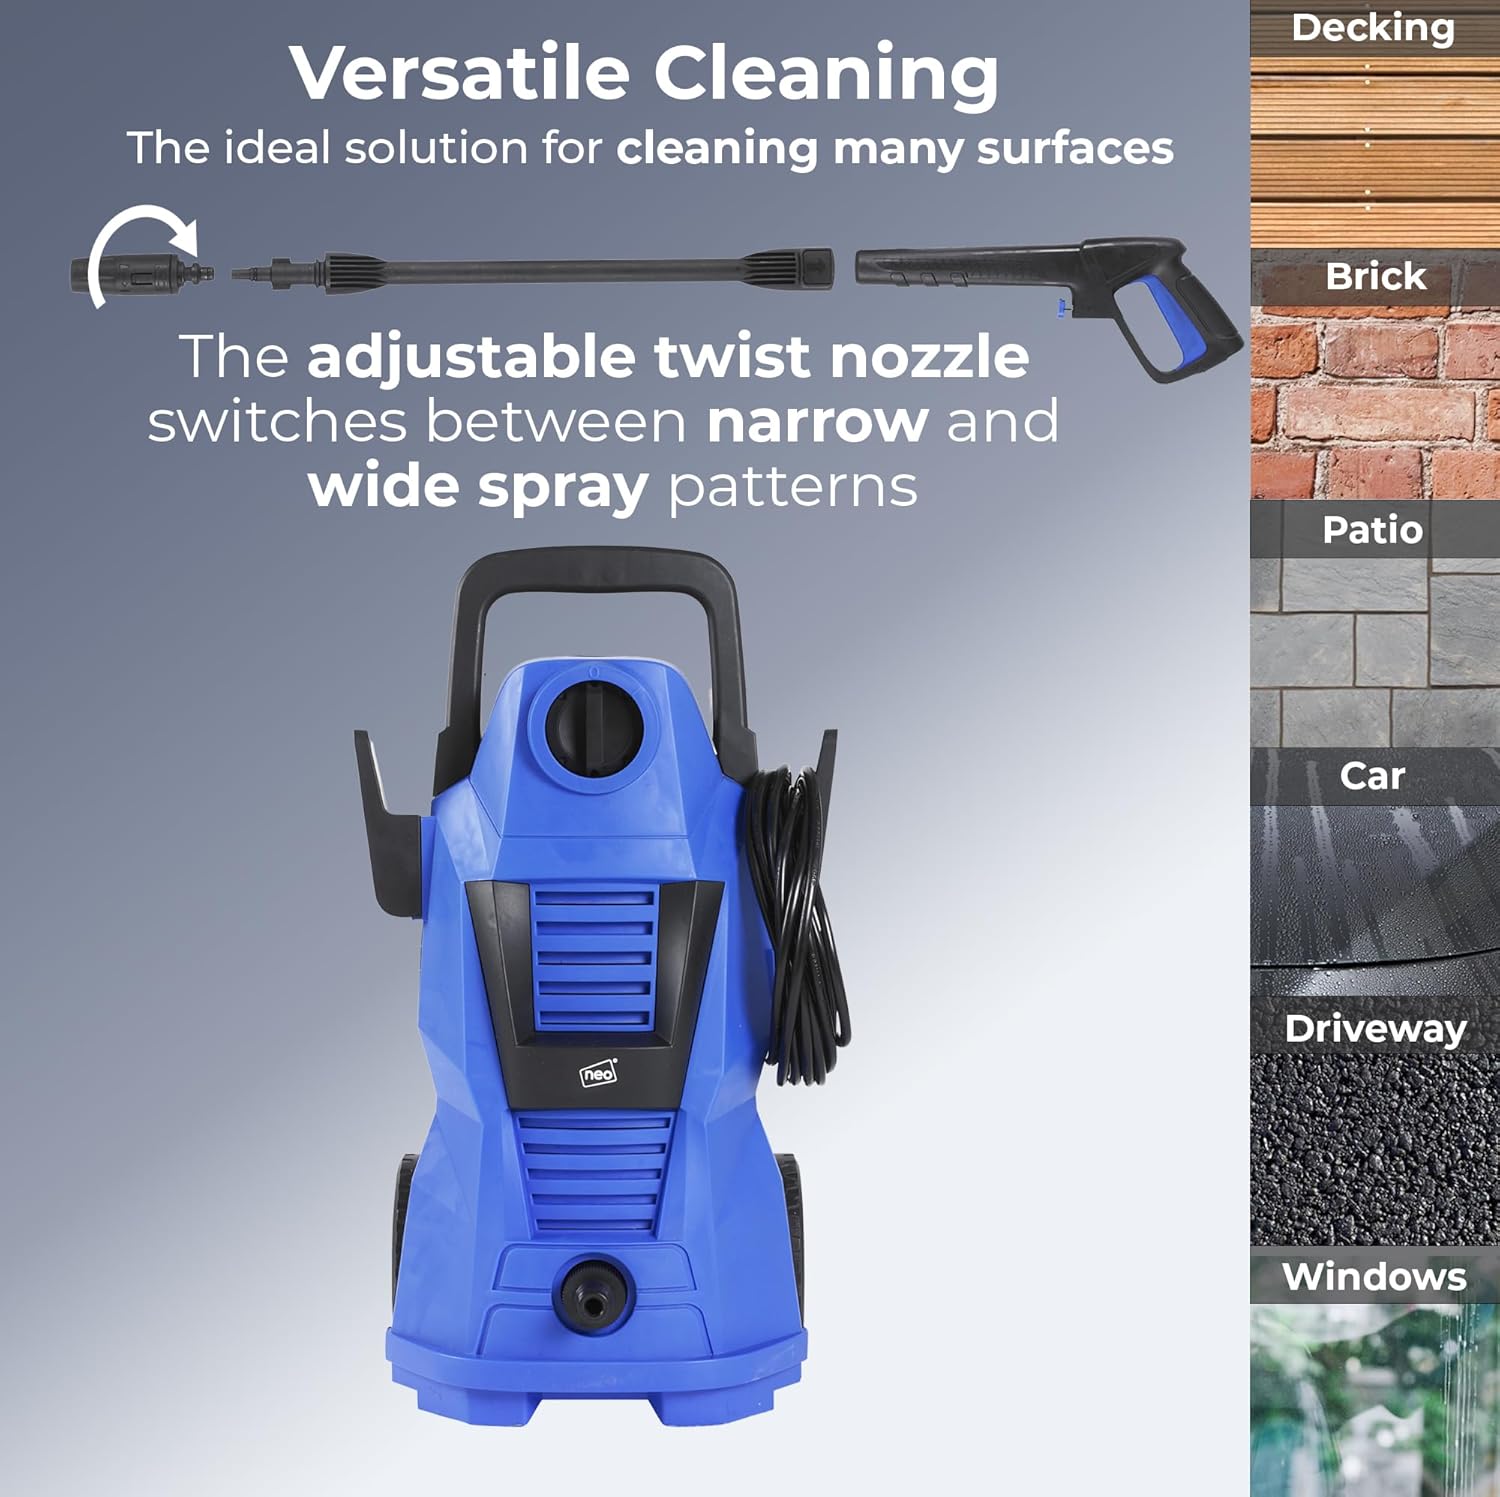
- Adjusting the Nozzle: The adjustable twist nozzle allows you to switch between a narrow, concentrated spray for stubborn dirt and a wider, fan-shaped spray for general cleaning or delicate surfaces. Rotate the nozzle head to change the spray pattern.
- Using the Foam Tank: To apply detergent, fill the foam tank with an appropriate pressure washer detergent. Attach the foam tank to the high-pressure gun (replacing the lance/nozzle assembly). The unit will then spray a mixture of water and detergent.
- Using the Cleaning Brush: For surfaces requiring scrubbing, attach the cleaning brush to the high-pressure gun. This is ideal for gentle cleaning of vehicles or other delicate items.
- Cleaning Technique: Always start cleaning from a distance and move closer to the surface as needed. Use sweeping motions to ensure even cleaning.
- Shutting Down: When finished, turn off the power switch on the unit. Turn off the water supply. Squeeze the trigger on the gun to release any remaining pressure in the system. Disconnect the water hose and power cord.

6. Maintenance
Proper maintenance ensures the longevity and optimal performance of your pressure washer:
- Cleaning: After each use, flush the system with clean water to remove any detergent residue. Wipe down the exterior of the unit with a damp cloth.
- Nozzle Cleaning: If the nozzle becomes clogged, use the included nozzle cleaning tool (if applicable) or a thin wire to clear any debris.
- Storage: Store the pressure washer in a dry, frost-free location. Disconnect all hoses and drain any remaining water from the unit and accessories to prevent freezing damage. Coil the high-pressure hose and power cord neatly.
- Winterization: If storing in freezing temperatures, use a pump protector or antifreeze solution specifically designed for pressure washers to prevent internal damage.
7. Troubleshooting
Refer to this section for common issues and their solutions:
| Problem | Possible Cause | Solution |
|---|---|---|
| No pressure or low pressure |
|
|
| Motor does not start |
|
|
| Water leaks |
|
|
8. Specifications
| Feature | Specification |
|---|---|
| Brand | Neo |
| Model Number | 0C-AX1X-3O2G |
| Part Number | NEO-HPW-110 |
| Power Source | Electric Cable |
| Motor Power | 1400 W (implied from product description) |
| Maximum Pressure | 110 Bars |
| Hose Length | 5 Meters |
| Power Cord Length | 5 Meters (from product description) |
| Product Dimensions (L x W x H) | 34.01 x 24 x 42.01 cm |
| Item Weight | 5 Kilograms |
| Color | Black |
| Compliant Specifications | CE |
9. Warranty and Support
Neo is committed to providing quality products and professional customer service. For any questions, technical assistance, or warranty claims, please contact Neo customer support through your retailer or the official Neo website. Please have your model number (0C-AX1X-3O2G) and purchase information ready when contacting support.


