Introduction
Thank you for choosing the KitchenAid Artisan 2-Slot Electric Toaster. This manual provides essential information for the safe and efficient operation of your new appliance. Please read all instructions carefully before use and retain this manual for future reference.
The KitchenAid Artisan Toaster is designed to provide an ultimate toasting experience with its auto-sensor technology, which automatically lowers and lifts toast. It features multiple browning settings, a keep-warm function, and specialized modes for bagels and sandwiches, ensuring perfect results for various bread types.
Important Safeguards
When using electrical appliances, basic safety precautions should always be followed, including the following:
- Read all instructions.
- Do not touch hot surfaces. Use handles or knobs.
- To protect against electrical shock, do not immerse cord, plugs, or toaster in water or other liquid.
- Close supervision is necessary when any appliance is used by or near children.
- Unplug from outlet when not in use and before cleaning. Allow to cool before putting on or taking off parts.
- Do not operate any appliance with a damaged cord or plug or after the appliance malfunctions, or has been dropped or damaged in any manner. Return appliance to the nearest authorized service facility for examination, repair, or adjustment.
- The use of accessory attachments not recommended by the appliance manufacturer may cause injuries.
- Do not use outdoors.
- Do not let cord hang over edge of table or counter, or touch hot surfaces.
- Do not place on or near a hot gas or electric burner, or in a heated oven.
- Extreme caution must be used when moving an appliance containing hot oil or other hot liquids.
- Do not use appliance for other than intended use.
- Oversize foods, metal foil packages, or utensils must not be inserted in a toaster as they may create a fire or risk of electric shock.
- A fire may occur if toasters are covered or touching flammable material, including curtains, draperies, walls, and the like, when in operation.
- Do not attempt to dislodge food when toaster is plugged in.
- Do not operate unattended.
- Always attach plug to appliance first, then plug cord into the wall outlet. To disconnect, turn any control to "off", then remove plug from wall outlet.
Parts and Features

Figure 1: Front view of the KitchenAid Artisan 2-Slot Electric Toaster in Cast Iron Black. This image highlights the sleek design, control panel with function buttons, browning control knob, and LED countdown timer.

Figure 2: Side view of the KitchenAid Artisan 2-Slot Electric Toaster showing its approximate dimensions: 32.41 cm height, 40.59 cm depth, and 24 cm width. These measurements help in planning counter space.
- Extra-Wide Toasting Slots: Accommodates various bread types, including thick slices and bagels.
- Auto Sensor with Keep-Warm Feature: Automatically lowers and lifts toast, and keeps it warm if not removed promptly.
- 7 Browning Settings: Allows precise control over toast shade, from lightly toasted to dark.
- LED Countdown Timer: Visually indicates the remaining toasting time.
- Bagel Function: Toasts the cut side of bagels while gently warming the outer side.
- Frozen Function: Gently defrosts and toasts frozen bread.
- Sandwich Function: Designed for use with the included sandwich rack.
- Cancel Button: Stops the toasting cycle at any time.
- Removable Crumb Tray: For easy cleaning.

Figure 3: The stainless steel sandwich rack accessory included with the KitchenAid Artisan Toaster. This rack is used to prepare delicious, no-drip toasted sandwiches.
Setup
- Unpacking: Carefully remove the toaster and all accessories from the packaging. Retain packaging for storage or future shipping.
- Placement: Place the toaster on a stable, flat, heat-resistant surface, away from flammable materials such as curtains or walls. Ensure adequate ventilation around the toaster.
- First Use: Before first use, operate the toaster without bread on the highest browning setting (7) to burn off any manufacturing residues. A slight odor or smoke may be present; this is normal and will dissipate. Ensure the area is well-ventilated.
- Power Connection: Plug the power cord into a grounded electrical outlet. Ensure the voltage of your power supply matches the rating label on the toaster.
Operating Instructions
Basic Toasting
- Insert slices of bread into the toasting slots.
- Select your desired browning level using the browning control knob (settings 1-7). A lower number yields lighter toast, a higher number yields darker toast.
- The auto sensor will automatically lower the bread into the toasting slots. The LED countdown timer will illuminate, indicating the progress of the toasting cycle.
- Once the cycle is complete, the toast will automatically be lifted. If the toast is not removed within 45 seconds, the keep-warm function will activate for up to 3 minutes.
- To stop the toasting cycle at any time, press the Cancel button.
Using Special Functions
- Bagel Function:
This function is ideal for bagels and buns. It toasts the cut side while gently warming the outer side.
- Insert the bagel halves with the cut side facing inwards.
- Select your desired browning level.
- Press the Bagel button. The indicator light for the Bagel function will illuminate.
- The toaster will automatically lower the bagel and begin the cycle.
- Frozen Function:
Use this function to defrost and toast frozen bread, waffles, or pastries.
- Insert frozen bread into the slots.
- Select your desired browning level.
- Press the Frozen button. The indicator light for the Frozen function will illuminate.
- The toaster will automatically lower the bread and adjust the toasting time for frozen items.
- Sandwich Function (with Sandwich Rack):
This function is specifically designed for preparing toasted sandwiches using the included sandwich rack.
- Prepare your sandwich and place it inside the sandwich rack.
- Insert the sandwich rack with the sandwich into the toasting slot.
- Select your desired browning level.
- Press the Sandwich button. The indicator light for the Sandwich function will illuminate.
- The toaster will automatically lower the sandwich rack and begin the cycle.
- Keep Warm Function:
If toast is not removed from the toaster within 45 seconds after the toasting cycle finishes, the toaster will automatically activate the Keep Warm function for up to 3 minutes. This ensures your toast remains warm until you are ready to retrieve it.
Maintenance and Cleaning
Regular cleaning will help maintain the performance and appearance of your toaster.
- Always unplug the toaster from the electrical outlet and allow it to cool completely before cleaning.
- Crumb Tray: Pull out the removable crumb tray located at the bottom of the toaster. Empty crumbs into a waste bin. Wipe the tray with a damp cloth and dry thoroughly before reinserting. Clean the crumb tray regularly to prevent crumb buildup, which can be a fire hazard.
- Exterior: Wipe the exterior of the toaster with a soft, damp cloth. Do not use abrasive cleaners or scouring pads, as they may scratch the surface. For stubborn marks, a mild detergent can be used, followed by wiping with a clean, damp cloth and drying thoroughly.
- Interior: Do not insert any objects into the toasting slots to clean. If food becomes lodged, unplug the toaster and carefully invert it to dislodge the food.
- Storage: When not in use, store the toaster in a clean, dry place. You may wrap the power cord around the cord wrap (if available) on the bottom of the unit.
Troubleshooting
| Problem | Possible Cause | Solution |
|---|---|---|
| Toaster does not turn on. | Not plugged in; power outage; circuit breaker tripped. | Ensure toaster is securely plugged into a working outlet. Check household circuit breaker. |
| Bread does not lower automatically. | Toaster is not plugged in or powered on; sensor obstruction. | Ensure toaster is plugged in and power is on. Check for any obstructions in the slots. |
| Toast is too light or too dark. | Browning setting is incorrect for bread type; bread moisture content varies. | Adjust the browning control knob to a higher or lower setting. Different bread types and freshness levels require different settings. |
| Smoke coming from toaster. | Crumbs accumulated in crumb tray; food lodged in slots; first use burn-off. | Unplug immediately. Clean crumb tray. If food is lodged, unplug and carefully remove. Initial smoke is normal for first use. |
| Keep Warm function not activating. | Toast removed too quickly; malfunction. | Ensure toast remains in slots for at least 45 seconds after cycle completion. If issue persists, contact customer support. |
If the problem persists after trying these solutions, please contact KitchenAid Customer Service.
Specifications
- Model: 5KMT2204BBK
- Brand: KitchenAid
- Colour: Cast Iron Black
- Material: Stainless Steel
- Number of Slices: 2
- Voltage: 240 Volts
- Product Dimensions: Approximately 24 cm (width) x 40.59 cm (depth) x 32.41 cm (height)
- Item Weight: 6.08 kg
- Special Features: LED Indicator, Auto Sensor, Keep Warm, Bagel Function, Frozen Function, Sandwich Function.
Warranty and Support
The KitchenAid Artisan 2-Slot Electric Toaster comes with a 5-year guarantee, ensuring peace of mind and long-lasting performance.
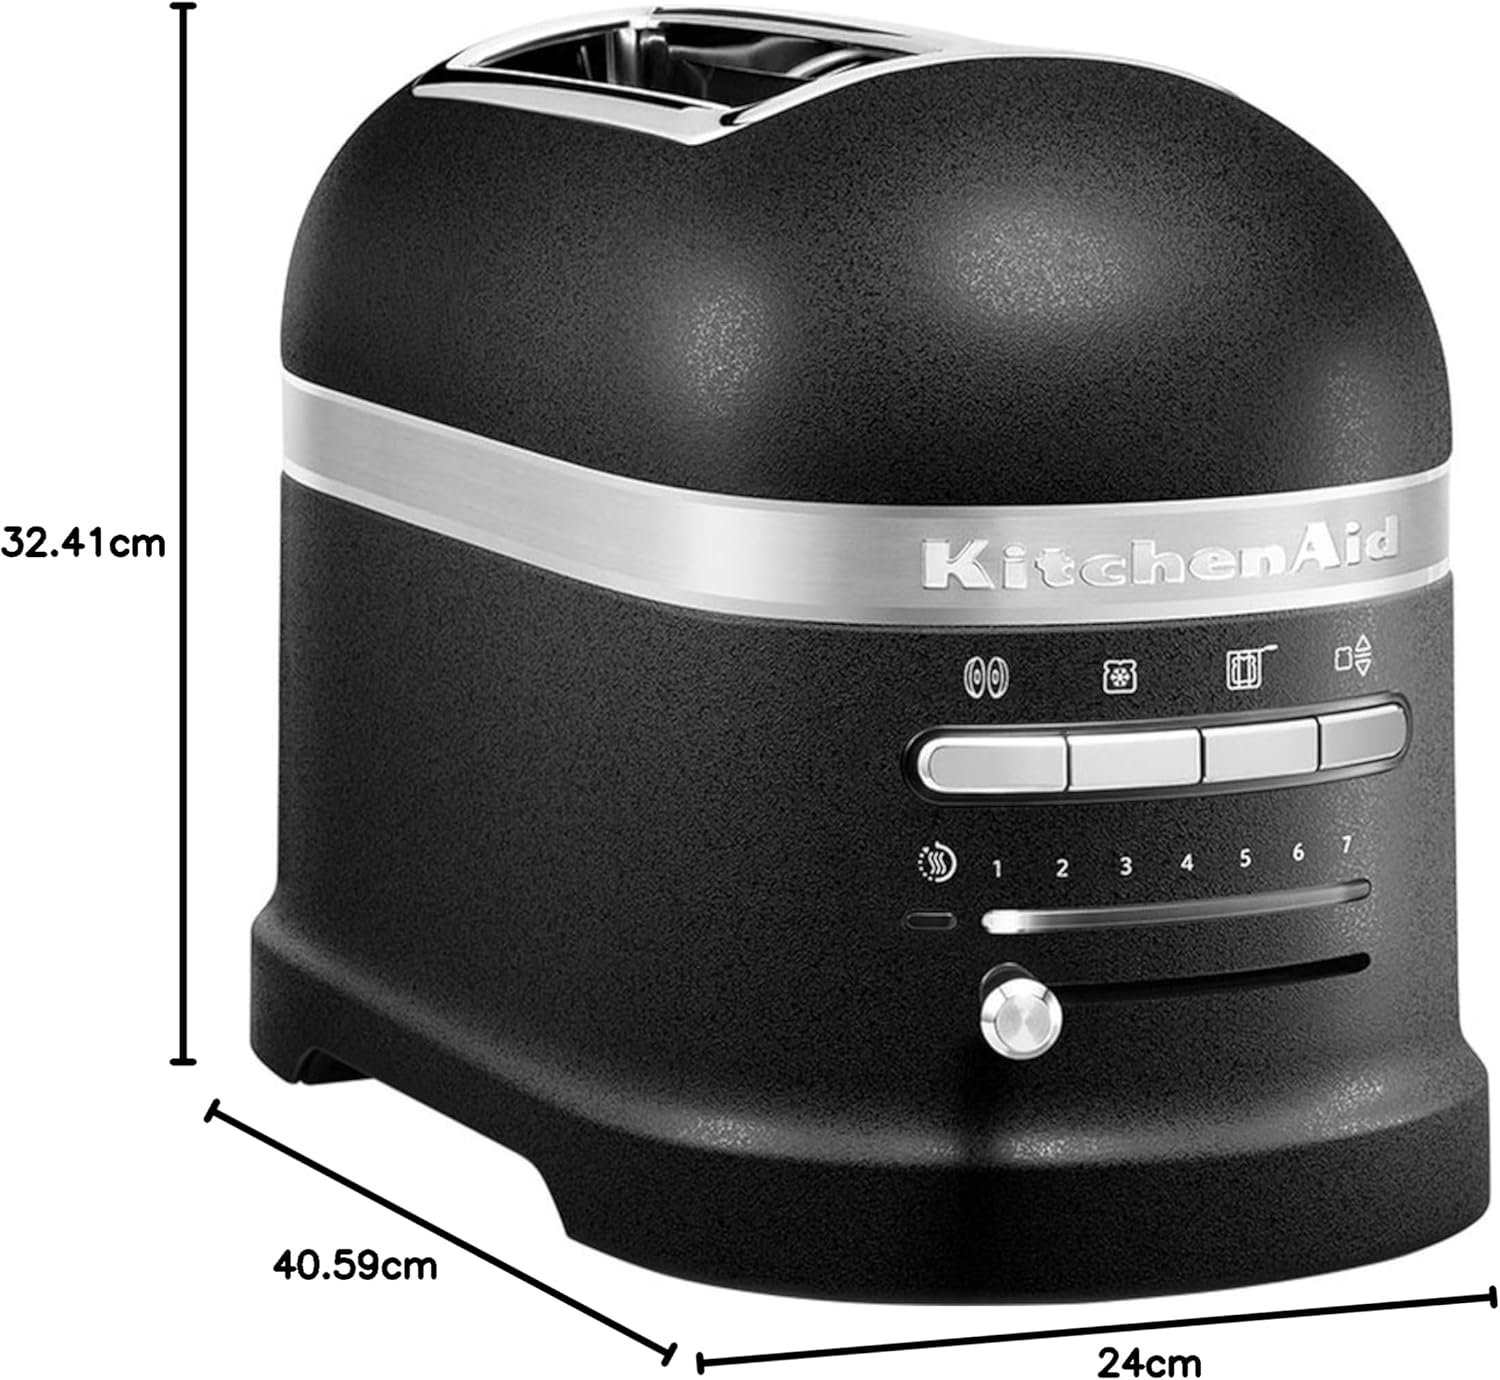
Figure 4: Official KitchenAid 5-Year Guarantee logo, signifying the extended warranty period for this product.
For warranty claims, technical support, or service inquiries, please visit the official KitchenAid website or contact their customer service department. Please have your model number (5KMT2204BBK) and proof of purchase ready when contacting support.
You can find more information and contact details on the official KitchenAid website: www.kitchenaid.com


