
1. Introduction
This manual provides detailed instructions for the safe installation, operation, and maintenance of your TORCHSTAR Essential Series 4-Inch Ultra-Thin LED Recessed Lighting fixtures. Please read this manual thoroughly before installation and retain it for future reference. These fixtures are designed for indoor use in residential and commercial applications, offering efficient and dimmable soft white illumination.
2. Product Features
- Energy Efficient: ETL and Energy Star certified, consuming only 10W to produce brightness equivalent to an 80W incandescent light. Features a scratch-resistant frosted lens to reduce glare.
- Ultra-Thin Design: Requires only 2 inches of ceiling space, making it suitable for installations where traditional housing cans cannot fit. Metal spring clips ensure secure mounting.
- Reliable and Safe: Equipped with unique waterproof male and female connectors, suitable for damp locations. IC-rated, allowing direct contact with insulation without overheating concerns.
- Versatile Illumination: Offers smooth dimming from 100% down to 5%, compatible with most standard dimmers. A 110° beam angle and CRI80+ provide quality light for various spaces including garages, kitchens, and bathrooms.
- Durable Construction: Designed for new construction, remodels, and retrofit installations. The aluminum body contributes to an extended lifespan of 36,000 hours.
3. Package Contents
Each package contains the following components:
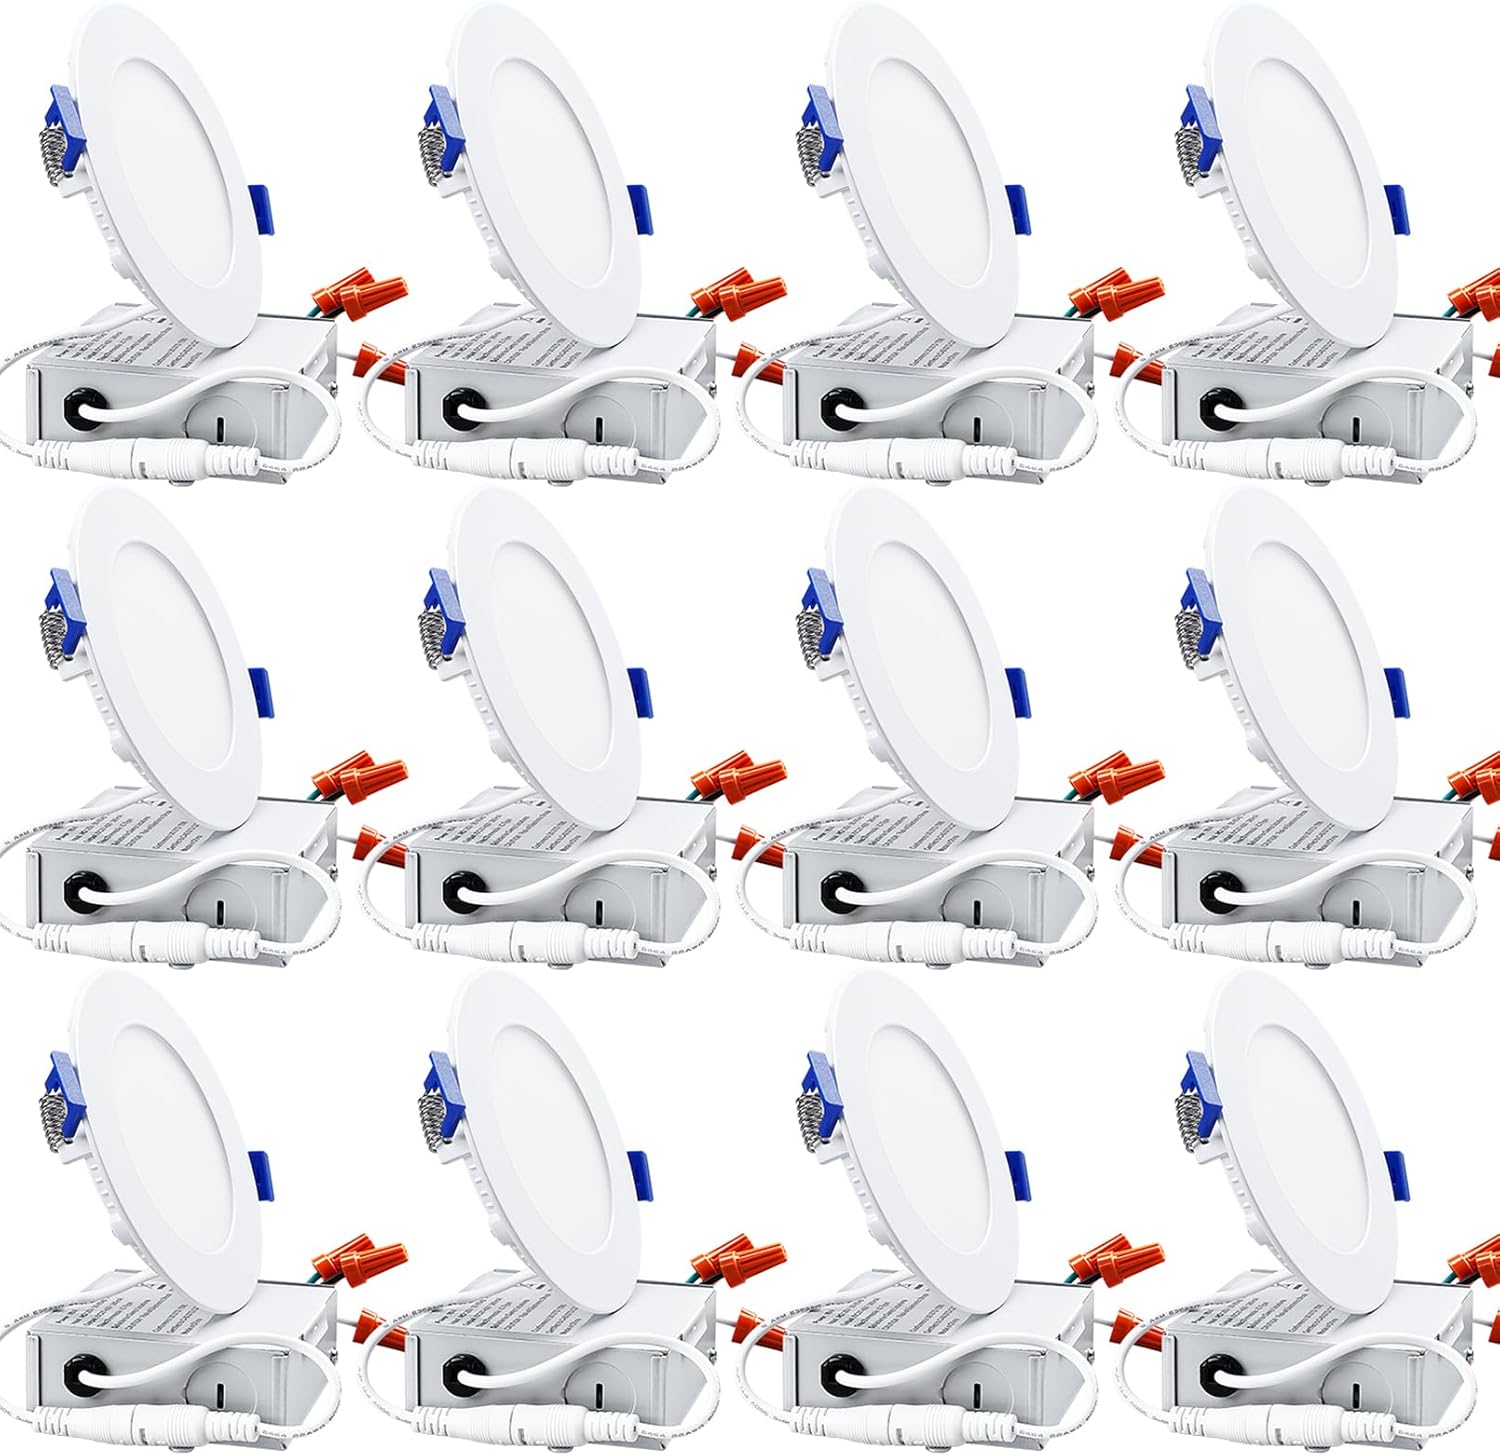
- 12 x LED Light Panels (4-inch, 2700K Soft White)
- 12 x J-Box (Junction Box) with integrated LED driver
- 12 x Sets of Metal Spring Clips (pre-attached to light panels)
4. Specifications
| Specification | Value |
|---|---|
| Brand | TORCHSTAR |
| Model Name | R1-SJ1DL4D-10W27D-12PM |
| Size | 4 Inch |
| Color Temperature | 2700K (Soft White) |
| Wattage | 10 Watts |
| Brightness | 650 Lumens |
| Voltage | 120 Volts |
| Dimmable | Yes (100%-5%) |
| Beam Angle | 110° |
| Color Rendering Index (CRI) | 80+ |
| Lifespan | 36,000 Hours |
| Material | Aluminum |
| Certifications | ETL, Energy Star |
| IC Rated | Yes |
| Damp Location Rated | Yes |
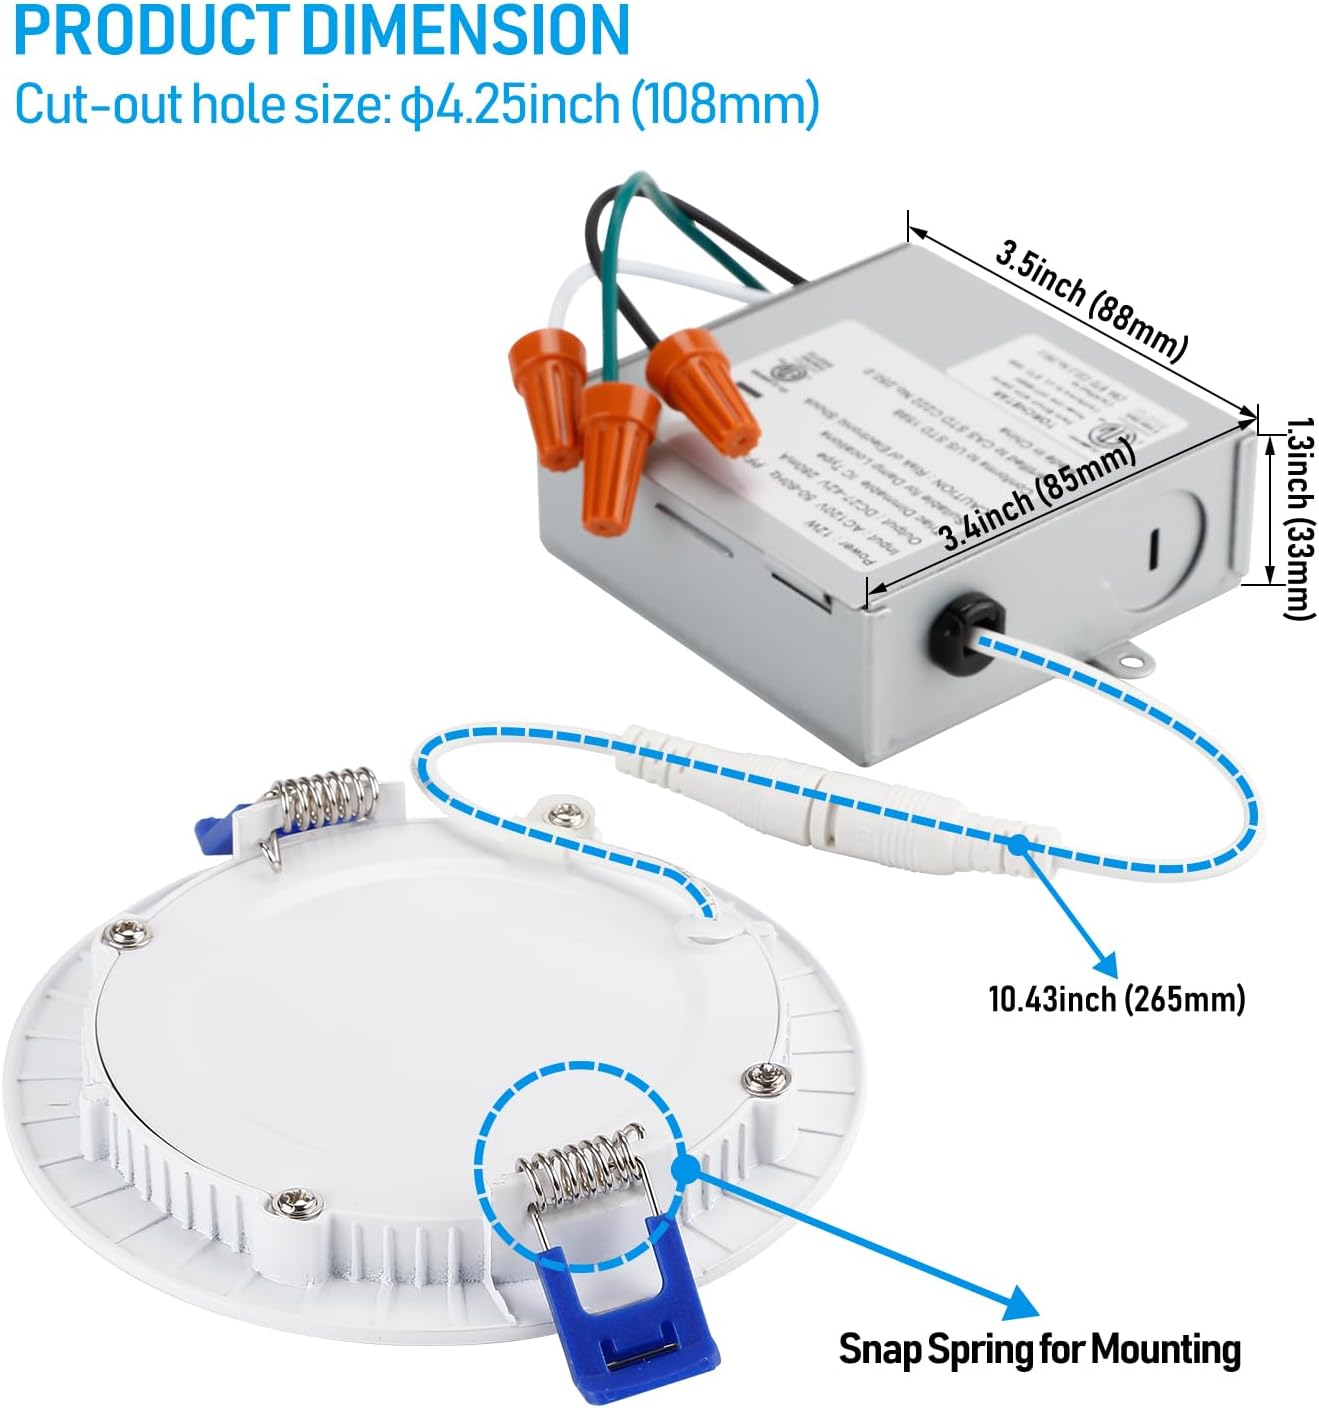
| Cut-out Hole Size | 4-1/4 inches (108mm) |
| J-Box Dimensions | 3.5 x 3.4 x 1.3 inches (88 x 85 x 33mm) |
| Minimum Ceiling Space | 2 inches |


5. Safety Information
WARNING: Risk of fire or electric shock. Installation requires knowledge of luminaires electrical systems. If not qualified, do not attempt installation. Contact a qualified electrician.
- Disconnect power at the circuit breaker before installation or servicing.
- Ensure all electrical connections comply with local codes and ordinances, as well as the National Electric Code (NEC).
- Do not make or alter any open holes in an enclosure of wiring or electrical components during kit installation.
- To prevent wiring damage or abrasion, do not expose wiring to edges of sheet metal or other sharp objects.
- This fixture is IC-rated, meaning it is suitable for direct contact with insulation.
- This fixture is suitable for damp locations.
- Do not use with dimmers not specifically designed for LED lighting. Refer to the dimmer manufacturer's instructions for compatibility.
6. Setup and Installation
Required Tools (not included): Hole saw (4-1/4 inch), wire strippers, screwdriver, measuring tape, pencil.
Installation Steps:
- Turn Off Power: Before starting, ensure the power supply to the installation area is turned off at the circuit breaker.
- Determine Location: Choose the desired location for each light fixture. Ensure there are no obstructions (e.g., joists, pipes) in the ceiling space.
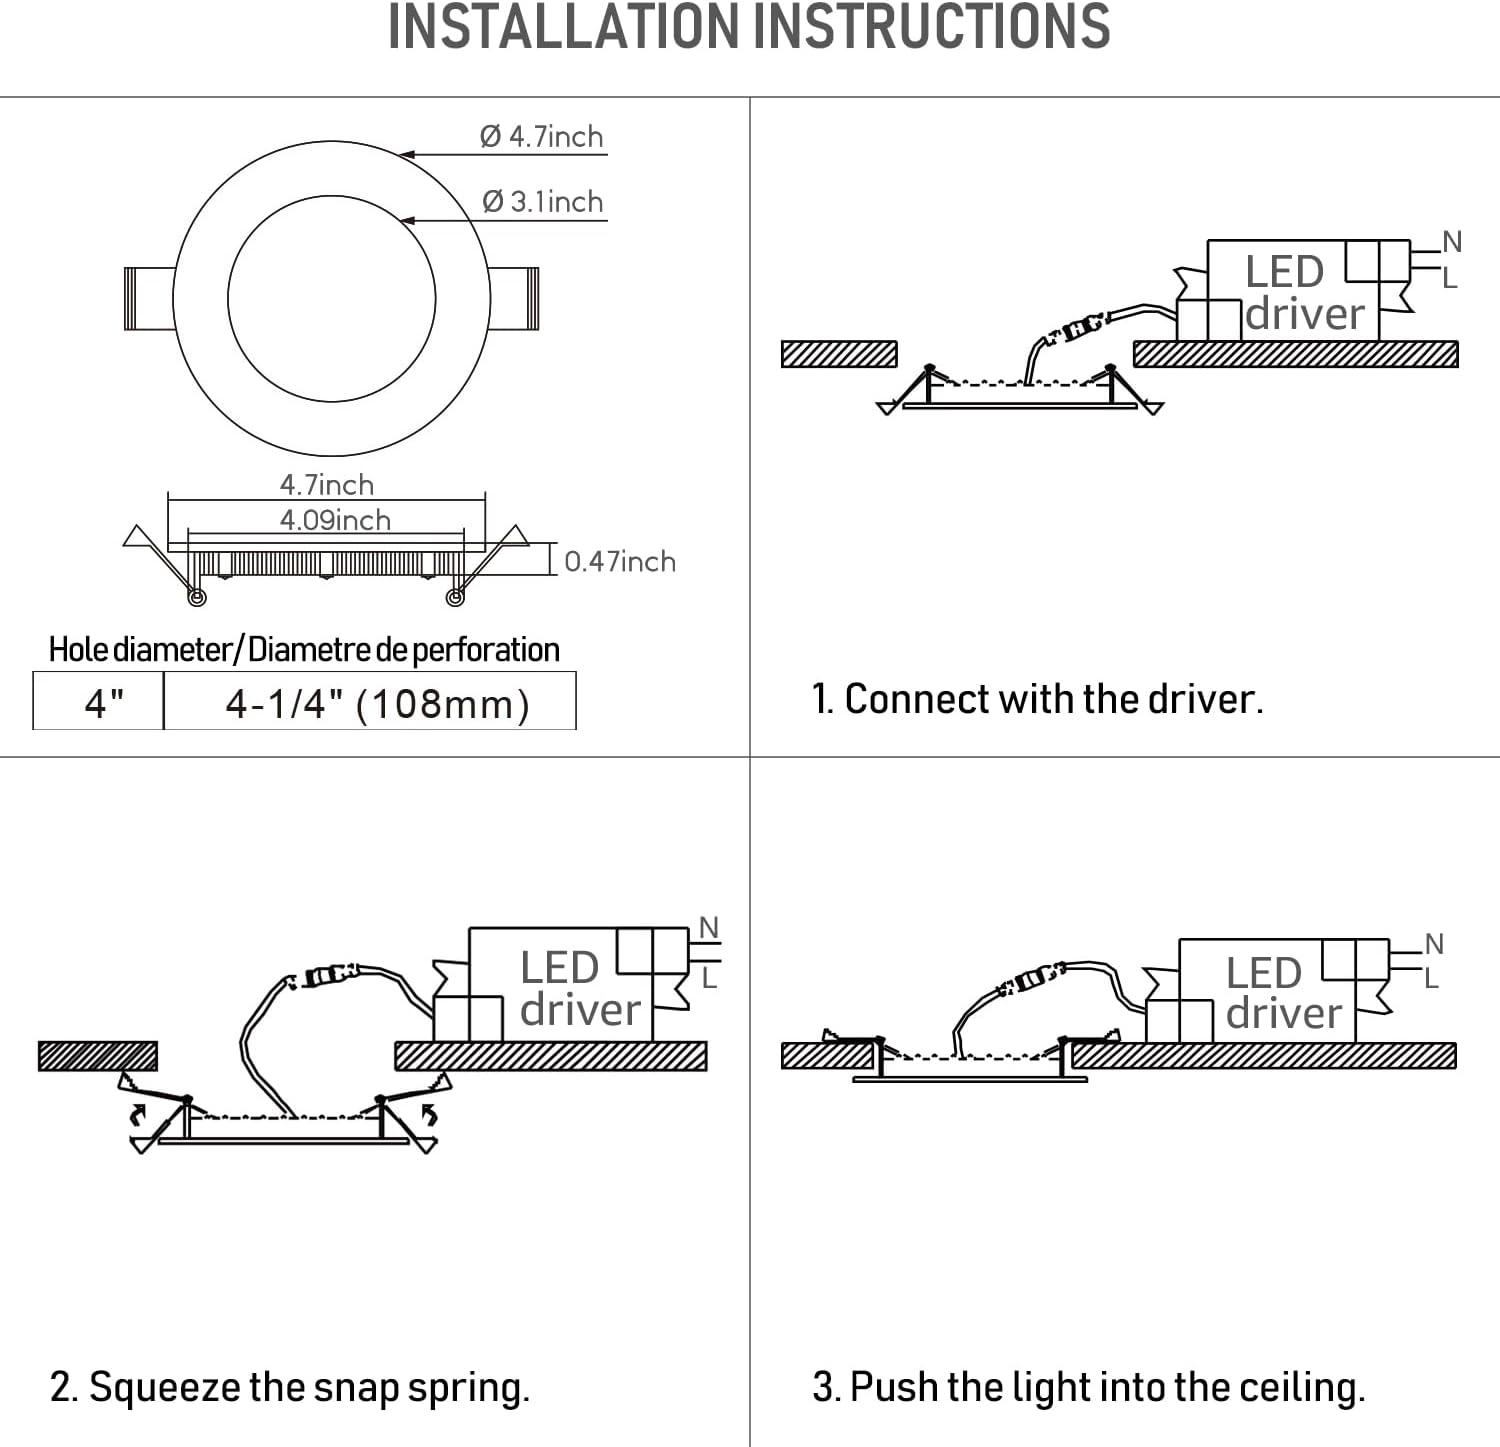
- Cut Hole: Using a 4-1/4 inch (108mm) hole saw, carefully cut a circular opening in the ceiling at each marked location.
- Prepare Wiring: Open the J-Box cover. Remove the appropriate knockout(s) for your electrical wiring. Connect the household electrical wires to the wires inside the J-Box using the provided wire nuts: black to black (live), white to white (neutral), and green/bare copper to green (ground). Secure the wires and close the J-Box cover.
- Position J-Box: Place the J-Box into the ceiling opening. It is designed to fit within the ceiling cavity.
- Connect Light to Driver: Connect the male connector from the LED light panel to the female connector extending from the J-Box. Ensure a secure connection.
- Install Light Fixture: Squeeze the two spring clips on the sides of the LED light panel upwards. Carefully push the light fixture into the ceiling hole. The spring clips will automatically snap down and hold the fixture firmly against the ceiling.
- Restore Power: Once all fixtures are installed, restore power at the circuit breaker.


7. Operating Instructions
Once installed and power is restored, your TORCHSTAR LED recessed lights are ready for use.
- Turning On/Off: Operate the lights using a standard wall switch connected to the circuit.
- Dimming: If connected to a compatible LED dimmer switch, you can adjust the brightness from 100% down to 5%. Adjust the dimmer control to achieve your desired light level.
- Color Temperature: These fixtures provide a fixed 2700K Soft White light, offering a warm and inviting ambiance.
8. Maintenance
The TORCHSTAR LED recessed lights are designed for long-term, maintenance-free operation.
- Cleaning: Ensure power is off before cleaning. Gently wipe the fixture with a soft, dry, or slightly damp cloth. Do not use harsh chemicals or abrasive cleaners, as these can damage the finish or electrical components.
- No User-Serviceable Parts: The LED components are integrated and not user-replaceable. Do not attempt to open or repair the fixture.
9. Troubleshooting
If you encounter issues with your lighting fixture, refer to the following common problems and solutions:
| Problem | Possible Cause | Solution |
|---|---|---|
| Light does not turn on. | No power supply; loose wiring; faulty switch; incorrect connection. | Check circuit breaker. Verify all wire connections are secure. Test the switch. Ensure the light panel is properly connected to the J-Box. |
| Light flickers or dims inconsistently. | Incompatible dimmer switch; loose wiring; voltage fluctuations. | Ensure you are using an LED-compatible dimmer. Check wiring connections. If flickering persists, consult an electrician. |
| Light is not as bright as expected. | Dimmer setting is too low; incorrect installation. | Adjust dimmer to maximum brightness. Verify correct wattage and lumen output for the model. |
| Humming noise from light. | Incompatible dimmer switch. | Replace with a high-quality, LED-compatible dimmer switch. |
If troubleshooting steps do not resolve the issue, please contact TORCHSTAR customer support or a qualified electrician.
10. Warranty and Support
TORCHSTAR provides a 3-year warranty for this product, covering defects in materials and workmanship from the date of purchase. This warranty does not cover damage caused by improper installation, misuse, abuse, or acts of nature.
For warranty claims, technical assistance, or any questions regarding your TORCHSTAR LED recessed lighting, please contact TORCHSTAR customer support through their official website or the retailer where the product was purchased. Please have your model number (R1-SJ1DL4D-10W27D-12PM) and proof of purchase available.