
1. Introduction
This manual provides essential information for the safe and efficient operation, setup, maintenance, and troubleshooting of your AEG BSB18C2BL-402C 18V Compact Hammer Drill. Please read these instructions thoroughly before using the tool and retain them for future reference. Proper use and maintenance will ensure optimal performance and extend the life of your tool.
2. General Safety Instructions
WARNING: Read all safety warnings, instructions, illustrations, and specifications provided with this power tool. Failure to follow all instructions listed below may result in electric shock, fire, and/or serious injury.
- Work Area Safety: Keep work area clean and well lit. Do not operate power tools in explosive atmospheres, such as in the presence of flammable liquids, gases, or dust.
- Electrical Safety: Avoid body contact with earthed or grounded surfaces. Do not expose power tools to rain or wet conditions.
- Personal Safety: Always wear eye protection, hearing protection, and a dust mask when operating the tool. Dress properly; avoid loose clothing or jewelry.
- Power Tool Use and Care: Do not force the power tool. Use the correct power tool for your application. Disconnect the battery pack from the power tool before making any adjustments, changing accessories, or storing power tools.
- Battery Tool Use and Care: Recharge only with the charger specified by the manufacturer. Use power tools only with specifically designated battery packs.
- Service: Have your power tool serviced by a qualified repair person using only identical replacement parts.
3. Product Overview
The AEG BSB18C2BL-402C is a compact and powerful 18V hammer drill designed for various drilling and fastening applications. Familiarize yourself with its components before operation.

Figure 1: The AEG BSB18C2BL-402C 18V Compact Hammer Drill, including two 4.0Ah Lithium-Ion batteries and a durable carrying case.

Figure 2: Detailed view of the hammer drill, showing the adjustable side handle, chuck, and battery connection point.
Key Components:
- 13mm Metal Chuck: For secure bit retention.
- Speed Selector: Two-speed gearbox for optimal performance.
- Torque/Mode Selector: Adjusts torque settings for screwdriving or selects drill/hammer drill modes.
- Trigger Switch: Variable speed control.
- Forward/Reverse Selector: Changes rotation direction.
- LED Work Light: Illuminates the work area.
- Side Handle: Provides additional control and stability.
- Battery Pack: 18V 4.0Ah Lithium-Ion battery.
4. Setup
4.1. Charging the Battery
- Connect the charger to a suitable power outlet.
- Slide the battery pack into the charger until it clicks into place.
- Allow the battery to charge fully. Refer to the charger's indicator lights for charging status.
- Once charged, remove the battery from the charger.
4.2. Installing/Removing the Battery Pack
- Installation: Align the battery pack with the receptacle on the tool handle and slide it in until it locks securely.
- Removal: Press the battery release button (usually located on the battery pack) and slide the battery out of the tool.
4.3. Attaching the Side Handle
The adjustable side handle provides better control, especially during high-torque applications or hammer drilling.
- Loosen the side handle by rotating it counter-clockwise.
- Slide the handle onto the front of the drill body, positioning it to your preference.
- Tighten the handle by rotating it clockwise until secure.
4.4. Installing Drill Bits/Accessories
- Ensure the tool is switched off and the battery pack is removed.
- Rotate the chuck collar counter-clockwise to open the chuck jaws.
- Insert the drill bit or accessory fully into the chuck.
- Rotate the chuck collar clockwise to tighten the jaws securely around the bit. Ensure the bit is centered and firmly gripped.
5. Operating Instructions
5.1. Selecting Speed
The drill features a two-speed gearbox:
- Speed 1 (0-500 RPM): For high-torque applications, larger diameter drilling, and screwdriving.
- Speed 2 (0-1950 RPM): For high-speed drilling with smaller bits.
Use the speed selector switch located on top of the drill to choose the desired speed range.
5.2. Selecting Operating Mode and Torque
Rotate the torque/mode selector ring to choose between:
- Screwdriving Mode: Set the ring to one of the numbered torque settings (e.g., 1-20). The clutch will disengage once the set torque is reached, preventing overtightening.
- Drill Mode: Set the ring to the drill icon. This provides full torque for drilling without clutch engagement.
- Hammer Drill Mode: Set the ring to the hammer drill icon. This engages the hammer mechanism for drilling into masonry.
5.3. Forward/Reverse Operation
The forward/reverse selector switch, located above the trigger, controls the direction of rotation. Push it left for forward (drilling/fastening) and right for reverse (removing screws/bits). Center position locks the trigger for safety.
5.4. Drilling and Fastening
- Ensure the correct bit is installed and the battery is charged.
- Select the appropriate speed and mode (Drill, Hammer Drill, or Screwdriving).
- Position the tool firmly against the workpiece.
- Press the trigger switch to start the tool. The integrated LED light will illuminate the work area.
- Apply steady, even pressure. Do not force the tool.
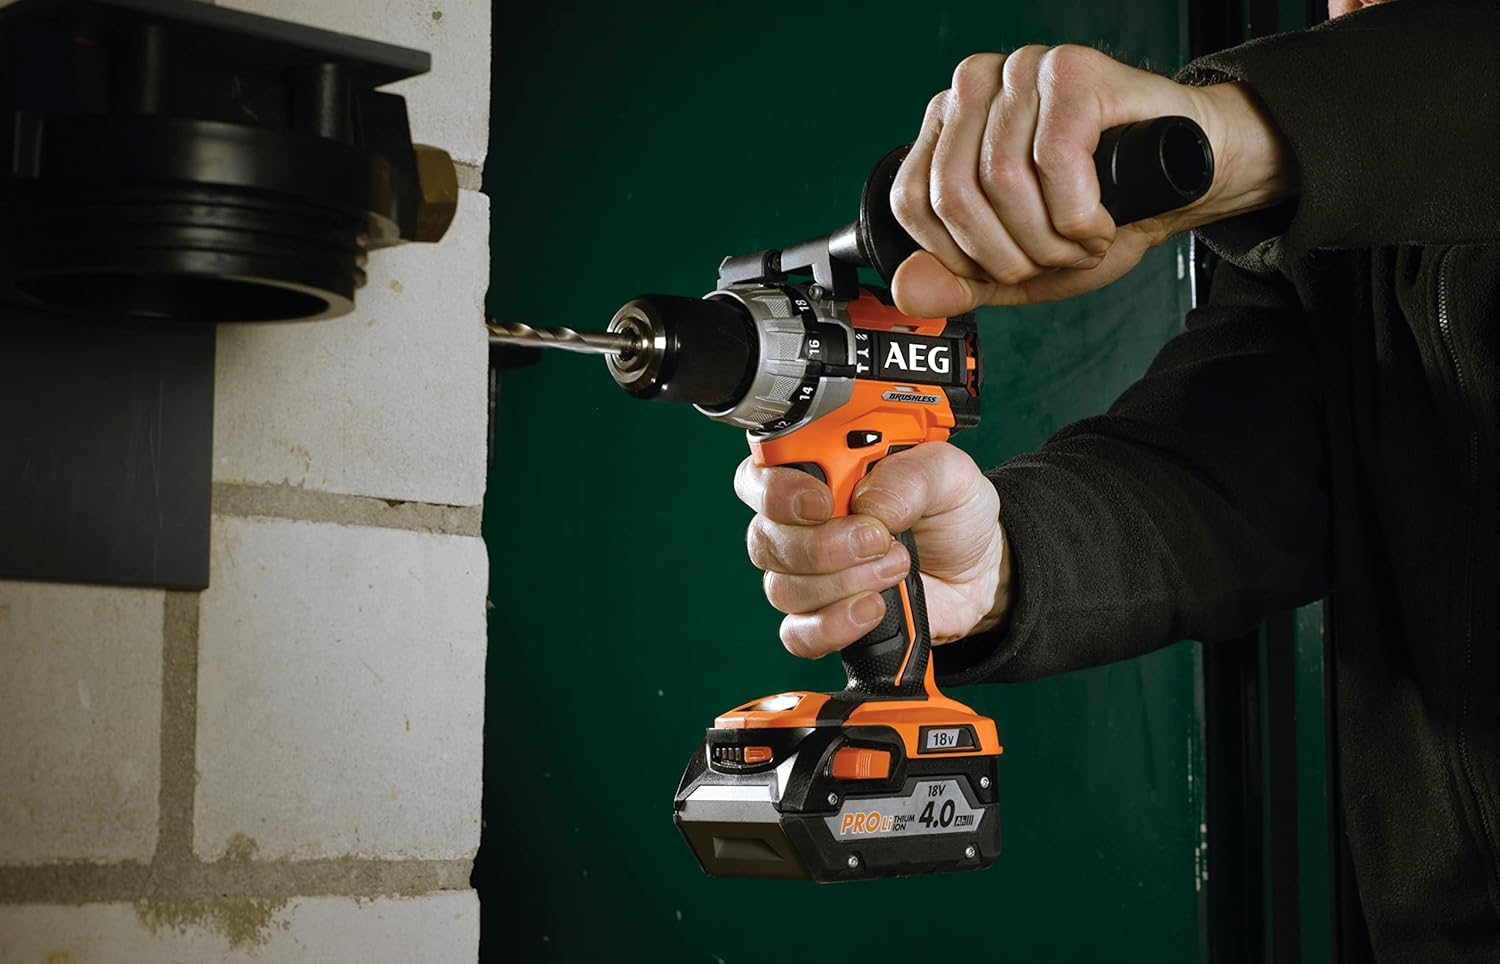
Figure 3: Demonstrating the drill in action, boring into a wooden beam. Ensure proper grip and safety gear.
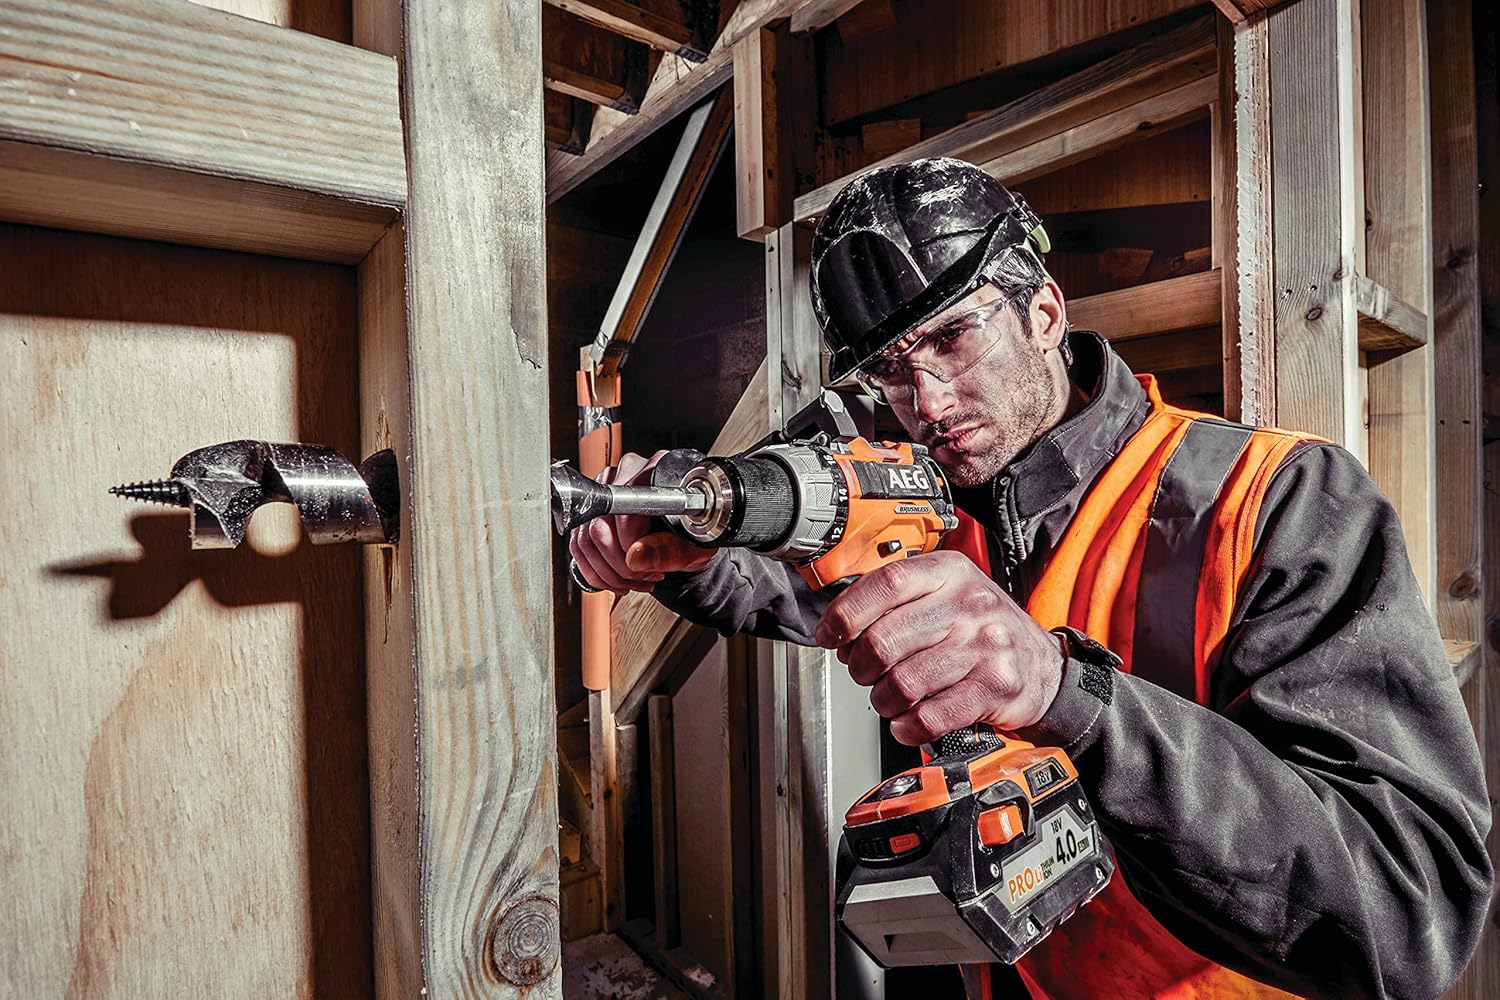
Figure 4: The hammer drill being used for drilling into a brick wall, showcasing its masonry capability.

Figure 5: The drill configured for screwdriving, demonstrating its versatility for fastening tasks.
6. Maintenance
6.1. Cleaning
- Always disconnect the battery pack before cleaning.
- Keep the ventilation openings of the tool clean to prevent overheating.
- Use a soft, damp cloth to clean the tool casing. Do not use solvents or abrasive cleaners.
- Clean the chuck jaws regularly to ensure proper bit gripping.
6.2. Battery Care and Storage
- Store battery packs in a cool, dry place, away from direct sunlight and extreme temperatures.
- For long-term storage, charge batteries to approximately 50% capacity.
- Do not store battery packs with metal objects that could short the terminals.
- The AEG Pro Li-ion technology includes charge protection for maximum battery and tool durability.
6.3. General Storage
Store the drill, batteries, and charger in the provided carrying case in a secure, dry location out of reach of children.
7. Troubleshooting
| Problem | Possible Cause | Solution |
|---|---|---|
| Tool does not start. | Battery not charged or improperly installed. Trigger lock engaged. | Charge battery fully and ensure it is securely installed. Disengage trigger lock. |
| Reduced power or speed. | Battery charge low. Overload protection activated. | Recharge battery. Reduce pressure on the tool or use a sharper bit. |
| Chuck not holding bit securely. | Chuck jaws dirty or worn. Bit not inserted fully. | Clean chuck jaws. Ensure bit is inserted completely and chuck is tightened firmly. |
| Excessive vibration. | Bent or damaged drill bit. Loose side handle. | Replace damaged bit. Tighten side handle. |
If problems persist, contact AEG customer support or an authorized service center.
8. Specifications
| Model | BSB18C2BL-402C (4935464097) |
| Brand | AEG |
| Voltage | 18 Volts |
| Battery Amperage | 4 Amps (4.0Ah) |
| Maximum Rotational Speed | 1950 RPM |
| Maximum Torque | 65 Newton Meters |
| Number of Speeds | 2 |
| Chuck Size | 13 mm (Metal) |
| Drilling Capacity (Wood) | 65 mm |
| Drilling Capacity (Metal) | 13 mm |
| Item Weight | 2 Kilograms (4.4 pounds) |
| Included Components | Drill, 2 x 4.0Ah Lithium-Ion batteries, Charger |
| Special Features | Compact design, Brushless motor, Integrated LED, Reversible |
9. Warranty and Support
For warranty information, service, or technical support, please refer to the warranty card included with your product or visit the official AEG website. Keep your proof of purchase for warranty claims.
AEG Official Website: www.aeg-powertools.eu
