
1. Introduction
Thank you for choosing the LABOREDUCER LED Dimmable Under Cabinet Puck Lights. This kit provides versatile lighting solutions for various indoor applications such as kitchens, wardrobes, and bookcases. The puck lights are designed for easy installation, offering both plug-in and hardwired options, and feature remote control for dimming and timer functions.
The lights are constructed from durable aluminum and plastic with a rust-proof and corrosion-resistant protective shell, ensuring longevity. A frosted PC cover provides uniform, glare-free illumination, promoting eye comfort. Each puck light emits 200 lumens of 6000K cool white light, offering a bright and natural appearance with a Color Rendering Index (CRI) over 83.
2. Package Contents
Please verify that all components are present in your package:
- 10 x LED Puck Lights
- 1 x Remote Control
- 1 x LED Controller
- 1 x 6-Way Splitter
- 1 x Power Adapter
- 1 x US Plug Power Cord
- 4 x Extension Cables (5 ft each)
- 25 x Cable Clips
- 15 x Double-Sided Adhesive Stickers
- 12 x Mounting Screws
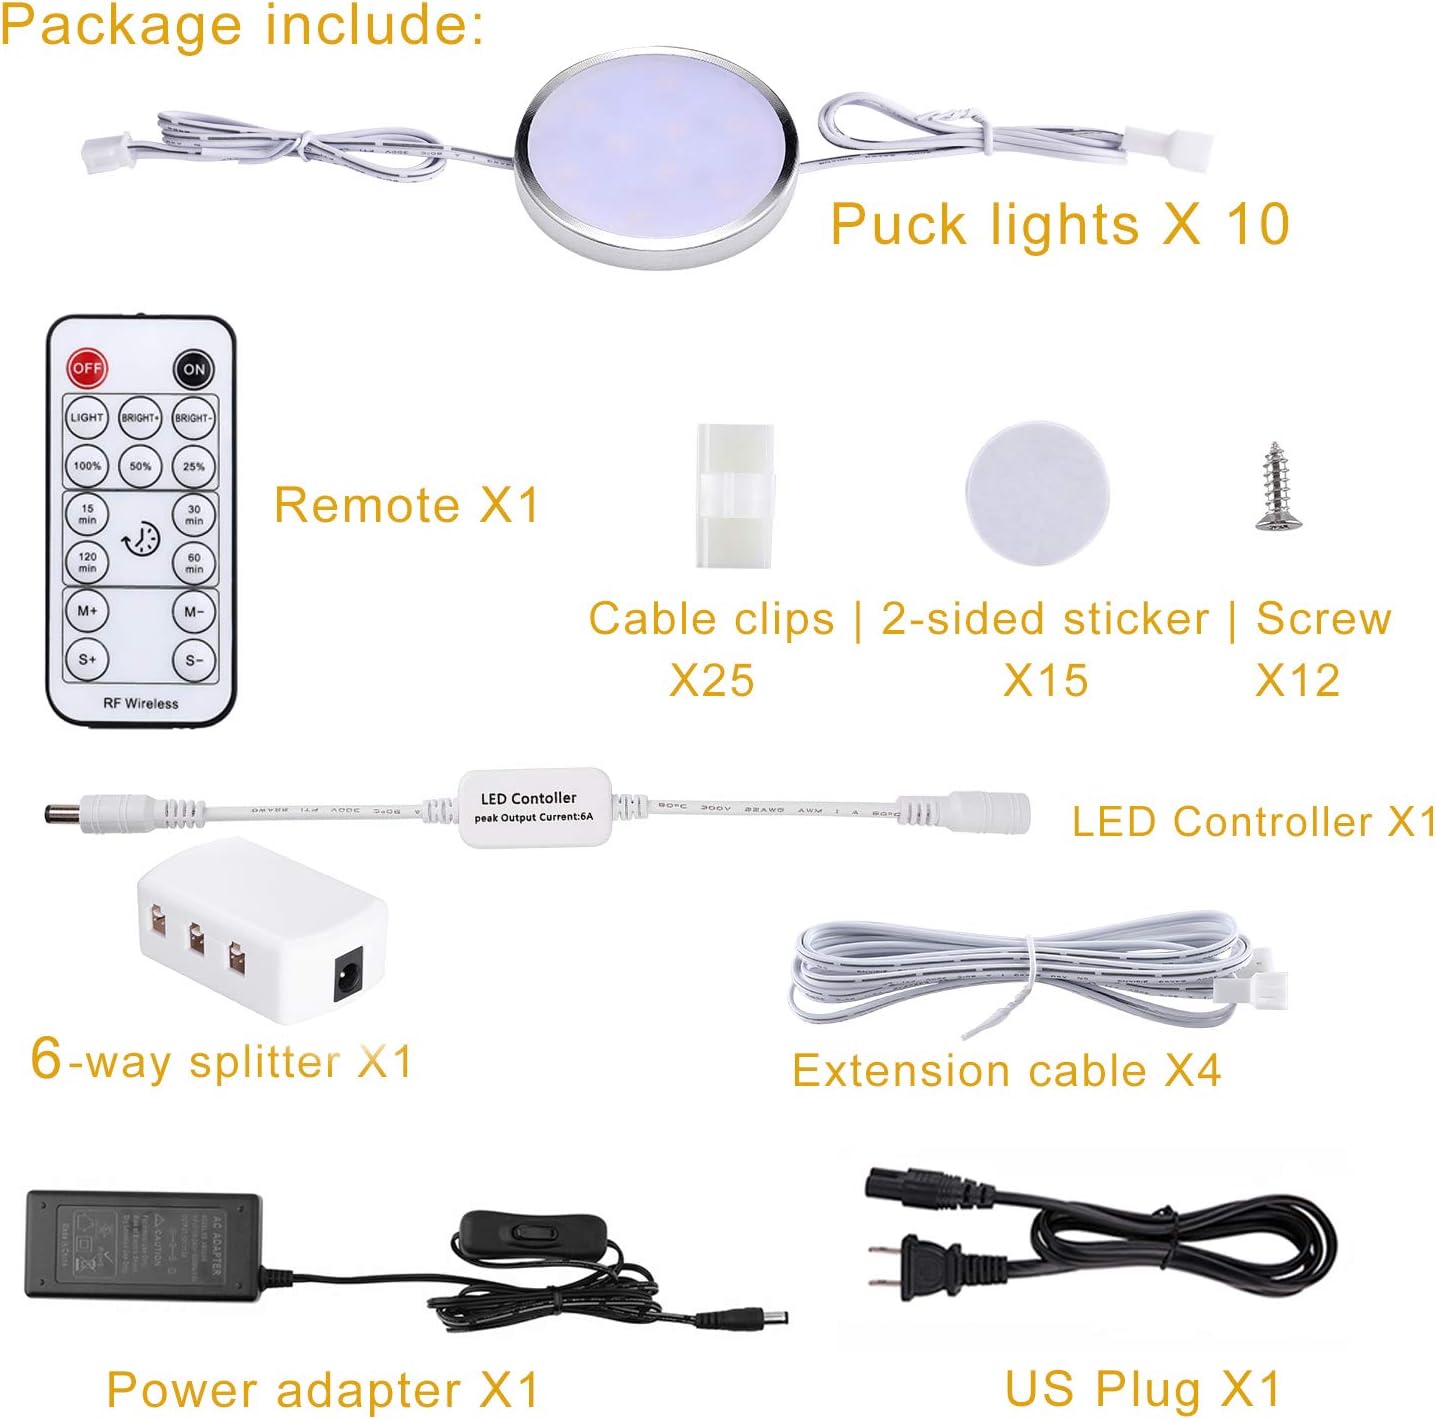
Figure 2.1: Included Components
3. Setup and Installation
The LABOREDUCER LED puck lights offer flexible installation options, including direct plug-in or hardwired connections, and can be linked in series or parallel.
3.1 Connection Methods
- Plug-in: Connect the power adapter to the LED controller, then to the 6-way splitter or directly to the first puck light in a series. Plug the power adapter into a standard wall outlet.
- Hardwired: The plug on the power adapter can be cut and wired directly to an electrical outlet or existing wiring for a permanent installation. Ensure all electrical work is performed by a qualified professional if you are unsure.
3.2 Linking Puck Lights
The puck lights can be connected in two ways:
- Series Connection: Connect the puck lights one by one in a chain. This is suitable when the power source is at one end of the installation area.
- Parallel Connection: Use the included 6-way splitter to connect multiple puck lights simultaneously. This method is ideal for distributing lights evenly from a central power point.

Figure 3.1: Optional Linking Methods
3.3 Mounting Options
Choose from the following mounting methods:
- Adhesive Stickers: For quick and easy installation on smooth surfaces. Ensure the surface is clean and dry before applying.
- Screws: For a more secure and permanent installation.
- Cable Clips: Use the provided clips to neatly manage and secure the wiring.
Screw Installation Steps:
- Stick the screw drawing template onto the desired mounting surface.
- Screw into the marked spots, leaving the screw head approximately 3mm high.
- Plug the puck light onto the screws.
- Push to fasten the light securely.
- Fasten cables with the provided clips for a tidy finish.

Figure 3.2: Screw Installation Guide
4. Operating Instructions
The LABOREDUCER LED puck lights are controlled using the included remote control.
4.1 Remote Control Functions
- ON/OFF: Press the 'ON' or 'OFF' button to turn the lights on or off.
- Dimming: Use the 'BRIGHT+' and 'BRIGHT-' buttons for smooth 0-100% dimming. Alternatively, select preset brightness levels: 25%, 50%, or 100%.
- Timer: Set the lights to automatically turn off after a specified duration. Options include 15, 30, 60, or 120 minutes.
4.2 Memory Function
The lights feature a memory function. When powered back on, they will resume the last brightness level set before being turned off.
4.3 Remote Pairing (If Needed)
If the remote control does not respond, it may need to be paired with the LED controller. Refer to the small instruction sheet included with the remote for specific pairing steps, as these can vary.
5. Maintenance
To ensure optimal performance and longevity of your LABOREDUCER LED puck lights, follow these simple maintenance guidelines:
- Cleaning: Gently wipe the puck lights with a soft, dry cloth. Avoid using abrasive cleaners or solvents, as these can damage the finish or electronic components.
- Inspection: Periodically check all connections and wiring for any signs of wear or damage. Ensure all mounting points remain secure.
- Environment: These lights are designed for indoor use only and are not water-resistant. Avoid exposure to moisture or extreme temperatures.
6. Troubleshooting
If you encounter any issues with your LABOREDUCER LED puck lights, please refer to the following troubleshooting guide:
| Problem | Possible Cause | Solution |
|---|---|---|
| Lights do not turn on. | No power supply. Loose connection. Remote battery dead. | Check if the power adapter is securely plugged in. Ensure all cables are firmly connected. Replace remote battery. |
| Remote control not working. | Remote battery dead. Remote not paired. Obstruction between remote and receiver. | Replace remote battery. Follow remote pairing instructions (refer to remote manual). Ensure clear line of sight to the LED controller. |
| Lights flicker or dim unexpectedly. | Unstable power supply. Loose connection. Overloaded circuit. | Ensure power source is stable. Check all connections. Ensure total wattage does not exceed adapter capacity. |
| Some puck lights not working in a series. | Faulty connection in the chain. | Check connections of individual puck lights. If one light is defective, others in the series should still work. Isolate and replace the faulty light if necessary. |
If the problem persists after attempting these solutions, please contact customer support.
7. Specifications
| Brand | LABOREDUCER |
| Model Number | LRRF10CWUS |
| Color | Cool White |
| Material | Aluminum, Plastic |
| Light Source | LED |
| Number of Light Sources | 10 |
| Voltage | 12 Volts |
| Wattage | 20 watts (Total for 10 pucks) |
| Brightness | 2000 Lumens (Total for 10 pucks) |
| Light Color Temperature | 6000K (Cool White) |
| Control Method | Remote Control |
| Connectivity Protocol | Hardwired / Plug-in |
| Item Dimensions (Puck) | 0.3"L x 0.3"W x 0.3"H (Thickness) |
| Indoor/Outdoor Usage | Indoor |
| Water Resistance Level | Not Water Resistant |

Figure 7.1: Component Dimensions
8. Warranty and Support
8.1 Warranty Information
LABOREDUCER products are manufactured to high-quality standards. Please refer to the product packaging or the seller's policy for specific warranty details and duration. Typically, a limited warranty covers manufacturing defects from the date of purchase.
8.2 Customer Support
For technical assistance, troubleshooting, or warranty claims, please contact LABOREDUCER customer support through the retailer's platform where the product was purchased. Provide your model number (LRRF10CWUS) and purchase details for faster service.
