
1. Setup
1.1 Unboxing and Initial Inspection
Carefully remove all components from the packaging. Verify that all items listed in the 'What's Included' section are present and undamaged. Keep packaging for future transport or storage.

Image 1: Contents of the VAULTEK Slider Series safe packaging, including the safe, keys, rechargeable battery, charging kit, mounting plate, and mounting hardware.
1.2 Battery Installation and Charging
The VAULTEK Slider Series safe is powered by a rechargeable Li-ion battery. Ensure the battery is fully charged before first use. The battery compartment is typically accessed by opening the safe's door and locating the designated slot. Insert the battery, ensuring correct polarity if indicated, or simply slide it in as shown in the video. Connect the charging cable to the safe and a power source.
Video 1: This video provides a quick overview of the Vaultek Slider Series, including battery installation and initial setup. It demonstrates how to install the rechargeable battery and connect the charging cable.
1.3 Setting the Master Code
To set your personal master code, open the safe using the provided manual key. Locate the program button inside the safe. Press and hold the program button until the keypad lights up. Enter your desired 4-8 digit code, then press and hold the program button again to confirm. Test your new code to ensure it functions correctly.
Video 2: This video demonstrates how to set the master code for the Vaultek Slider Series safe. It shows the process of entering a new code and confirming it.
1.4 Fingerprint Enrollment (Biometric Models)
For biometric models, you can enroll up to 20 unique fingerprints. To enroll a fingerprint, first ensure the safe is open. Press the program button briefly. The fingerprint scanner will illuminate. Place your finger on the scanner, lift, and repeat several times until the safe confirms successful enrollment. Enroll at least two administrative fingerprints for primary access.

Image 2: Close-up of the VAULTEK Slider Series safe showing the backlit numeric keypad, manual key entry, Nano Key (sold separately), and biometric scanner for authorized entry.
1.5 App Connection (WiFi Models)
Download the VAULTEK app from your device's app store. Open the app and follow the on-screen instructions to pair your safe. You will typically need to enter your master code and press specific buttons on the safe to initiate the pairing process. The app allows for live alerts, battery monitoring, and managing fingerprints.

Image 3: Screenshots of the VAULTEK WiFi app and online dashboard, showing features like live alerts, battery level, and fingerprint management. A QR code for app download is also visible. Scan this QR code to download the app: https://qrco.de/bcekwx
1.6 Mounting the Safe
The Slider Series safe comes with a mounting plate for secure installation. Choose a suitable location, such as a wall, inside a desk, or on the side of a nightstand. Use the provided mounting hardware to attach the plate securely. Once the plate is installed, slide the safe onto the plate until it locks into place. Ensure the safe is mounted with a slight downward tilt to assist with gravity-assisted opening.
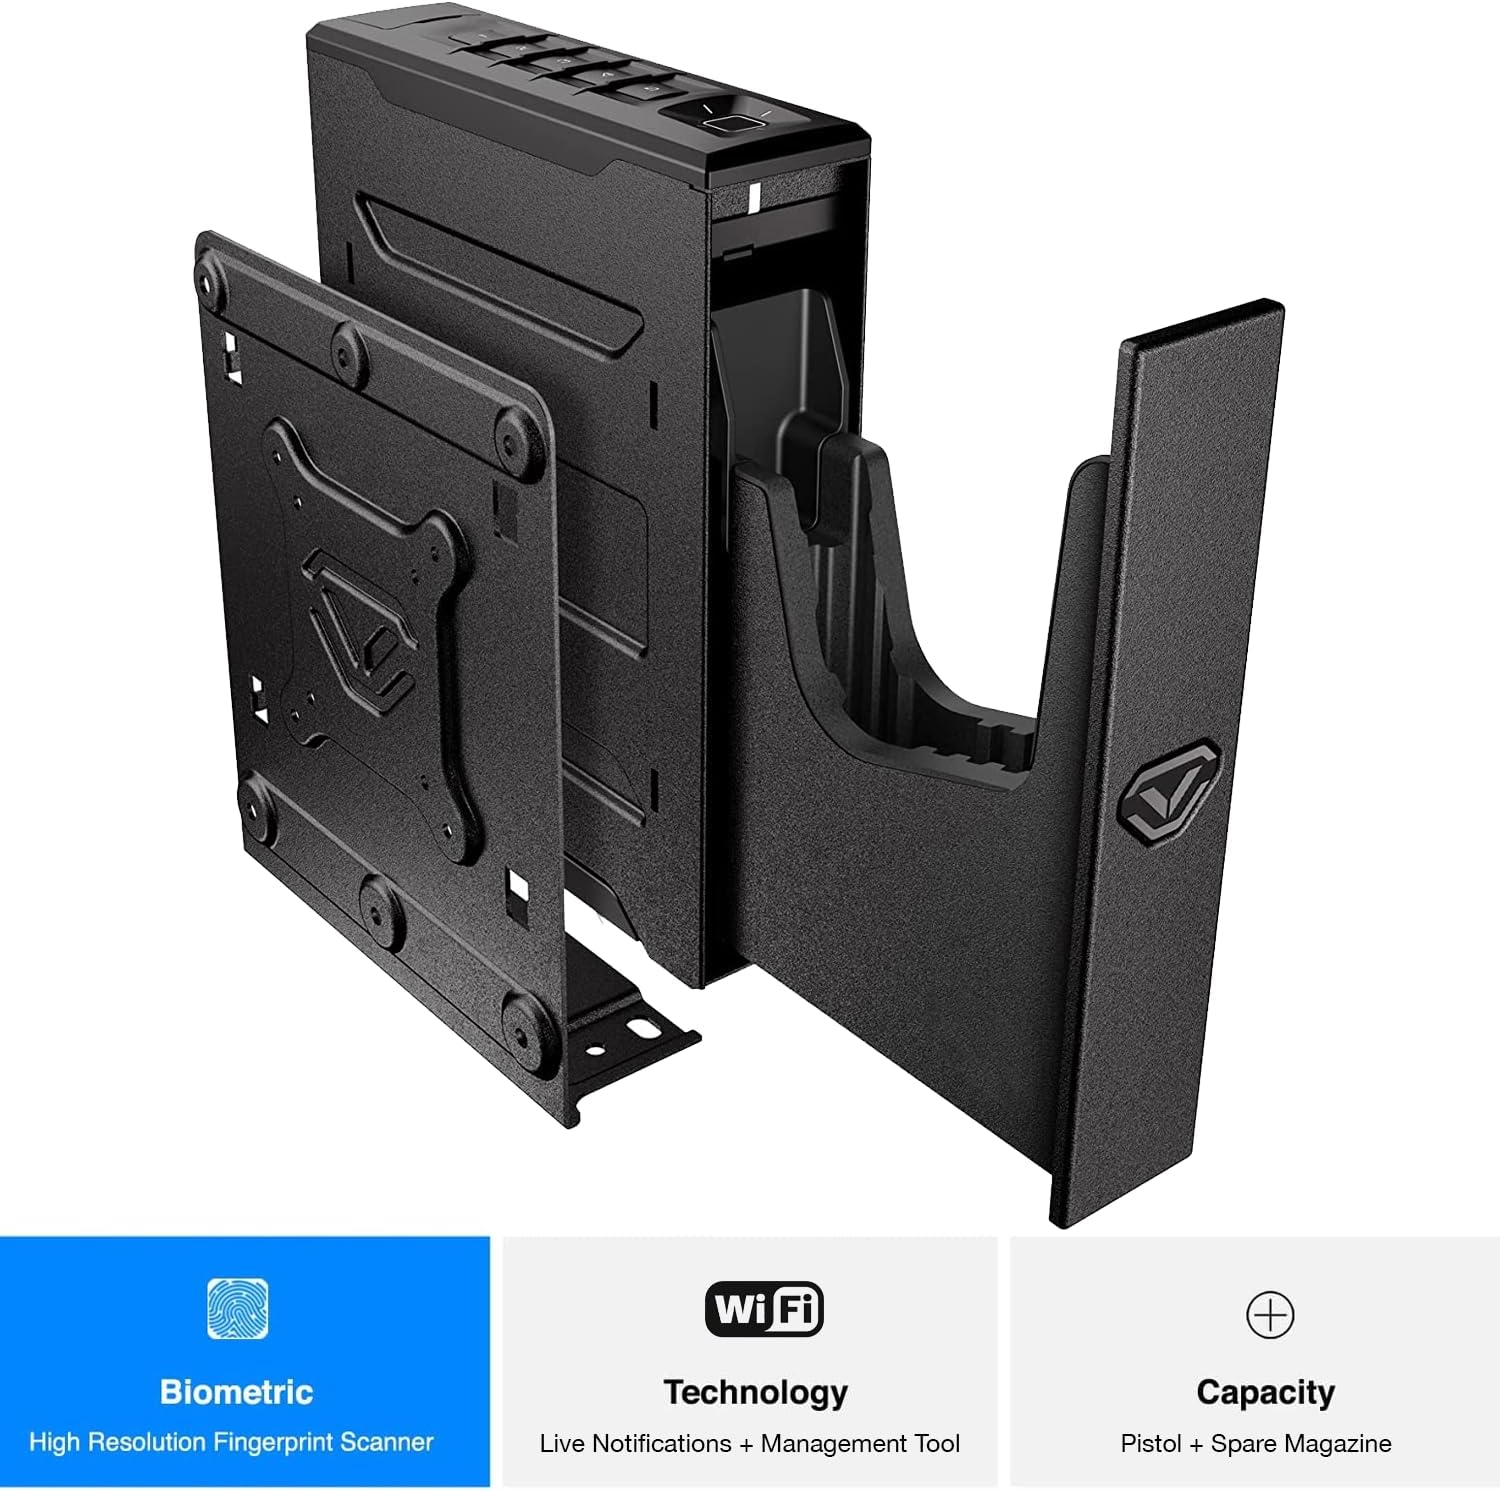
Image 4: VAULTEK Slider Series safe with its mounting plate detached, illustrating how the safe can be mounted to a surface.
2. Operating the Safe
2.1 Quick Access with Code or Fingerprint
To open the safe using your master code, simply enter the code on the backlit numeric keypad. The safe will automatically slide open, presenting your firearm in a ready position. For biometric access, place your enrolled finger on the scanner. The safe will verify your fingerprint and open rapidly.

Image 5: The VAULTEK Slider Series safe in an open position, revealing a handgun and spare magazine inside, demonstrating its quick access feature.
2.2 Manual Key Entry
In case of battery depletion or electronic malfunction, the safe can be opened using the provided manual keys. Insert the key into the keyhole, turn it, and the safe will unlock. This provides a reliable backup access method.
2.3 Closing the Safe
To close the safe, simply push the sliding door back into its closed position until it latches securely. Ensure no obstructions prevent the door from closing completely.
3. Maintenance
3.1 Battery Care
Regularly check the battery level via the mobile app or the safe's indicator lights. Recharge the Li-ion battery as needed using the provided charging kit. Avoid completely draining the battery to prolong its lifespan. If the safe will be stored for an extended period, ensure the battery is charged to approximately 50% and stored in a cool, dry place.
3.2 Cleaning
Clean the exterior of the safe with a soft, damp cloth. Avoid abrasive cleaners or solvents that could damage the finish. For the biometric scanner, use a lint-free cloth to gently wipe away any smudges or debris to ensure optimal performance.
3.3 Internal Mechanism
The precision rail system is designed for smooth operation. Avoid applying excessive force when opening or closing the safe. Periodically inspect the rails for any debris and gently clean if necessary. Do not lubricate the internal mechanisms unless specifically instructed by VAULTEK support.
4. Troubleshooting
4.1 Safe Not Opening Electronically
- Check Battery: Ensure the rechargeable Li-ion battery is charged. If low, charge the battery or use the manual key.
- Incorrect Code/Fingerprint: Verify you are entering the correct master code or using an enrolled fingerprint. Try re-enrolling your fingerprint if issues persist.
- Keypad/Scanner Obstruction: Ensure the keypad and biometric scanner are clean and free from debris.
4.2 App Connectivity Issues
- Bluetooth/WiFi Enabled: Ensure Bluetooth and/or WiFi is enabled on your mobile device and the safe.
- Proximity: Keep your mobile device within range of the safe for stable connection.
- Re-pair Device: If issues persist, try unpairing and re-pairing your safe with the app.
4.3 Sliding Door Obstruction
If the sliding door is not opening or closing smoothly, inspect the internal compartment for any objects that might be blocking the mechanism. Remove any obstructions carefully.
5. Specifications
| Brand | VAULTEK |
| Product Dimensions | 2.6"D x 9"W x 11.25"H |
| Lock Type | Electronic, Key |
| Color | Black |
| Material | Carbon Steel |
| Special Feature | Durable |
| Mounting Type | Wall Mount |
| Included Components | Key |
| Item Weight | 7.5 Pounds |
| Alarm | Anti-theft |
| Water Resistance Level | Not Water Resistant |
| Chamber Height | 11.25 Inches |
| Chamber Width | 9 Inches |
| Chamber Depth | 2.6 Inches |
| Model Number | 85124500783 |
| UPC | 851245007831 |

Image 6: A handgun being inserted into the VAULTEK Slider Series safe, demonstrating its internal capacity and optics-ready design. Max handgun length: 8.875 inches.
6. Warranty & Support
For detailed warranty information and customer support, please refer to the official VAULTEK website or contact their customer service directly. Keep your purchase receipt and product serial number handy for any warranty claims or technical assistance.