
1. Introduction
This manual provides essential information for the safe and efficient operation, setup, maintenance, and troubleshooting of your TOMAHAWK TWG120A Welder Generator. Please read this manual thoroughly before operating the equipment and retain it for future reference.

Figure 1: TOMAHAWK TWG120A Welder Generator
Key Features:
- 120 Amp Stick MMA Welding: Provides smooth and consistent welding performance.
- 2200 Watt Generator Output: Capable of powering electric tools simultaneously with welding operations.
- Inverter Technology: Ensures a stable sine wave for reliable welding and power generation.
- Versatile Welding Capacity: Designed to weld materials of 1/3, 1/4, and 3/8 inch thickness.
- Electronic Amperage Control: Features an electronic reader and knob for precise amperage adjustments.
- Portable Design: Equipped with a rugged frame and wheels for easy transport.
2. Safety Information
WARNING: Read and understand all safety warnings and instructions before operating this equipment. Failure to follow these warnings and instructions may result in electric shock, fire, serious injury, or death.
- Electric Shock Hazard: Improper grounding or contact with live electrical parts can cause severe injury or death. Ensure the generator is properly grounded. Do not operate in wet conditions.
- Carbon Monoxide Hazard: Engine exhaust contains poisonous carbon monoxide. Operate the generator only in well-ventilated areas, away from windows, doors, and vents.
- Fire/Explosion Hazard: Gasoline is highly flammable. Refuel in a well-ventilated area with the engine off and cool. Keep fuel away from sparks, open flames, and heat sources.
- Hot Surfaces: Engine and muffler become hot during operation and can cause burns. Allow the unit to cool before touching or servicing.
- Proposition 65 Warning: This product can expose you to chemicals including carbon monoxide, which is known to the State of California to cause birth defects or other reproductive harm. For more information go to www.P65Warnings.ca.gov.


Figure 2: Safety Icons indicating Electric Shock and Carbon Monoxide Hazards.
3. Setup and Assembly
Before first use, some assembly and preparation are required.
3.1 Unpacking and Inspection
Carefully remove the welder generator from its packaging. Inspect for any damage that may have occurred during shipping. Report any damage to your dealer immediately.
3.2 Components Included
The TOMAHAWK TWG120A Welder Generator typically includes:
- Welder Generator Unit
- Wheel Kit (wheels, axles, hardware)
- Lift Handles
- Ground Clamp (10 ft. long)
- Electrode Holder (10 ft. long)
- Basic Welding Starter Kit

Figure 3: Included Welding Starter Kit components.
3.3 Assembly Steps
- Attach Wheels and Handles: Securely attach the two wheels and lift handles to the generator frame using the provided hardware.
- Add Engine Oil: Before starting, add the appropriate amount of 10W-30 engine oil to the crankcase. Refer to the engine manual for exact capacity and type. Do not overfill.
- Add Fuel: Fill the fuel tank with fresh, unleaded gasoline. Ensure the fuel cap is securely tightened.
- Connect Welding Cables: Connect the ground clamp and electrode holder cables to their respective terminals on the control panel. Ensure connections are tight.

Figure 4: Detail of the 7 HP engine and rugged wheel kit for portability.
4. Operating Instructions
4.1 Starting the Engine
- Ensure the unit is on a level surface.
- Check oil and fuel levels.
- Turn the fuel valve to the "ON" position.
- Move the choke lever to the "CHOKE" position (if engine is cold).
- Turn the engine switch to the "ON" position.
- Pull the recoil starter handle firmly until the engine starts.
- Once the engine starts, gradually move the choke lever to the "RUN" position.
4.2 Welding Operation (Stick MMA)
The TOMAHAWK TWG120A is designed for smooth 120 Amp Stick MMA welding.
- Prepare Workpiece: Clean the material to be welded, removing any rust, paint, or grease.
- Select Electrode: Choose an appropriate electrode for your material and thickness. The unit is capable of welding 1/3, 1/4, and 3/8 inch materials.
- Set Amperage: Use the electronic reader and knob on the control panel to set the desired amperage. The unit offers a range of 40-120 Amps DC output.
- Connect Ground Clamp: Securely attach the ground clamp to the workpiece or a clean, bare metal part of the work table.
- Insert Electrode: Insert the electrode into the electrode holder.
- Begin Welding: Strike an arc and begin welding. Maintain a consistent arc length and travel speed for optimal results.

Figure 5: Control panel with amperage adjustment and power outlets.

Figure 6: Welder Generator in use for outdoor welding tasks.
4.3 Generator Operation
The unit provides 2200 Watts of stable power for running electric tools.
- Ensure the engine is running stably.
- Plug your 120V tools into the available outlets on the control panel.
- Do not exceed the maximum rated wattage of 2200 Watts.
- The inverter technology ensures a stable sine wave, suitable for sensitive electronics, though primarily designed for power tools.
5. Maintenance
Regular maintenance is crucial for the longevity and safe operation of your welder generator.
5.1 Engine Maintenance
- Oil Change: Change engine oil after the first 20 hours of operation, then every 50-100 hours or annually.
- Air Filter: Inspect and clean the air filter regularly. Replace if heavily soiled or damaged.
- Spark Plug: Inspect and clean the spark plug annually or every 100 hours. Replace if worn.
- Fuel System: Use fresh gasoline. If storing for extended periods, drain the fuel tank or use a fuel stabilizer.
5.2 General Maintenance
- Keep the unit clean and free of debris.
- Check all fasteners for tightness periodically.
- Inspect welding cables and connections for wear or damage before each use.

Figure 7: Exploded view for identifying spare parts and accessories.
6. Troubleshooting
This section provides solutions to common issues. For problems not listed here, contact customer support.
| Problem | Possible Cause | Solution |
|---|---|---|
| Engine does not start | No fuel, low oil, choke incorrect, engine switch off, faulty spark plug. | Check fuel level, add oil, adjust choke, turn engine switch ON, inspect/replace spark plug. |
| No welding output | Loose cable connections, incorrect amperage setting, faulty electrode. | Check all cable connections, verify amperage setting, try a new electrode. |
| No power from outlets | Overload, circuit breaker tripped, engine not running correctly. | Reduce load, reset circuit breaker, ensure engine is running smoothly. |
| Engine runs rough | Stale fuel, dirty air filter, fouled spark plug. | Drain and replace with fresh fuel, clean/replace air filter, clean/replace spark plug. |
7. Specifications
| Feature | Detail |
|---|---|
| Model Number | TWG120A |
| Brand | Tomahawk Power |
| Welding Amperage | 120 Amps (Stick MMA) |
| Generator Output | 2200 Watts (2.2 KW) |
| Engine Horsepower | 7 HP |
| Fuel Type | Gasoline |
| Voltage | 120 Volts |
| Product Dimensions (L x W x H) | 28 x 22 x 23 inches |
| Item Weight | 99 Pounds |
| Special Feature | Portable, Inverter Technology |
| Recommended Uses | Commercial, DIY, Field Welding |
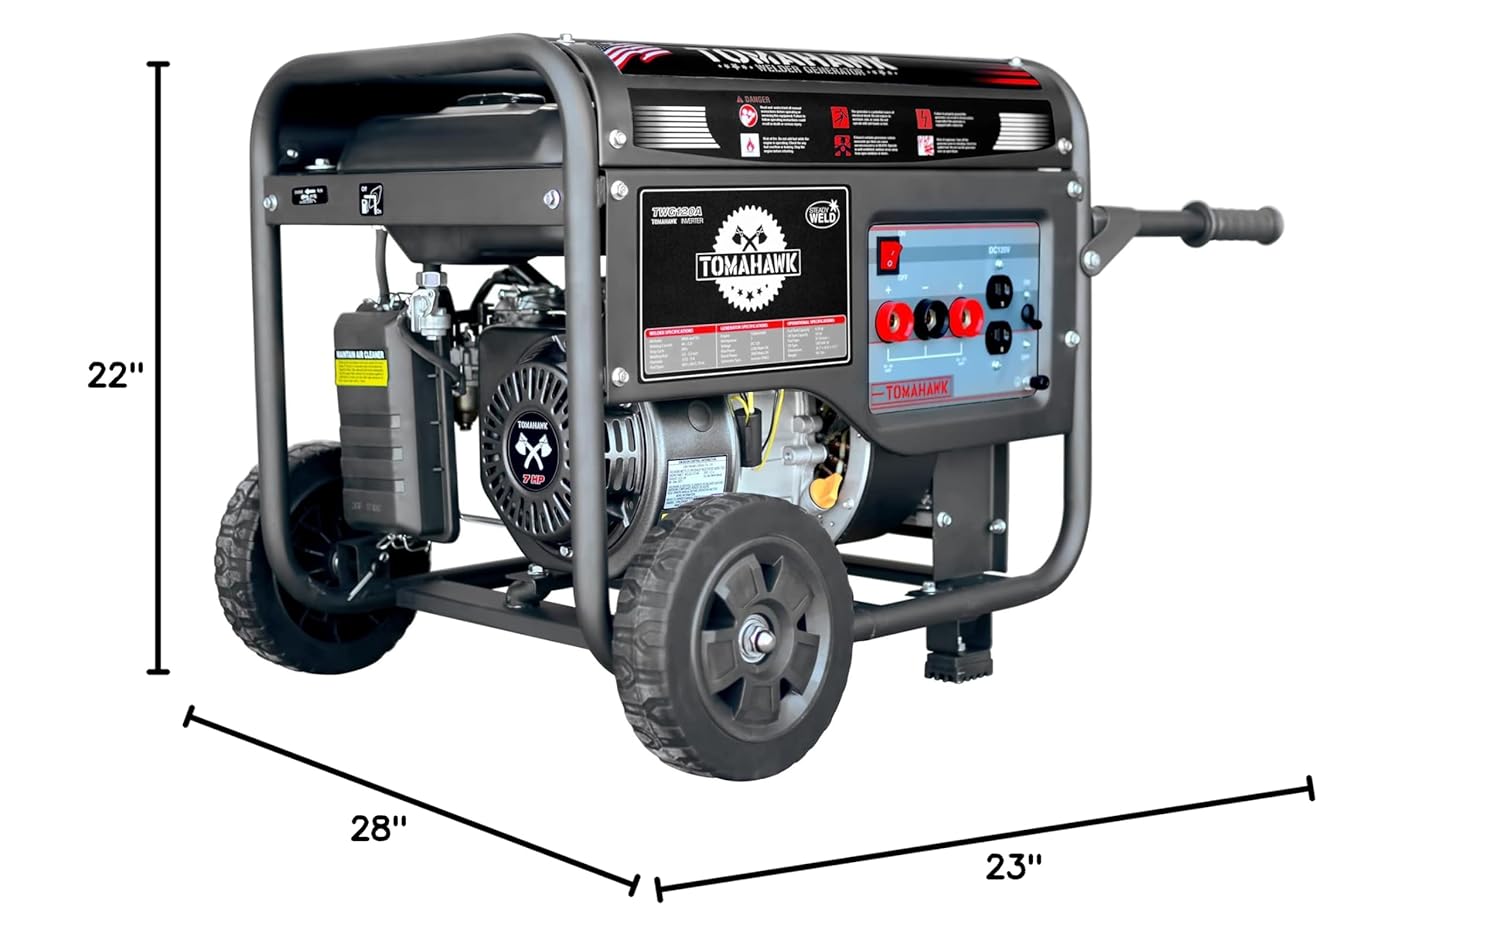
Figure 8: Physical dimensions of the Welder Generator.
8. Warranty and Support
For warranty information, please refer to the documentation included with your purchase or contact Tomahawk Power directly. Keep your proof of purchase for warranty claims.
If you require technical assistance, spare parts, or have questions regarding the operation of your TOMAHAWK TWG120A Welder Generator, please contact Tomahawk Power customer support.
Contact Information:
- Refer to your product packaging or the official Tomahawk Power website for the most current contact details.
- Online resources and FAQs may also be available.


