1. Introduction
The GoWesty Wasser-Stopper Pop-Top Rainfly is designed to provide enhanced weather protection and insulation for your Volkswagen Vanagon's pop-top tent. This accessory acts as an additional barrier against rain and wind, similar to a rainfly on a traditional camping tent. It also offers an extra layer of insulation and creates a convenient vestibule storage area over the pop-top luggage rack.
While this product significantly improves weather protection, it is important to note that it cannot guarantee 100% dryness for the pop-top tent, the interior of your camper, or its contents under all conditions.
2. Safety Information
- Ensure all attachment points are securely fastened before use, especially in windy conditions.
- Do not operate the vehicle with the rainfly installed if it obstructs your view or interferes with vehicle components.
- Periodically inspect the rainfly and its hardware for wear or damage. Replace any damaged components immediately.
- Avoid using the rainfly near open flames or extreme heat sources.
3. Package Contents
Your GoWesty Wasser-Stopper Pop-Top Rainfly package should contain the following items:
- 1 x GoWesty Wasser-Stopper Pop-Top Rainfly
- Installation Hardware (straps, hooks, etc.)
- Step-by-step Installation Instructions (this manual)
4. Setup and Installation
The GoWesty Wasser-Stopper Pop-Top Rainfly is designed for straightforward installation. Follow these steps carefully:
- Prepare Your Vanagon: Ensure your Volkswagen Vanagon's pop-top is fully raised and secured. Clear any debris from the pop-top roof and surrounding areas.
- Position the Rainfly: Carefully drape the rainfly over the raised pop-top tent. The silver reflective side should face outwards. Align the rainfly so it covers the entire pop-top tent and extends over the front and rear of the roof.
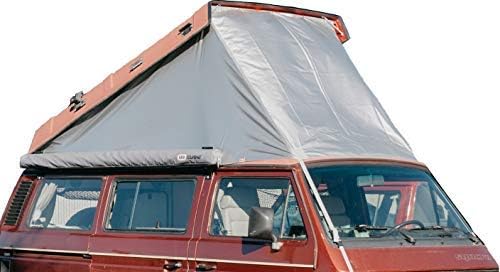
Figure 4.1: The GoWesty Wasser-Stopper Pop-Top Rainfly fully installed on a Volkswagen Vanagon, providing comprehensive coverage.
- Secure Front Straps: Locate the straps at the front of the rainfly. Route these straps down towards the front bumper/grille area of your Vanagon. Use the provided hooks or attachment points to secure the straps firmly. Ensure they are taut but not overly tight, allowing for slight movement without flapping.

Figure 4.2: Detail of the front strap securely attached to the vehicle's front.
- Secure Rear Attachments: Identify the attachment points at the rear of the rainfly. These typically involve securing the rainfly to the rear edge of the pop-top roof or the vehicle's body. Ensure a snug fit to prevent wind from getting underneath.

Figure 4.3: Detail of the rainfly's rear attachment point, ensuring a secure fit.
- Side Attachments (if applicable): Some models may have side attachment points or elastic loops. Secure these to the vehicle's rain gutters or other suitable points to keep the rainfly taut along the sides.
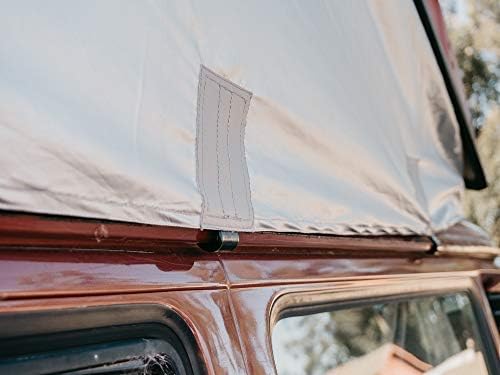
Figure 4.4: Example of a side attachment point for added stability.
- Check for Security: Once all straps and attachments are in place, gently tug on various parts of the rainfly to ensure it is securely fastened and will not shift in the wind.
5. Operating Instructions
Once installed, the GoWesty Wasser-Stopper Pop-Top Rainfly operates passively to provide its benefits:
- Rain Protection: The urethane-coated polyester material repels water, preventing direct rain contact with your pop-top tent.
- Insulation: The rainfly acts as an additional layer, helping to insulate the pop-top tent against temperature fluctuations, keeping it warmer in cold conditions and potentially cooler in direct sunlight.
- Vestibule Storage: The design creates a covered area over the pop-top luggage rack. To utilize this, simply zip down the front screen of your pop-top tent and place bulky gear or items you wish to keep dry but outside the main living area into this space.
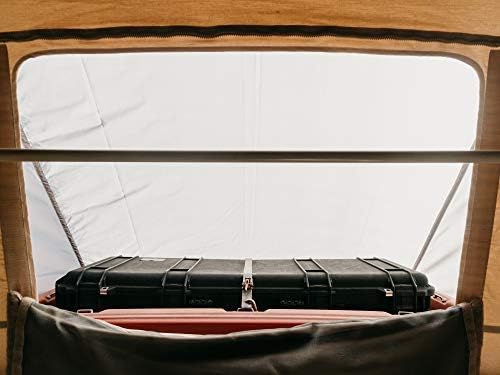
Figure 5.1: Utilizing the vestibule storage area under the rainfly.
6. Maintenance and Care
Proper care will extend the life of your GoWesty Wasser-Stopper Pop-Top Rainfly:
- Cleaning: Hand wash the rainfly with mild soap and cool water. Do not use harsh detergents, bleach, or abrasive cleaners.
- Drying: Air dry completely before folding and storing. Do not machine dry.
- Storage: Store in a cool, dry place away from direct sunlight when not in use. Ensure it is free of dirt and moisture to prevent mildew.
- Inspection: Regularly inspect the fabric for tears, punctures, or signs of wear. Check all straps and hardware for integrity. Repair minor damage promptly to prevent it from worsening.
7. Troubleshooting
- Rainfly not fully shedding water: Ensure the rainfly is taut and properly angled to allow water runoff. Check for any tears or damage to the urethane coating.
- Excessive flapping in wind: Re-check all attachment points and straps to ensure they are securely fastened and tightened appropriately. Adjust tension as needed.
- Difficulty installing: Refer to the "Setup and Installation" section and ensure the pop-top is fully raised. If issues persist, double-check that you have the correct rainfly model for your Vanagon.
8. Specifications
| Attribute | Detail |
|---|---|
| Brand | GoWesty |
| Model Number | GVW-RAINFLY-GY |
| Material | Urethane Coated Polyester |
| Item Weight | 5 Pounds |
| Recommended Uses | Camping & Hiking |
| Water Resistance | Waterproof |
| Care Instructions | Hand Wash |
| Assembly Required | Yes |
9. Warranty and Support
For information regarding warranty coverage or to obtain support for your GoWesty Wasser-Stopper Pop-Top Rainfly, please contact GoWesty directly through their official website or the retailer from whom you purchased the product. Keep your proof of purchase for any warranty claims.
GoWesty contact information can typically be found on their official website: www.gowesty.com


