1. Product Overview
The Progress Lighting Gulliver Collection P350117-141 is a four-light semi-flush convertible fixture. This fixture features an airy design with arching details and a dual-toned frame in a Galvanized finish with antique white accents. Its design complements various interior styles including Rustic, Modern Farmhouse, Urban Industrial, and Coastal settings. This fixture can be installed as a semi-flush mount or converted to a hanging fixture.
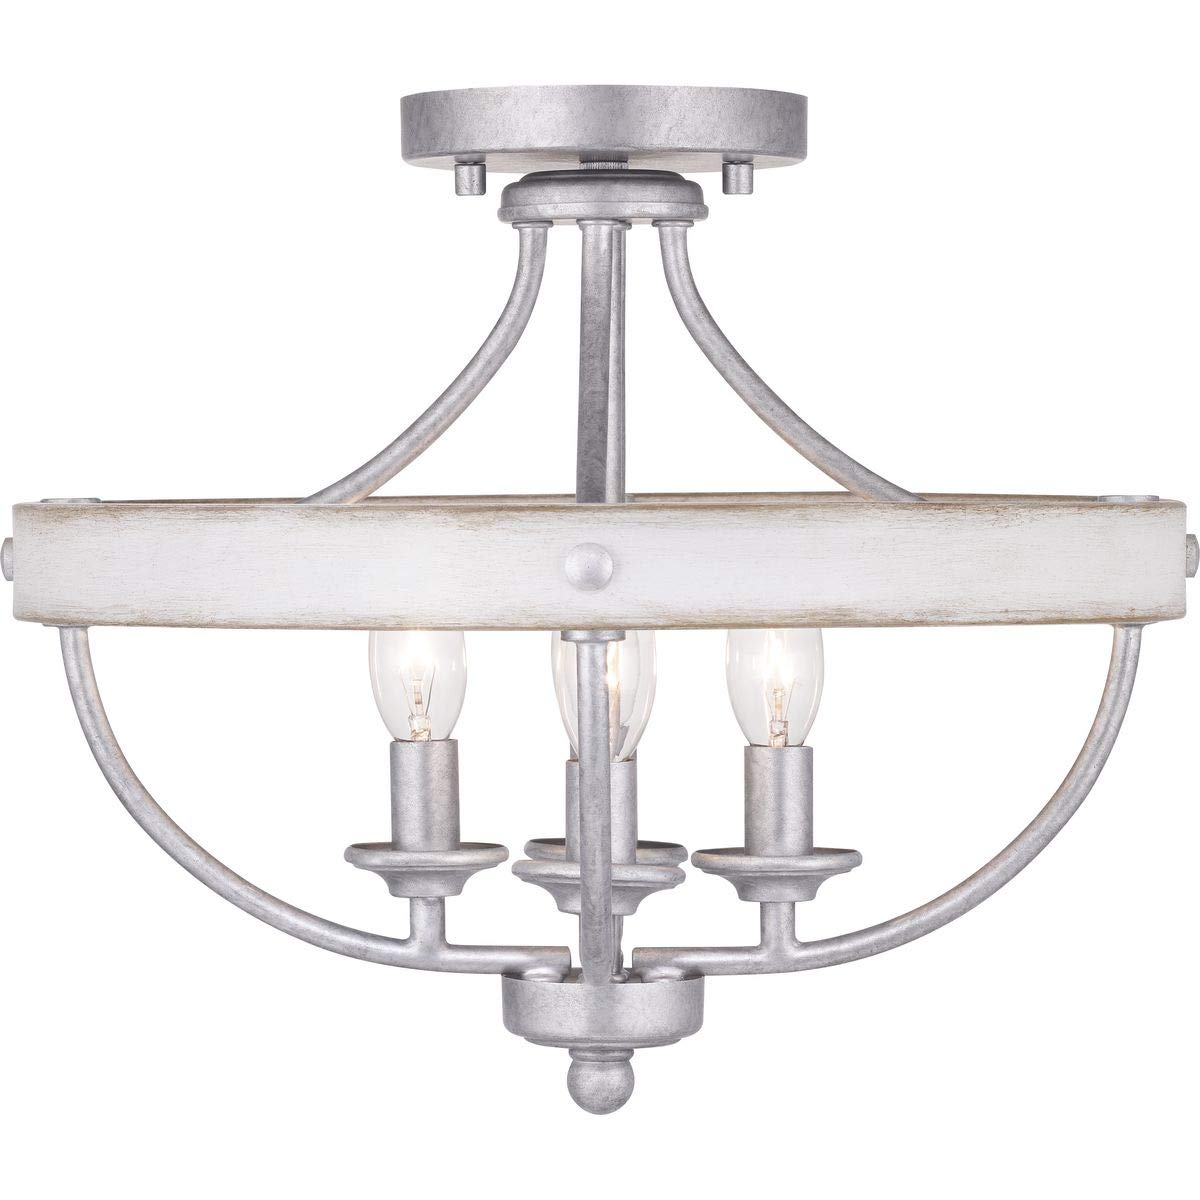
Figure 1: Progress Lighting Gulliver Collection Four-Light Semi-Flush Convertible Fixture.
Understanding Fixture Types
This video provides an overview of close-to-ceiling lighting trends, including flush mount and semi-flush mount fixtures, which can help in understanding the application of your Gulliver fixture.
Video 1: Close to Ceiling Lighting Trends by Progress Lighting. This video explains the differences and applications of flush mount and semi-flush mount ceiling light fixtures, providing context for the Gulliver Collection's design.
2. Safety Information
Before beginning installation, carefully read and understand these instructions. Failure to do so may result in electric shock, fire, or other injuries that could be fatal or cause property damage. All wiring must be performed by a qualified electrician in accordance with national and local electrical codes.
- WARNING: Disconnect power at the main circuit breaker or fuse box before installation or servicing.
- CAUTION: Risk of electric shock. Ensure the electrical supply is turned off before handling the fixture.
- Do not exceed the recommended wattage for bulbs.
- Handle glass components with care to prevent breakage.
3. Package Contents
Verify that all components are present before proceeding with installation. If any parts are missing or damaged, contact customer service.
- Light Fixture Assembly
- Mounting Hardware Kit (mounting strap, outlet box screws, mounting screws, wire connectors)
- Canopy/Cover Plate
- Instruction Sheet
4. Installation
Tools Required (Not Included)
- Phillips Head Screwdriver
- Flathead Screwdriver
- Wire Strippers
- Pliers
- Electrical Tape
- Safety Glasses
Installation Steps
- Turn Off Power: Locate the circuit breaker or fuse box that supplies power to the fixture location. Turn off the power completely.
- Prepare Mounting: Attach the mounting strap to the outlet box using the provided outlet box screws. Ensure the mounting strap is securely fastened.
- Wiring: Connect the fixture's electrical wires to the corresponding household wires using the wire connectors. Connect the black wire (live) to the black wire, the white wire (neutral) to the white wire, and the bare copper or green wire (ground) to the household ground wire. Secure all connections with electrical tape.
- Mount Fixture: Carefully lift the fixture and align it with the mounting strap. Secure the fixture to the mounting strap using the mounting screws.
- Install Bulbs: Insert four E12 Candelabra base bulbs (not included) into the sockets. Do not exceed 60 watts per bulb.
- Restore Power: Once installation is complete and all connections are secure, restore power at the main circuit breaker or fuse box.
Converting to a Hanging Fixture
This fixture is designed to be convertible. If you wish to install it as a hanging fixture, refer to the detailed instructions provided in the package for chain length adjustment and secure hanging methods. This typically involves attaching a chain to the fixture and canopy, and adjusting the length to achieve the desired hanging height.

Figure 2: Dimensional drawing of the Gulliver Collection fixture.
5. Operation
Once installed and powered, the fixture operates like any standard ceiling light. Use your wall switch or dimmer (if installed) to turn the light on and off. Ensure compatible E12 Candelabra base bulbs are used for optimal performance.

Figure 3: Close-up of bulb sockets.
6. Maintenance
Cleaning
To clean the fixture, ensure the power is turned off. Use a soft, dry cloth to wipe down the metal and glass surfaces. Avoid abrasive cleaners or solvents, as these can damage the finish.
Bulb Replacement
Always turn off the power before replacing bulbs. Allow bulbs to cool before touching them. This fixture requires four E12 Candelabra base bulbs, with a maximum wattage of 60 watts per bulb. Using bulbs with higher wattage can cause overheating and damage to the fixture or create a fire hazard.
7. Troubleshooting
| Problem | Possible Cause | Solution |
|---|---|---|
| Light does not turn on | No power to the fixture Loose wiring connection Faulty bulb | Check circuit breaker/fuse Verify all wire connections are secure (power off) Replace bulb(s) |
| Light flickers | Loose bulb Incorrect bulb type Loose wiring connection Incompatible dimmer switch | Tighten bulb Ensure E12 Candelabra base, 60W max bulbs are used Check wiring connections (power off) Consult an electrician to check dimmer compatibility |
8. Specifications
| Feature | Detail |
|---|---|
| Brand | Progress Lighting |
| Model Number | P350117-141 |
| Fixture Type | Semi-Flush Convertible |
| Color | Gray (with antique white accents) |
| Material | Alloy Steel, Glass |
| Product Dimensions | 15.25"L x 15.25"W x 12.63"H |
| Number of Light Sources | 4 |
| Bulb Base | E12 Candelabra |
| Max Wattage per Bulb | 60 watts |
| Voltage | 120 Volts |
| Finish Type | Galvanized |
| Indoor/Outdoor Usage | Indoor |
| Assembly Required | Yes |
| Item Weight | 6.28 Pounds |
9. Warranty and Support
This Progress Lighting fixture is covered by a 1-year Limited Warranty. This warranty guarantees your satisfaction with your purchase and includes professional after-sales customer service support. For warranty claims or technical assistance, please contact Progress Lighting customer service.
Please retain your proof of purchase for warranty validation.


