
Pro Breeze PB-AC01
Pro Breeze 9000 BTU Portable Air Conditioner
Model: PB-AC01 - User Manual
1. Introduction
Thank you for choosing the Pro Breeze 9000 BTU Portable Air Conditioner. This versatile 4-in-1 unit provides powerful cooling, efficient dehumidification, fan-only operation, and a quiet sleep mode, designed for medium to large rooms up to 22m². This manual provides essential information for safe operation, installation, maintenance, and troubleshooting to ensure optimal performance and longevity of your appliance.
2. Important Safety Instructions
Please read these instructions carefully before operating the appliance and retain them for future reference. Failure to follow these instructions may result in electric shock, fire, or serious injury.
- Always ensure the appliance is placed on a flat, stable surface.
- Do not operate the unit with a damaged cord or plug.
- Keep the air inlet and outlet grilles clear of obstructions.
- Do not insert objects into the air outlet.
- Unplug the unit from the power outlet before cleaning or maintenance.
- This appliance is for indoor use only.
- The refrigerant R290 used in this unit is highly flammable. Handle with care and ensure proper ventilation.
3. Package Contents
Carefully unpack your Pro Breeze Portable Air Conditioner and check that all items are present and in good condition:
- Pro Breeze Portable Air Conditioner Unit
- Remote Control (requires 2 AAA batteries, included)
- Exhaust Hose
- Hose Connector (short)
- Window Sealing Plate Kit (for sliding windows)
- Circular Connector
- Water Drain Pipe
- Window Sealing Cloth (for hinged windows)

Figure 3.1: The Pro Breeze Portable Air Conditioner unit shown with its included remote control and various window installation accessories.
4. Product Overview and Components
Familiarize yourself with the main parts of your air conditioner:
- Control Panel: Located on the top of the unit for manual operation.
- Air Outlet: Front grille where cooled air is expelled. Features adjustable louvers for directing airflow.
- Air Inlet: Rear grilles for drawing in air.
- Exhaust Air Outlet: Connection point for the exhaust hose.
- Drainage Port: For continuous drainage during dehumidification.
- Casters: Wheels at the base for easy mobility.

Figure 4.1: Detailed view of the unit's control panel and the included remote control, highlighting various functions and display elements.
5. Setup and Installation
Proper installation is crucial for the efficient operation of your portable air conditioner.
5.1 Unit Placement
Place the unit on a flat, stable surface, ensuring at least 30cm (12 inches) of clearance from walls or other objects to allow for proper airflow.
5.2 Exhaust Hose Installation
- Screw the hose connector onto one end of the exhaust hose.
- Attach the circular connector to the other end of the exhaust hose.
- Insert the hose connector into the exhaust air outlet on the back of the air conditioner.
- Extend the exhaust hose to the nearest window.
5.3 Window Kit Installation
The unit comes with two options for window installation:
- For Sliding Windows: Use the adjustable window sealing plate kit. Insert the circular connector of the exhaust hose into the opening of the sealing plate.
- For Hinged Windows: Use the provided window sealing cloth. Secure the cloth around the window opening and pass the exhaust hose through the designated opening in the cloth.

Figure 5.1: Visual guide demonstrating the installation of the window kit for both hinged and sliding window types, ensuring efficient hot air exhaust.
Ensure the exhaust hose is as short and straight as possible to maximize cooling efficiency. Avoid kinks or sharp bends in the hose.
6. Operating Instructions
6.1 Control Panel and Remote Control
The unit can be operated using the digital control panel on top of the unit or the included remote control. The remote control has a strong range of up to 5 meters.
- POWER Button: Turns the unit ON or OFF.
- MODE Button: Cycles through Cooling, Dehumidifier, Fan, and Sleep modes.
- UP/DOWN Arrows: Adjust temperature settings or timer duration.
- SPEED Button: Selects fan speed (High/Low).
- TIMER Button: Sets the auto-on or auto-off timer.
6.2 Operating Modes

Figure 6.1: Overview of the four versatile operating modes and two fan speeds available on the air conditioner.
- Cooling Mode: Provides powerful air conditioning. Set your desired temperature using the UP/DOWN arrows.
- Dehumidifier Mode: Removes excess moisture from the air. Connect the water drain pipe for continuous drainage. The unit has a dehumidification capacity of 0.9L/h and a 1.8L water tank.
- Fan Mode: Circulates air without cooling. Choose between high or low fan speed.
- Sleep Mode: Operates quietly for undisturbed rest, gradually adjusting temperature for comfort.

Figure 6.2: The Pro Breeze air conditioner offers three primary functions: air cooling, fan operation, and dehumidification, making it a versatile climate control solution.
6.3 Smart Features (WiFi & App Control)
This air conditioner is WiFi-enabled, allowing you to control it remotely via a smartphone application. It is compatible with Amazon Alexa and Google Home for voice control.
- Download the Pro Breeze app (or compatible smart home app like Tuya) from your app store.
- Follow the in-app instructions to connect your air conditioner to your home WiFi network.
- Once connected, you can control modes, temperature, fan speed, and set schedules from your smartphone.

Figure 6.3: The mobile application interface allows for convenient remote control of the air conditioner's functions, including mode selection and fan speed adjustment.

Figure 6.4: The air conditioner supports voice control via smart home assistants like Amazon Alexa and Google Home, offering hands-free operation.
6.4 Smart Scheduling
Utilize the app's scheduling feature to program the unit to turn on or off at specific times, optimizing energy usage and comfort.

Figure 6.5: The smart scheduling feature allows users to set precise timers for automatic operation, enhancing convenience and energy efficiency.
6.5 Airflow Direction (Oscillation)
The unit features adjustable horizontal louvers that allow you to precisely direct the airflow where needed, covering a wide area with 115° oscillation.

Figure 6.6: The adjustable louvers provide a wide 115° oscillation, allowing for broad and effective air distribution throughout the room.
7. Maintenance
Regular maintenance ensures the efficiency and longevity of your air conditioner.
7.1 Cleaning the Air Filter
The air filter should be cleaned every two weeks or more frequently depending on usage and air quality. A dirty filter can reduce efficiency and airflow.
- Unplug the unit from the power outlet.
- Remove the filter from the back of the unit.
- Wash the filter with warm, soapy water. Rinse thoroughly.
- Allow the filter to air dry completely before reinserting it.
7.2 Draining Water
During dehumidification or prolonged cooling, water will accumulate in the internal tank. The unit will stop operating when the tank is full. Drain the water as follows:
- Place a shallow pan or container under the drainage port at the back of the unit.
- Remove the drain plug.
- Allow all water to drain out.
- Replace the drain plug securely.
7.3 Storage
If storing the unit for an extended period, ensure it is completely drained and the filter is clean and dry. Store in a cool, dry place, covered to protect from dust.
8. Troubleshooting
Before contacting customer support, please refer to the following common issues and solutions:
| Problem | Possible Cause | Solution |
|---|---|---|
| Unit does not turn on. | No power; power cord unplugged; circuit breaker tripped. | Check power connection; reset circuit breaker. |
| Unit does not cool effectively. | Window/door open; exhaust hose not properly installed; air filter dirty; room too large. | Close windows/doors; ensure hose is sealed; clean filter; verify room size is within specifications. |
| Unit is noisy. | Unit not on a flat surface; fan speed too high. | Place on a flat surface; reduce fan speed. |
| Water leakage. | Drain plug loose; unit tilted. | Ensure drain plug is secure; place unit on a level surface. |
| Remote control not working. | Batteries dead or incorrectly inserted; remote too far from unit. | Replace batteries; ensure correct polarity; operate within 5m range. |
9. Specifications
| Feature | Detail |
|---|---|
| Brand | Pro Breeze |
| Model Number | PB-AC01 |
| Cooling Capacity | 9000 BTU |
| Dimensions (L x W x H) | 29.5 x 32.5 x 70.2 cm |
| Weight | 29.9 kg |
| Energy Efficiency Class | A |
| Voltage | 220 Volts |
| Power | 750 Watts |
| Refrigerant | R-290 |
| Dehumidification Capacity | 0.9 L/h |
| Water Tank Capacity | 1.8 L |
| Controller Type | Remote Control, Digital Display, App Control |
| Connectivity | WiFi (Amazon Alexa, Google Home compatible) |
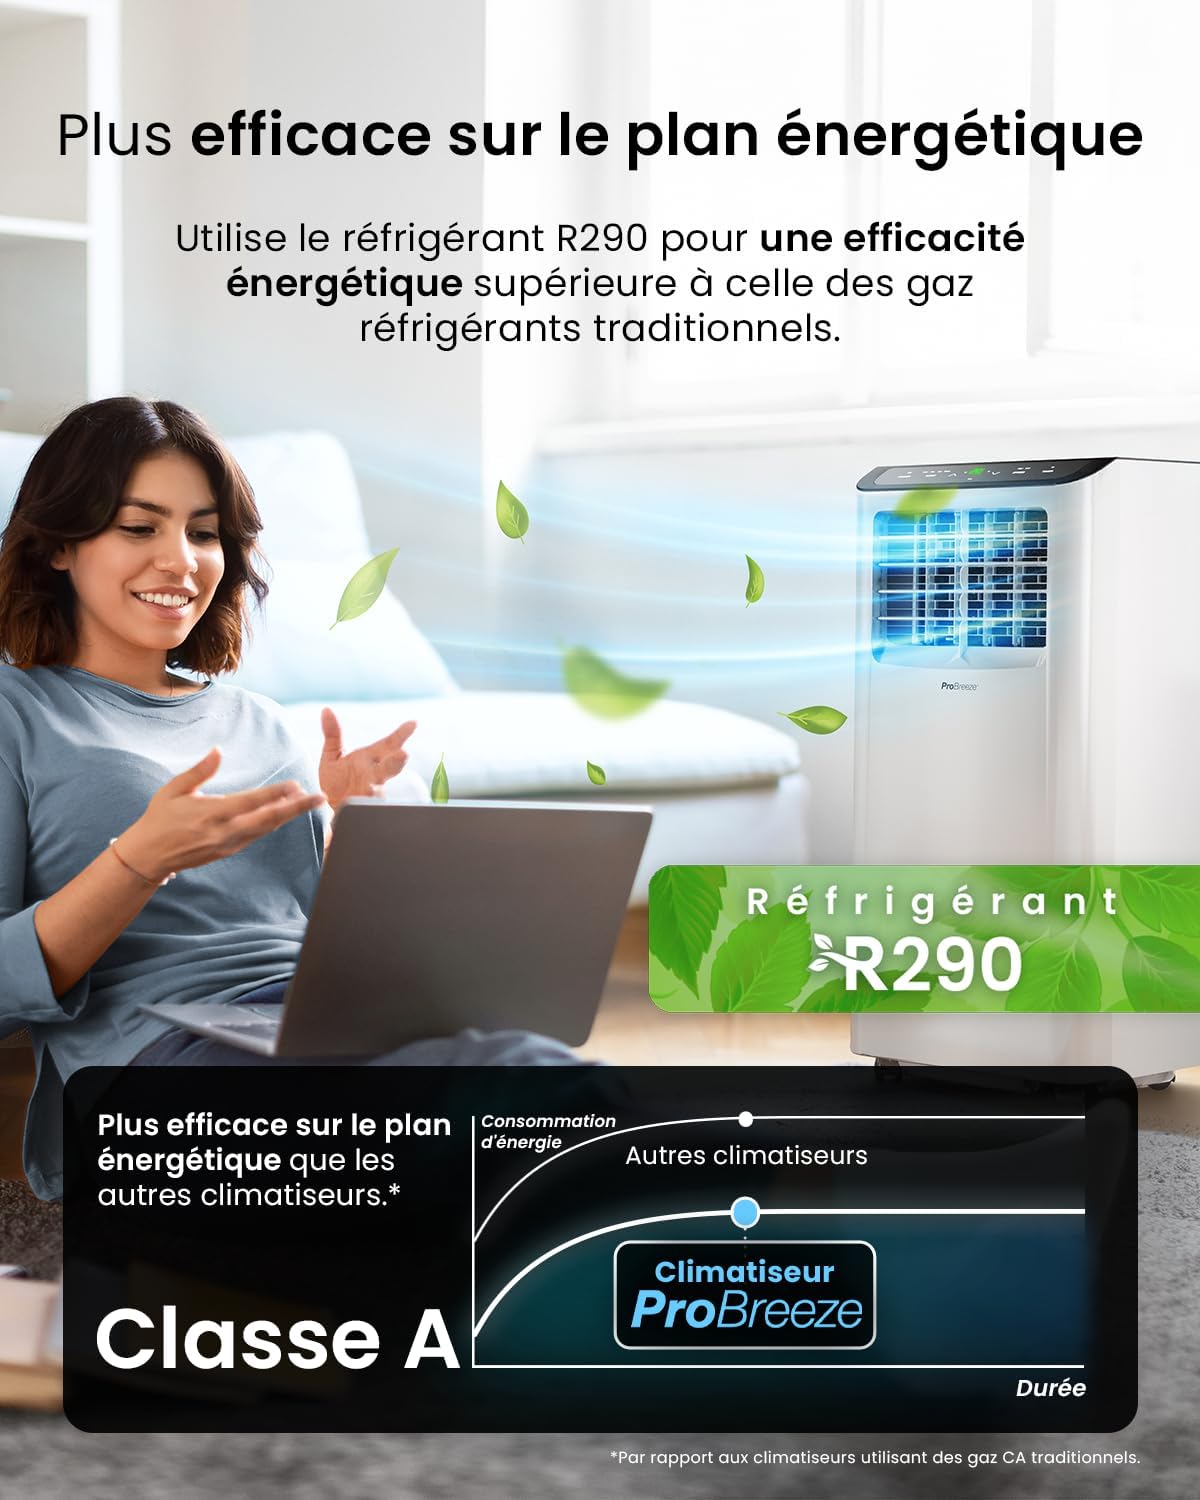
Figure 9.1: The Pro Breeze air conditioner utilizes R290 refrigerant for superior energy efficiency, achieving a Class A energy rating.
10. Warranty and Support
Pro Breeze products are manufactured to the highest quality standards. For warranty information or technical support, please refer to the warranty card included with your purchase or visit the official Pro Breeze website. You can also contact our customer service team for assistance.
For further assistance, please visit: www.probreeze.com/support
Related documentsPB-AC01


Ask a question about this manual
Ask about setup, troubleshooting, compatibility, parts, safety, or missing instructions. Manuals+ will review the question and use this page’s manual context to help answer it.