
1. Introduction
This manual provides essential information for the safe operation, assembly, maintenance, and troubleshooting of your WEN 6515T Benchtop Belt and Disc Sander. Please read and understand all instructions before using the tool to ensure proper function and personal safety.
The WEN 6515T is a versatile two-in-one sanding machine designed for various woodworking tasks, including sanding, smoothing, and deburring. It features both a 1-inch by 30-inch belt sander and a 5-inch sanding disc, powered by a 2.3-amp motor.
Key Features:
- Two-in-one sanding machine with a 1-inch by 30-inch belt and a 5-inch disc.
- 2.3A motor provides up to 3160 FPM for the belt and 3450 RPM for the disc.
- Sturdy heavy-duty base prevents walking and wobbling during operation.
- Features two separate dust ports for maximum vacuuming efficiency.
- Includes a miter gauge, an 80-grit sanding disc, and a 100-grit sanding belt.
2. Safety Information
Always follow basic safety precautions when using power tools to reduce the risk of fire, electric shock, and serious personal injury. Keep your work area clean and well-lit. Do not operate power tools in explosive atmospheres, such as in the presence of flammable liquids, gases, or dust. Keep children and bystanders away while operating a power tool.
Personal Safety: Always wear eye protection, such as safety goggles, and hearing protection. Use a dust mask when sanding to avoid inhaling fine particles. Do not overreach; maintain proper footing and balance at all times. Dress properly; avoid loose clothing, jewelry, or long hair that can get caught in moving parts.
Electrical Safety: Ensure the power tool plug matches the outlet. Never modify the plug. Do not abuse the cord; never use it for carrying, pulling, or unplugging the power tool. Keep the cord away from heat, oil, sharp edges, or moving parts.
Proposition 65 Warning: This product may contain chemicals known to the State of California to cause cancer and birth defects or other reproductive harm. Always consult the full safety manual for detailed warnings.
3. Components Overview
Familiarize yourself with the main components of your WEN 6515T sander before operation.

Figure 1: Front view of the WEN 6515T Benchtop Belt and Disc Sander, showing the belt and disc sanding areas.
- Belt Sanding Area: Includes the 1x30 inch sanding belt and its adjustable work table.
- Disc Sanding Area: Features the 5-inch sanding disc with its own adjustable work table and miter gauge slot.
- Motor Housing: Contains the 2.3A motor that drives both sanding functions.
- Power Switch: Located on the front of the motor housing for easy access.
- Dust Ports: Two separate ports for connecting a vacuum system to manage dust.
- Adjustable Work Tables: Provide support for workpieces and can be angled for bevel sanding.
4. Setup and Assembly
Your WEN 6515T sander requires minimal assembly. Ensure the unit is unplugged before beginning any assembly or adjustment.
4.1 Attaching Dust Ports
Locate the two dust ports. Attach them securely to their respective openings on the sander. These ports are designed to connect to a shop vacuum or dust collection system for efficient dust removal during operation.

Figure 2: Side view showing the dust port connection point for the belt sander.
4.2 Adjusting Work Tables
Both the belt and disc sander feature adjustable work tables. To adjust the angle, loosen the locking knob beneath the table, set the desired angle using the angle guide, and then tighten the knob securely. Ensure the table is stable before operation.

Figure 3: Close-up of the disc sander work table with miter gauge for angled work.
4.3 Belt Tracking Adjustment
The sanding belt must track correctly to prevent damage to the belt and the machine. If the belt drifts to one side, use the belt tracking adjustment knob (typically located near the upper roller) to center the belt. Turn the knob slightly while the sander is running (briefly, with caution) until the belt runs true.
5. Operating Instructions
Always ensure the workpiece is securely held and that you maintain a firm grip. Never apply excessive pressure, as this can slow the motor and reduce sanding efficiency.
5.1 Belt Sander Operation
- Ensure the 1x30 inch sanding belt is properly installed and tracking correctly.
- Adjust the belt work table to the desired angle.
- Turn on the sander using the power switch.
- Gently bring the workpiece into contact with the moving belt. Sand with the grain of the wood for best results.
- Move the workpiece evenly across the belt to prevent uneven wear and gouging.

Figure 4: Detailed view of the belt sander in operation.
5.2 Disc Sander Operation
- Verify the 5-inch sanding disc is securely attached.
- Adjust the disc work table to the desired angle. The included miter gauge can be used for precise angle sanding.
- Turn on the sander.
- Present the workpiece to the disc, always using the downward-rotating side of the disc (left side when facing the disc) to prevent the workpiece from being thrown.
- Move the workpiece slowly and evenly across the disc surface.
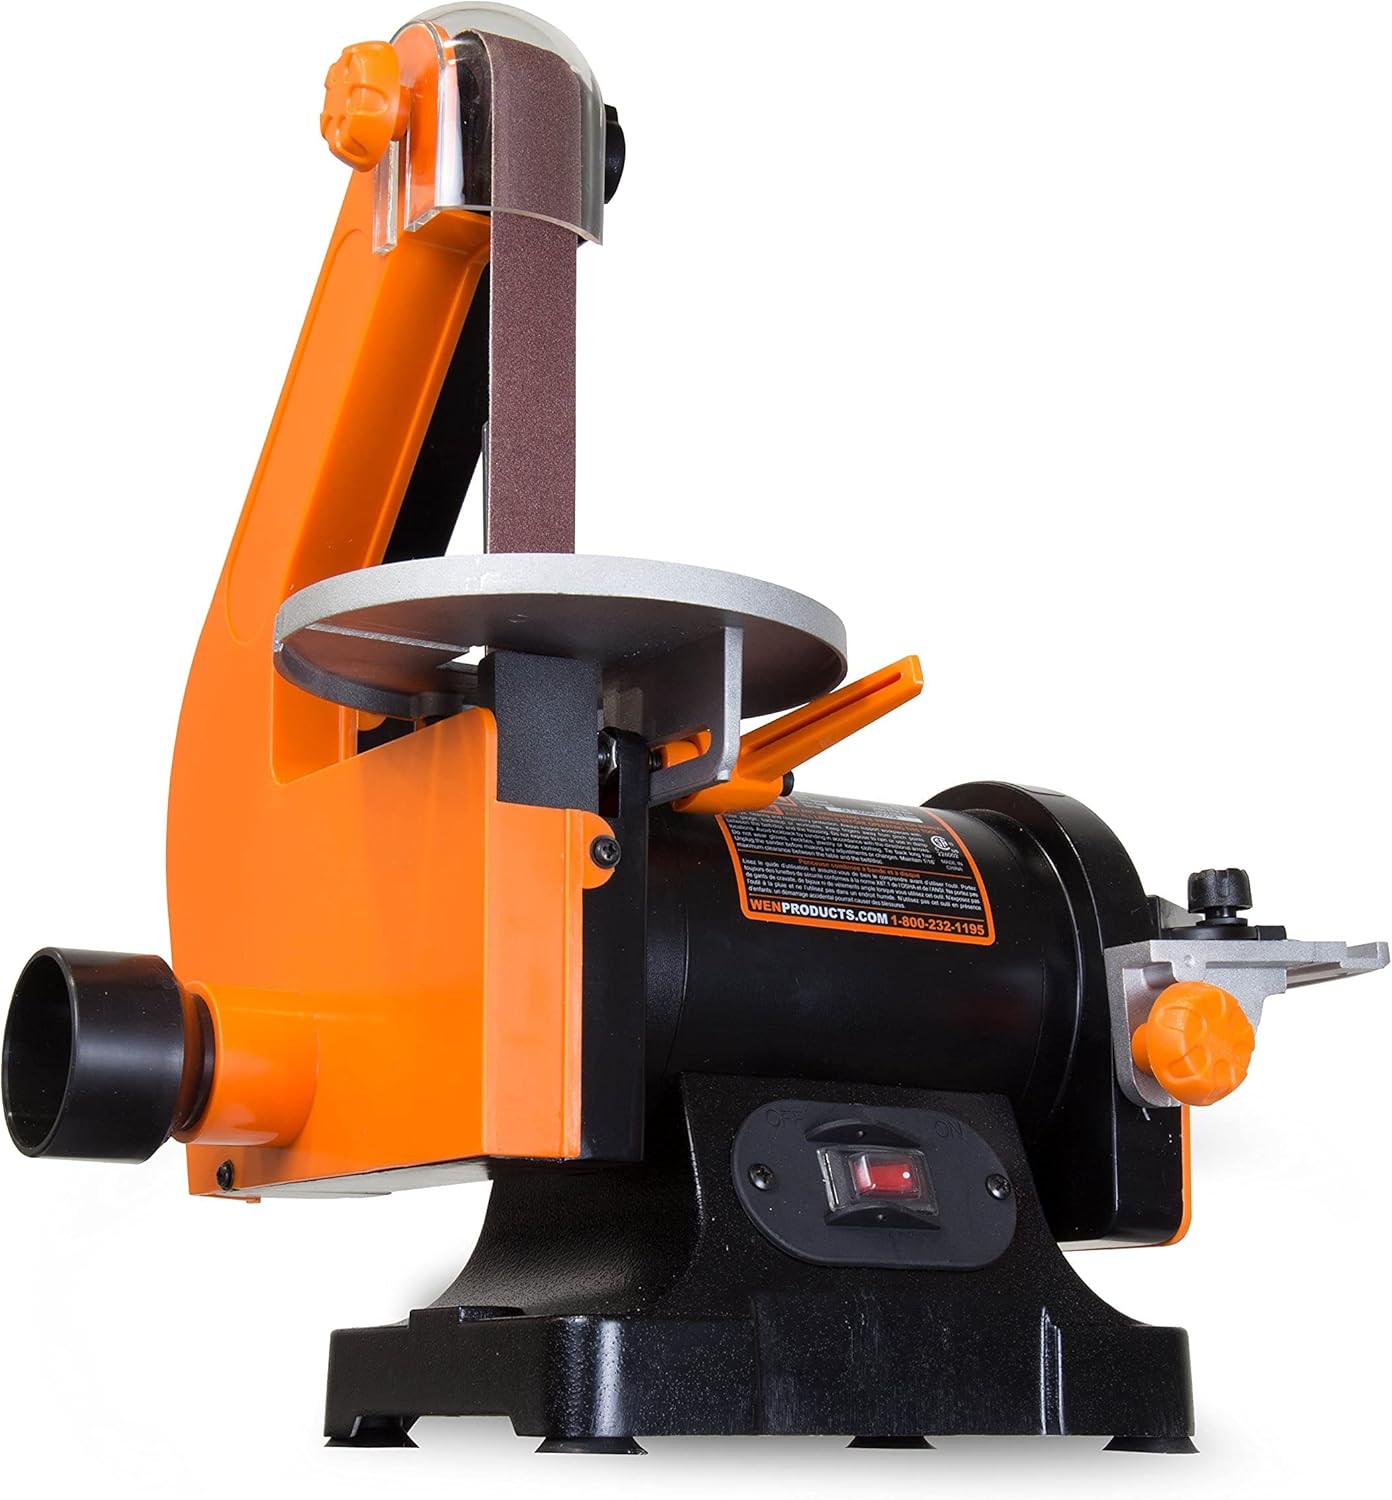
Figure 5: Angled view of the sander, illustrating both belt and disc sanding areas.
6. Maintenance
Regular maintenance ensures the longevity and optimal performance of your sander. Always unplug the tool before performing any maintenance.
6.1 Belt and Disc Replacement
Belt Replacement: To replace the 1x30 inch sanding belt, release the belt tension lever (usually located on the side of the belt assembly). Slide the old belt off and slide the new belt on, ensuring the directional arrow on the belt matches the rotation direction of the sander. Re-engage the tension lever and adjust tracking if necessary.
Disc Replacement: The 5-inch sanding disc typically uses an adhesive backing. To replace, carefully peel off the old disc. Clean the disc plate thoroughly to remove any adhesive residue. Align the new adhesive-backed disc with the disc plate and press firmly to secure it.
6.2 Dust Collection
Connect a shop vacuum or dust collector to the dust ports during operation to minimize airborne dust and keep the work area clean. Regularly empty your dust collection system.
6.3 General Cleaning
After each use, clean the sander with a dry cloth to remove dust and debris. Do not use solvents or harsh chemicals, as they may damage plastic parts. Periodically inspect the power cord for any damage.
7. Troubleshooting
If you encounter issues with your WEN 6515T sander, refer to the following common troubleshooting tips:
- Sander does not start: Check if the power cord is securely plugged into a working outlet. Ensure the power switch is in the "ON" position. Verify that the circuit breaker has not tripped.
- Belt tracking issues: Adjust the belt tracking knob as described in Section 4.3. Ensure the belt tension is correctly applied.
- Excessive vibration or noise: Check for loose components or fasteners. Ensure the sanding belt and disc are properly installed and not damaged.
- Poor sanding performance: The sanding belt or disc may be worn out and require replacement. Ensure you are not applying excessive pressure, which can bog down the motor.
For issues not covered here, contact WEN customer support.
8. Specifications
| Specification | Value |
|---|---|
| Brand | WEN |
| Model Number | 6515T |
| Product Dimensions | 11.5"L x 11.5"W x 15.5"H |
| Item Weight | 16 pounds |
| Power Source | Electric (Corded) |
| Voltage | 120 volts |
| Amperage Capacity | 2.3 A |
| Belt Speed | Up to 3160 FPM |
| Disc Speed | Up to 3450 RPM |
| Belt Size | 1 inch x 30 inches |
| Disc Size | 5 inches |
| Included Grit (Belt) | 100-grit |
| Included Grit (Disc) | 80-grit |
9. Warranty and Support
Your WEN 6515T Benchtop Belt and Disc Sander comes with a two-year warranty, ensuring peace of mind regarding manufacturing defects and workmanship. For warranty claims, technical assistance, or to order replacement parts, please contact WEN customer service.
WEN provides a nationwide network of skilled service technicians and a helpful customer phone line to assist you with any product-related inquiries.


