
1. Introduction
This manual provides detailed instructions for the setup, operation, and maintenance of your ANSTEN D1 Wireless Headphones. Please read this manual thoroughly before using the product to ensure proper functionality and to maximize your listening experience. The ANSTEN D1 headphones are designed for use with various audio sources, including televisions, PCs, and other devices, offering both wireless and wired connectivity options.
2. Product Overview
2.1. Package Contents
The ANSTEN D1 Wireless Headphones package includes the following items:
- D1 Wireless TV Headphone
- 2.4GHz Transmitter/Charging Base
- 3.5mm-3.5mm Audio Cable
- RCA Cable
- Optical Cable
- AC/DC Power Adapter
- NiMH AAA Size Batteries for Headphone (2 pieces)
- 6.3mm to 3.5mm Adapter
- User Manual

Figure 1: Included Components
2.2. Headphone and Transmitter
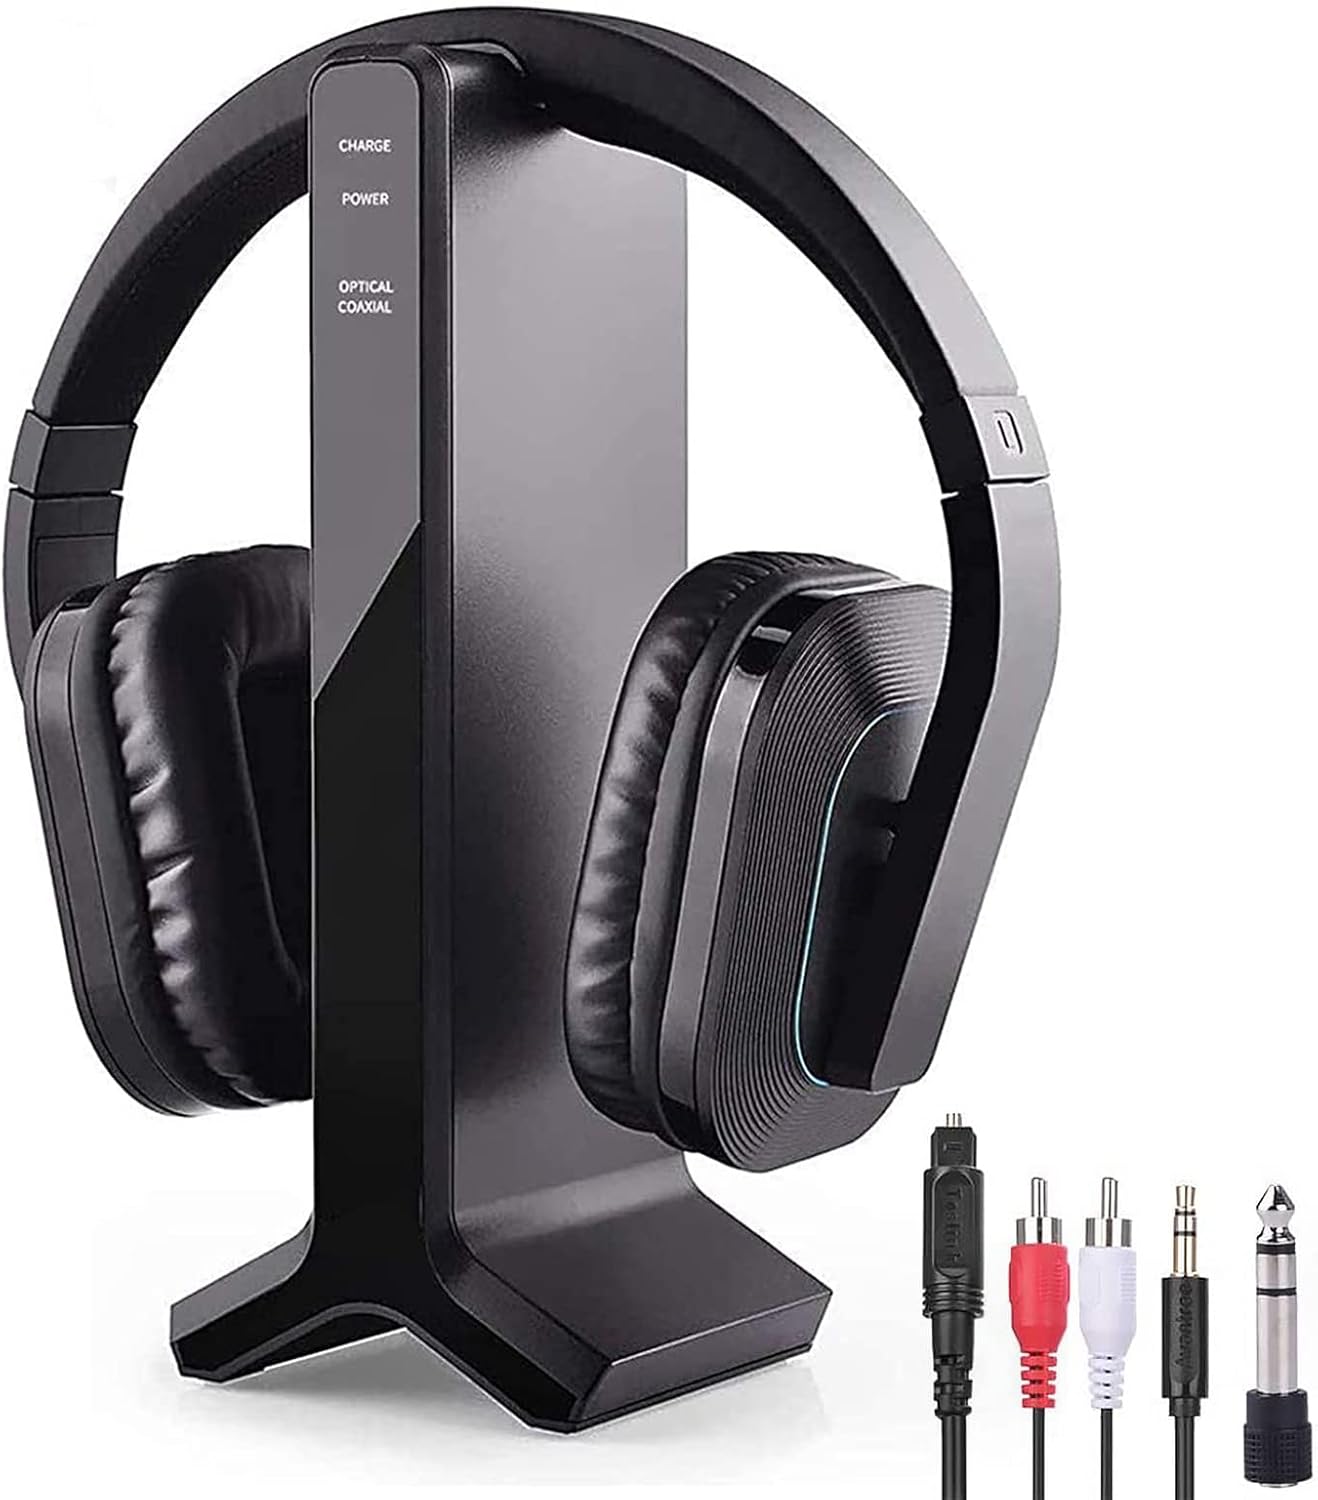
Figure 2: ANSTEN D1 Wireless Headphones and Transmitter/Charging Dock
The headphones feature an over-ear design with soft pads and an elastic headband for comfort. The transmitter doubles as a charging dock and provides multiple audio input options.
3. Setup
3.1. Initial Charging
Before first use, ensure the headphones are fully charged. Place the headphones on the charging dock. The charging indicator on the transmitter will show the charging status. A full charge typically provides up to 12 hours of playtime.

Figure 3: Easy Charging on the Dock
3.2. Connecting the Transmitter to Your Audio Source
The transmitter supports multiple audio input types. Choose the appropriate cable based on your TV or audio device's output ports.

Figure 4: Transmitter Audio Input Options
- Optical Connection: Use the provided Optical Cable. Connect one end to the transmitter's OPTICAL input and the other end to your TV's Optical Audio Out port.
- RCA Connection: Use the provided RCA Cable. Connect the red and white plugs to the transmitter's AUDIO IN (RCA) ports and the other end to your TV's RCA Audio Out ports.
- AUX (3.5mm) Connection: Use the provided 3.5mm-3.5mm Audio Cable. Connect one end to the transmitter's AUDIO IN (3.5mm) port and the other end to your TV's 3.5mm Audio Out (headphone jack).
- Coaxial Connection: Use the provided Coaxial Cable. Connect one end to the transmitter's COAXIAL input and the other end to your TV's Coaxial Audio Out port.
After connecting the audio cable, ensure the switch on the transmitter is set to the corresponding input type (OPTICAL, COAXIAL, or AUDIO).
3.3. Powering the Transmitter
Connect the AC/DC power adapter to the transmitter's DC IN 5V port and plug it into a power outlet. Switch the power button on the transmitter to 'ON'.
3.4. TV Audio Settings (Important for Optical/Coaxial)
If using an Optical or Coaxial connection and you experience no sound, you may need to adjust your TV's audio output settings to PCM (Pulse Code Modulation). Refer to your TV's manual for specific instructions. General steps are:
- Press "Menu" on your TV remote.
- Navigate to "Audio Settings" or "Sound Settings".
- Look for "Advanced Audio" or similar options.
- Find "Audio Output Mode" or "Digital Audio Output Mode".
- Select "PCM" as the audio output format.
- Save the settings.
4. Operating Instructions
4.1. Wireless Mode
Once the transmitter is connected and powered on, and the headphones are charged, turn on the headphones. They will automatically connect to the transmitter. You can now enjoy audio wirelessly.

Figure 5: Wireless Range up to 100 ft (30m)
The 2.4 GHz band transmission provides strong wall penetrability and a wireless range of up to 100 feet (30 meters), allowing you to move freely while listening.
4.2. Wired Mode
The headphones can also be used in wired mode. Connect the 3.5mm-3.5mm audio cable directly from your audio source (e.g., phone, PC) to the headphone's 3.5mm input jack. In wired mode, the headphones do not need to be powered on.

Figure 6: Wired and Wireless Operation Modes
4.3. Volume Control
Adjust the volume directly on the headphones using the dedicated volume controls. For optimal sound, ensure your TV's volume is set to a moderate level or adjusted as needed to avoid distortion.
4.4. Automatic Power Off
The headphones will automatically turn off if no signal is received or the signal is too weak for 5 minutes. This feature helps conserve battery life.
5. Charging
To recharge the headphones, simply place them on the transmitter's charging dock. Ensure the headphone band contacts the charging pins correctly. The charging indicator on the transmitter will illuminate to confirm charging. A full charge provides approximately 12 hours of playtime.
Important:
- Never attempt to recharge conventional dry cells.
- Batteries (battery pack or installed batteries) should not be exposed to excessive heat such as direct sunlight or fire.
- Only use the supplied rechargeable (LR03/AAA) batteries. Do not use other types of batteries or non-rechargeable batteries.
- When the headphones are not in use, switch them OFF to avoid damaging the batteries.
6. Maintenance
- Clean the headphones and transmitter with a soft, dry cloth. Do not use liquid cleaners or abrasive materials.
- Avoid exposing the device to extreme temperatures, humidity, or direct sunlight.
- Store the headphones on the charging dock or in a safe place when not in use.
7. Troubleshooting
This section addresses common issues you might encounter with your ANSTEN D1 Wireless Headphones.
7.1. No Sound or Sound Only on One Ear
- Check Connections: Ensure all audio cables are securely connected to both the transmitter and your TV/audio source.
- Transmitter Input Selection: Verify that the switch on the transmitter is set to the correct audio input type (Optical, Coaxial, or Audio).
- TV Audio Output Settings: For Optical or Coaxial connections, ensure your TV's digital audio output is set to "PCM". Refer to section 3.4 for detailed steps.
- TV Speaker Settings: If using a 3.5mm connection, ensure the TV speaker is set to "headset". For RCA or optical connections, the TV speaker might need to be set to "External Speaker" or muted if you only want sound through the headphones.
- Restart: Play TV sound again and restart the headset.
7.2. Current Noise or Blasting Sound
- Ensure the headset is turned on after the completion of the cable connection to the device. Connecting cables while the headphone is already on can cause noise.
- When turning on the headphone, keep the TV sound low or turn the volume down before wearing it.
7.3. Cannot Charge
- Ensure the headphone band is retracted correctly to make proper contact with the charging pins on the dock.
- Verify the AC/DC power adapter is securely connected to the transmitter and a working power outlet.
7.4. Sound Dropouts/Disappear
- Move closer to the transmitter.
- Remove any obstacles between the transmitter and the headphones that might interfere with the signal.
- Play TV sound again and restart the headset.
8. Specifications
| Feature | Specification |
|---|---|
| Model Name | D1 |
| Connectivity Technology | Optical/RCA/AUX (2.4GHz Wireless) |
| Headphones Jack | 3.5 mm Jack |
| Wireless Communication Technology | 2.4GHz RF (Note: Product description mentions Bluetooth, but specifications indicate 2.4GHz for wireless TV connection) |
| Compatible Devices | TV with RCA, Coaxial, or Optical audio output |
| Control Type | Volume Control, Button |
| Battery Life | 12 Hours (Playtime) |
| Wireless Range | Up to 100 feet (30 meters) |
| Frequency Range | 30 Hz - 20 kHz |
| Material | Acrylonitrile Butadiene Styrene (ABS) |
| Item Weight | 1.1 Pounds |
| Product Dimensions | 11.4 x 6.1 x 9.1 inches |
| Ear Placement | Over Ear |
| Noise Control | Sound Isolation |
9. Safety Information
- Excessive sound pressure from earphones and headphones can cause hearing loss. Use at moderate volume levels.
- Do not expose the device to water or moisture.
- Keep out of reach of children.
10. Warranty and Support
For warranty information and customer support, please refer to the ANSTEN official website or contact their customer service directly. Online video user guides for ANSTEN products may also be available on their YouTube channel.


