1. Introduction and Overview
The AGM Mini Exercise Bike is a compact, lightweight, and portable pedal exerciser designed for strengthening both arms and legs. It offers a convenient way to exercise anywhere, whether at home, in the office, or even outdoors. Its adjustable resistance and easy-to-read LCD display allow you to customize your workout and track your progress effectively.
This manual provides detailed instructions for the assembly, operation, and maintenance of your AGM Mini Exercise Bike to ensure safe and effective use.
2. Product Components
Before assembly, please ensure all components are present:
- Main Unit (Mini Exercise Bike)
- 2 x Stabilizer Bars (Feet)
- 2 x Pedals (Left 'L' and Right 'R')
- Mounting Screws and Wrench
- LCD Display Unit
- 1 x AAA Battery (for LCD display, may not be included)
- Non-slip Mat
- User Manual

Image: Overview of the AGM Mini Exercise Bike and its main components.
3. Setup and Assembly
Follow these steps to assemble your mini exercise bike:
- Attach Stabilizer Bars: Securely attach the two stabilizer bars to the main unit using the provided screws and wrench. Ensure they are firmly tightened for stability.
- Attach Pedals: Identify the Left (L) and Right (R) pedals. Screw the pedals into their corresponding crank arms. Note that one pedal may have a reverse thread (often the left pedal), so turn it counter-clockwise to tighten. Ensure both pedals are securely fastened.
- Install LCD Display Battery: Gently remove the LCD display unit from its slot. Insert the AAA battery (if not pre-installed) into the battery compartment. Reinsert the LCD display unit into its slot on the main unit.
- Positioning: Place the non-slip mat on the floor where you intend to use the exercise bike. Position the exercise bike on top of the mat to prevent sliding during use.

Image: Fully assembled AGM Mini Exercise Bike ready for use.
Video: Step-by-step guide on how to assemble and use the mini exercise bike.
4. Operating Instructions
The AGM Mini Exercise Bike can be used for both leg and arm exercises. Always ensure the unit is stable before beginning your workout.
4.1. Adjustable Resistance
The resistance level can be easily adjusted using the tension knob located on the front of the unit. Turn the knob clockwise to increase resistance for a more challenging workout, and counter-clockwise to decrease resistance. Adjust the resistance to suit your fitness level and exercise goals.

Image: Close-up of the adjustable tension knob for resistance control.
4.2. LCD Display Functions
The LCD display provides real-time feedback on your workout. Press the red button to cycle through the following metrics:
- SCAN: Automatically cycles through all metrics.
- TIME: Displays the duration of your current workout session.
- DISTANCE: Shows the estimated distance covered.
- COUNT: Tracks the total number of pedal revolutions.
- CALORIES: Estimates the calories burned during your workout.
- T-COUNT: Displays the total accumulated count of pedal revolutions (resets only when battery is replaced).

Image: The LCD display showing various workout metrics.
4.3. Leg Exercise
Place the exercise bike on the non-slip mat in front of a chair or sofa. Sit comfortably and place your feet into the pedal straps. Adjust the straps to ensure your feet are secure. Begin pedaling in a smooth, controlled motion. You can adjust the resistance as needed.

Image: User performing leg exercises with the mini bike while seated.
4.4. Arm Exercise
Place the exercise bike on a stable table or desk. Sit in front of it and grasp the pedals with your hands, placing your hands into the straps. Begin rotating the pedals with your arms in a smooth, controlled motion. Adjust the resistance to your comfort level.

Image: User performing arm exercises with the mini bike on a desk.
Video: Demonstration of various exercises that can be performed with the AGM Mini Exercise Bike.
5. Maintenance
Proper maintenance ensures the longevity and optimal performance of your exercise bike.
- Cleaning: Wipe down the unit with a damp cloth after each use to remove sweat and dust. Avoid using abrasive cleaners or solvents.
- Storage: Store the exercise bike in a cool, dry place away from direct sunlight and extreme temperatures. Its compact design allows for easy storage under a desk or in a closet.
- Odor: Upon initial unboxing, a slight odor from manufacturing materials may be present. This is normal and will dissipate if the unit is placed in a well-ventilated area for a couple of days.
- Stability: Always use the provided non-slip mat, especially on smooth surfaces like tile or hardwood, to prevent the unit from sliding during exercise.
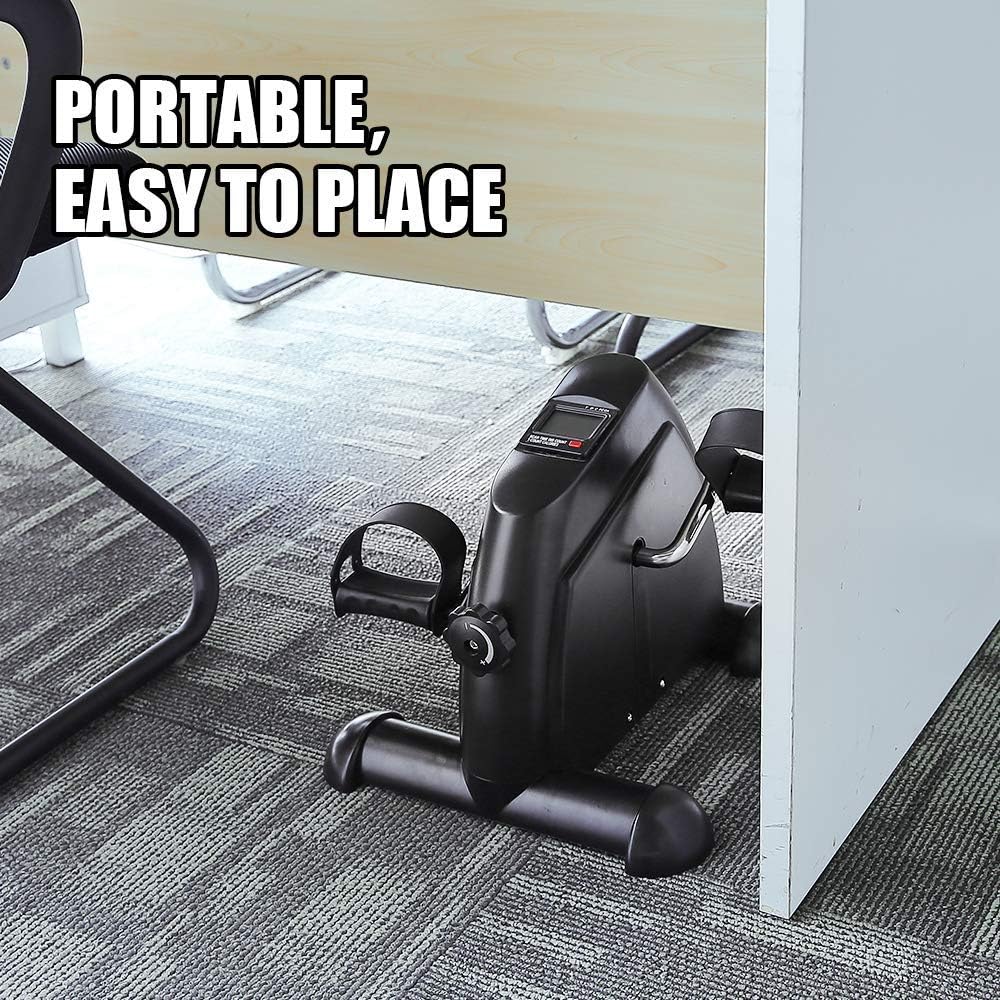
Image: Detail of the non-slip mat and anti-slip pedal design for enhanced stability.
6. Troubleshooting
If you encounter any issues with your AGM Mini Exercise Bike, refer to the following common problems and solutions:
| Problem | Possible Cause | Solution |
|---|---|---|
| Unit slides during use | Not on a non-slip surface; excessive resistance. | Ensure the unit is placed on the provided non-slip mat or a carpeted surface. Reduce resistance if sliding persists. |
| Pedals creak or resistance is inconsistent | Loose pedals; internal friction; tension knob issue. | Check that pedals are securely tightened. Adjust the tension knob gradually. If creaking persists, ensure no debris is obstructing the pedal mechanism. |
| LCD display not working | Battery drained or incorrectly installed. | Check the AAA battery. Replace if necessary and ensure it is inserted with correct polarity. |
| Unit feels unstable or wobbly | Loose stabilizer bars or uneven surface. | Ensure the stabilizer bars are tightly secured. Place the unit on a flat, even surface. |
7. Specifications
| Feature | Detail |
|---|---|
| Brand | AGM |
| Model Number | heimtrainer |
| Dimensions (L x W x H) | 27.99 x 38 x 18.01 cm (approx. 11 x 15 x 7 inches) |
| Item Weight | 3.5 Kilograms (approx. 7.7 lbs) |
| Material Type | Stainless Steel, Polypropylene |
| Control Type | Physical Button (for LCD) |
| Display Type | LCD |
| Power Source | Battery Powered (1 AAA battery required) |
| Resistance Levels | Adjustable (via tension knob) |
| Features | Lightweight, Adjustable |

Image: Visual representation of the mini exercise bike's dimensions.
8. Warranty and Support
AGM stands behind the quality of its products. If you encounter any issues related to the quality of your Mini Exercise Bike, please do not hesitate to contact AGM customer support.
For support, please refer to the contact information provided with your purchase or visit the official AGM website. Please have your model number (heimtrainer) and purchase details ready when contacting support.


