
ASRock B450M PRO4
ASRock B450M PRO4 Motherboard User Manual
Model: B450M PRO4
1. Introduction
This manual provides comprehensive instructions for the installation, operation, and maintenance of your ASRock B450M PRO4 AM4 AMD Motherboard. Designed for AMD Ryzen processors, this Micro ATX motherboard offers robust performance and a wide range of features for building a reliable computing system.
Please read this manual thoroughly before beginning installation to ensure proper setup and to maximize the performance and longevity of your motherboard.
2. Safety Information
Always observe the following safety precautions when handling your motherboard and other computer components:
- Ensure all power is disconnected from the computer before installation or maintenance.
- Wear an anti-static wrist strap or frequently touch a grounded metal object to discharge static electricity. Electrostatic discharge (ESD) can damage sensitive components.
- Handle the motherboard by its edges to avoid touching sensitive components or circuits.
- Keep the motherboard and components away from moisture and extreme temperatures.
- Do not force components into place. If a component does not fit easily, recheck its orientation and the manual.
3. Package Contents
Verify that all items are present in your motherboard package:
- ASRock B450M PRO4 Motherboard
- I/O Shield
- SATA Data Cables (typically 2)
- Support CD/DVD (for drivers and utilities)
- Quick Installation Guide / User Manual
- M.2 Screw Package
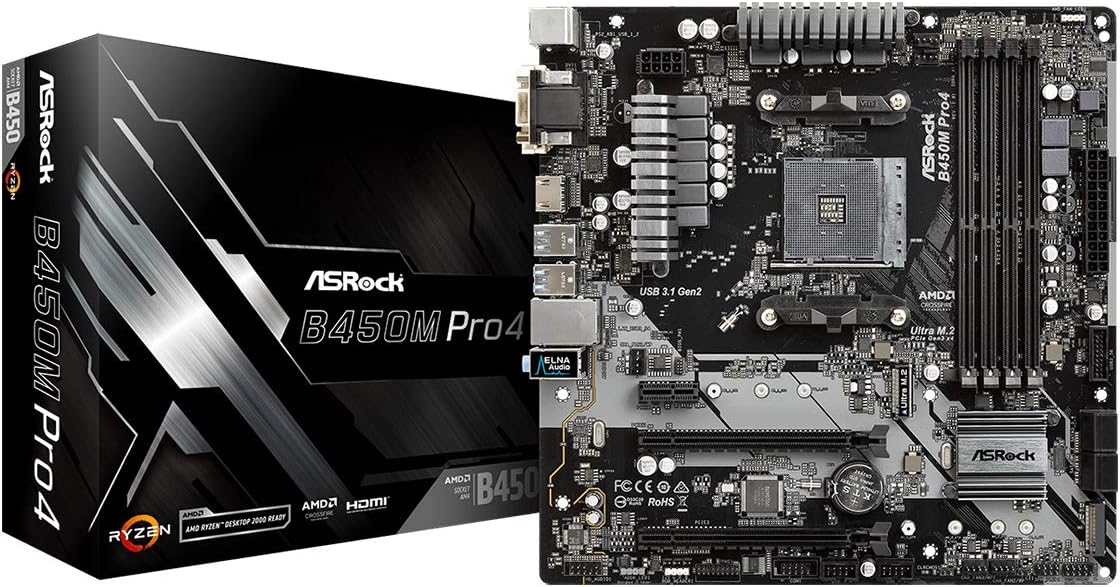
Image: ASRock B450M PRO4 Motherboard shown alongside its retail packaging.
4. Setup and Installation
Follow these steps for proper installation of your motherboard and its components.
4.1 Motherboard Layout
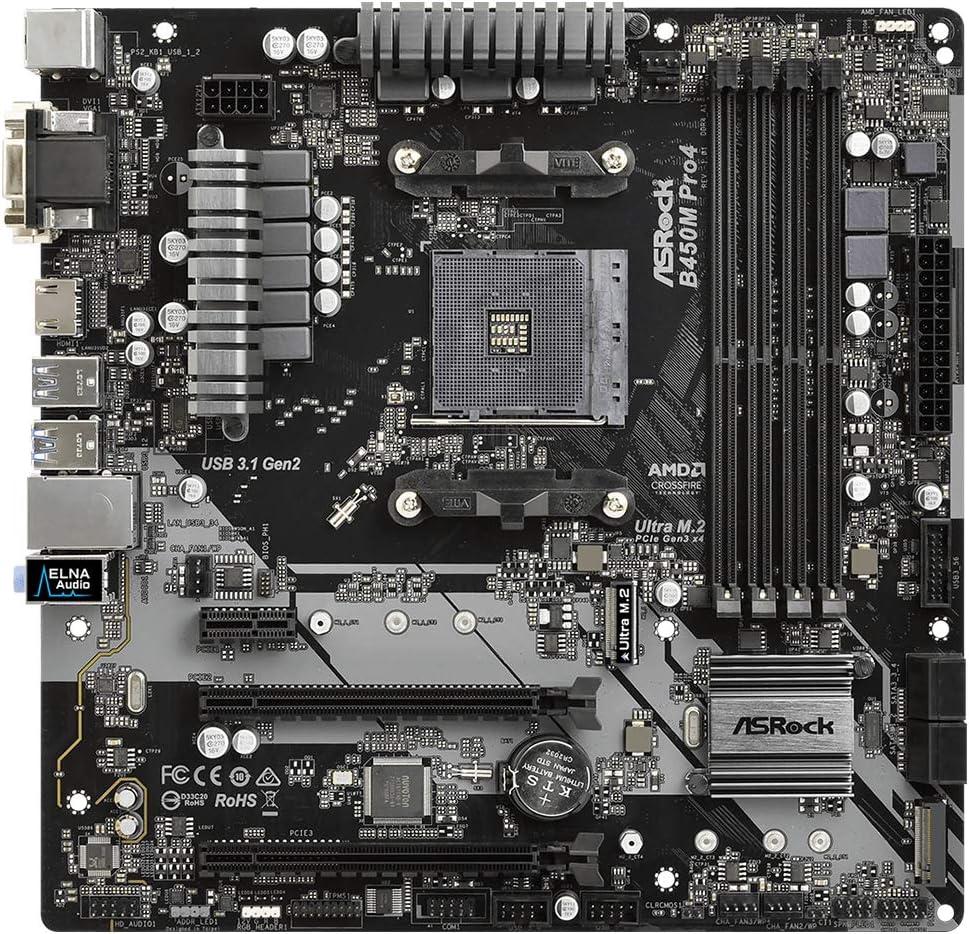
Image: Top-down view of the ASRock B450M PRO4 motherboard, highlighting key component locations such as the CPU socket, DIMM slots, and PCIe slots.

Image: Angled view of the ASRock B450M PRO4 motherboard, providing a clearer perspective of the heatsinks and various connectors.
4.2 CPU Installation
- Locate the AM4 CPU socket on the motherboard.
- Lift the small metal lever on the side of the CPU socket to open it.
- Carefully align the triangular arrow on the CPU with the corresponding mark on the socket. Gently place the CPU into the socket without forcing it.
- Lower the metal lever back into its original position to secure the CPU.
- Apply thermal paste to the top of the CPU (if not pre-applied on your cooler) and install the CPU cooler according to its manufacturer's instructions.
4.3 Memory (RAM) Installation
The ASRock B450M PRO4 features 4 DDR4 DIMM slots, supporting up to 64GB of RAM.
- Open the clips at both ends of the DIMM slots.
- Align the notch on the RAM module with the key in the DIMM slot.
- Press down firmly on both ends of the RAM module until the clips snap into place, securing the module.
- For dual-channel operation, install memory modules in matching colored slots (e.g., A2 and B2).
4.4 Storage Device Installation (SATA & M.2)
This motherboard supports SATA 6Gb/s devices and M.2 SSDs.
- SATA Devices: Connect your SATA hard drives or SSDs to the SATA ports on the motherboard using SATA data cables. Connect power from your power supply to the drives.
- M.2 SSDs: The motherboard has two M.2 slots. Remove the M.2 screw and standoff from the desired slot. Insert the M.2 SSD into the slot at an angle, then gently push it down and secure it with the screw.
4.5 Expansion Card Installation (PCIe)
The ASRock B450M PRO4 includes PCI-Express 3.0 x16 slots and PCI-Express 2.0 x1 slots.
- Align your graphics card or other PCIe expansion card with the appropriate slot.
- Press down firmly until the card is fully seated in the slot and the retention clip locks into place.
- Secure the card to your PC case with a screw.
4.6 Connecting Power Supply
- Connect the 24-pin ATX power connector from your power supply to the main power socket on the motherboard.
- Connect the 8-pin (or 4-pin) CPU power connector to the corresponding socket near the CPU.
4.7 Connecting Front Panel & Rear I/O
- Connect the front panel headers (Power SW, Reset SW, HDD LED, Power LED) to the corresponding pins on the motherboard. Refer to the motherboard diagram for exact pin locations.
- Connect USB 2.0, USB 3.0, and audio headers from your case to the motherboard.
- Install the I/O shield into your PC case.
- Connect external peripherals (monitor, keyboard, mouse, etc.) to the rear I/O ports.

Image: Close-up view of the rear I/O panel of the ASRock B450M PRO4 motherboard, showing various ports including USB, HDMI, DVI, VGA, and audio jacks.
5. Operating Instructions
5.1 First Boot and BIOS Setup
- After assembling your system, connect a monitor, keyboard, and mouse.
- Power on your computer. Press the DEL or F2 key repeatedly during startup to enter the BIOS/UEFI setup utility.
- In the BIOS, you can configure boot order, enable XMP for memory, adjust fan speeds, and set other system parameters. Save changes and exit to continue.
5.2 Operating System Installation
Insert your operating system installation media (USB drive or DVD) and follow the on-screen prompts to install your preferred OS (e.g., Windows 10).
5.3 Driver Installation
After OS installation, install the necessary drivers for your motherboard components. You can find these on the included support CD/DVD or download the latest versions from the official ASRock website. Key drivers include chipset, audio, LAN, and graphics (if using integrated graphics or after installing a dedicated GPU).
6. Maintenance
- Cleaning: Regularly clean dust from your computer case and motherboard components using compressed air. Ensure the system is powered off and unplugged before cleaning.
- BIOS Updates: Periodically check the ASRock website for BIOS updates. BIOS updates can improve system stability, compatibility, and performance. Follow the instructions provided by ASRock carefully when updating the BIOS.
- Component Checks: Ensure all cables and components are securely seated. Loose connections can lead to system instability.
7. Troubleshooting
If you encounter issues, consider the following common troubleshooting steps:
- No Power:
- Check if the power supply is switched on and all power cables (24-pin ATX, 8-pin CPU) are securely connected to the motherboard.
- Ensure the front panel power switch cable is correctly connected to the motherboard header.
- No Display:
- Verify that the monitor is connected to the correct video output (either motherboard's integrated graphics port if using an APU, or dedicated graphics card).
- Reseat the graphics card and RAM modules.
- Try booting with only one RAM stick installed.
- System Instability/Crashes:
- Check CPU and GPU temperatures. Overheating can cause instability.
- Ensure RAM is compatible and correctly installed. Run a memory diagnostic tool.
- Update drivers and BIOS to the latest versions.
- Peripheral Not Detected:
- Try connecting the peripheral to a different port.
- Install or update relevant drivers for the peripheral.
- Check BIOS settings to ensure the port is enabled.
For more detailed troubleshooting, refer to the full user manual available on the ASRock support website.
8. Specifications
| Feature | Detail |
|---|---|
| Brand | ASRock |
| Model Number | B450M PRO4 |
| CPU Socket | Socket AM4 |
| Chipset | AMD B450 |
| Memory Type | DDR4 |
| Memory Slots | 4 x DIMM Slots |
| Max Memory Capacity | 64GB |
| Memory Speed Support | DDR4-3200+(OC)/2933/2667/2400/2133 MHz |
| PCIe Slots | 2x PCI-Express 3.0 x16, 1x PCI-Express 2.0 x1 |
| Storage Interfaces | SATA 6Gb/s, 2x M.2 Slots |
| USB Ports | USB 3.1 Gen2 (Type-A + Type-C), USB 3.1 Gen1, USB 2.0 |
| Video Outputs | HDMI, DVI-D, D-Sub (VGA) |
| Form Factor | Micro ATX |
| Dimensions (LxWxH) | 9.61 x 9.61 x 1.57 inches |
9. Warranty and Support
Your ASRock B450M PRO4 Motherboard is covered by a manufacturer's warranty. Please refer to the warranty card included in your package or visit the official ASRock website for detailed warranty terms and conditions specific to your region.
For technical support, driver downloads, BIOS updates, and additional documentation, please visit the official ASRock support website:
You can also find additional user guides and installation manuals in PDF format:
Related documentsB450M PRO4


Ask a question about this manual
Ask about setup, troubleshooting, compatibility, parts, safety, or missing instructions. Manuals+ will review the question and use this page’s manual context to help answer it.