1. Introduction
Thank you for choosing the Igloo ICEB26WH Automatic Portable Countertop Ice Maker. This manual provides essential information for the safe and efficient operation, maintenance, and troubleshooting of your new appliance. Please read it thoroughly before first use and retain it for future reference.
This portable ice maker is designed for convenience, producing up to 26 pounds of ice in a 24-hour period, with the first batch of 9 ice cubes ready in as little as 7 minutes. It offers two ice cube sizes to suit your preferences.
2. Safety Information
To ensure safe operation and prevent damage, please adhere to the following safety guidelines:
- Electrical Safety: Ensure the appliance is plugged into a grounded outlet. Do not operate with wet hands or if the power cord is damaged.
- Placement: Place the ice maker on a stable, level surface, away from direct sunlight, heat sources, and corrosive gases. Ensure adequate ventilation around the unit.
- Water Quality: Use only potable (drinkable) water in the reservoir.
- Children: Keep the appliance out of reach of children and supervise them when the unit is in use.
- Maintenance: Always unplug the unit before cleaning or performing any maintenance. Do not immerse the appliance in water.
- Proposition 65 Warning: This product may contain chemicals known to the State of California to cause cancer and birth defects or other reproductive harm.
3. Product Overview
Familiarize yourself with the components of your Igloo ICEB26WH Ice Maker:

Image 3.1: Front-right view of the Igloo ICEB26WH Ice Maker, showcasing its compact design and control panel.

Image 3.2: Diagram illustrating the dimensions of the ice maker, highlighting the removable ice basket, LED control panel, and included ice scoop.
Components:
- Ice Maker Unit: The main appliance housing the compressor, water reservoir, and ice-making mechanism.
- Ice Basket: A removable basket to collect the freshly made ice cubes.
- Ice Scoop: A plastic scoop for convenient ice retrieval.
Control Panel:
The intuitive LED control panel features indicators and buttons for easy operation:
- ADD WATER Indicator: Illuminates when the water reservoir needs refilling.
- ICE FULL Indicator: Illuminates when the ice basket is full, and the unit will pause ice production.
- SMALL/LARGE Ice Size Selection: Button to toggle between small and large cylindrical ice cube sizes.
- POWER Button: To turn the unit on or off.

Image 3.3: Visual representation of key features including instant ice, dual ice sizes, low noise, self-cleaning, and the LED control panel.
4. Setup
- Unpack: Carefully remove the ice maker from its packaging. Remove all packing materials, including any tape or protective films.
- Position: Place the ice maker on a flat, stable, and heat-resistant surface. Ensure there is at least 4 inches of clearance around the unit for proper ventilation. Avoid placing it near heat sources or in direct sunlight.
- Stabilize: Allow the unit to stand upright for at least 2 hours before plugging it in. This allows the refrigerant to settle.
- Initial Cleaning: Before first use, clean the interior of the ice maker. Refer to the "Cleaning and Maintenance" section for detailed instructions.
- Fill Water Reservoir: Open the top lid and fill the water reservoir with potable water up to the MAX fill line. Do not overfill.
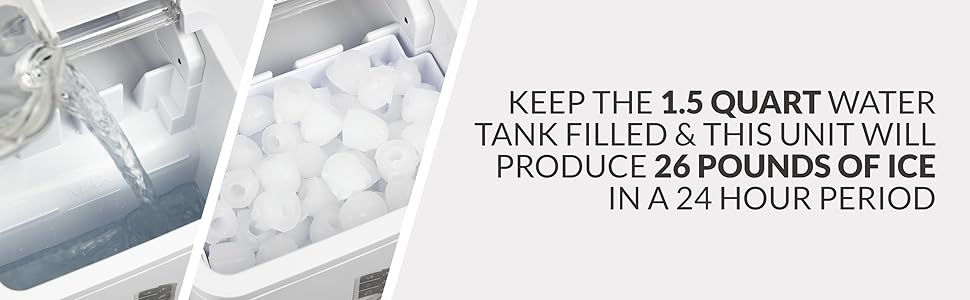
Image 4.1: Illustrates filling the water reservoir and the ice production capacity.
5. Operating Instructions
- Power On: Plug the ice maker into a grounded electrical outlet. Press the POWER button on the control panel to turn the unit on.
- Select Ice Size: Press the SELECT button to choose between small or large ice cube sizes. The corresponding indicator light will illuminate.
- Ice Production: The ice maker will begin its cycle. Water will be pumped to the freezing fingers, and ice cubes will form. The first batch of 9 ice cubes will be ready in approximately 7 minutes.
- Ice Collection: Once formed, the ice cubes will be released into the ice basket. The unit will continue to make ice until the basket is full or the water reservoir is empty.
- Indicators:
- If the ADD WATER indicator illuminates, refill the water reservoir. The unit will resume operation automatically once water is added.
- If the ICE FULL indicator illuminates, remove ice from the basket. The unit will resume ice production automatically.
- Storing Ice: The ice basket is not refrigerated. For long-term storage, transfer ice cubes to a freezer.

Image 5.1: Details on the ice maker's quick production and automatic features.

Image 5.2: Depicts the two available ice cube sizes: small and large bullet ice.
6. Cleaning and Maintenance
Regular cleaning and maintenance will prolong the life of your ice maker and ensure optimal performance.
6.1. Daily Cleaning
- Unplug the unit.
- Remove the ice basket and wash it with warm, soapy water. Rinse and dry thoroughly.
- Wipe the exterior of the unit with a soft, damp cloth.
6.2. Self-Cleaning Function
The Igloo ICEB26WH features an automatic self-cleaning function:
- Ensure the unit is empty of ice and water.
- Fill the water reservoir with a mixture of water and white vinegar (or a recommended ice maker cleaning solution) according to the product instructions.
- Activate the self-cleaning cycle (refer to your specific model's control panel instructions, typically a long press of a button or a specific sequence).
- After the cycle, drain the cleaning solution completely.
- Rinse the reservoir thoroughly with clean water and drain again to remove any residue.

Image 6.1: Highlights the low noise operation and the automatic self-cleaning feature.
6.3. Draining and Storage
- When not in use for an extended period, unplug the unit and drain all water from the reservoir.
- Clean and dry the interior thoroughly to prevent mold or mildew growth.
- Store the ice maker in a cool, dry place.
7. Troubleshooting
If you encounter issues with your ice maker, consult the following table before contacting customer support:
| Problem | Possible Cause | Solution |
|---|---|---|
| Unit does not turn on. | Not plugged in; power outage; faulty outlet. | Ensure unit is securely plugged into a working, grounded outlet. Check circuit breaker. |
| "ADD WATER" indicator is on, but reservoir is full. | Water sensor malfunction; air bubble. | Unplug and replug the unit. Gently shake the unit to dislodge any air bubbles near the sensor. |
| Ice is not forming or is very small. | Insufficient water; high ambient temperature; poor ventilation; unit recently moved. | Ensure water reservoir is full. Operate in a cooler environment. Ensure proper ventilation. Allow unit to sit upright for 2 hours if recently moved. |
| "ICE FULL" indicator is on, but basket is not full. | Ice sensor obstructed or dirty. | Clean the ice sensor (located near the ice basket). Ensure no ice cubes are blocking the sensor. |
| Ice melts quickly in the basket. | Ice basket is not refrigerated. | This is normal. Transfer ice to a freezer for storage. |
8. Specifications
| Feature | Specification |
|---|---|
| Model Number | ICEB26WH |
| Brand | Igloo |
| Product Dimensions (D x W x H) | 12.2" x 9" x 12.8" |
| Daily Ice Production | Up to 26 lbs |
| Water Tank Capacity | 1.5 Quarts |
| Ice Production Cycle | 9 cubes in as little as 7 minutes |
| Operating Wattage | 120 Watts |
| Power Supply | 120V, 60Hz (Standard US) |
| Included Accessories | Ice Maker, Ice Basket, Ice Scoop |
9. Warranty and Support
This Igloo ICEB26WH Ice Maker comes with a manufacturer's warranty. Please refer to the warranty card included with your purchase for specific terms and conditions, including coverage duration and limitations.
For technical support, troubleshooting assistance beyond this manual, or warranty claims, please contact the retailer where the product was purchased or the manufacturer directly. Contact information can typically be found on the product packaging or the manufacturer's official website.


