1. Introduction
This manual provides detailed instructions for the operation and maintenance of your Bside EMT01 Digital Wood Moisture Meter. This instrument is designed to accurately measure the moisture content in various wood materials, providing essential data for drying processes and quality control. Please read this manual thoroughly before using the device to ensure proper and safe operation.
2. Safety Information
- Keep the device out of reach of children. The measurement probes are sharp and can cause injury.
- Do not attempt to measure live electrical circuits with this device. It is designed for wood moisture measurement only.
- Avoid exposing the meter to extreme temperatures, high humidity, or direct sunlight.
- Do not immerse the device in water or other liquids.
- If the device is damaged, do not use it. Contact customer support for assistance.
- Remove the battery if the device will not be used for an extended period to prevent leakage.
3. Package Contents
Please check the package contents upon receipt. If any items are missing or damaged, contact your retailer.
- 1 x Bside EMT01 Digital Wood Moisture Meter
- 1 x User Manual (this document)
4. Product Overview
The Bside EMT01 features a clear LCD display, two sharp measurement pins, and intuitive buttons for mode selection and data hold. A protective cap covers the pins when not in use.
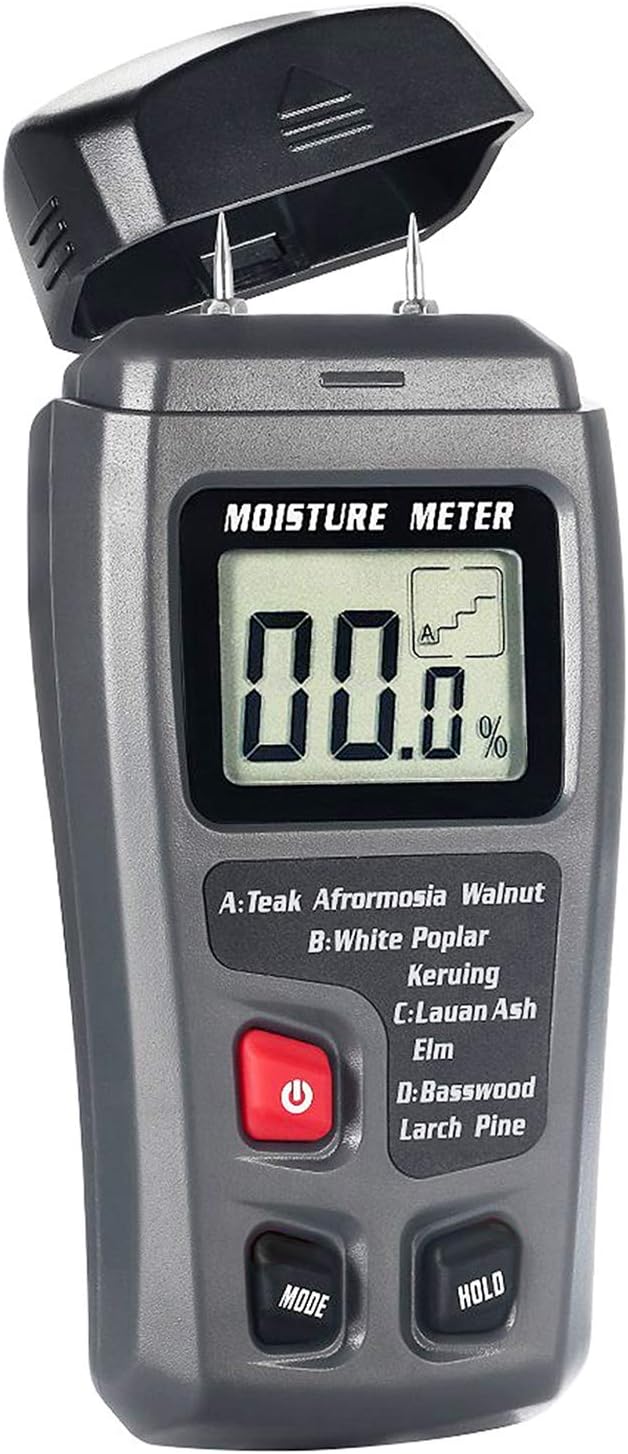
Figure 1: Front view of the Bside EMT01 Digital Wood Moisture Meter with the protective cap removed, showing the LCD display, measurement pins, and control buttons.
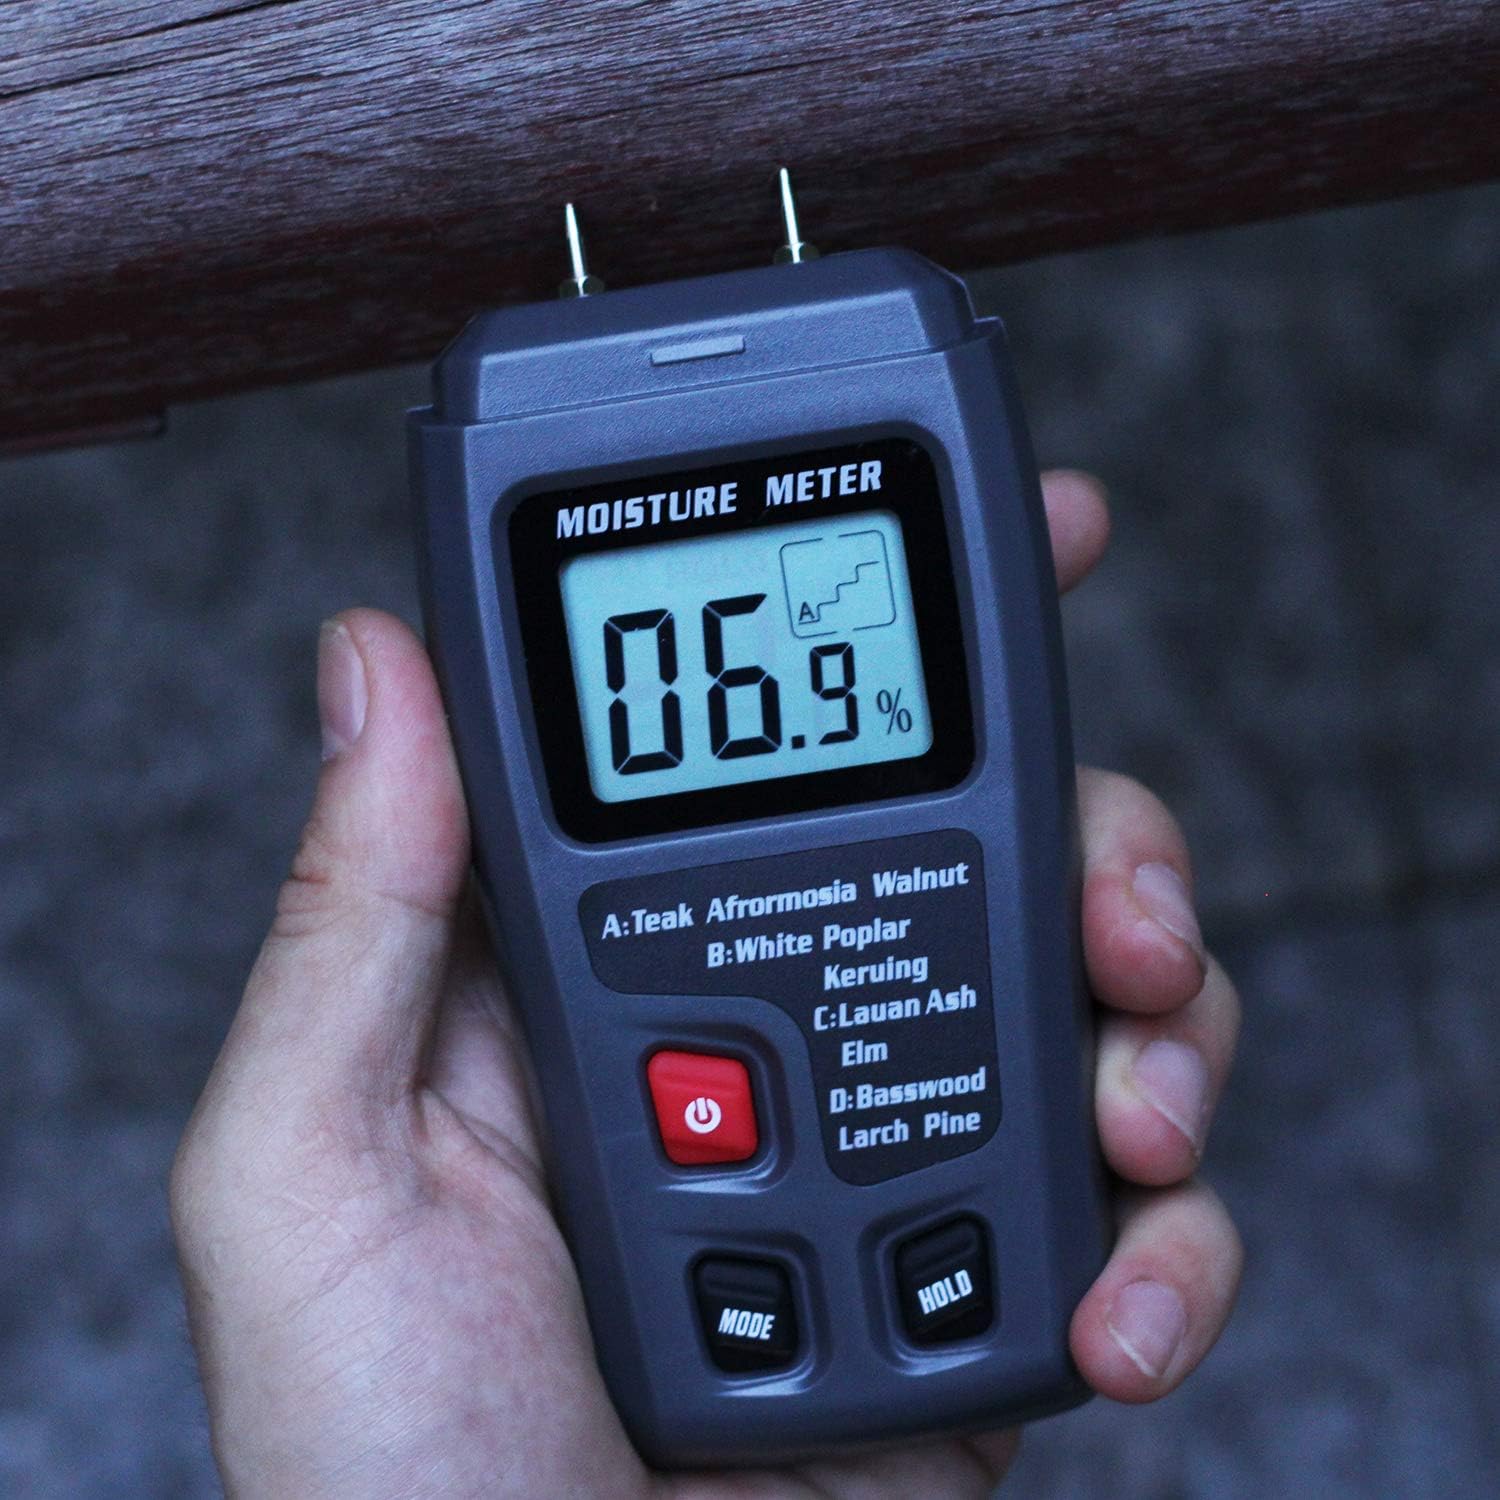
Figure 2: The Bside EMT01 Digital Wood Moisture Meter held in a hand, illustrating its ergonomic design and portability.
4.1. Components
- Measurement Pins: Two sharp pins for penetrating wood surfaces to measure moisture.
- Protective Cap: Covers the measurement pins when the device is not in use.
- LCD Display: Shows moisture content percentage and selected wood group.
- Power Button (⏻): Turns the device on and off.
- MODE Button: Selects the appropriate wood calibration scale (A, B, C, D).
- HOLD Button: Freezes the current measurement on the display.
5. Specifications
| Material | ABS |
| Display | LCD Display |
| Measurement Range (Wood) | 0-99.9% |
| Resolution | 0.1% |
| Accuracy | 0.5% |
| Probe Length | 10mm |
| Power Supply | 1 x 9V Battery (not included) |
| Item Dimensions (L x W x H) | 14 x 6.5 x 3 cm (5.51 x 2.56 x 1.18 inches) |
| Item Weight | 104g (3.68 oz) |
6. Setup
6.1. Battery Installation
- Locate the battery compartment cover on the back of the device.
- Slide or unclip the cover to open the compartment.
- Insert one 9V battery, ensuring the polarity (+/-) matches the diagram inside the compartment.
- Close the battery compartment cover securely.
Note: A 9V battery is not included in the package and must be purchased separately.
7. Operating Instructions
7.1. Power On/Off
- To turn on the device, press the red Power button (⏻). The LCD display will illuminate.
- To turn off the device, press and hold the Power button (⏻) for a few seconds.
- The device features an auto-power-off function to conserve battery life if inactive for a period.
7.2. Selecting Wood Group
Before taking a measurement, it is crucial to select the correct wood calibration scale (group) for the material you are testing. This ensures accurate readings. Press the MODE button repeatedly to cycle through the four wood groups: A, B, C, and D. The selected group will be indicated on the LCD display.
Wood Species Group Table:
| Group | Wood Species |
|---|---|
| A | Teak, Walnut, Afrormosia, Rubber Tree, Imbuia, Kokrodua, Niove Bidinkala, Cork |
| B | Keruing, White Poplar, Beech, Cedar, Tola |
| C | Lauan, Ash, Elm, Fir, Maple, Padauk, Oak, Cherry |
| D | Basswood, Larch, Pine, Birch |
7.3. Taking a Measurement
- Remove the protective cap from the measurement pins.
- Turn on the device by pressing the Power button.
- Select the appropriate wood group using the MODE button.
- Carefully insert the two measurement pins into the wood material. Ensure both pins penetrate the surface to obtain an accurate reading.
- The moisture content percentage will be displayed on the LCD.
- To hold the current reading on the display, press the HOLD button. Press it again to release the hold function.
- After measurement, remove the pins from the wood and replace the protective cap.
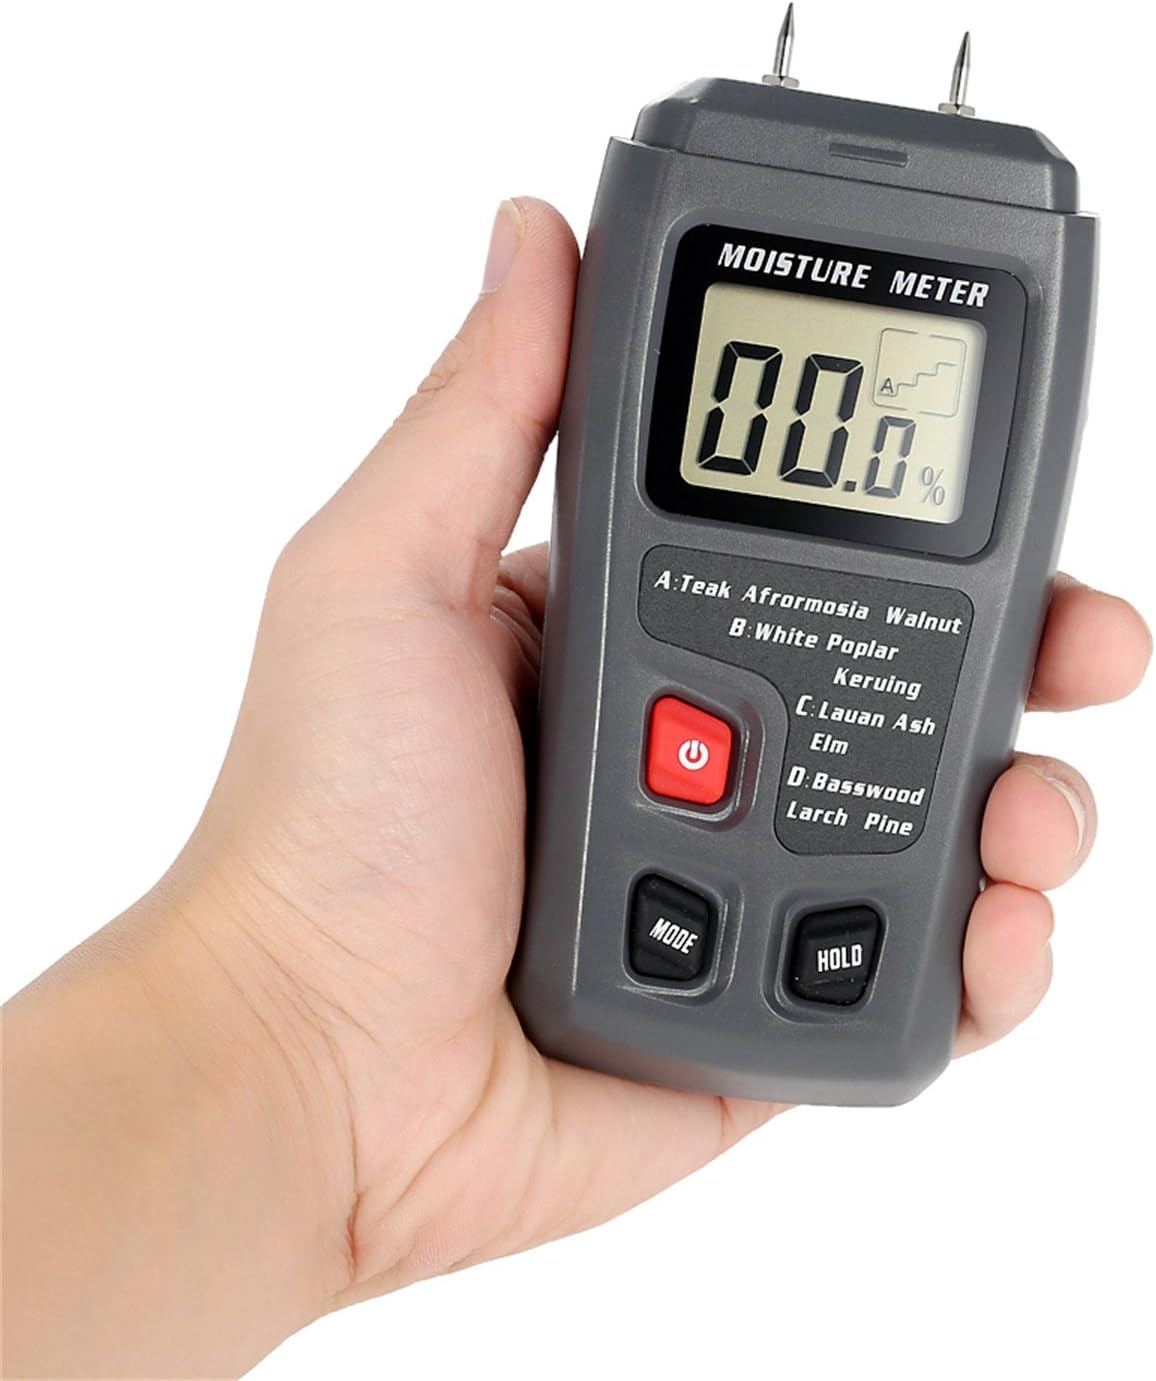
Figure 3: The moisture meter in use, with its pins inserted into a piece of wood to measure moisture content.
Important: The pins will leave small marks on the wood surface. Consider this when choosing the measurement location.
8. Maintenance
- Cleaning: Wipe the device with a soft, dry cloth. Do not use abrasive cleaners or solvents.
- Storage: Store the meter in a cool, dry place, away from direct sunlight and extreme temperatures. Always replace the protective cap over the pins when storing.
- Battery Replacement: When the battery indicator appears on the display, replace the 9V battery as described in the "Battery Installation" section.
9. Troubleshooting
| Problem | Possible Cause | Solution |
|---|---|---|
| Device does not power on. | Battery is dead or incorrectly installed. | Replace the 9V battery or check its polarity. |
| No reading or "0.0%" displayed. | Pins not fully inserted into the wood, or wood is extremely dry. | Ensure pins penetrate the wood surface. If wood is very dry, "0.0%" may be an accurate reading. |
| Inaccurate readings. | Incorrect wood group selected; pins are dirty or damaged. | Verify the correct wood group is selected. Clean pins with a dry cloth. If pins are damaged, contact support. |
10. Warranty and Support
This product comes with a standard manufacturer's warranty. For specific warranty terms and conditions, please refer to the documentation provided at the time of purchase or contact your retailer. For technical support or service inquiries, please contact the seller or manufacturer directly.


