
iSpring US31
iSpring US31 3-Stage Under Sink Water Filtration System User Manual
Model: US31 | Brand: iSpring
1. Introduction
Thank you for choosing the iSpring US31 3-Stage Under Sink Water Filtration System. This manual provides detailed instructions for the proper installation, operation, and maintenance of your new water filtration system. With correct setup and care, this system will provide clean, refreshing drinking water for years to come.
The iSpring US31 system utilizes a 3-stage purification process: PP sediment filtration, GAC carbon filtration, and CTO carbon filtration. This process effectively removes common drinking water sediments such as dust, sand, particles, dirt, and rust. Additionally, it targets heavy metals, harmful chemicals, chloramine, cloudiness, colors, chlorine taste, and odors. This system is designed to preserve healthy minerals in your water and does not lower Total Dissolved Solids (TDS).
2. Safety Precautions
- Ensure the water pressure is 30 psi or above. If below, a booster pump is recommended.
- If your water pressure is higher than 70 psi, a pressure regulator may be needed.
- This product is designed for residential use only.
- The water filtration system is designed for cold water only.
- The system operating temperature range is 40° to 100° Fahrenheit.
- This water filtration system does not reduce TDS concentration.
- The system may require drilling a hole into the sink or countertop for faucet installation.
- Always shut off the water supply and drain remaining water from the system before performing any maintenance.
- Use only authorized iSpring parts. Using unauthorized or aftermarket components will void the product warranty.
- It is recommended that users check external fittings and connections regularly to ensure all components are secure and operating properly.
- Unauthorized modification or disassembly are strictly prohibited and will void the warranty.
- This system is not intended for use by persons (including children) with reduced physical, sensory or mental capabilities or lack of experience and knowledge unless they have been given supervision or instruction concerning the use of the appliance by a person responsible for their safety. Children should be supervised to ensure that they do not play with the appliance.
3. Product Overview
The iSpring US31 is a tankless, high-capacity 3-stage under sink water filtration system designed for drinking water. It features a European-designed brushed nickel all-metal faucet and a clear see-through first-stage housing for easy filter inspection.
3.1 Filtration Stages
- Stage 1: PP Sediment Filter (FP15): Removes dust, sand, particles, dirt, and rust. Protects and extends the life of subsequent filters.
- Stage 2: GAC Carbon Filter (FG15): Further removes chlorine, tastes, odors, and organic compounds.
- Stage 3: CTO Carbon Block Filter (FC15): Provides final filtration for fine sediments, chlorine, and other contaminants, improving water clarity and taste.
3.2 Key Features
- NSF Certified: Manufactured to comply strictly with FDA standards and tested by independent third party against NSF/ANSI standards (42, 53, 61) for water quality, material safety, and structural integrity.
- High Flow Rate: Up to 1 GPM (gallons per minute) depending on source water pressure.
- Tankless Design: Saves space under the sink.
- No Electricity Needed: Operates without electrical power.
- Zero Waste Water: Efficient filtration process.
- Brushed Nickel Faucet: Durable all-metal faucet with European design.
- Easy Installation & Maintenance: Designed for hassle-free setup and filter changes.

Figure 1: iSpring US31 3-Stage Under Sink Water Filtration System components.
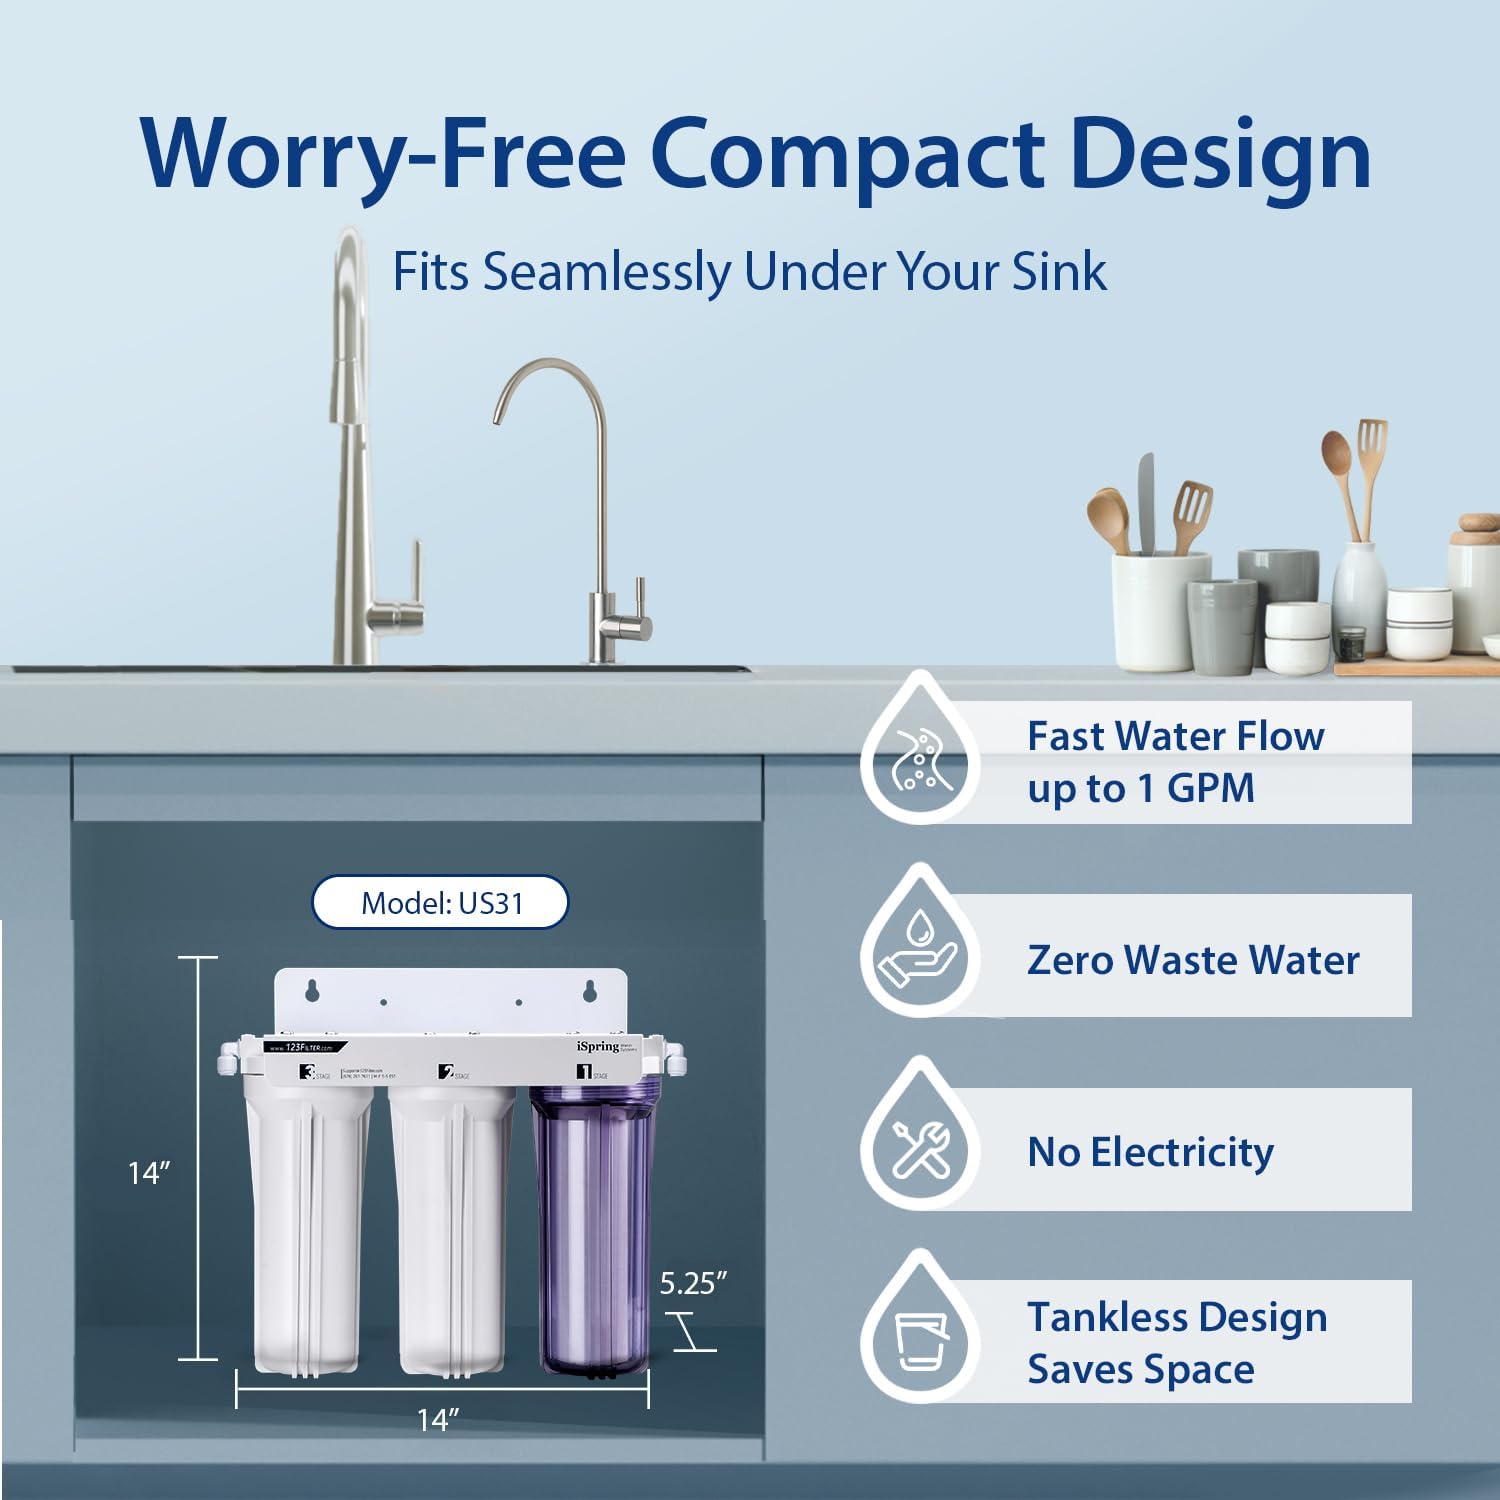
Figure 2: Compact design of the iSpring US31 system, fitting seamlessly under the sink. Dimensions: 14"L x 5.25"W x 14"H.
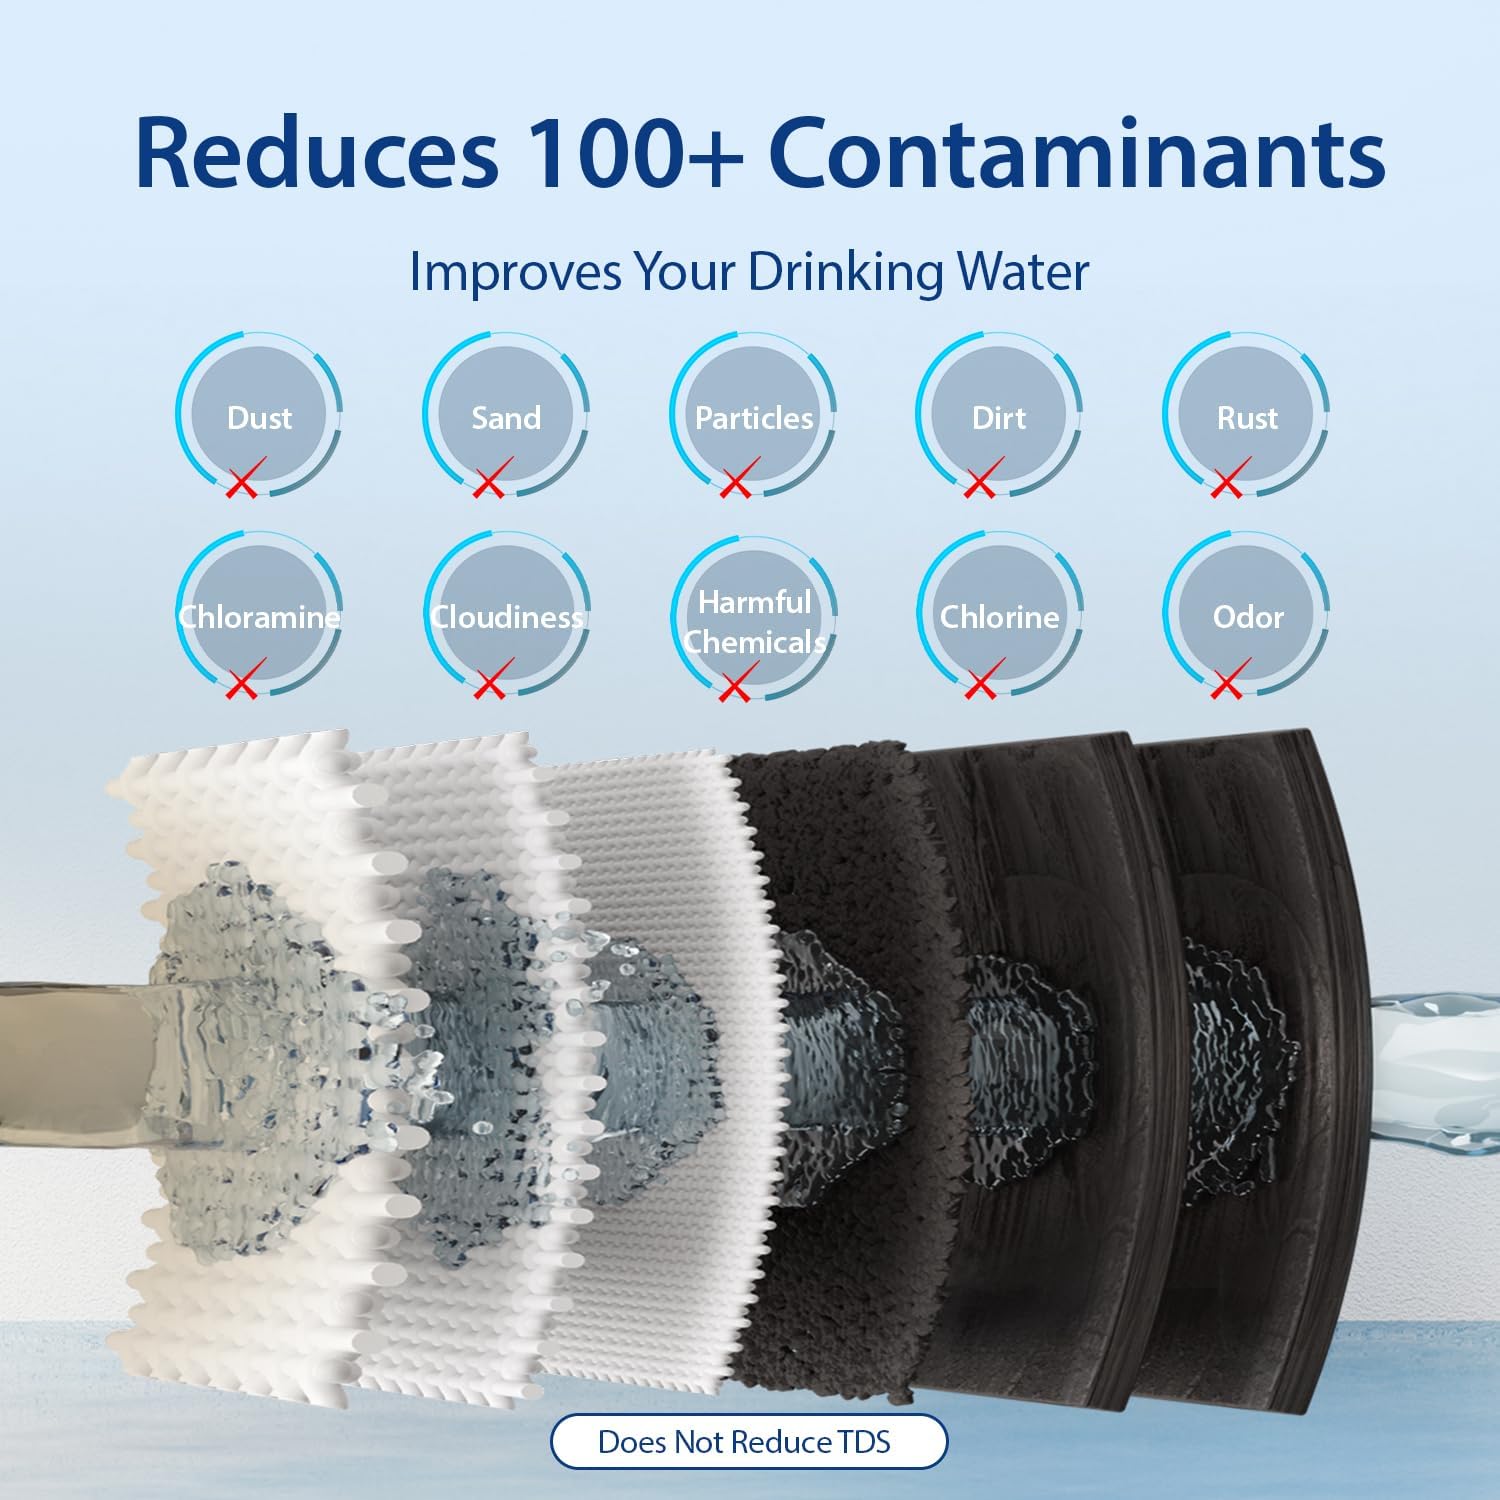
Figure 3: Diagram illustrating the reduction of various contaminants by the iSpring US31 system, including dust, sand, particles, dirt, rust, chloramine, cloudiness, harmful chemicals, chlorine, and odor. Note: Does not reduce TDS.
4. Package Contents
Please ensure all parts are included in your package before beginning installation:
- iSpring US31 System and Housing (3-stage filter housing with mounting bracket)
- Filters: PP Sediment (FP15), GAC Carbon (FG15), CTO Carbon Block (FC15)
- Brushed Nickel Drinking Faucet
- Feed Water Adapter
- Fittings and Tubing (1/4" tubing, quick connect fittings, locking clips)
- Plumber's Tape
- Housing Wrench
- Faucet Hanger
5. Required Tools
The following tools are recommended for installation:
- Flashlight
- Spanner Wrench
- Utility Knife
- Towels
- Drill (if no pre-existing faucet hole)
6. Setup and Installation
Before starting, ensure the area under your sink is clean and clear. Watch the official installation video for a visual guide:
Video 1: iSpring US31 3-Stage Under-Sink Water Filter Installation Guide. This video provides a step-by-step visual walkthrough of the installation process for the iSpring US31 system.
6.1 Feed Water Adapter Installation
- Turn off Water Supply: Turn off the cold-water supply valve located under the sink. Turn on the kitchen faucet to drain any remaining water and release pressure from the connector hose.
- Disconnect Faucet Hose: Unscrew the faucet connector hose from the cold-water supply valve. Have a towel ready to catch any excess water.
- Install Feed Water Adapter: Install the feed water adapter to the cold-water supply valve. Ensure the O-ring is properly seated inside the adapter to prevent leaks. Tighten with a wrench.
- Reconnect Faucet Hose: Reinstall the faucet connector hose to the feed water adapter and tighten it with a wrench.
- Connect Tubing: Turn the feed water valve to the OFF position. Insert the 1/4" tubing half an inch deep into the quick-connect fitting of the feed water adapter. Then, insert a C-clip to lock the tubing in place. Measure and cut the tube, ensuring enough length for future maintenance.
6.2 Drinking Faucet Installation
Choose a suitable flat surface on the sink or countertop to install the drinking faucet. If your kitchen sink does not have a pre-existing hole, you will need to drill one (1/2-inch to 1 1/2-inch diameter).
- Prepare Area: Clean and dry the sinkhole area.
- Assemble Faucet (Top Side): Insert the front plate, then the rubber washer, into the faucet base.
- Insert Faucet: Insert the faucet into the sinkhole.
- Assemble Faucet (Under Sink): From under the sink, insert the rubber washer, followed by the wing nut, onto the faucet stem. Tighten the wing nut to secure the faucet.
- Connect Tubing to Faucet: Insert the 1/4" tubing into the quick-connect fitting at the bottom of the faucet stem, half an inch deep. Insert a C-clip to secure the tubing in place. Measure and cut the tubing, ensuring enough length for future maintenance.
6.3 System Unit Installation
- Unwrap Filters: Unscrew Stage 1, 2, and 3 filter housings. Take out and unwrap all filters.
- Insert Filters: Insert the filters back into their housings. Ensure the housing O-rings are properly seated to prevent leaks.
- Tighten Housings: Twist the housings counter-clockwise onto the housing caps. Use the housing wrench to tighten each housing another 1/4 to 1/2 of a turn. DO NOT OVER TIGHTEN as this can cause leaks and make future filter replacement difficult.
- Install Elbow Fittings: Install the elbow fitting to the system inlet port (marked 'IN'). Install the other elbow fitting to the system outlet port (marked 'OUT' or 'FAUCET'). Do not over tighten these fittings.
- Connect Tubing to System: Insert the tubing from the feed water adapter to the system water inlet fitting. Insert the tubing from the drinking water faucet to the system water outlet fitting. Ensure all tubing is inserted 1/2-inch deep into the fittings to prevent leaks. Lock the tubing in place by inserting a C-clip.
- Final Water Supply Activation: Turn on the cold-water supply valve and slowly turn on the feed water valve. Let the water fill the system and flush the filters for at least 5 minutes. Check all connections for leaks. Shut off the drinking water faucet when finished.

Figure 4: Diagram showing easy DIY installation of the iSpring US31 system under the sink.
7. Operating Instructions
Once installed, your iSpring US31 system is ready for use. Simply turn on the dedicated drinking water faucet to dispense filtered water. For optimal performance and taste, it is recommended to flush the system for a few minutes if it has not been used for an extended period.
7.1 Connecting to a Refrigerator (Optional)
You can connect your iSpring US31 system to your refrigerator's ice maker or water dispenser using an iSpring Ice Maker Kit (ICEK), sold separately. This provides crystal clear, odor-free ice cubes and filtered water directly from your refrigerator, eliminating the need for a separate fridge water filter.
Video 2: iSpring ICEK Fridge Water Line and Ice Maker Connection Kit. This video demonstrates how to connect your iSpring filtration system to a refrigerator for filtered water and ice.
8. Maintenance (Filter Replacement)
Regular filter replacement is crucial for maintaining the performance and water quality of your iSpring US31 system. Each filter has a recommended service life:
- PP Sediment Filter (FP15): Replace every 6 months.
- GAC Carbon Filter (FG15): Replace every 12 months.
- CTO Carbon Block Filter (FC15): Replace every 12 months.
Note: Filter lifespan may vary depending on source water quality and usage.
8.1 Filter Replacement Steps
- Shut off Water & Release Pressure: Shut off the water inlet from the feed water adapter. Turn on the drinking water faucet to release pressure from the system.
- Unscrew Housing: Unscrew the filter housing(s) using the housing wrench by turning it clockwise. Have a bucket or towel ready to catch any water.
- Remove & Dispose: Take out and dispose of the exhausted filter(s).
- Insert New Filter(s): Unwrap the new filter(s). Insert the new filter(s) back into their housings in the proper order. Ensure the housing O-rings are properly seated to prevent leaks.
- Tighten Housing(s): Twist the housing(s) counter-clockwise onto the housing caps. Use the housing wrench to tighten each housing another 1/4 to 1/2 of a turn. DO NOT OVER TIGHTEN.
- Restore Water Supply & Flush: Slowly turn on the feed water valve. Let the water fill the system and flush the filters for at least 5 minutes. Check all connections for leaks. Shut off the drinking water faucet when finished.

Figure 5: Replacement Instructions Step 1: Turn off cold water valve and open faucets.

Figure 6: Replacement Instructions Step 2: Remove the filter housing with the wrench.

Figure 7: Replacement Instructions Step 3: Install the new filter.

Figure 8: Replacement Instructions Step 4: Open the valve and rinse for 5 minutes.
9. Troubleshooting
| Problem | Possible Cause | Solution |
|---|---|---|
| Water Leakage | Loose fittings, improperly seated O-rings, cracked housing. | Tighten all fittings. Check and reseat O-rings. Replace cracked components. |
| Low Water Flow | Clogged filters, low incoming water pressure. | Replace filters. Check incoming water pressure and consider a booster pump if needed. |
| Bad Taste/Odor | Exhausted carbon filters. | Replace GAC and CTO carbon filters. |
| Cloudy Water | New filters releasing air, sediment filter exhausted. | Flush system for longer. Replace sediment filter. |
9.1 Leak Stop Valve (Optional)
An iSpring Leak Stop Valve can automatically shut off the inlet water from entering the water system if it detects a leak, effectively protecting your home from water damage. The valve is highly sensitive to water, so install it with extra caution. The leakstop pad inside the valve will easily absorb water and expand, requiring replacement every time it comes into contact with water.
Video 3: iSpring Leak Stop Valve Installation Guide. This video provides instructions for installing an optional leak stop valve with your filtration system.
10. Specifications
| Parameter | Specification |
|---|---|
| Brand | iSpring |
| Model Name | US31 |
| Special Feature | Tankless water filtration system |
| Product Dimensions | 13"L x 5.3"W x 14.2"H |
| Installation Type | Under Sink |
| Maximum Flow Rate | 1 Gallon Per Minute |
| Upper Temperature Rating | 100 Degrees Fahrenheit |
| Minimum Inlet Water Pressure | 30 psi |
| Maximum Inlet Water Pressure | 70 psi |
| Incoming Water Temperature | 40 - 100 °F |
| Item Weight | 11.99 pounds (5.45 Kilograms) |
| UPC | 662425095681 |
11. Warranty and Support
The iSpring US31 Water Filtration System is backed by a 1-year Manufacturer Warranty with lifetime support from Atlanta, GA, USA. iSpring is committed to providing high-quality drinking water solutions and stands behind its products with dedicated customer support.
For any issues, concerns, or questions regarding your iSpring US31 system, please do not hesitate to contact iSpring customer service:
- Phone: (678) 261-7611 (M-F 9-5 EST)
- Email: support@iSpringFilter.com
- Website: www.iSpringFilter.com

Figure 9: iSpring's commitment to product quality, customer support, and warranties.
Related documentsUS31


Ask a question about this manual
Ask about setup, troubleshooting, compatibility, parts, safety, or missing instructions. Manuals+ will review the question and use this page’s manual context to help answer it.