1. Introduction
The NUX JTC Mini is a compact guitar looper pedal with an integrated drum machine, designed to provide musicians with a powerful tool for practice, songwriting, and live performance. It features 24-bit audio quality, up to 6 minutes of recording time, and an intelligent drum machine that automatically syncs its tempo to your recorded loops.
2. Safety Information
- Power Supply: Use only a regulated 9V DC power adapter (center negative) with sufficient current capacity. Incorrect power supplies can damage the unit.
- Environment: Do not expose the unit to water, moisture, extreme temperatures, or direct sunlight. Avoid using in dusty or dirty environments.
- Handling: Do not drop or subject the unit to strong impacts. Do not attempt to disassemble or modify the unit.
- Cleaning: Clean only with a soft, dry cloth. Do not use liquid cleaners.
3. Package Contents
- NUX JTC Mini Guitar Looper Drum Machine Pedal
- User Manual
4. Product Overview
4.1 Controls and Indicators

Image 1: Front view of the NUX JTC Mini pedal, showing the LEVEL and SELECT knobs, DRUM button, and footswitch.
- LEVEL Knob: Adjusts the overall output volume of the pedal, affecting both the loop and drum machine.
- SELECT Knob: Used to choose from various drum patterns/genres (e.g., CTRY, ROCK, FNK, R&B, LAT, POP, BLU, MT, BEAT, DAC, BALD).
- DRUM Button: Activates or deactivates the drum machine.
- DRUM LED: Indicates the status of the drum machine (e.g., on/off).
- Footswitch: The primary control for recording, playing, overdubbing, stopping, undoing, redoing, and clearing loops.
- STATUS LED (above footswitch): Indicates the current status of the looper (e.g., recording, playing, stopped, overdubbing).
4.2 Input/Output Ports
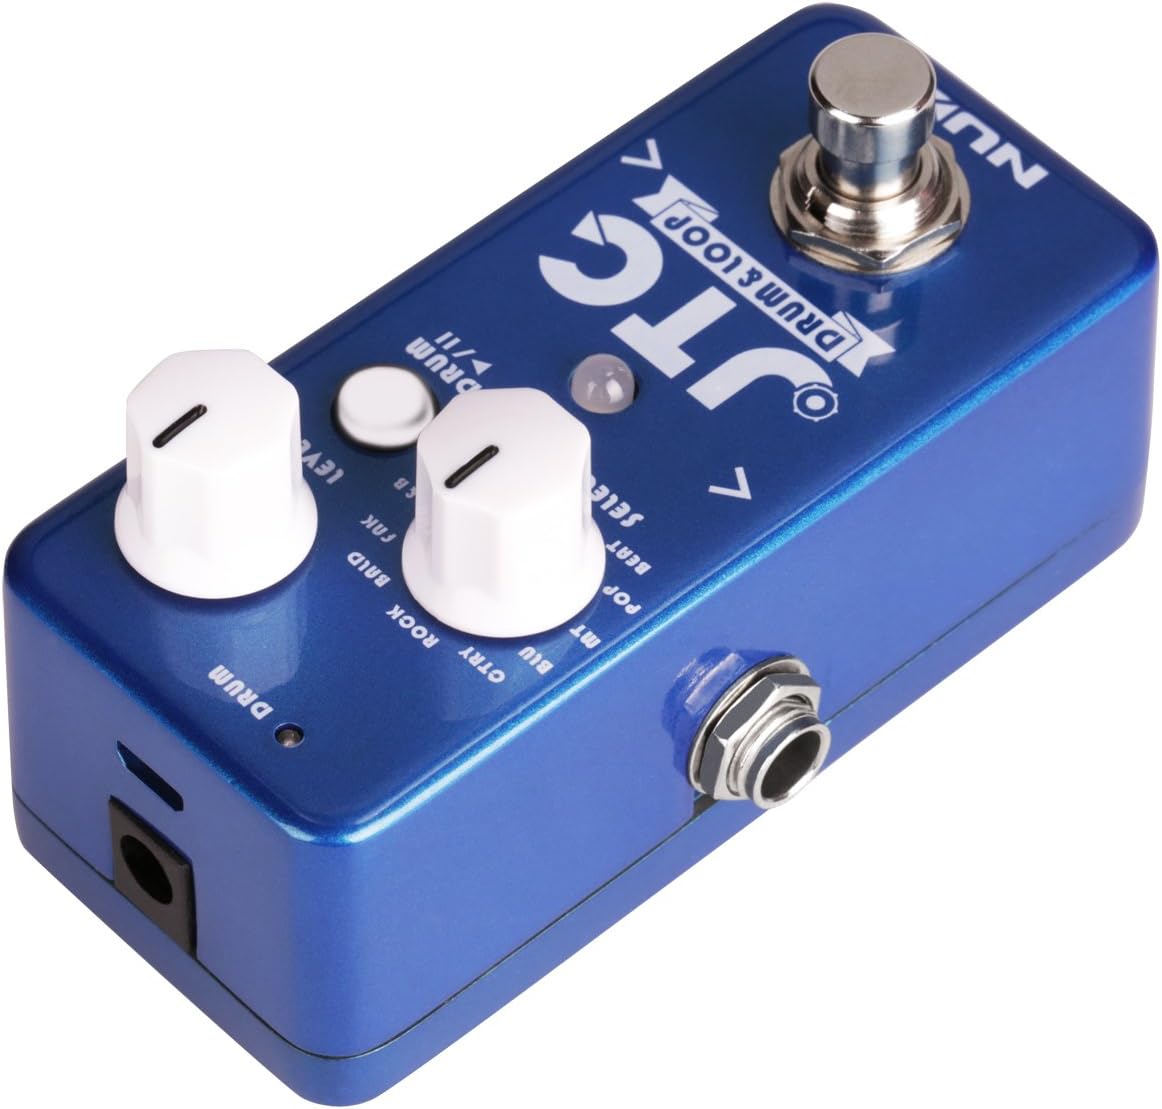
Image 2: Side view of the NUX JTC Mini pedal, showing the input and output jacks.
- INPUT Jack: Connect your guitar or other instrument to this 1/4-inch mono jack.
- OUTPUT Jack: Connect this 1/4-inch mono jack to your amplifier or other effects pedals.
- DC IN Jack: Connect a 9V DC (center negative) power adapter here.
5. Setup
- Ensure the pedal is placed on a stable surface.
- Connect your guitar or instrument to the INPUT jack of the JTC Mini.
- Connect the OUTPUT jack of the JTC Mini to your amplifier or the input of the next pedal in your signal chain.
- Connect a 9V DC (center negative) power adapter to the DC IN jack. The pedal will power on automatically.
- Adjust the LEVEL knob to a suitable starting position, typically around the middle.
6. Operating Instructions
6.1 Looping Functions
- Record: Press the footswitch once. The STATUS LED will turn red, indicating recording has started.
- Play: After recording your first loop, press the footswitch once more. The STATUS LED will turn green, and your loop will begin to play.
- Overdub: While a loop is playing (STATUS LED green), press the footswitch once. The STATUS LED will turn red/green (or blink), indicating overdubbing. Play your additional part. Press the footswitch again to stop overdubbing and return to playback.
- Stop: Double-press the footswitch quickly. The loop will stop, and the STATUS LED will turn off.
- Undo/Redo: While a loop is playing, press and hold the footswitch for approximately 1 second to undo the last overdub. Press and hold again to redo it.
- Clear Loop: While the looper is stopped (STATUS LED off), double-press and hold the footswitch for approximately 1 second. The STATUS LED will blink rapidly, then turn off, indicating the loop has been cleared.
6.2 Drum Machine Functions
- Activate/Deactivate: Press the DRUM button to turn the drum machine on or off. The DRUM LED will illuminate when active.
- Select Drum Style: Turn the SELECT knob to cycle through the available drum patterns.
- Tempo Synchronization: The JTC Mini's drum machine automatically detects the tempo of your recorded loop and adjusts its playback speed accordingly. There is no manual tempo control for the drum machine.
- Drum Volume: The drum volume is controlled by the main LEVEL knob, which affects both loop and drum output.
6.3 Saving and Deleting Loops
The JTC Mini automatically saves your last recorded loop when the pedal is powered off. This means your most recent loop will be available when you power the unit back on. To permanently remove a loop, you must manually clear it using the 'Clear Loop' function described above.
7. Maintenance
- Cleaning: Use a soft, dry cloth to wipe the pedal's surface. Avoid abrasive cleaners or solvents.
- Storage: When not in use for extended periods, disconnect the power supply and store the pedal in a cool, dry place away from direct sunlight.
- Jacks and Knobs: Periodically check input/output jacks and knobs for any looseness or debris.
8. Troubleshooting
| Problem | Possible Cause | Solution |
|---|---|---|
| No sound output. | Incorrect cable connections, power issue, LEVEL knob too low. | Check all cable connections. Ensure power adapter is correctly connected. Increase the LEVEL knob. |
| Loop not recording or playing. | Incorrect footswitch operation. | Refer to 'Looping Functions' section for correct footswitch presses. |
| Drum machine not working. | Drum machine is off, LEVEL knob too low. | Press the DRUM button to activate. Increase the LEVEL knob. |
| Distorted sound. | Input signal too hot, LEVEL knob too high. | Reduce the output volume from your guitar or previous pedal. Lower the JTC Mini's LEVEL knob. |
9. Specifications
| Feature | Detail |
|---|---|
| Audio Quality | 24-bit |
| Recording Time | Up to 6 minutes |
| Power Source | 9V DC (center negative) |
| Item Weight | 8.8 ounces (approx. 250g) |
| Product Dimensions | 2.56 x 2.6 x 4.61 inches (approx. 6.5 x 6.6 x 11.7 cm) |
| Color | Blue, Silver |
10. Warranty and Support
NUX products are designed and manufactured to high-quality standards. For information regarding warranty coverage, technical support, or service, please refer to the official NUX website or contact your authorized NUX dealer. Please retain your proof of purchase for warranty claims.


