
RICH SOLAR RS-MPPT20
RICH SOLAR 20A MPPT Solar Charge Controller User Manual
Model: RS-MPPT20
1. Introduction
The RICH SOLAR 20 Amp MPPT Solar Charge Controller is an advanced, efficient device designed to manage power flow from your solar panels to your battery bank. Utilizing Maximum Power Point Tracking (MPPT) technology, it optimizes energy harvest from your solar array, ensuring maximum charging efficiency for various battery types. This controller automatically detects 12V or 24V DC system voltages and offers robust electronic protections for safe and reliable operation.
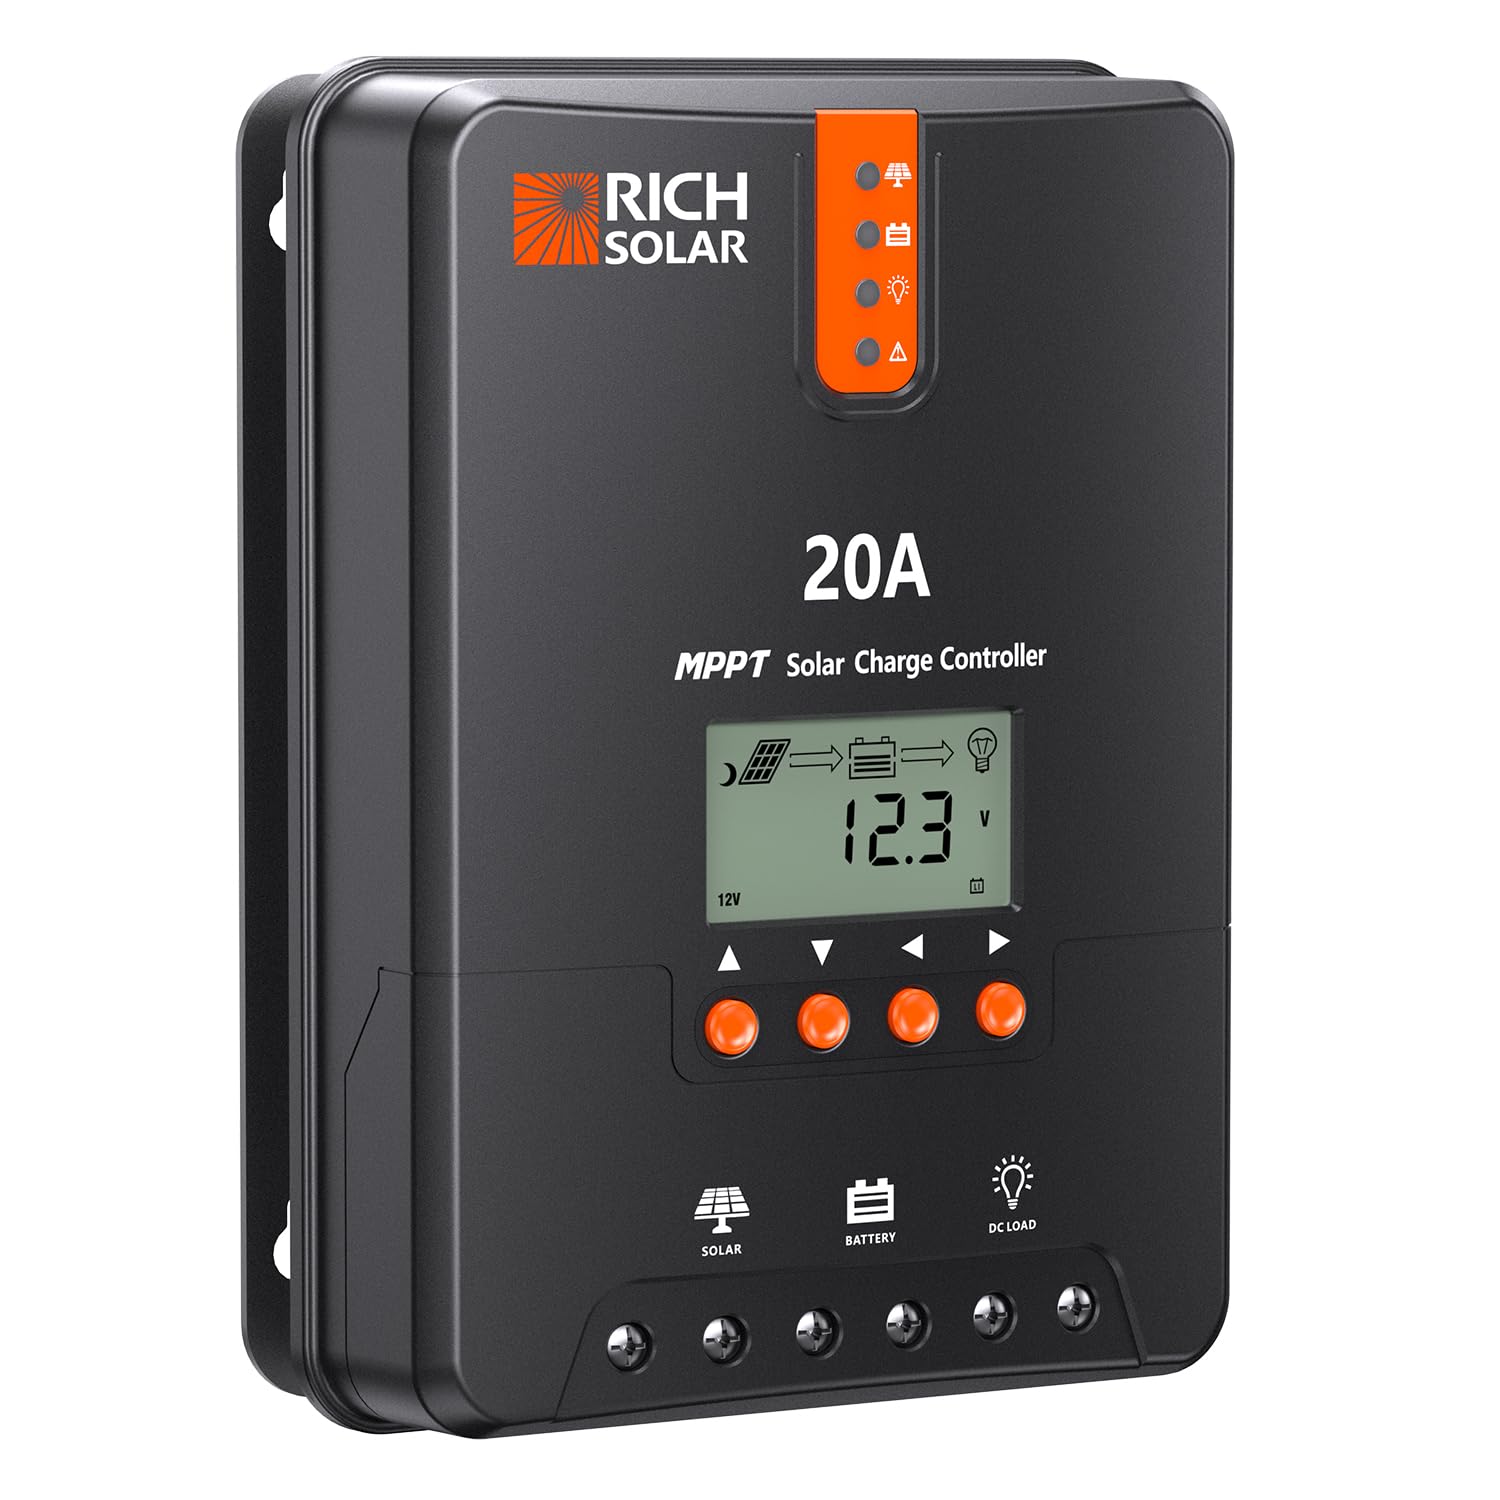
Figure 1.1: Front view of the RICH SOLAR 20A MPPT Solar Charge Controller, showing the LCD display and control buttons.
Key Features:
- Battery Compatibility: Supports Sealed, Gel, Flooded, and Lithium deep cycle battery options.
- Automatic Voltage Detection: Automatically detects 12V or 24V DC system voltages.
- High Efficiency MPPT: Innovative MPPT technology with up to 99% tracking efficiency and 98% peak conversion efficiency.
- Comprehensive Protection: Includes electronic protection against overcharging, over-discharging, overload, short circuit, and reverse polarity.
- Durable Design: Die-cast aluminum housing for effective heat dissipation and enhanced durability.
- Temperature Sensor: Capable of measuring battery temperature for optimized charging.
- Communication Port: RS232 port for communication with the BT-1 Bluetooth module, enabling smartphone app connectivity.
2. Setup and Installation
Proper installation is crucial for the safe and efficient operation of your MPPT solar charge controller. Please follow these steps carefully.
2.1 Safety Precautions
- Ensure all power sources are disconnected before installation.
- Wear appropriate personal protective equipment (PPE), including safety glasses and insulated gloves.
- Install the controller in a well-ventilated area, away from flammable materials and direct sunlight.
- Ensure proper grounding of the system.
2.2 Mounting the Controller
Mount the controller vertically on a flat, non-flammable surface to allow for adequate airflow and heat dissipation. Ensure there is sufficient space around the unit for wiring and ventilation.

Figure 2.1: Product dimensions for mounting, showing approximate measurements of 8.27 inches length, 5.94 inches width, and 2.34 inches height.
2.3 Wiring Connections
Follow the connection order below to prevent damage to the controller or other components. Always connect the battery first, then the solar panel, and finally the DC load.
- Connect the Battery: Connect the positive and negative terminals of your battery bank to the corresponding "BAT+" and "BAT-" terminals on the charge controller. Ensure correct polarity. The controller will automatically detect the 12V or 24V system voltage.
- Connect the Solar Panel: Connect the positive and negative terminals of your solar panel array to the "PV+" and "PV-" terminals on the charge controller. Ensure correct polarity.
- Connect the DC Load (Optional): If using, connect your DC load to the "LOAD+" and "LOAD-" terminals.

Figure 2.2: Illustration of the solar charge controller connected to a solar panel and a battery, demonstrating the wiring setup for reliable MPPT power.

Figure 2.3: A user interacting with the controller, highlighting the ease of connection and setup.
3. Operating Instructions
Once installed, the RICH SOLAR MPPT charge controller operates largely automatically. This section details its key operational aspects.
3.1 LCD Display and Buttons
The integrated LCD display provides real-time information about your solar system, including battery voltage, charging current, and system status. The buttons below the display allow for navigation through menus and adjustment of settings.
3.2 Charging Stages
The controller employs a 4-stage charging algorithm to optimize battery health and longevity:
- Bulk Charging: Delivers maximum current to rapidly charge the battery.
- Boost Charging: Charges the battery to a higher voltage to ensure a full charge.
- Floating Charging: Maintains the battery at a constant voltage, compensating for self-discharge.
- Equalization (for certain battery types): Periodically overcharges the battery to balance cell voltages.

Figure 3.1: A graph depicting the 4-stage charging process (Fast, Sustaining, Floating, and Boost) for extended battery life.
3.3 Battery Temperature Compensation
The controller includes a temperature sensor to adjust charging parameters based on battery temperature, ensuring optimal and safe charging in varying environmental conditions (cold and heat).

Figure 3.2: The controller connected to a battery with a smart temperature sensor, illustrating its ability to compensate for cold and heat.
3.4 Battery Type Selection
The controller is compatible with various deep cycle battery types. Ensure the correct battery type (Sealed, Gel, Flooded, or Lithium) is selected in the controller's settings for proper charging. Refer to the detailed settings menu in the full manual for specific instructions on changing battery types.

Figure 3.3: The controller shown with different battery types (Li, SLD, GEL, FLD, AGM), indicating its compatibility with multiple 12V/24V batteries.
3.5 Bluetooth Connectivity
The RS232 port allows communication with the optional BT-1 Bluetooth module. Once connected, you can pair the module with a smartphone app to monitor system performance and adjust settings remotely.
4. Maintenance
Regular maintenance ensures the longevity and optimal performance of your RICH SOLAR MPPT charge controller.
- Cleanliness: Keep the controller clean and free from dust and debris. Use a dry cloth for cleaning.
- Connections: Periodically check all wiring connections to ensure they are tight and free from corrosion. Loose connections can lead to overheating and poor performance.
- Ventilation: Ensure that the ventilation openings are not obstructed to allow for proper heat dissipation.
- Environmental Check: Verify that the installation environment remains within the recommended temperature and humidity ranges.
5. Troubleshooting
This section provides guidance on common issues you might encounter. For more complex problems or error codes not listed, please refer to the comprehensive user manual or contact RICH SOLAR support.
| Problem | Possible Cause | Solution |
|---|---|---|
| Controller not powering on | No battery connection or low battery voltage. | Check battery connections and ensure battery voltage is above the minimum operating voltage. |
| No charging from solar panels | Solar panel disconnected, insufficient sunlight, or incorrect polarity. | Verify solar panel connections, ensure adequate sunlight, and check polarity. |
| Battery not fully charging | Incorrect battery type setting, undersized solar array, or battery degradation. | Confirm battery type setting, consider adding more solar panels, or test battery health. |
| Error Code E15 (or similar) | Specific system fault (e.g., battery overcharged, internal error). | Refer to the full manual for specific error code definitions and troubleshooting steps. Often, disconnecting and reconnecting the battery can reset minor errors. If persistent, contact support. |
Intelligent Protection Features:
The controller is equipped with multiple protection mechanisms to ensure system safety:
- Over-discharging Protection
- Overcharging Protection
- Overload Protection
- Short Circuit Protection
- Reverse Polarity Protection
- Reverse Current Protection
- Temperature Compensation

Figure 5.1: Visual representation of the intelligent protection features, including over-discharging, overcharging, overload, short circuit, reverse polarity, reverse current, and temperature compensation.
6. Specifications
Technical specifications for the RICH SOLAR 20A MPPT Solar Charge Controller (Model: RS-MPPT20).
| Parameter | Value |
|---|---|
| Nominal System Voltage | 12V/24V Auto Recognition |
| Rated Battery Current | 20A |
| Rated Load Current | 20A |
| Max. PV Input Short Current | 25A |
| Max. Battery Voltage | 32V |
| Max Solar Input Voltage | 100 VDC |
| Mounting Oval | 0.30 x 0.18 in |
| Net Weight | 1.4 kg (3.08 lb) |
| Discharge Circuit Voltage Drop | ≤ 0.15V |
| Overall Dimension (L x W x H) | 20.98 x 15.09 x 5.94 cm (8.27 x 5.94 x 2.34 inches) |
| Material | Aluminium |
| Colour | Black |

Figure 6.1: A visual summary of the key specifications for the RICH SOLAR 20A MPPT Solar Charge Controller.
7. Warranty and Support
RICH SOLAR is committed to providing high-quality products and excellent customer service.
7.1 Warranty Information
For detailed warranty terms and conditions, please refer to the official RICH SOLAR website or the warranty card included with your product. The warranty typically covers manufacturing defects and ensures the product meets its specified performance standards.
7.2 Customer Support
If you have any questions, require technical assistance, or need to report an issue, please contact RICH SOLAR customer support. RICH SOLAR offers dedicated U.S. support to assist you.
- Online Resources: Visit the official RICH SOLAR website for FAQs, additional manuals, and product information.
- Contact Information: Refer to the product packaging or the RICH SOLAR website for the most current contact details (phone, email, or live chat).

Figure 7.1: Images showcasing the RICH SOLAR team and facilities, emphasizing their commitment to American design and dedicated support.


Figure 7.2: Information about RICH SOLAR's company background and mission to make renewable energy accessible.
Related documentsRS-MPPT20


Ask a question about this manual
Ask about setup, troubleshooting, compatibility, parts, safety, or missing instructions. Manuals+ will review the question and use this page’s manual context to help answer it.