1. Introduction
Thank you for choosing maXpeedingrods Coilover Suspension Kit. This manual provides essential information for the proper installation, adjustment, and maintenance of your new coilovers. Designed for Mazda 3 BK (2004-2009), Mazda 3 BL (2009-2013), and Mazdaspeed 3 models, these coilovers offer adjustable ride height and improved handling characteristics. Please read this manual thoroughly before proceeding with installation or adjustments.
2. Safety Information
WARNING: Installation of suspension components should only be performed by qualified professionals. Improper installation can lead to serious injury, vehicle damage, or loss of vehicle control. Always wear appropriate personal protective equipment (PPE) including safety glasses and gloves.
- Ensure the vehicle is securely supported on jack stands or a lift before beginning any work.
- Never work under a vehicle supported only by a jack.
- Disconnect the battery before working on any electrical components.
- Use appropriate tools for each step.
- Refer to your vehicle's service manual for specific torque specifications and procedures.
- After installation, perform a full alignment of the vehicle.
- Test drive the vehicle carefully in a safe area to ensure proper function before regular use.
3. Package Contents
Verify that all components are present and undamaged before beginning installation. If any parts are missing or damaged, contact maXpeedingrods customer support immediately.
- Front Coilover Assemblies (2)
- Rear Shock Absorbers (2)
- Rear Springs (2)
- Adjustment Wrenches (2)
- Instruction Manual (this document)

Image: A pair of maXpeedingrods coilovers, showing the front strut assemblies.

Image: A pair of maXpeedingrods rear shock absorbers.
4. Specifications
| Feature | Specification |
|---|---|
| Model Number | FM50TZ |
| Fitment | Mazda 3 BK (2004-2009), Mazda 3 BL (2009-2013), Mazdaspeed 3 |
| Spring Rate Front | 10 kg/mm (560 lbs/in) |
| Spring Rate Rear | 7 kg/mm (392 lbs/in) |
| Spring Preload | 7-10 mm (recommended) |
| Height Adjustment Range | 1-3 inches lowering from stock height |
| Structure | Twin-tube |
| Material | 6061 Aluminum Alloy with T6 treatment |
| Item Weight | Approximately 59.8 pounds (total package) |
| Product Dimensions | 24.8 x 20.08 x 8.27 inches (package) |
Note: These coilovers are designed to lower your vehicle and will not maintain original ride height.
5. Installation Guide (Setup)
This section provides a general overview of the installation process. It is highly recommended that installation be performed by a certified automotive technician. Refer to your vehicle's specific service manual for detailed removal and installation procedures for your model.
5.1. Pre-Installation
- Park the vehicle on a level, solid surface.
- Engage the parking brake.
- Loosen the lug nuts on all wheels.
- Safely lift the vehicle using a hydraulic lift or jack stands. Ensure the vehicle is stable and secure.
- Remove the wheels.
- Clean the area around the existing suspension components to prevent dirt from entering critical parts.
5.2. Front Coilover Installation
- Remove OEM Strut:
- Disconnect any brake lines or ABS sensor wires attached to the strut assembly.
- Remove the bolts securing the lower strut mount to the steering knuckle.
- Open the hood and locate the upper strut tower nuts. Remove these nuts.
- Carefully remove the entire OEM strut assembly from the vehicle.
- Install maXpeedingrods Front Coilover:
- Insert the new coilover assembly into the strut tower from below.
- Secure the upper mount with the provided nuts (or reuse OEM if specified). Do not fully tighten yet.
- Align the lower mount of the coilover with the steering knuckle. It may be necessary to use a jack to slightly raise the lower control arm to align the holes.
- Insert and tighten the lower mounting bolts to the manufacturer's specified torque.
- Reconnect any brake lines or ABS sensor wires.
- Fully tighten the upper strut tower nuts to the manufacturer's specified torque.

Image: A single maXpeedingrods front coilover assembly.
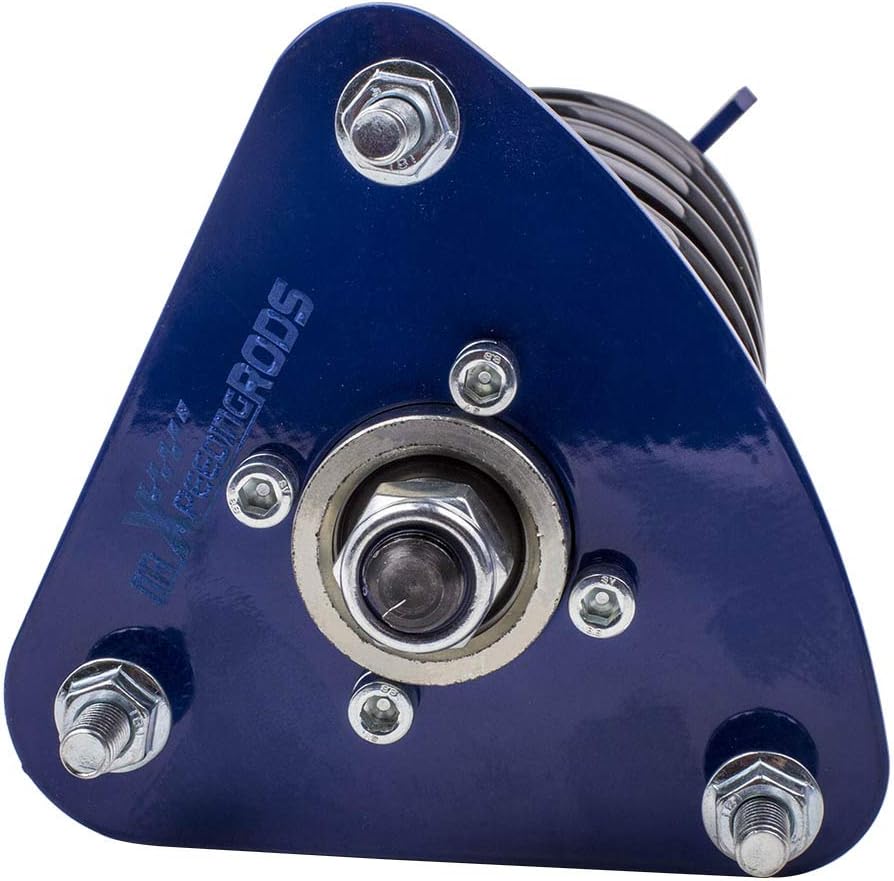
Image: Detail of the maXpeedingrods coilover top mount.
5.3. Rear Shock Absorber and Spring Installation
- Remove OEM Components:
- Support the rear suspension arm with a jack.
- Remove the lower shock absorber bolt.
- Remove the upper shock absorber bolts from inside the trunk or under the vehicle.
- Carefully lower the suspension arm to relieve tension on the spring and remove the OEM spring.
- Remove the OEM shock absorber.
- Install maXpeedingrods Rear Components:
- Install the new maXpeedingrods rear spring into its perch.
- Install the new maXpeedingrods rear shock absorber, securing the upper mount first.
- Raise the suspension arm with a jack to align the lower shock mount and insert the bolt. Tighten to the manufacturer's specified torque.
- Ensure the spring is properly seated in its upper and lower perches.

Image: A single maXpeedingrods rear shock absorber.

Image: Exploded view of front coilover and rear shock absorber components.
5.4. Post-Installation
- Reinstall the wheels and tighten lug nuts to factory specifications.
- Lower the vehicle completely.
- Bounce the vehicle a few times to settle the suspension.
- Re-check all bolts and nuts for proper torque.
- Important: A professional wheel alignment is required immediately after suspension installation to ensure proper handling and tire wear.
6. Adjustment & Tuning (Operating)
maXpeedingrods coilovers allow for ride height adjustment. Damping adjustment is not a feature of this specific model (FM50TZ) as indicated by the product description.
6.1. Ride Height Adjustment
The ride height can be adjusted by rotating the lower spring perch on the coilover body. This model allows for 1-3 inches of lowering from the original ride height.
- Lift the vehicle safely to relieve pressure from the suspension.
- Loosen the locking collar above the lower spring perch using the provided adjustment wrenches.
- Rotate the lower spring perch to raise or lower the vehicle.
- Turning clockwise (up) will raise the vehicle.
- Turning counter-clockwise (down) will lower the vehicle.
- Ensure both sides of the vehicle (front or rear) are adjusted equally to maintain an even ride height.
- Once the desired height is achieved, tighten the locking collar securely against the spring perch.
- Lower the vehicle and check the ride height. Repeat adjustment if necessary.
- After any height adjustment, a wheel alignment is recommended.

Image: Detail of the coilover body with adjustment collars for ride height.
7. Maintenance
Regular inspection and maintenance will prolong the life and performance of your maXpeedingrods coilovers.
- Regular Inspection: Periodically inspect all suspension components for signs of wear, damage, or corrosion. Check for leaks from the shock absorbers.
- Bolt Torque: Re-check the torque of all mounting bolts and nuts after the first 500 miles of driving and then every 5,000-10,000 miles.
- Cleaning: Keep the coilover threads and adjustment collars clean from dirt and debris. Use a mild soap and water solution. Avoid harsh chemicals that may damage finishes or seals.
- Lubrication: Apply a thin layer of anti-seize lubricant to the coilover threads during initial installation and periodically during maintenance to prevent seizing and ease future adjustments.
- Alignment: Maintain proper wheel alignment, especially after any significant height adjustments.
8. Troubleshooting
If you experience any issues with your maXpeedingrods coilovers, refer to the following common problems and solutions. If the problem persists, contact professional assistance or maXpeedingrods customer support.
| Problem | Possible Cause | Solution |
|---|---|---|
| Excessive Bounciness / Harsh Ride | Incorrect spring preload, damaged shock absorber, improper installation. | Check spring preload (7-10mm recommended). Inspect shocks for leaks or damage. Verify all mounting points are secure. Professional inspection recommended. |
| Clunking / Knocking Noises | Loose mounting bolts, worn bushings, damaged top mount, components rubbing. | Inspect all bolts for proper torque. Check bushings and top mounts for wear. Ensure no components are contacting other parts of the vehicle. |
| Uneven Ride Height | Unequal height adjustment, damaged spring, bent component. | Measure and adjust ride height on both sides of the vehicle. Inspect springs for damage. |
| Poor Handling / Steering Response | Incorrect alignment, loose components, damaged shock absorber. | Perform a professional wheel alignment. Check all suspension components for tightness and damage. |
9. Warranty & Support
maXpeedingrods products are manufactured to high standards and undergo rigorous quality control. For specific warranty terms and conditions, please refer to the warranty card included with your product or visit the official maXpeedingrods website. Keep your proof of purchase for warranty claims.
For technical support, installation assistance, or warranty inquiries, please contact maXpeedingrods customer service through their official channels. Provide your product model number (FM50TZ) and purchase details when contacting support.
10. Video Resources
The following video provides additional insights into maXpeedingrods coilover technology and manufacturing processes.
Video: maXpeedingrods Advanced T7 Series Coilovers. This video showcases the manufacturing process, material quality, and testing procedures for maXpeedingrods coilovers, highlighting features like ultra low-temperature racing damper oil, 6061-T6 billet aluminum components, upgraded damper technology, and optimized spring rate settings.


