
1. Product Overview
1.1 Components
The Pruveeo 112GW Dash Cam package typically includes the following items:
- Main Dash Cam Unit (Front Camera with LCD screen)
- Rear Camera
- Car Charger Power Cable
- Suction Cup Mount
- Adhesive Mount
- USB Data Cable
- User Manual
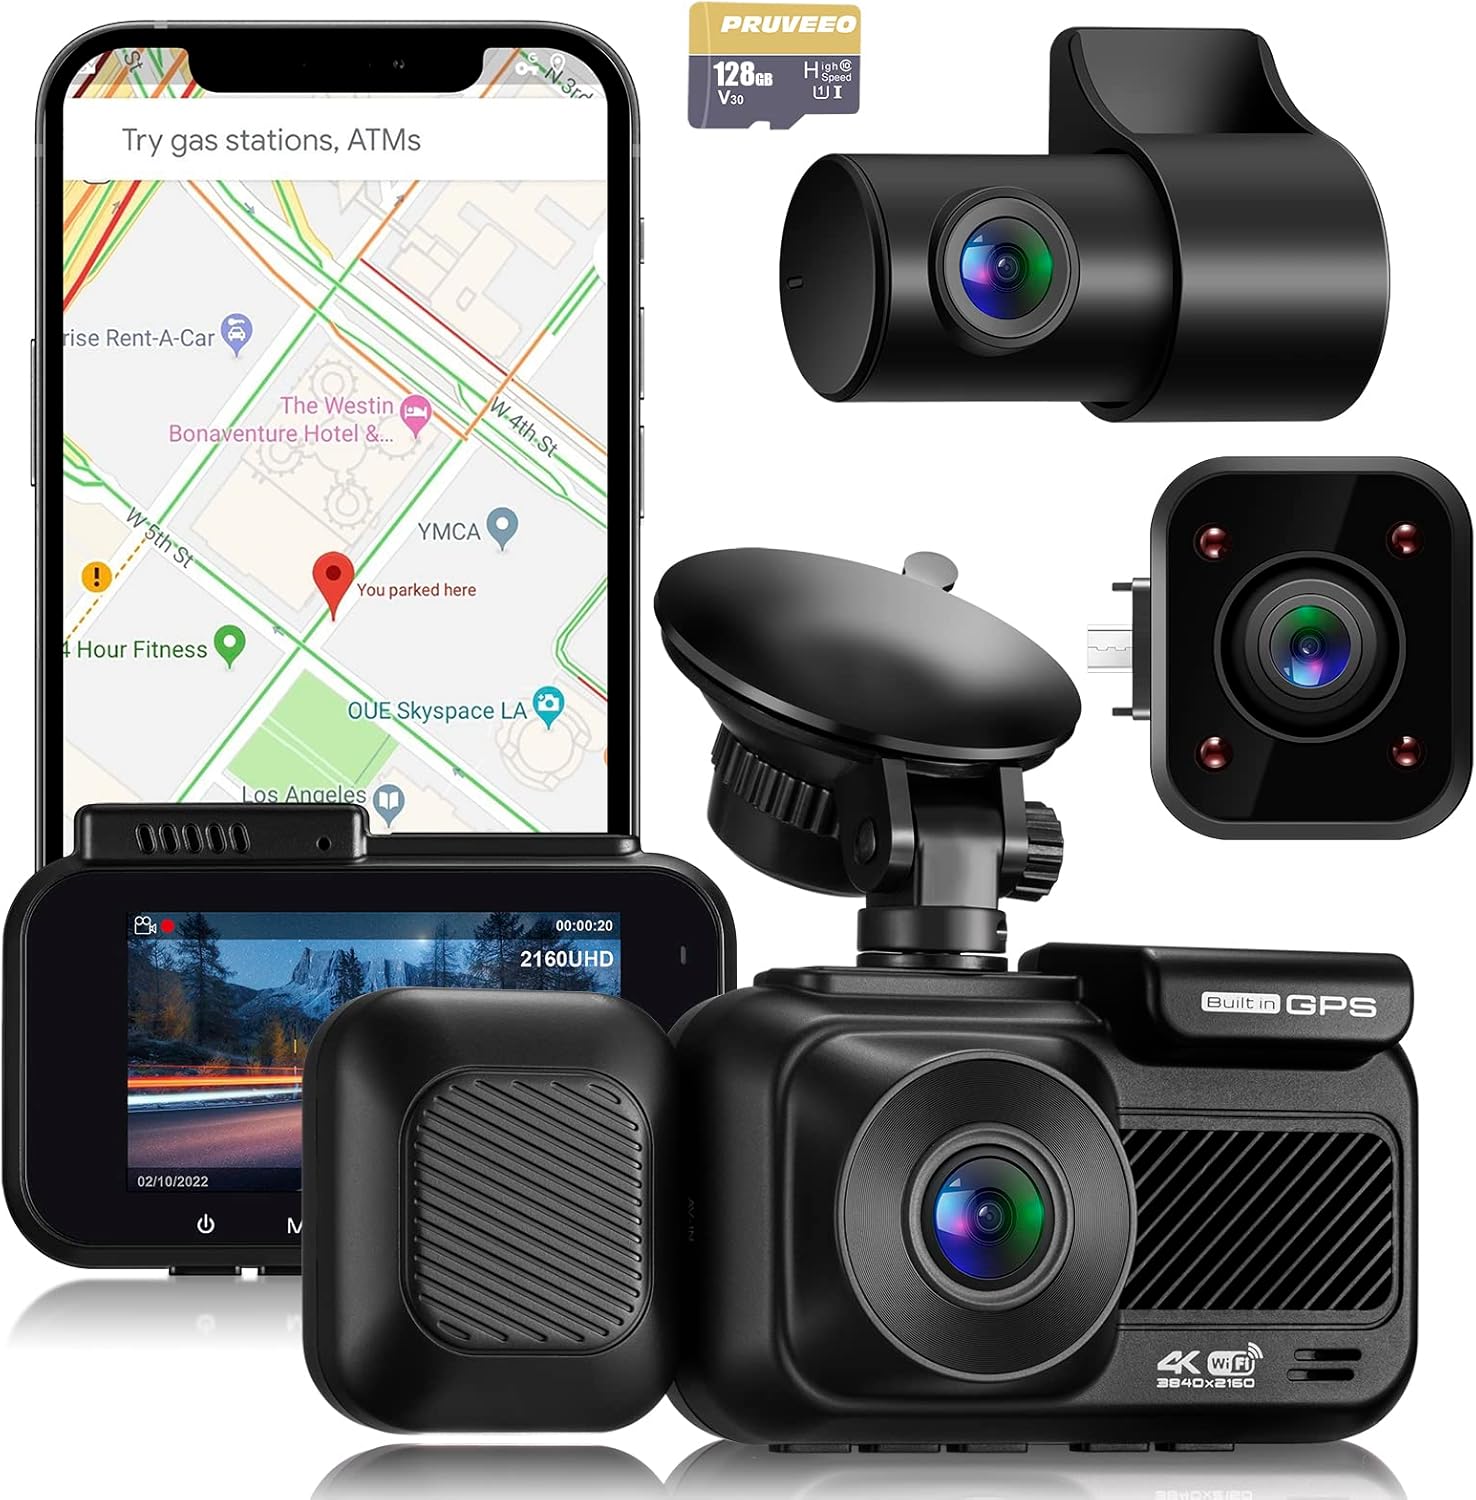
This image displays the primary components included with the Pruveeo 112GW Dash Cam: the main front camera unit with a 2.4-inch LCD screen, a separate rear camera, a GPS module, and the power cable. A 128GB microSD card is also shown, indicating storage capability.
1.2 Key Features
The Pruveeo 112GW Dash Cam offers a range of features designed for vehicle recording:
- Full HD 1080P Recording: Captures clear video footage.
- Built-in Wi-Fi: Allows connection to a mobile application for viewing, downloading, and sharing footage.
- Built-in GPS: Records driving location and speed data, viewable via a dedicated player.
- Sony Sensor: Enhances image quality, particularly in low-light conditions.
- 170-degree Wide Angle Lens: Provides a broad view of the road ahead.
- 2.4-inch LCD Screen: For real-time viewing and menu navigation.
- Infrared Night Vision: For improved recording in dark environments.
- Voice Control: Hands-free operation for common functions like taking photos or starting/stopping video.
- Loop Recording: Automatically overwrites the oldest footage when the memory card is full.
- G-Sensor (Collision Detection): Automatically locks footage upon impact to prevent overwriting.
- Parking Monitor: Records events when the vehicle is parked and detects motion or impact.
- Super Capacitor: Provides enhanced durability and reliability in extreme temperatures compared to traditional batteries.

This diagram illustrates key functional advantages, including modular capability, ultra-wide angle, loop recording, Wi-Fi support, collision detection, internal GPS logger, parking monitor, super capacitor, and Sony IMX 335 sensor. Note: While the image mentions '4K', this manual pertains to the 1080P model.

This image shows the dash cam's display interface, indicating 2160UHD recording (note: this manual is for the 1080P model) and highlighting its super night vision feature, with a road scene at night.
2. Safety Information
Please read and understand all safety instructions before using the Pruveeo 112GW Dash Cam. Failure to follow these instructions may result in injury or damage to the device.
- Proper Installation: Ensure the dash cam is installed securely and does not obstruct the driver's view of the road or interfere with vehicle safety features (e.g., airbags).
- Power Supply: Use only the provided car charger and power cable. Using unauthorized chargers may damage the device or cause fire.
- Operating Temperature: Avoid exposing the device to extreme temperatures (above 60°C / 140°F or below -10°C / 14°F) as this can affect performance and battery life.
- Water and Moisture: Keep the device away from water, rain, and moisture. It is not waterproof.
- Cleaning: Clean the lens and screen with a soft, dry cloth. Do not use abrasive cleaners or solvents.
- Legal Compliance: Always adhere to local laws and regulations regarding dash cam usage and recording.
- Memory Card: Use a high-quality, high-speed (Class 10 or higher) microSD card for optimal performance.
3. Setup
3.1 Installation
3.1.1 Mounting the Dash Cam
- Clean the windshield area where you intend to mount the dash cam.
- Attach the suction cup mount or adhesive mount to the main dash cam unit.
- Mount the dash cam on the windshield, ideally behind the rearview mirror, ensuring it does not obstruct your view. Press firmly to secure.
- Adjust the lens angle to capture the desired view of the road.

This image demonstrates the proper placement of the dash cam on the car's windshield, typically behind the rearview mirror, to ensure an unobstructed view and secure attachment.
3.1.2 Connecting Power
- Connect the car charger power cable to the dash cam's power input port.
- Plug the other end of the car charger into your vehicle's 12V power outlet (cigarette lighter socket).
- Route the cable neatly along the windshield and dashboard edges to avoid interference with driving.
3.1.3 Installing the Rear Camera (Optional)
- Connect the rear camera cable to the designated port on the main dash cam unit.
- Mount the rear camera on the rear windshield using its adhesive, ensuring a clear view.
- Route the cable discreetly from the front unit to the rear of the vehicle.
3.2 Initial Configuration
3.2.1 Inserting the Memory Card
- Ensure the dash cam is powered off.
- Insert a Class 10 or higher microSD card (up to 128GB recommended) into the memory card slot until it clicks into place.
- Power on the dash cam. It is recommended to format the memory card through the dash cam's menu settings before first use.
3.2.2 First Power On and Basic Settings
- Once powered, the dash cam will typically turn on automatically and begin recording.
- Access the menu settings to configure date/time, video resolution, loop recording duration, G-sensor sensitivity, and other preferences.
3.2.3 GPS Functionality
The built-in GPS module automatically records your vehicle's location and speed. Ensure the dash cam has a clear view of the sky for optimal GPS signal reception. GPS data can be viewed using a dedicated player on a computer.
3.2.4 Wi-Fi Connection and App Pairing
- Download the Pruveeo mobile application from your smartphone's app store.
- On the dash cam, enable Wi-Fi through the menu settings. The dash cam will broadcast a Wi-Fi network.
- On your smartphone, connect to the dash cam's Wi-Fi network (SSID and password will be displayed on the dash cam screen).
- Open the Pruveeo app to connect to the dash cam, view live footage, access recordings, and adjust settings.
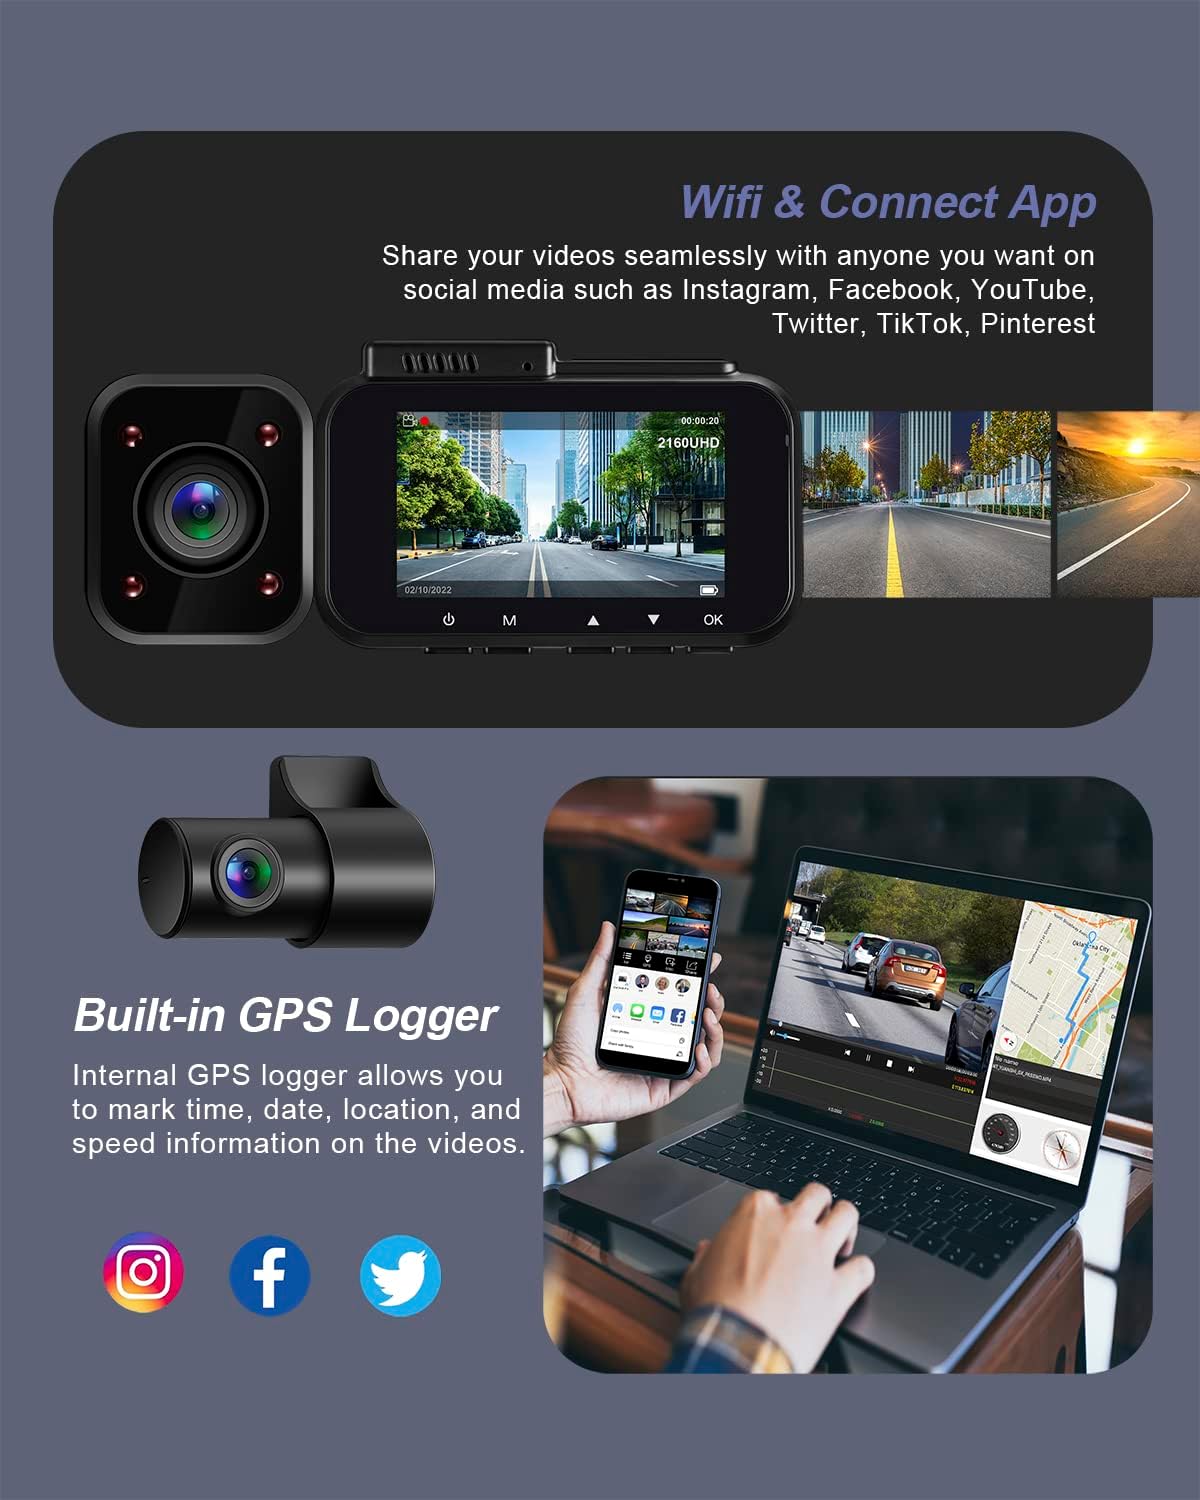
This image illustrates the dash cam's Wi-Fi connectivity for app integration and video sharing, alongside its built-in GPS logger feature which records location and speed data.
4. Operating Instructions
4.1 Basic Recording
4.1.1 Automatic Recording
The dash cam automatically starts recording when connected to power and the vehicle's ignition is turned on. It will stop recording and power off shortly after the ignition is turned off.
4.1.2 Loop Recording
Recordings are saved in segments (e.g., 1, 3, or 5 minutes). When the memory card is full, the oldest unlocked files are automatically overwritten by new recordings. Adjust loop recording duration in the settings.
4.1.3 Emergency Recording (G-Sensor)
The built-in G-sensor detects sudden impacts or collisions. When triggered, the current video segment is automatically locked and saved to a protected folder, preventing it from being overwritten by loop recording. Adjust G-sensor sensitivity in the settings.
4.2 Voice Control
The Pruveeo 112GW supports voice commands for hands-free operation. Speak clearly and directly to the dash cam to execute commands.
- "Lock the video": Protects the current recording from being overwritten.
- "Turn on screen": Activates the LCD display.
- "Turn off screen": Deactivates the LCD display.
- "Video start": Initiates video recording.
- "Take photo": Captures a still image.

This image depicts a driver using voice commands such as 'Lock the video', 'Turn on screen', 'Turn off screen', 'Video start', and 'Take photo' to operate the dash cam hands-free.
4.3 Parking Mode
When enabled, parking mode provides surveillance while your vehicle is parked. The dash cam will automatically record if it detects motion or an impact.
- Buffered Recording: If an event is detected, the dash cam saves 15 seconds of video before the event and 30 seconds after the event.
- Auto Event Detection: Automatically records when detecting moving objects or impact while the car is parked.
- Low Bitrate Recording: Records video at a lower bitrate to conserve storage space during extended parking surveillance.

This diagram illustrates the buffered parking mode, which records events leading up to and following an impact or detected motion while the vehicle is parked, saving 15 seconds before and 30 seconds after the event.
4.4 Viewing and Managing Footage
4.4.1 On the Device
Use the dash cam's LCD screen and navigation buttons to browse and play back recorded videos directly on the device.
4.4.2 Via Mobile App
Connect your smartphone to the dash cam via Wi-Fi using the Pruveeo app. You can view live footage, download recordings to your phone, and manage settings.
4.4.3 On a Computer
Remove the microSD card from the dash cam and insert it into a computer's card reader. You can then access and copy video files. For GPS data playback, use the dedicated GPS player software (usually available for download from the manufacturer's website).
4.5 Wide Angle Camera Views
The Pruveeo 112GW Dash Cam system provides extensive coverage:
- Front Camera: 170-degree wide angle.
- Internal Camera: 160-degree wide angle (if applicable to the specific model variant).
- Rear Camera: 140-degree wide angle.
This comprehensive coverage ensures a broad view of the road ahead, the vehicle's interior, and the rear, providing detailed surveillance.
5. Maintenance
5.1 Memory Card Management
Regularly format the microSD card (at least once a month) through the dash cam's settings menu to ensure optimal performance and prevent data corruption. Back up any important footage before formatting.
5.2 Cleaning the Device
Use a soft, dry, lint-free cloth to clean the dash cam's lens and screen. Do not use liquid cleaners or abrasive materials, as they can damage the device.
5.3 Firmware Updates
Periodically check the Pruveeo official website for available firmware updates. Firmware updates can improve performance, add new features, or fix bugs. Follow the instructions provided with the firmware update carefully.
6. Troubleshooting
If you encounter issues with your Pruveeo 112GW Dash Cam, refer to the following common problems and solutions:
- Dash Cam Not Powering On:
Ensure the car charger is properly connected to both the dash cam and the vehicle's 12V outlet. Check if the vehicle's 12V outlet is functioning. Try a different power source if available. - Recording Issues (e.g., stops recording, corrupted files):
Format the microSD card regularly. Ensure you are using a high-speed (Class 10 or higher) microSD card from a reputable brand. Replace the memory card if issues persist. Check if loop recording is enabled. - GPS Signal Loss or Inaccuracy:
Ensure the dash cam has a clear view of the sky, free from obstructions like tinted windows or metallic coatings. Move the dash cam to a different location on the windshield if necessary. - Wi-Fi Connection Problems:
Ensure Wi-Fi is enabled on the dash cam and your smartphone. Verify the Wi-Fi password. Try restarting both the dash cam and your smartphone. Ensure the Pruveeo app is up to date. - Buttons Not Responding:
Perform a soft reset by pressing and holding the power button for 10-15 seconds. If unresponsive, use a paperclip to press the reset button (if available). - Poor Video Quality:
Clean the dash cam lens. Ensure the protective film has been removed from the lens. Check video resolution settings in the menu.
7. Specifications
The following are the technical specifications for the Pruveeo 112GW Dash Cam:
| Feature | Detail |
|---|---|
| Model Number | F8 |
| Display Type | LCD |
| Video Capture Resolution | 1080p |
| Connectivity Technology | Wi-Fi |
| Mounting Type | Adhesive Mount |
| Product Dimensions | 5.08 x 2.54 x 10.16 cm |
| Item Weight | 581 g |
| Manufacturer | Pruveeo |
8. Warranty Information
The Pruveeo 112GW Dash Cam comes with a limited manufacturer's warranty. The duration and terms of the warranty may vary by region and retailer. Please retain your proof of purchase for warranty claims.
For specific warranty details and to register your product, please refer to the official Pruveeo website or contact their customer support directly.
9. Customer Support
If you require further assistance, have questions not covered in this manual, or need technical support, please contact Pruveeo customer service.
- Refer to the contact information provided on the official Pruveeo website.
- Check the product packaging for support contact details.
When contacting support, please have your product model (112GW/F8) and purchase information ready.

