
1. Introduction and Overview
This manual provides instructions for the AT&T CL80107 Additional Handset. This handset is an accessory unit designed to expand your existing AT&T CL82x07, CL82x57, CL82x67, CL83x07, or CL84x07 series cordless phone system. It cannot function independently and requires a compatible base unit to operate.
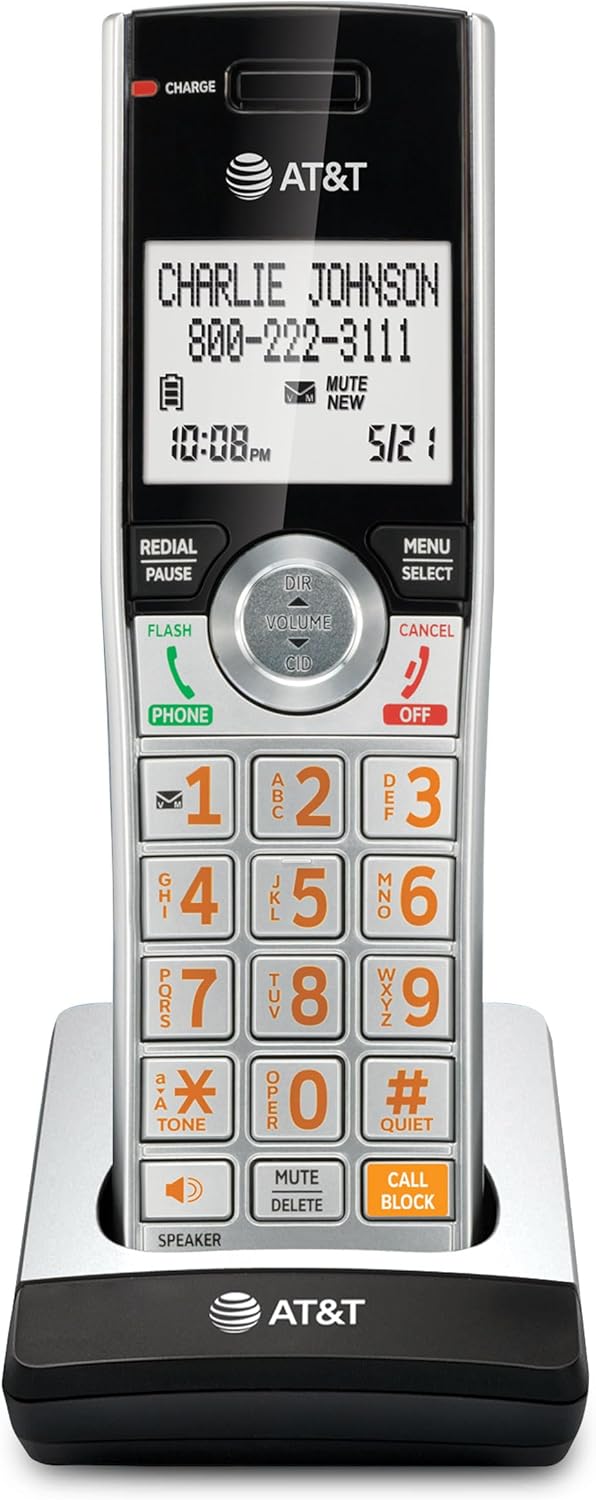
Figure 1: AT&T CL80107 Additional Handset

Figure 2: The CL80107 is an accessory handset and requires a compatible base unit.
2. What's in the Box
Verify that your package contains the following items:
- 1 Cordless Handset (CL80107)
- 1 Charging Cradle
- 1 Power Adapter for Charging Cradle
- 1 Battery Pack
- 1 Battery Compartment Cover
3. Setup
3.1 Battery Installation
- Locate the battery compartment on the back of the handset.
- Insert the battery pack into the compartment, ensuring the connector is properly aligned with the handset's battery jack.
- Place the battery compartment cover over the battery and slide it into place until it clicks securely.
3.2 Charging the Handset
- Connect the small end of the power adapter to the charging cradle.
- Plug the large end of the power adapter into a standard electrical outlet.
- Place the handset in the charging cradle. The CHARGE indicator light on the handset should illuminate, indicating proper charging.
- Allow the handset to charge for at least 10 hours before initial use to ensure full battery capacity.
3.3 Registering the Handset
The CL80107 is an additional handset and must be registered to a compatible AT&T CL82x07, CL82x57, CL82x67, CL83x07, or CL84x07 series base unit before it can be used. Refer to your main base unit's user manual for specific registration instructions. Generally, the process involves:
- Placing the handset in its charging cradle.
- Initiating the registration process on the base unit (often by pressing and holding a specific button like PAGE or HANDSET LOCATOR).
- Following the on-screen prompts on the handset to complete registration.
Once registered, the handset will display its assigned number (e.g., HANDSET 2) and be ready for use.
4. Operating Instructions
4.1 Making and Receiving Calls
- To Make a Call: Press PHONE or SPEAKER, then dial the number.
- To Answer a Call: Press PHONE or SPEAKER when the phone rings.
- To End a Call: Press OFF or place the handset in the charging cradle.
4.2 Adjusting Volume
During a call, press VOLUME DIR or CID to increase or decrease the earpiece or speakerphone volume.
4.3 Caller ID Announce
The handset announces the name of the caller, allowing you to screen calls without needing to look at the display. This feature requires Caller ID service from your telephone service provider.

Figure 3: Extra-large display for easy viewing of caller information.
4.4 Smart Call Blocker
This feature helps reduce unwanted calls. Robocalls can be automatically blocked from ringing through. You can manage a list of allowed numbers and blocked numbers. Consult your base unit's manual for detailed setup and management of the Smart Call Blocker feature.

Figure 4: Handset with large, easy-to-press buttons, including a dedicated 'CALL BLOCK' button.
4.5 Speakerphone
To activate the speakerphone during a call, press the SPEAKER button. Press it again to return to the earpiece. The handset features a simulated full-duplex speakerphone for clear conversations.

Figure 5: Using the simulated full-duplex handset speakerphone.
4.6 Intercom
If you have multiple registered handsets, you can use the intercom feature to communicate between them. Refer to your base unit's manual for specific instructions on initiating and responding to intercom calls.
4.7 Quiet Mode
The Quiet Mode feature allows you to silence the ringer on the handset for a set period. To activate or deactivate, press and hold the #QUIET button on the handset. Consult your base unit's manual for customization options.

Figure 6: The #QUIET button for activating Quiet Mode.
4.8 Push-to-Talk
The Push-to-Talk feature allows you to use your handsets as a two-way radio for instant communication. Press the PUSH TO TALK button on the side of the handset to initiate a conversation with another registered handset.

Figure 7: Location of the Push-to-Talk button on the handset.
5. Maintenance
5.1 Cleaning
Clean the handset and charging cradle with a soft, damp cloth. Do not use cleaning sprays or harsh chemicals, as these may damage the finish or electronic components.
5.2 Battery Care
The handset uses a rechargeable Lithium Ion battery. For optimal performance:
- Always return the handset to the charging cradle when not in use.
- If the handset will not be used for an extended period, remove the battery to prevent leakage.
- Replace the battery when its performance significantly decreases. Use only the specified replacement battery pack.
6. Troubleshooting
If you experience issues with your AT&T CL80107 Additional Handset, try the following basic troubleshooting steps:
- Handset not charging: Ensure the power adapter is securely plugged into both the charging cradle and the electrical outlet. Verify the handset is correctly seated in the cradle and the CHARGE indicator is lit.
- No dial tone: Confirm the handset is registered to the base unit. If it is, check the main base unit and its connection to the telephone line.
- Poor range or static: Move the handset closer to the base unit. Ensure there are no large metal objects or other electronic devices interfering with the signal.
- Handset not responding: Try removing the battery from the handset, waiting a few seconds, and then reinserting it. Place the handset back in the charger.
For more detailed troubleshooting, refer to the user manual of your main AT&T CL82x07, CL82x57, CL82x67, CL83x07, or CL84x07 series base unit.
7. Specifications
| Feature | Specification |
|---|---|
| Model Number | CL80107 |
| Product Dimensions | 2.83 x 7.25 x 3.13 inches |
| Item Weight | 8.8 ounces (0.55 lbs) |
| Battery Type | 1 Lithium Ion battery (included) |
| Color | Silver/Black |
| Telephone Type | Cordless |
| Material | Metal, Plastic |
| Power Source | Corded Electric (for charging cradle) |
| Dialer Type | Keypad |
8. Warranty and Support
For warranty information and technical support, please refer to the documentation included with your main AT&T cordless phone system or visit the official AT&T website. Keep your purchase receipt as proof of purchase for warranty claims.


