
Behringer EUROPOWER PMP2000D
Behringer EUROPOWER PMP2000D
2000-Watt 14-Channel Powered Mixer User Manual
Introduction
This manual provides detailed instructions for the setup, operation, and maintenance of your Behringer EUROPOWER PMP2000D Powered Mixer. Please read this manual thoroughly before operating the device to ensure proper use and to maximize its performance and longevity. The PMP2000D combines a powerful 2,000-Watt Class-D amplifier with a versatile 14-channel mixer, featuring premium mic preamps, a KLARK TEKNIK FX processor, and dual 9-band graphic EQs, making it an ideal solution for live sound applications.
Important Safety Instructions
- Read these instructions.
- Keep these instructions.
- Heed all warnings.
- Follow all instructions.
- Do not use this apparatus near water.
- Clean only with dry cloth.
- Do not block any ventilation openings. Install in accordance with the manufacturer’s instructions.
- Do not install near any heat sources such as radiators, heat registers, stoves, or other apparatus (including amplifiers) that produce heat.
- Do not defeat the safety purpose of the polarized or grounding-type plug. A polarized plug has two blades with one wider than the other. A grounding-type plug has two blades and a third grounding prong. The wide blade or the third prong are provided for your safety. If the provided plug does not fit into your outlet, consult an electrician for replacement of the obsolete outlet.
- Protect the power cord from being walked on or pinched particularly at plugs, convenience receptacles, and the point where they exit from the apparatus.
- Only use attachments/accessories specified by the manufacturer.
- Use only with the cart, stand, tripod, bracket, or table specified by the manufacturer, or sold with the apparatus. When a cart is used, use caution when moving the cart/apparatus combination to avoid injury from tip-over.
- Unplug this apparatus during lightning storms or when unused for long periods of time.
- Refer all servicing to qualified service personnel. Servicing is required when the apparatus has been damaged in any way, such as power-supply cord or plug is damaged, liquid has been spilled or objects have fallen into the apparatus, the apparatus has been exposed to rain or moisture, does not operate normally, or has been dropped.
Setup
Unpacking
Carefully unpack your EUROPOWER PMP2000D mixer and inspect it for any signs of damage that may have occurred during transit. Retain the original packing materials for future shipping or storage. Ensure all components listed in the packaging are present.
Placement
Place the mixer on a stable, flat surface. Ensure adequate ventilation around the unit to prevent overheating. Do not block the ventilation grilles on the sides or rear of the mixer.
Connections
Before making any connections, ensure the mixer is powered off and unplugged from the mains.
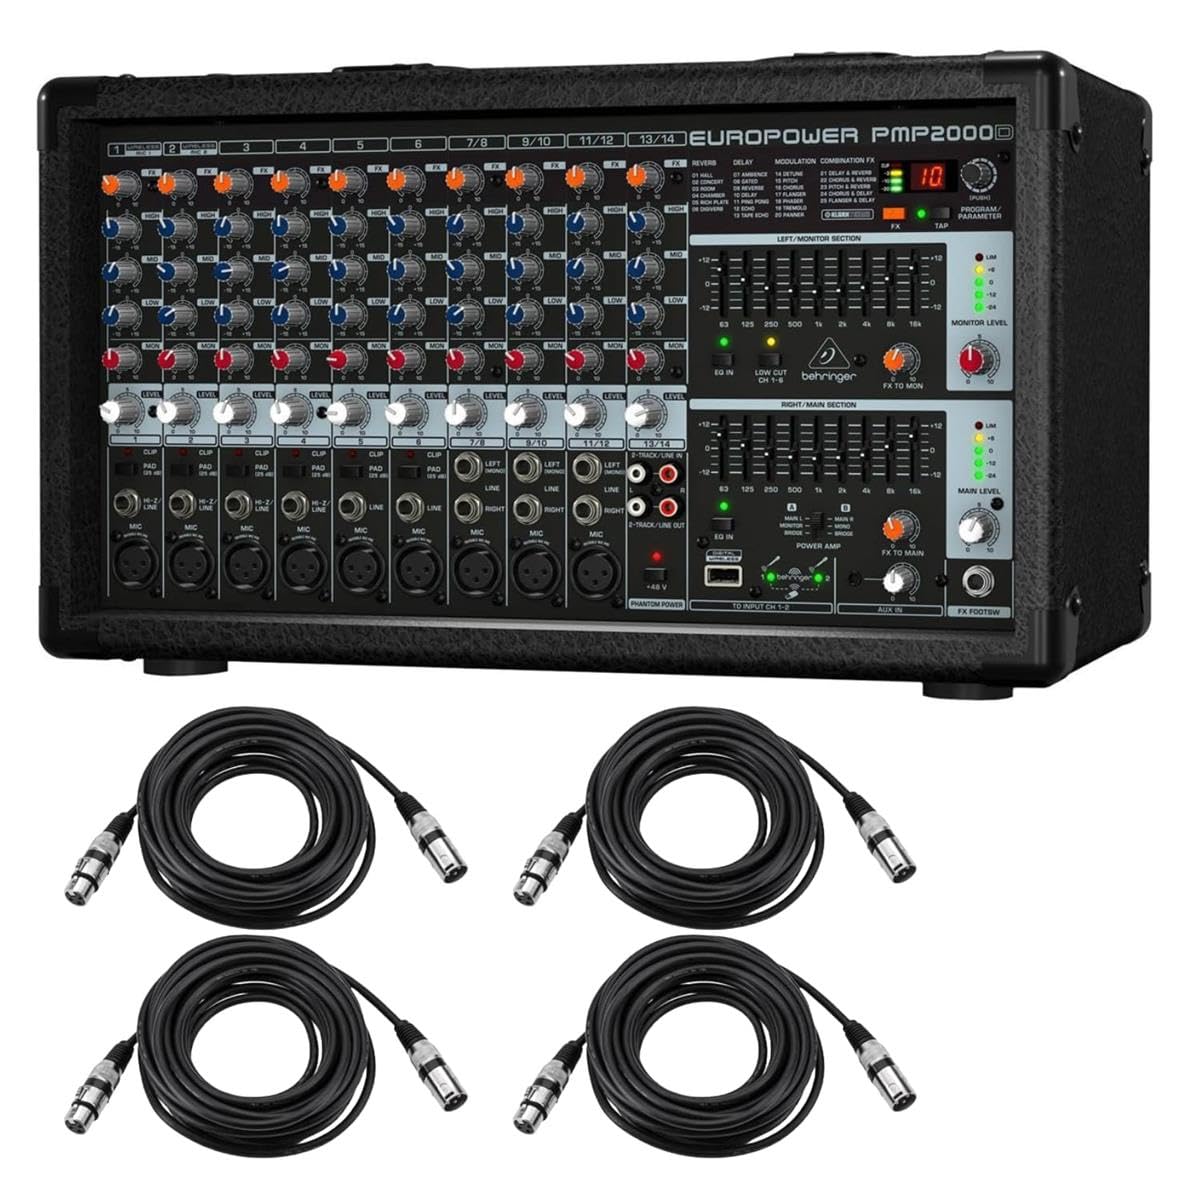
Figure 1: Behringer EUROPOWER PMP2000D Powered Mixer with included XLR microphone cables.
- Power Connection: Connect the supplied power cord to the AC IN socket on the rear panel of the mixer and then to a suitable mains outlet.
- Microphone/Instrument Inputs: Connect microphones to the XLR inputs (channels 1-9) and instruments or line-level devices to the 1/4" TRS inputs. For condenser microphones, ensure +48V phantom power is enabled (see Operating section).
- Speaker Outputs: Connect your passive loudspeakers to the OUTPUT A and OUTPUT B connectors on the rear panel. Ensure the impedance of your speakers matches the mixer's output requirements (typically 4-8 ohms).
- Auxiliary Inputs/Outputs: Use the 2-TRACK IN/OUT (RCA) for connecting external playback devices or recording outputs. The AUX IN can be used for additional line-level inputs.

Figure 2: An XLR microphone cable, commonly used for connecting microphones to the mixer.

Figure 3: Rear panel connections of the PMP2000D, including AC power input and speaker outputs.
Operating the Mixer
Front Panel Overview
The front panel of the PMP2000D is divided into several sections: input channels, left/monitor section, right/main section, and the digital effects processor.

Figure 4: Detailed view of the PMP2000D front panel controls.
Channel Controls (Channels 1-14)
- GAIN: Adjusts the input sensitivity for the microphone or line input. Set this to achieve a strong signal without clipping (indicated by the CLIP LED).
- PAD: Attenuates the input signal by 20 dB for very hot signals, preventing overload.
- LOW CUT: Activates a high-pass filter to remove unwanted low-frequency rumble (e.g., from stage vibrations or wind noise).
- EQ (HIGH, MID, LOW): Three-band equalizer for shaping the tone of each channel. Adjust these controls to enhance or cut specific frequencies.
- FX: Sends a portion of the channel's signal to the internal digital effects processor.
- MON: Sends a portion of the channel's signal to the monitor mix output.
- LEVEL: Adjusts the overall output level of the individual channel to the main mix.
- CLIP LED: Illuminates when the input signal is too high, indicating potential distortion. Reduce the GAIN control if this LED lights up frequently.
Main Section Controls
- MAIN LEVEL: Controls the overall output volume of the main stereo mix.
- FX TO MAIN: Adjusts the amount of the effects processor's output that is sent to the main mix.
- GRAPHIC EQ: Dual 9-band graphic equalizers (one for Left/Monitor, one for Right/Main) allow for precise frequency shaping of the overall mix or monitor send.
- PHANTOM POWER (+48V): Activates +48V phantom power for all XLR microphone inputs, required for condenser microphones. Ensure microphones are connected before activating.
- POWER AMP MODE: Selects the operating mode for the internal power amplifier:
- STEREO: Left and Right channels are amplified separately.
- MONO: Both amplifier channels output the summed mono signal.
- BRIDGE: Combines both amplifier channels for a single, higher-power mono output (requires specific speaker wiring).
Digital Effects Processor
The PMP2000D features a high-quality KLARK TEKNIK FX processor with 25 presets, including various reverbs, delays, chorus, flanger, phaser, pitch shifter, and multi-effects. Use the PROGRAM/PARAMETER knob to select effects and adjust their parameters. The FX MUTE button allows for quick muting of the effects return.
Maintenance
Cleaning
To clean the mixer, use a soft, dry cloth. Do not use any liquid cleaners, solvents, or abrasive materials, as these can damage the finish and internal components.
Storage
When not in use for extended periods, store the mixer in a cool, dry place, away from direct sunlight and extreme temperatures. It is recommended to use the original packaging for protection during storage or transport.
Troubleshooting
| Problem | Possible Cause | Solution |
|---|---|---|
| No power | Power cord not connected; Power switch off; Faulty outlet | Check power cord connection; Turn power switch on; Try a different outlet |
| No sound from speakers | Speaker cables disconnected; MAIN LEVEL turned down; Channel LEVEL turned down; Incorrect POWER AMP MODE | Check speaker connections; Increase MAIN LEVEL; Increase channel LEVEL; Verify POWER AMP MODE setting |
| Distorted sound | Input GAIN too high (CLIP LED on); Speaker impedance mismatch; Damaged speaker | Reduce input GAIN; Ensure speaker impedance matches mixer; Test with different speakers |
| No microphone signal | Microphone not connected; Channel LEVEL down; Phantom power off (for condenser mics) | Check microphone connection; Increase channel LEVEL; Activate +48V PHANTOM POWER |
Specifications
| Feature | Detail |
|---|---|
| Product Dimensions | 17.91 x 10.87 x 9.84 inches |
| Item Model Number | EUROPOWER PMP2000D |
| Manufacturer | Behringer |
| Number of Channels | 14 |
| Item Weight | 26.9 Pounds |
| Connectivity Technology | Auxiliary |
| Power Source | Corded Electric |
Warranty and Support
This Behringer EUROPOWER PMP2000D Powered Mixer is covered by the manufacturer's warranty. For detailed warranty terms, conditions, and information on how to obtain technical support or service, please refer to the official Behringer website or contact their authorized customer service representatives. Keep your proof of purchase for warranty claims.
Related documentsEUROPOWER PMP2000D


Ask a question about this manual
Ask about setup, troubleshooting, compatibility, parts, safety, or missing instructions. Manuals+ will review the question and use this page’s manual context to help answer it.