
1. Introduction
Thank you for choosing the Briloner LED Ceiling Light/Spotlights. This modern lighting fixture, crafted from durable metal with a satin nickel finish, is designed to provide cosy and warm white illumination (3000 Kelvin) for your indoor spaces. Its rotatable and pivotable spots allow for flexible light direction, making it suitable for various rooms such as living rooms, bedrooms, and dining areas.
This manual provides essential information for the safe installation, operation, and maintenance of your new ceiling light.

Figure 1.1: Briloner LED Ceiling Light/Spotlights, showcasing its three adjustable light heads and satin nickel finish.
2. Safety Instructions
Please read all safety instructions carefully before installing or using this product. Failure to follow these instructions may result in electric shock, fire, or other hazards.
- Indoor Use Only: This product is designed exclusively for indoor use. Do not install or use it in damp or wet locations, or outdoors.
- Electrical Safety: Always disconnect the power supply at the main circuit breaker before installation, maintenance, or bulb replacement. Ensure all electrical connections are secure and comply with local electrical codes. If you are unsure about electrical wiring, consult a qualified electrician.
- Bulb Type: Use only GU10 LED bulbs as specified. Do not exceed the maximum wattage rating.
- Handling: Handle the light fixture and bulbs with care. Avoid touching bulbs directly with bare hands, as oils can reduce bulb life.
- Cleaning: Before cleaning, ensure the light is switched off and has cooled down. Use a soft, dry cloth. Do not use abrasive cleaners or solvents.
3. Package Contents
Verify that all components are present and undamaged before beginning installation. If any parts are missing or damaged, contact your retailer.
- 1 x Briloner LED Ceiling Light Fixture (Satin Nickel, 47.5 x 8 x 12 cm)
- 3 x GU10 LED Bulbs (3 Watt, 250 Lumen, 3000 Kelvin)
- Mounting Hardware (screws, wall plugs)
4. Setup and Installation
Although this product requires no assembly, professional installation by a qualified electrician is recommended to ensure safety and proper functionality.
- Prepare for Installation: Turn off the main power supply to the installation area at the circuit breaker. Use a voltage tester to confirm the power is off.
- Mark Mounting Points: Position the light fixture base against the ceiling at the desired location. Use a pencil to mark the drilling points for the mounting screws.
- Drill Holes: Drill pilot holes at the marked points. Insert appropriate wall plugs if installing into plasterboard or masonry.
- Connect Wiring: Carefully connect the household electrical wires to the corresponding terminals on the light fixture. Ensure correct polarity (Live to Live, Neutral to Neutral, Earth to Earth). Secure all connections firmly.
- Mount Fixture: Align the light fixture base with the drilled holes and secure it to the ceiling using the provided mounting screws.
- Insert Bulbs: Gently insert the GU10 LED bulbs into the spotlight sockets. Twist them clockwise until they are securely in place.
- Restore Power: Once installation is complete and all connections are secure, restore power at the main circuit breaker.

Figure 4.1: Dimensional drawing of the ceiling light (dimensions in mm), showing a length of 475mm and a height of 120mm.
5. Operating Instructions
Operating your Briloner LED Ceiling Light is straightforward:
- Power On/Off: Use your standard wall switch to turn the light fixture on or off.
- Adjusting Spotlights: The individual spotlights are rotatable and pivotable. Gently adjust each spot to direct the light beam to your desired area.

Figure 5.1: The Briloner LED Ceiling Light installed in a contemporary living space, demonstrating its aesthetic integration.
6. Maintenance
Regular maintenance will help prolong the life and appearance of your ceiling light.
- Cleaning: Ensure the light is switched off and cool before cleaning. Wipe the metal surfaces with a soft, dry, lint-free cloth. Do not use liquid cleaners, abrasive materials, or chemical solvents, as these can damage the finish.
- Bulb Replacement: If a bulb needs replacing, first turn off the power at the circuit breaker. Allow the bulb to cool completely. Gently twist the old GU10 bulb counter-clockwise to remove it. Insert a new GU10 LED bulb (max 3W, 250 Lumen, 3000K recommended) by aligning the pins and twisting clockwise until secure.
7. Troubleshooting
If you encounter issues with your ceiling light, refer to the following common problems and solutions:
| Problem | Possible Cause | Solution |
|---|---|---|
| Light does not turn on. | No power supply. | Check the circuit breaker and wall switch. Ensure power is restored. |
| Light does not turn on. | Loose or incorrect wiring. | Turn off power at the circuit breaker. Check all wire connections. Consult a qualified electrician if unsure. |
| Light does not turn on. | Faulty bulb. | Turn off power. Replace the bulb with a new, working GU10 LED bulb. |
| Light flickers. | Loose bulb or connection. | Turn off power. Ensure bulbs are securely twisted into their sockets. Check wiring connections. |
8. Specifications
Detailed technical specifications for the Briloner LED Ceiling Light:
| Attribute | Value |
|---|---|
| Brand | BRILONER |
| Model (ASIN) | B01LXDVS1I |
| Dimensions (L x W x H) | 47.5 x 8 x 12 cm |
| Item Weight | 0.55 Kilograms |
| Material | Metal |
| Colour | Satin Nickel |
| Style | Modern |
| Light Fixture Form | Spotlight |
| Bulb Type | GU10 LED (3 bulbs included) |
| Bulb Wattage | 3 Watt per bulb |
| Luminous Flux | 250 Lumen per bulb |
| Colour Temperature | 3000 Kelvin (Warm White) |
| Specific Use | Indoor use only |
| Assembly Required | No (installation required) |
| Batteries Required | No |
| Date First Available | 1 December 2016 |
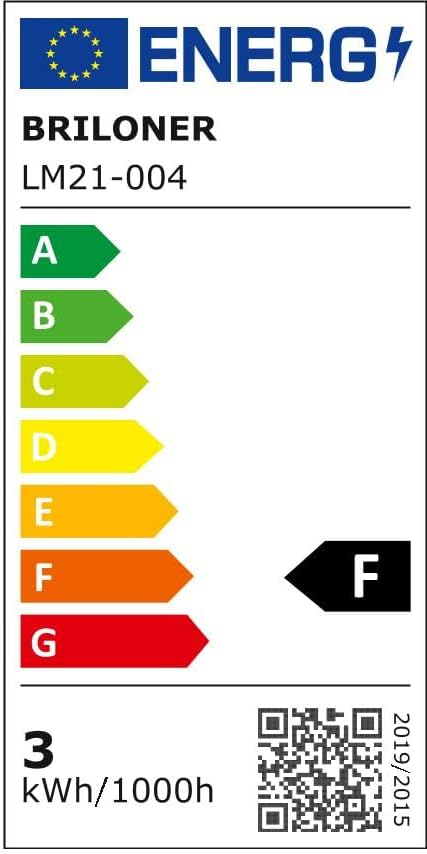
Figure 8.1: Energy efficiency label for the Briloner LM21-004, indicating an energy class of F and consumption of 3 kWh/1000h. For more details, visit the official EPREL database: https://eprel.ec.europa.eu/qr/687037
9. Warranty and Support
Briloner products are manufactured to high-quality standards. For information regarding warranty coverage, please refer to the terms and conditions provided by your retailer at the time of purchase, or visit the official Briloner website.
If you require technical assistance, have questions about installation, or need to report a defect, please contact your point of purchase or Briloner customer support. When contacting support, please have your product model (ASIN: B01LXDVS1I) and purchase date available.
Briloner Website: https://www.briloner.com


