
1. Introduction
This manual provides essential information for the safe and efficient operation, maintenance, and troubleshooting of your AQUAPARX 4T - 1.3 HP Outboard Motor. Please read it thoroughly before use to ensure proper handling and to prevent damage or injury. Keep this manual in a safe place for future reference.
2. Safety Information
Always prioritize safety when operating any marine equipment. Failure to follow these safety guidelines can result in serious injury or property damage.
- Read the Manual: Understand all instructions and warnings before operating the motor.
- Ventilation: Operate the motor in a well-ventilated area to avoid carbon monoxide poisoning.
- Fuel Handling: Handle fuel with extreme care. Refuel in a well-ventilated area with the engine off and cool. Do not smoke or use open flames near fuel.
- Emergency Stop: Familiarize yourself with the engine's kill switch and ensure it is easily accessible and functional.
- Propeller Safety: Keep hands, feet, and clothing clear of the propeller at all times, especially when the engine is running or being started.
- Personal Protective Equipment: Wear appropriate personal flotation devices (PFDs) and other safety gear as required by local regulations.
- Engine Condition: Regularly inspect the motor for any signs of damage, loose connections, or fuel leaks before each use.
3. Product Overview
The AQUAPARX 4T - 1.3 HP Outboard Motor is a compact, air-cooled, 4-stroke engine designed for small watercraft. It features a short shaft and an integrated fuel tank, making it suitable for both fresh and saltwater use.
Key Components:
- Engine Unit: The main powerhead, featuring a 4-stroke engine.
- Throttle Grip: Controls engine speed.
- Kill Switch: For emergency engine shutdown.
- Transom Clamps: Securely attach the motor to the boat.
- Propeller: Provides propulsion.

Image: The engine head of the AQUAPARX 4T - 1.3 HP Outboard Motor, showing the '4 STROKE' label.
4. Setup
4.1 Unpacking and Inspection
Carefully remove all components from the packaging. Inspect the motor for any signs of shipping damage. Ensure all parts listed in the packing list are present. If any damage or missing parts are found, contact your dealer immediately.
4.2 Mounting the Outboard Motor
Attach the outboard motor securely to the transom of your boat using the integrated transom clamps. Ensure the motor is centered and the clamps are tightened firmly to prevent movement during operation.

Image: Close-up view of the transom clamps used to secure the outboard motor to a boat.
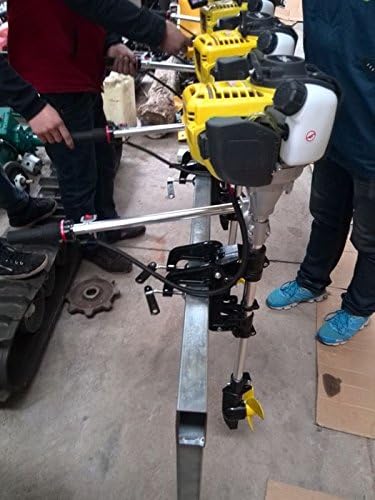
Image: The AQUAPARX outboard motor fully assembled and mounted on a display stand, showing its overall structure.
4.3 Fueling the Motor
The motor uses an integrated fuel tank. Fill the tank with unleaded gasoline (minimum 87 octane). Do not overfill. Ensure the fuel cap is securely fastened after fueling. The motor is designed for a fuel consumption rate of approximately 1 liter per hour.
4.4 Engine Oil
As a 4-stroke engine, it requires engine oil. Refer to the engine block for specific oil type recommendations, typically a 10W-30 or 10W-40 marine-grade oil. Check the oil level before each use and top up as necessary. Do not overfill the oil reservoir.
5. Operating Instructions
5.1 Pre-Operation Checks
- Verify fuel level.
- Check engine oil level.
- Ensure the propeller is clear of any obstructions.
- Confirm the kill switch lanyard is properly attached.
- Check all connections and fasteners for tightness.
5.2 Starting the Engine
- Ensure the motor is submerged in water to the correct depth.
- Attach the kill switch lanyard to yourself or your clothing.
- If the engine is cold, engage the choke.
- Set the throttle to the start position (usually indicated on the throttle grip).
- Pull the starter cord firmly and smoothly until the engine starts.
- Once started, gradually disengage the choke as the engine warms up.
5.3 Throttle Control
The engine speed is controlled by rotating the throttle grip on the tiller handle. Rotate it towards you to increase speed and away from you to decrease speed.

Image: Close-up view of the throttle grip on the tiller handle, showing speed markings.
5.4 Stopping the Engine
To stop the engine, simply press the kill switch button located on the tiller handle. In an emergency, pulling the kill switch lanyard will also immediately stop the engine.

Image: Close-up view of the red kill switch button located on the tiller handle.
6. Maintenance
Regular maintenance is crucial for the longevity and reliable performance of your outboard motor.
6.1 After Each Use
- Freshwater Flush: If used in saltwater, flush the cooling system with fresh water to prevent corrosion.
- Cleaning: Wipe down the exterior of the motor to remove salt, dirt, and grime.
- Inspection: Check for any visible damage, loose bolts, or fuel/oil leaks.
6.2 Spark Plug Replacement
The spark plug should be inspected periodically and replaced if fouled or worn. A replacement spark plug is typically included with the motor. Refer to the engine specifications for the correct spark plug type and gap.
6.3 Oil Change
Change the engine oil after the first 20 hours of operation, and then every 50 hours or annually, whichever comes first. Use the recommended marine-grade 4-stroke engine oil.
6.4 Propeller Inspection
Regularly inspect the propeller for damage such as bends, chips, or cracks. A damaged propeller can reduce performance and cause excessive vibration. Replace if necessary.

Image: The propeller and lower unit of the AQUAPARX outboard motor.
6.5 Storage
For long-term storage, especially during winter, perform the following steps:
- Drain the fuel tank or add a fuel stabilizer.
- Change the engine oil.
- Remove the spark plug and add a small amount of engine oil into the cylinder, then slowly pull the starter cord a few times to distribute the oil. Reinstall the spark plug.
- Store the motor in a dry, well-ventilated area, preferably upright.
7. Troubleshooting
This section provides solutions to common operational issues. For problems not listed here, contact qualified service personnel.
| Problem | Possible Cause | Solution |
|---|---|---|
| Engine will not start | No fuel, stale fuel, fouled spark plug, kill switch engaged, choke not set correctly. | Check fuel level, replace with fresh fuel, clean/replace spark plug, ensure kill switch is disengaged, adjust choke. |
| Engine runs poorly or lacks power | Clogged fuel filter, incorrect throttle setting, propeller damage, low oil level. | Clean/replace fuel filter, adjust throttle, inspect/replace propeller, check/add oil. |
| Excessive vibration | Damaged propeller, loose mounting clamps. | Inspect/replace propeller, tighten transom clamps. |
| Engine overheats | Insufficient air cooling, engine not fully submerged. | Ensure air vents are clear, verify proper submersion depth. |
8. Specifications
- Brand: AQUAPARX
- Model: 8719-1
- Engine Type: 4-stroke
- Power: 1.3 HP
- Shaft Type: Short shaft
- Cooling System: Air-cooled
- Fuel Tank: Integrated
- Estimated Fuel Consumption: 1 liter/hour
- Weight: 9.8 kg
- Material (Hardware/Motor Arm): Stainless steel
- Operation Mode: Manual
9. Warranty and Support
For warranty information, please refer to the documentation provided at the time of purchase or contact your AQUAPARX dealer. If you require technical assistance or have questions regarding your outboard motor, please contact AQUAPARX customer support or your authorized service center.