1. Introduction
This manual provides detailed instructions for the installation, operation, and maintenance of your Gravity GR-13.7DV 13.7" Flip Down LCD Monitor. This high-resolution monitor features a built-in DVD player, USB port, SD card reader, and HDMI port, offering versatile entertainment options for your vehicle. Please read this manual thoroughly before use to ensure proper functionality and safety.
2. Product Features
- 13.7" NTSC/PAL TFT LCD High Resolution Monitor
- Built-in DVD Player with USB Port / SD Card Reader / HDMI Port
- Built-in IR/FM Transmitter with door light (Bright White LED)
- MP3/MP4 Playable
- Compatible with MP4/DVD/VCD/CD/MP3/CD-R/CD-RW formats
- Includes Game Controller & Wireless Remote
- Available with 3 different color cases: Black, Beige, Light Blue
3. Package Contents
Verify that all items are present in the package:
- Gravity GR-13.7DV Flip Down LCD Monitor
- Wireless Remote Control
- Game Controller
- Power and AV Cables
- Mounting Hardware (screws, brackets)
- Interchangeable Color Case (Black, Beige, or Light Blue)

Image: The Gravity GR-13.7DV Flip Down LCD Monitor shown with its included wireless remote control. The monitor is in the down position, displaying content.

Image: Close-up view of the wireless remote control, featuring various buttons for media playback, menu navigation, volume, and game controls.

Image: The beige interchangeable color case for the Gravity GR-13.7DV monitor, allowing customization of the unit's appearance.

Image: The light blue interchangeable color case for the Gravity GR-13.7DV monitor, providing another option for aesthetic customization.
4. Setup and Installation
Professional installation is recommended for optimal performance and safety. Ensure the vehicle's power is disconnected before beginning installation.
4.1 Mounting the Monitor
- Identify a suitable mounting location on the vehicle's ceiling, ensuring it does not obstruct driver visibility or airbag deployment.
- Use the provided mounting plate (if applicable) as a template to mark drilling points.
- Drill pilot holes and secure the mounting plate to the vehicle's roof structure using appropriate screws.
- Attach the monitor unit to the mounting plate, ensuring it is securely fastened.
4.2 Wiring Connections
Connect the power and audio/video cables as follows:
- Power (Red Wire): Connect to a switched 12V accessory power source in the vehicle.
- Ground (Black Wire): Connect to a solid chassis ground point.
- Door Light (White Wire): Connect to the vehicle's dome light circuit to enable the integrated LED lights to illuminate when doors open.
- AV Input (Yellow RCA): Connect external video sources (e.g., game console, external DVD player).
- AV Output (Yellow RCA): Connect to other monitors or video systems.
- HDMI Input: Connect HDMI compatible devices for high-definition video and audio.
- USB Port: Insert USB flash drives for media playback.
- SD Card Slot: Insert SD cards for media playback.
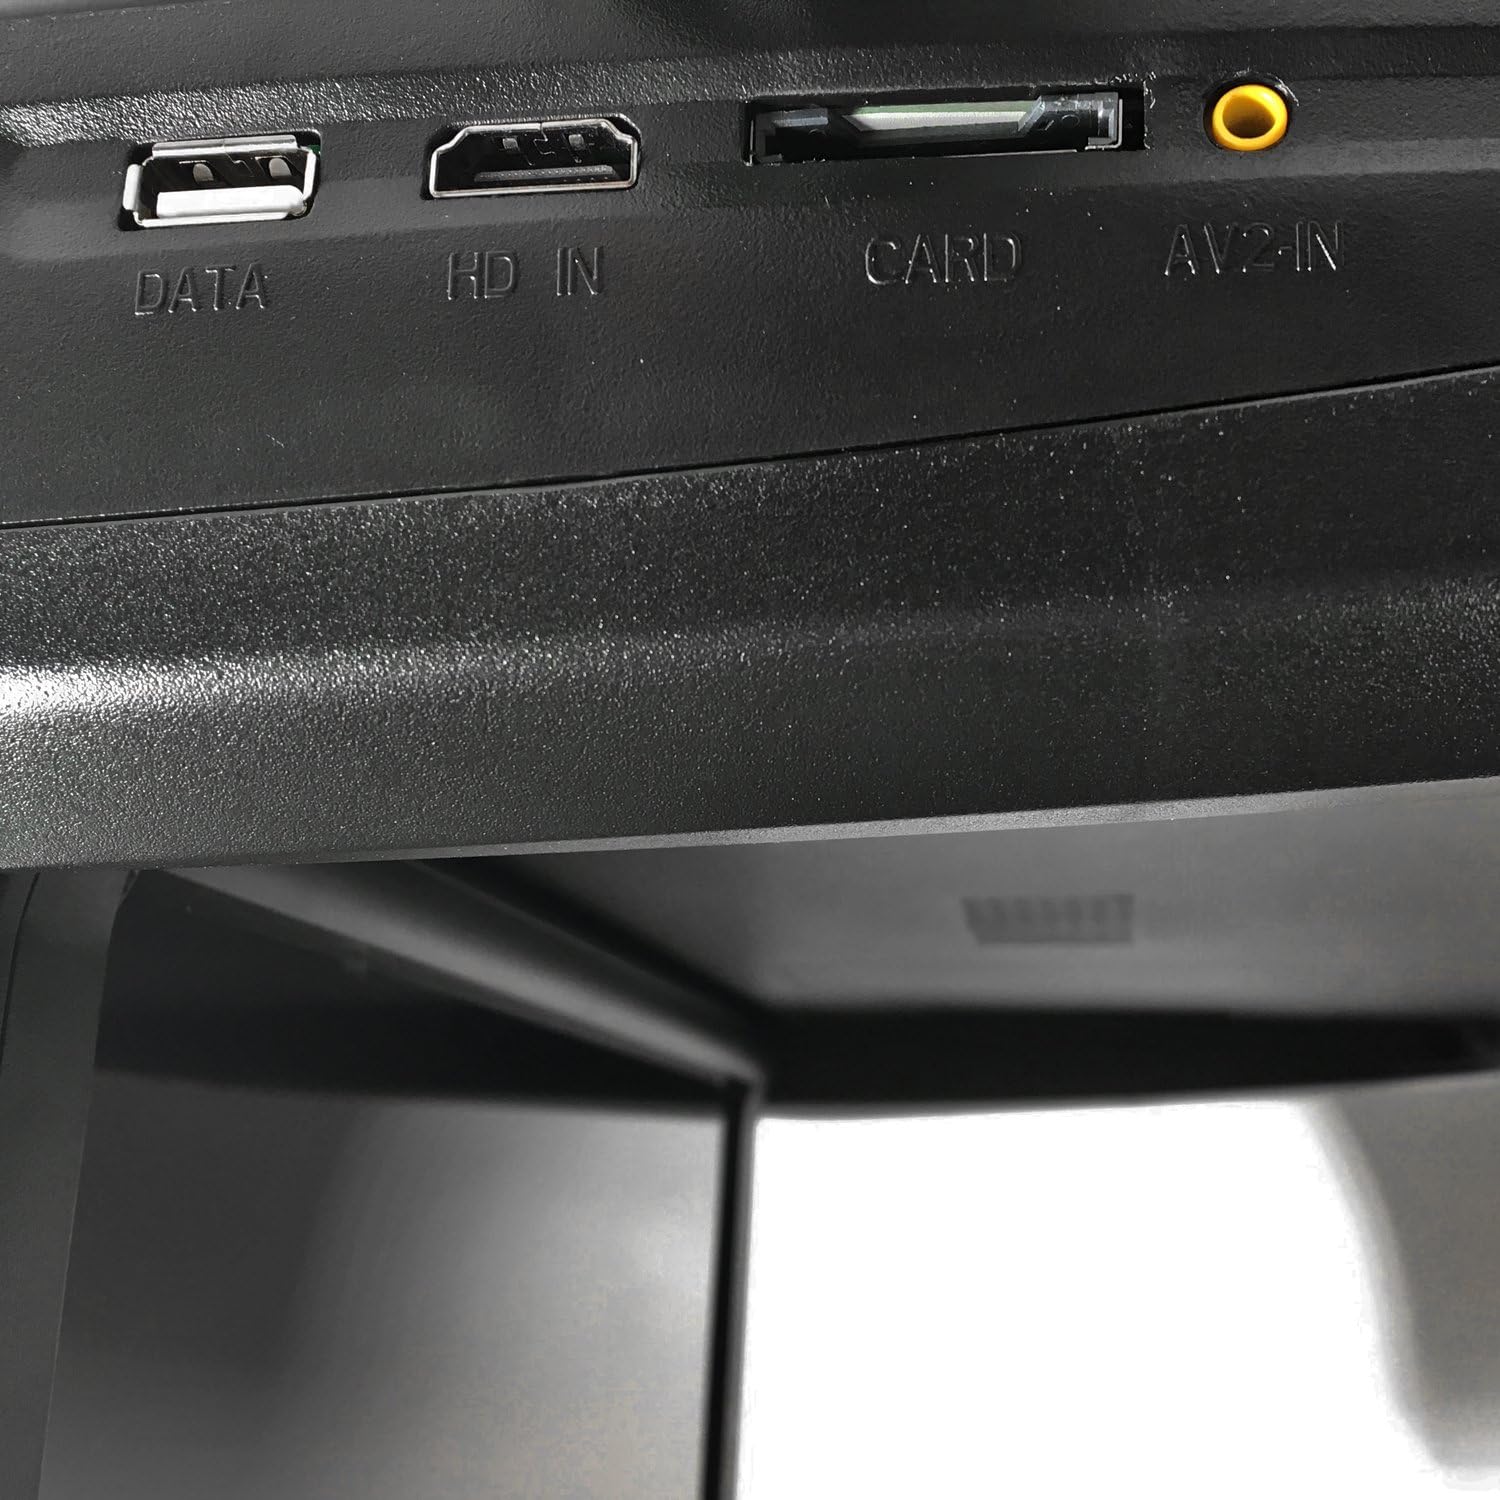
Image: Close-up view of the input/output ports on the side of the monitor, labeled "DATA" (USB), "HD IN" (HDMI), "CARD" (SD), and "AV-IN".
5. Operating Instructions
5.1 Basic Operation
- Power On/Off: Press the power button on the unit or remote control.
- Flip Down/Up: Gently pull the monitor down to the desired viewing angle. Push it back up until it clicks into place for storage.
- Source Selection: Use the "MODE" button on the unit or remote to cycle through input sources (DVD, USB, SD, HDMI, AV).
- Volume Control: Adjust volume using the VOL+/- buttons on the remote.

Image: The Gravity GR-13.7DV monitor in its folded-up position, showing the control panel on the top unit.
5.2 DVD/CD Playback
- Insert a DVD or CD into the disc slot. The unit will automatically switch to DVD mode and begin playback.
- Use the remote control for playback functions: Play/Pause, Stop, Fast Forward/Rewind, Next/Previous Track, Menu, Title, Subtitle, Angle.
5.3 USB/SD Media Playback
- Insert a USB flash drive into the "DATA" port or an SD card into the "CARD" slot.
- Select USB or SD as the source using the "MODE" button.
- Navigate through files and folders using the arrow keys on the remote and press "OK" to select.
5.4 HDMI Input
- Connect an HDMI cable from your external device to the "HD IN" port on the monitor.
- Select HDMI as the source using the "MODE" button.
5.5 IR/FM Transmitter
- IR Transmitter: Enables wireless audio transmission to IR headphones (not included). Ensure headphones are compatible with the unit's IR frequency.
- FM Transmitter: Transmits audio to your vehicle's FM radio. Select an unused FM frequency on the monitor and tune your car radio to the same frequency.
5.6 Gaming Function
The unit includes pre-loaded games. Connect the provided game controller to the designated port (if available, or via USB) and select the game mode from the menu.
6. Maintenance
- Cleaning: Use a soft, dry cloth to clean the monitor screen and exterior. For stubborn marks, dampen the cloth slightly with water. Avoid harsh chemicals or abrasive cleaners.
- Disc Care: Handle discs by their edges. Keep them clean and free of scratches to ensure proper playback.
- Storage: When not in use, ensure the monitor is folded up securely to protect the screen.
7. Troubleshooting
| Problem | Possible Cause | Solution |
|---|---|---|
| No Power | Loose power connection; Blown fuse; Vehicle ignition off. | Check power wiring; Replace fuse; Turn vehicle ignition to ACC or ON. |
| No Video/Black Screen | Incorrect source selected; Loose video cable; Disc/USB/SD error. | Select correct input source; Check video cable connections; Try a different disc/USB/SD. |
| No Audio | Volume too low; Incorrect audio output setting (FM/IR); Loose audio cable. | Increase volume; Check FM/IR settings; Ensure audio cables are connected. |
| Remote Control Not Working | Dead batteries; Obstruction between remote and IR receiver; Remote out of range. | Replace batteries; Remove obstructions; Ensure remote is pointed at the unit. |
| Disc Error | Dirty, scratched, or incompatible disc. | Clean disc; Try a different disc; Ensure disc format is supported. |
8. Specifications
| Feature | Detail |
|---|---|
| Screen Size | 13.7 Inches (Visible screen diagonal: 14" / 35 cm) |
| Display Type | TFT LCD, LED Backlight |
| Resolution | High Resolution (Specific resolution not provided, but implied by "High Resolution Monitor") |
| Video System | NTSC/PAL Auto Switching |
| Media Compatibility | MP4, DVD, VCD, CD, MP3, CD-R, CD-RW |
| Inputs | HDMI, USB, SD Card, AV-In |
| Outputs | AV-Out, IR Transmitter, FM Transmitter |
| Power Supply | DC 12V |
| Manufacturer | Gravity |
| Model Number | GR-10.4FDM (Product title refers to GR-13.7DV) |
9. Warranty and Support
This Gravity product is designed for reliability and performance. For specific warranty details, please refer to the warranty card included with your product or contact Gravity customer support. Keep your purchase receipt as proof of purchase for any warranty claims.
For technical assistance or support, please contact the retailer where the product was purchased or refer to the manufacturer's official website for contact information.


