1. Introduction
Thank you for choosing the VILTROX VX-18M Professional Aluminum Alloy Heavy Duty Video Camera Camcorder Panorama Tripod with Fluid Drag Head. This manual provides essential instructions for the proper setup, operation, maintenance, and troubleshooting of your new tripod. Please read this manual thoroughly before use to ensure optimal performance and longevity of the product.

Image 1.1: The VILTROX VX-18M Professional Video Tripod with its included carrying bag.
2. Product Components
The VILTROX VX-18M tripod system consists of several key components designed for stability and smooth operation. Familiarize yourself with these parts before assembly and use.
- Fluid Drag Head: Provides smooth panning and tilting movements.
- Quick Release Plate: For quick attachment and detachment of your camera or camcorder.
- Tripod Legs: Three-section aluminum alloy legs for adjustable height and stability.
- Leg Locking Knobs: Secure the extended leg sections in place.
- Mid-Level Spreader: Enhances stability by connecting the tripod legs.
- Rubber Horseshoe Pads / Spiked Feet: Interchangeable feet for various terrains.
- Spirit Level: Integrated into the fluid head for precise leveling.
- Pan Handle: For controlling pan and tilt movements.
- Carrying Bag: For convenient transport and storage.

Image 2.1: Key structural components of the tripod, highlighting the leg locking knob, aluminum alloy material, non-slip rubber feet, and the triangle stability system.

Image 2.2: Detailed view of the fluid head and quick release plate, indicating the rubber mat, 1/4-inch screw, quick plate insurance button, handle interface, spirit level, and adjustment knobs for vertical and horizontal movement.
3. Setup Instructions
Follow these steps to correctly set up your VILTROX VX-18M tripod:
- Unpack the Tripod: Carefully remove the tripod and all accessories from the carrying bag.
- Extend the Legs: Loosen the leg locking knobs on each leg section. Extend the legs to your desired height. Ensure all sections are fully extended or retracted evenly for maximum stability. Securely tighten the leg locking knobs.
- Adjust Mid-Level Spreader: The mid-level spreader helps stabilize the tripod. Adjust it to achieve the desired leg spread and stability.
- Level the Tripod: Use the integrated spirit level on the fluid head to ensure the tripod base is perfectly level. Adjust the leg lengths as needed.
- Attach Camera to Quick Release Plate: Secure your camera or camcorder to the quick release plate using the 1/4-inch screw. Ensure it is tightly fastened.
- Mount Quick Release Plate: Insert the quick release plate with your camera into the fluid head. Engage the quick plate insurance button to lock it securely in place. Verify that the camera is firmly attached before use.
- Attach Pan Handle: Screw the pan handle into the designated interface on the fluid head.
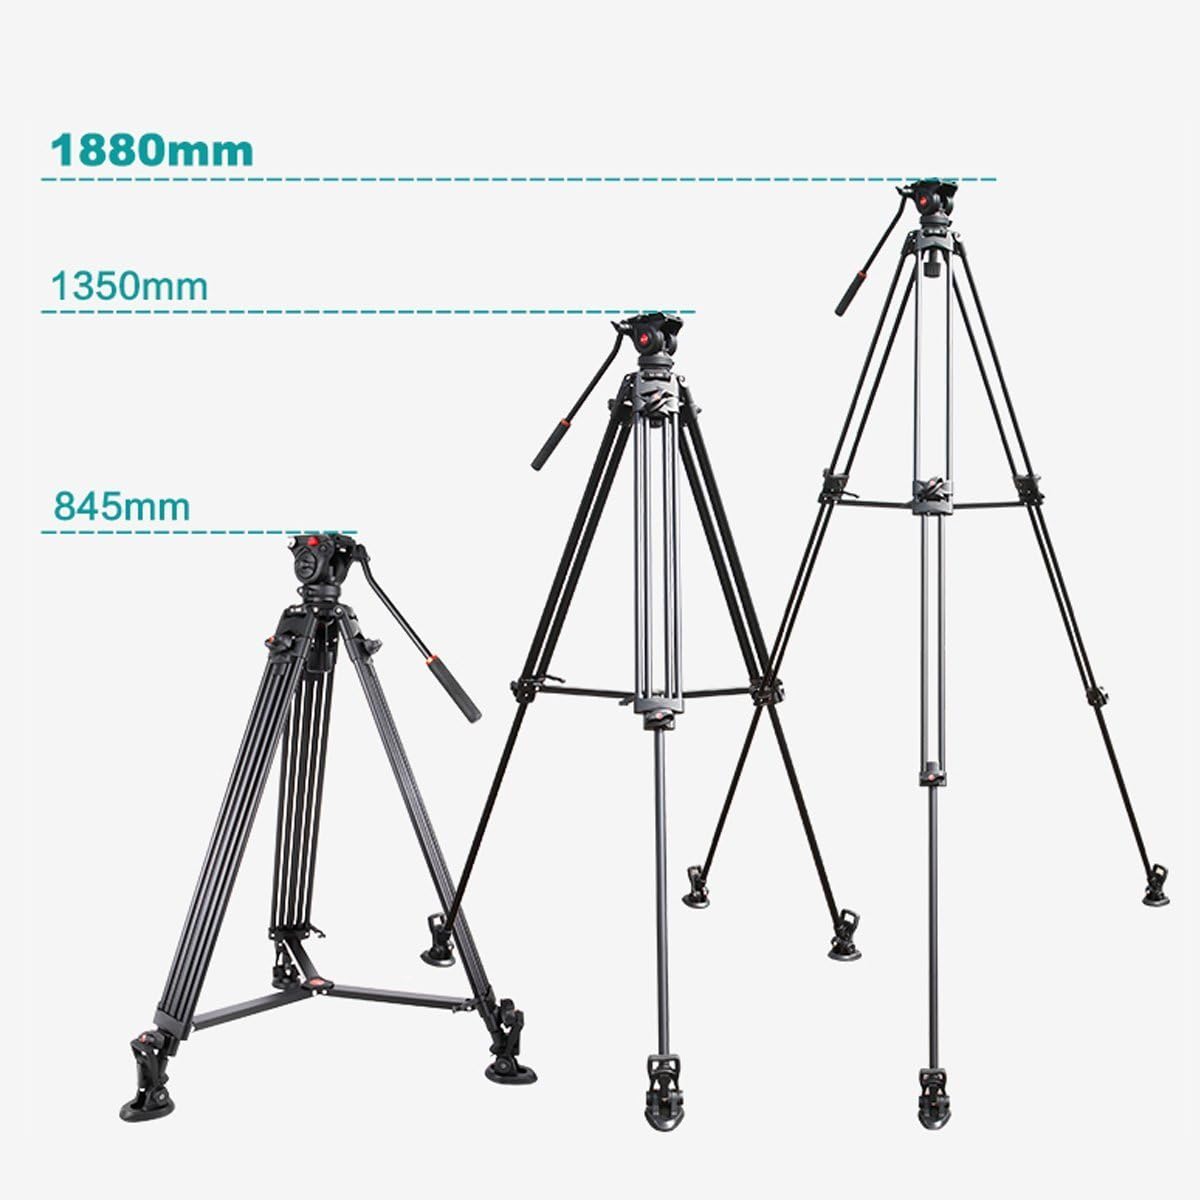
Image 3.1: The tripod demonstrating its adjustable height capabilities, from a minimum of 845mm to a maximum of 1880mm.

Image 3.2: The 60mm spherical bowl mouth design, which allows for quick and precise leveling of the fluid head.

Image 3.3: Dimensions of the quick release plate, measuring 50mm by 91mm, for compatibility reference.
4. Operating Instructions
Once set up, your VILTROX VX-18M tripod is ready for use. The fluid drag head allows for smooth and controlled camera movements.
- Adjusting Pan and Tilt: Use the pan handle to smoothly rotate the camera horizontally (pan) and vertically (tilt). The fluid drag system ensures consistent resistance for cinematic movements.
- Locking Pan and Tilt: The fluid head features separate locking mechanisms for pan and tilt. Rotate the appropriate knobs (refer to Image 2.2) to lock the head in a fixed position.
- Panoramic Shooting: The fluid head supports a full 360-degree panoramic rotation. Ensure the pan lock is disengaged for smooth panoramic shots.
- Tilt Range: The head offers a versatile tilt range from -75 degrees to +90 degrees, allowing for various shooting angles.

Image 4.1: The fluid head's extensive tilt range, allowing for angles from -75 degrees to +90 degrees.
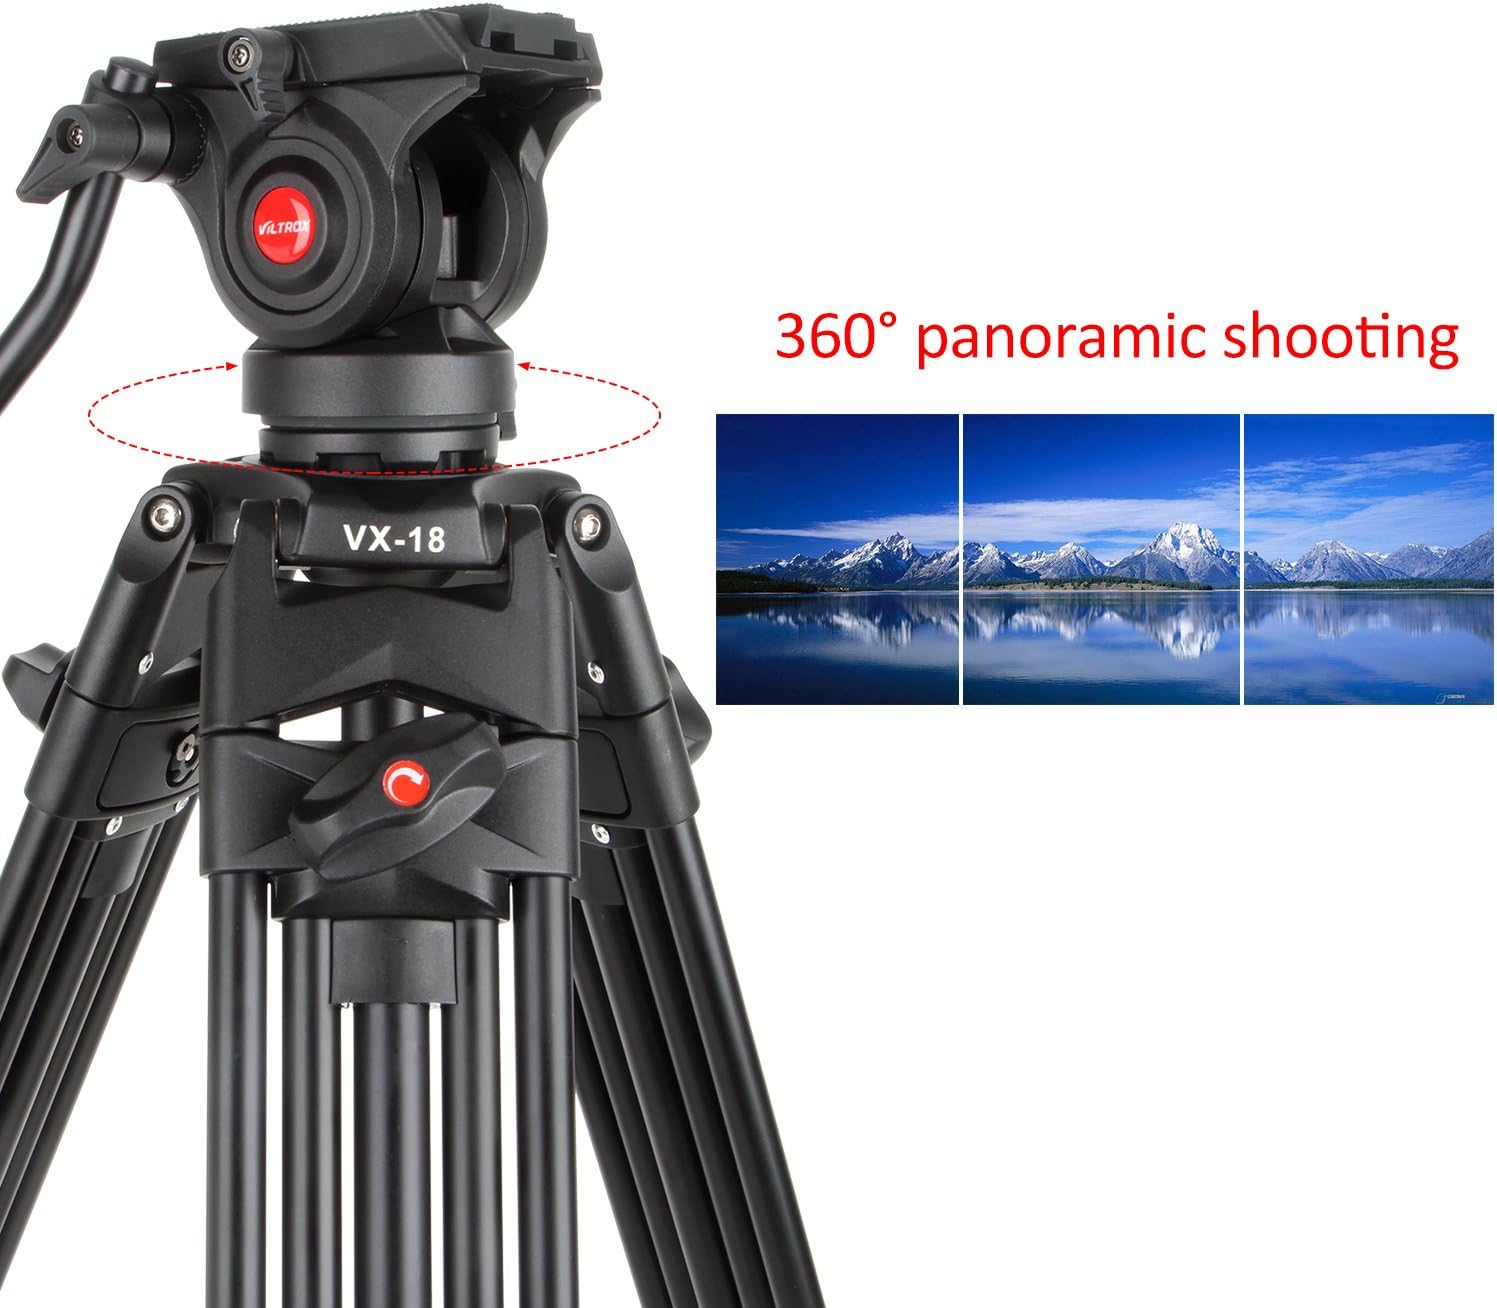
Image 4.2: The tripod head's ability to perform a full 360-degree panoramic rotation, illustrated with example landscape shots.

Image 4.3: The VILTROX VX-18M tripod deployed in an outdoor setting with a camera, and demonstrating its portability with the carrying bag.
5. Maintenance
Proper maintenance ensures the longevity and optimal performance of your tripod.
- Cleaning: After each use, especially in dusty or sandy environments, wipe down the tripod legs and head with a soft, dry cloth. For stubborn dirt, a slightly damp cloth can be used, followed by immediate drying.
- Lubrication: The fluid head is factory-sealed and does not require user lubrication. Do not attempt to disassemble the fluid head.
- Storage: Store the tripod in its carrying bag in a cool, dry place, away from extreme temperatures and humidity. Ensure all leg sections are retracted and locked before storage.
- Inspection: Periodically check all screws, knobs, and leg locks for tightness. Tighten any loose components to maintain stability.

Image 5.1: The durable carrying bag provided for protecting and transporting the tripod.
6. Troubleshooting
If you encounter issues with your tripod, refer to the following common problems and solutions:
| Problem | Possible Cause | Solution |
|---|---|---|
| Tripod is unstable or wobbly. | Leg locks are not fully tightened; legs are unevenly extended; mid-level spreader not properly set. | Ensure all leg locks are securely tightened. Extend legs evenly. Adjust the mid-level spreader for maximum stability. Check the ground for unevenness. |
| Pan or tilt movements are not smooth. | Pan/tilt lock is partially engaged; excessive weight on the head; dirt in the mechanism. | Ensure pan and tilt locks are fully disengaged. Verify camera weight is within the specified limit. Clean the head exterior. Do not attempt to lubricate internal fluid head components. |
| Camera is not securely attached to the head. | Quick release plate not fully inserted; quick plate insurance button not engaged; camera screw loose. | Re-insert the quick release plate until it clicks into place. Ensure the quick plate insurance button is engaged. Tighten the 1/4-inch screw connecting the camera to the plate. |
7. Specifications
Key technical specifications for the VILTROX VX-18M Professional Video Tripod:
| Feature | Specification |
|---|---|
| Model Number | VX-18M |
| Material | Aluminum Alloy |
| Item Weight | 4 Kilograms (8.8 pounds) |
| Weight Limit | 12 Kilograms |
| Maximum Height | 188 Centimeters (74 inches) |
| Minimum Height | 83 Centimeters (32.7 inches) |
| Tripod Head Type | Fluid Head |
| Tilt Range | -75 degrees to +90 degrees |
| Pan Range | 360 degrees |
| Package Dimensions | 38.58 x 7.56 x 7.09 inches |
8. Warranty and Support
For warranty information, please refer to the documentation included with your product at the time of purchase or visit the official VILTROX website. If you require technical support or have questions not covered in this manual, please contact VILTROX customer service through their official channels.


