
1. Introduction
Welcome to the RockJam 61-Key Keyboard Piano Kit. This manual provides essential information for setting up, operating, maintaining, and troubleshooting your new instrument. Please read this manual thoroughly before use to ensure optimal performance and longevity of your product.
The RockJam 61-Key Keyboard Piano Kit is designed for musicians of all ages and skill levels, offering a comprehensive musical experience with its versatile features and included accessories.
2. Package Contents
Upon opening your RockJam 61 Key Keyboard Piano Kit, please verify that all the following components are included:
- 61 Key Keyboard Piano
- Piano Bench
- Keyboard Stand
- Keynote Stickers
- Sheet Music Stand
- Power Adapter
- Headphones
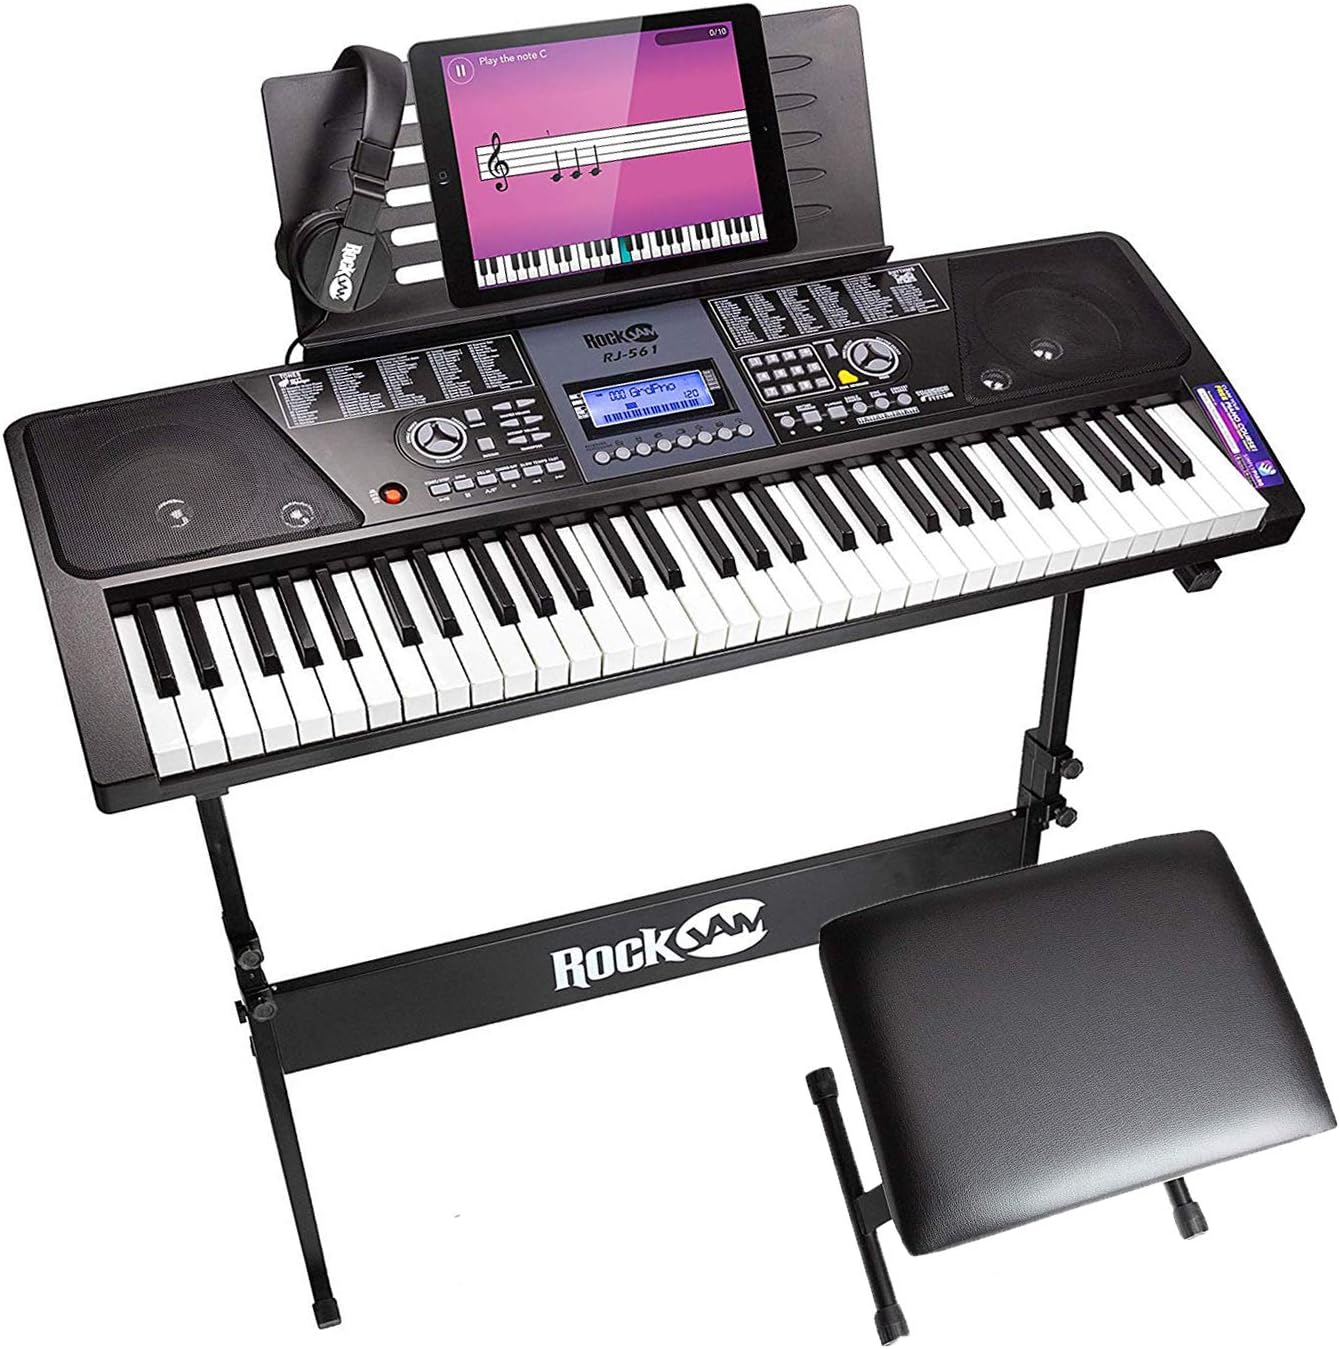
Figure 2.1: Complete RockJam 61 Key Keyboard Piano Kit setup.
3. Setup Guide
3.1 Assembling the Keyboard Stand
- Unfold the X-style keyboard stand.
- Adjust the height to your preferred playing position using the locking mechanism. Ensure the stand is stable.
- Place the 61-key keyboard securely on the stand. Some models may have screws/screw holes to secure the keyboard to the stand for added stability.

Figure 3.1: Keyboard Stand Assembly. Note the adjustable height and rubber feet for secure grip.
3.2 Assembling the Piano Bench
- Unfold the piano bench.
- Ensure the legs are fully extended and locked into place for stability.
- The bench features extra padding for comfort and rubber feet for secure grip.

Figure 3.2: Piano Bench Assembly. The bench is padded for comfort and has rubber feet for stability.
3.3 Connecting Power and Accessories
- Connect the power adapter to the DC 9V input port on the back of the keyboard. Plug the adapter into a suitable power outlet.
- If using headphones for private practice, plug them into the 3.5mm headphone jack. This will mute the built-in speakers.
- Attach the sheet music stand to the designated slot on the top of the keyboard.
- Apply the keynote stickers to the keys as desired to assist with learning.

Figure 3.3: Rear panel connections for power and headphones.

Figure 3.4: Included Headphones for private practice.

Figure 3.5: Keynote Stickers applied to keyboard keys.
4. Operating Instructions
4.1 Power On/Off
Locate the power button, typically on the control panel. Press to turn the keyboard on or off. The LCD display will illuminate upon power-on.
4.2 LCD Display and Control Panel
The intuitive LCD display provides visual feedback for selected rhythms, tones, teaching functions, and demo songs. Navigate through options using the dedicated buttons on the control panel.

Figure 4.1: LCD Display and Control Buttons.
4.3 Tones and Rhythms
The keyboard features 50 tones and 100 rhythms. Use the 'Tone' and 'Rhythm' selection buttons, often accompanied by a numeric keypad, to choose your desired sound or accompaniment style. The selected number will appear on the LCD.
4.4 Teaching Functions and Demo Songs
Utilize the built-in teaching functions and 30 demo songs to aid in learning. These features are designed to provide an immersive learning experience for beginners.
4.5 Record and Playback
The record and playback functionality allows you to capture your performances and layer sounds. Refer to the control panel for 'Record' and 'Playback' buttons to initiate and review your musical creations.

Figure 4.2: Keyboard Control Panel.
4.6 External Learning Resources
Your kit includes exclusive lessons from Simply Piano. This software can be used in conjunction with your keyboard to further enhance your learning journey.
Video 4.1: Official product overview of the RockJam 61-Key Electronic Keyboard Piano SuperKit, demonstrating its features and included accessories.
5. Maintenance and Care
To ensure the longevity and optimal performance of your RockJam keyboard, follow these maintenance guidelines:
- Cleaning: Use a soft, dry cloth to wipe down the keyboard and accessories. For stubborn dirt, a slightly damp cloth can be used, followed immediately by a dry cloth. Avoid abrasive cleaners or solvents.
- Storage: When not in use, store the keyboard in a cool, dry place away from direct sunlight and extreme temperatures. Protect it from dust using a keyboard cover if available.
- Handling: Avoid dropping the keyboard or subjecting it to strong impacts. Do not place heavy objects on the keys or control panel.
- Power: Always disconnect the power adapter from the wall outlet when the keyboard is not in use for extended periods.
6. Troubleshooting
If you encounter any issues with your RockJam keyboard, refer to the table below for common problems and their solutions:
| Trouble | Possible Reason / Solution |
|---|---|
| A slight noise is heard when turning the power on or off. | This is normal and nothing to worry about. |
| After turning the power on to the keyboard there was no sound when the keys were pressed. | Check the master volume is set to the correct volume. Check that headphones or any other equipment are not plugged into the keyboard as these will cause the built-in speaker system to cut off automatically. |
| Sound is distorted or interrupted and the keyboard is not working properly. | Use of incorrect power adapter. Use the power adapter supplied or the batteries may need replacing. |
| There is a slight difference in timbre of some notes. | This is normal. The best length of sustain for different tones has been pre-set. |
| The master volume or accompaniment volume is not right. | Check that the master volume and accompaniment volume are set correctly. |
| In SYNC status the auto accompaniment does not work. | Check to make sure Single Finger or Fingered mode has been selected and then play a note from the first 19 keys on the left hand side of the keyboard. |
| The pitch of the note is not correct | Check that the transpose is set to 00. |
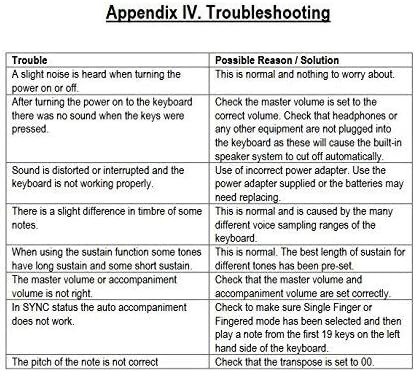
Figure 6.1: Troubleshooting Guide.
7. Specifications
| Feature | Detail |
|---|---|
| Model Name | RockJam 61-Key Keyboard Piano Kit with Stand, Stool, Headphones, Keynote Stickers & Lessons |
| Model Number | RJ561 |
| Number of Keys | 61 |
| Dimensions (L x W x H) | 36.2" x 12.8" x 4.4" (Keyboard) |
| Item Weight | 19.84 Pounds |
| Power Source | Corded Electric (9 Volts) |
| Output Wattage | 10 Watts |
| Connectivity Technology | USB |
| Connector Type | 3.5mm Jack (Headphones) |
| Skill Level | All |
| Special Features | Built-In Speaker, Digital Display, Headphone Jack, Recording, Compact |
| Supported Software | Simply Piano |
| Manufacturer | PDT Limited |
| Country of Origin | China |
8. Warranty and Support
For detailed warranty information and customer support, please refer to the official RockJam website or contact your retailer.
You can also find additional resources and product information on the RockJam Store on Amazon.
A comprehensive User Guide in PDF format is available for download: User Guide (PDF).
Protection Plans
Optional protection plans are available for purchase to extend coverage beyond the standard warranty:
- 3-Year Protection Plan: $23.99
- 4-Year Protection Plan: $32.99
- Complete Protect: $16.99/month (Renews Monthly Until Cancelled)
For return policy details, please refer to your purchase agreement or the retailer's return policy. The standard return policy for this product is 30 days for refund/replacement when sold by Amazon.


