
1. Introduction
This manual provides instructions for the installation, operation, and maintenance of the hansgrohe Showerpipe Duschsystem Rainmaker Select E 460 2jet EcoSmart. Please read this manual thoroughly before installation and use to ensure proper function and safety.
2. Safety Information
- Ensure all local plumbing and building codes are followed during installation.
- Installation should be performed by a qualified professional.
- Do not exceed the maximum operating pressure specified in the technical data.
- The safety stop at 40°C (104°F) is designed to prevent scalding. Do not bypass this feature unless necessary and with extreme caution.
- Protect the product from frost.
3. Components Included
The hansgrohe Showerpipe Duschsystem Rainmaker Select E 460 2jet EcoSmart typically includes the following components:
- Overhead Shower: Rainmaker Select 460 2jet
- Hand Shower: Raindance Select S 120 3jet EcoSmart 9 l/min
- Shower Holder: Porter'S
- Shower Hose: Isiflex 1.60 m
- Thermostat: ShowerTablet Select 700 with integrated shelf
- Shower Arm
- Mounting hardware
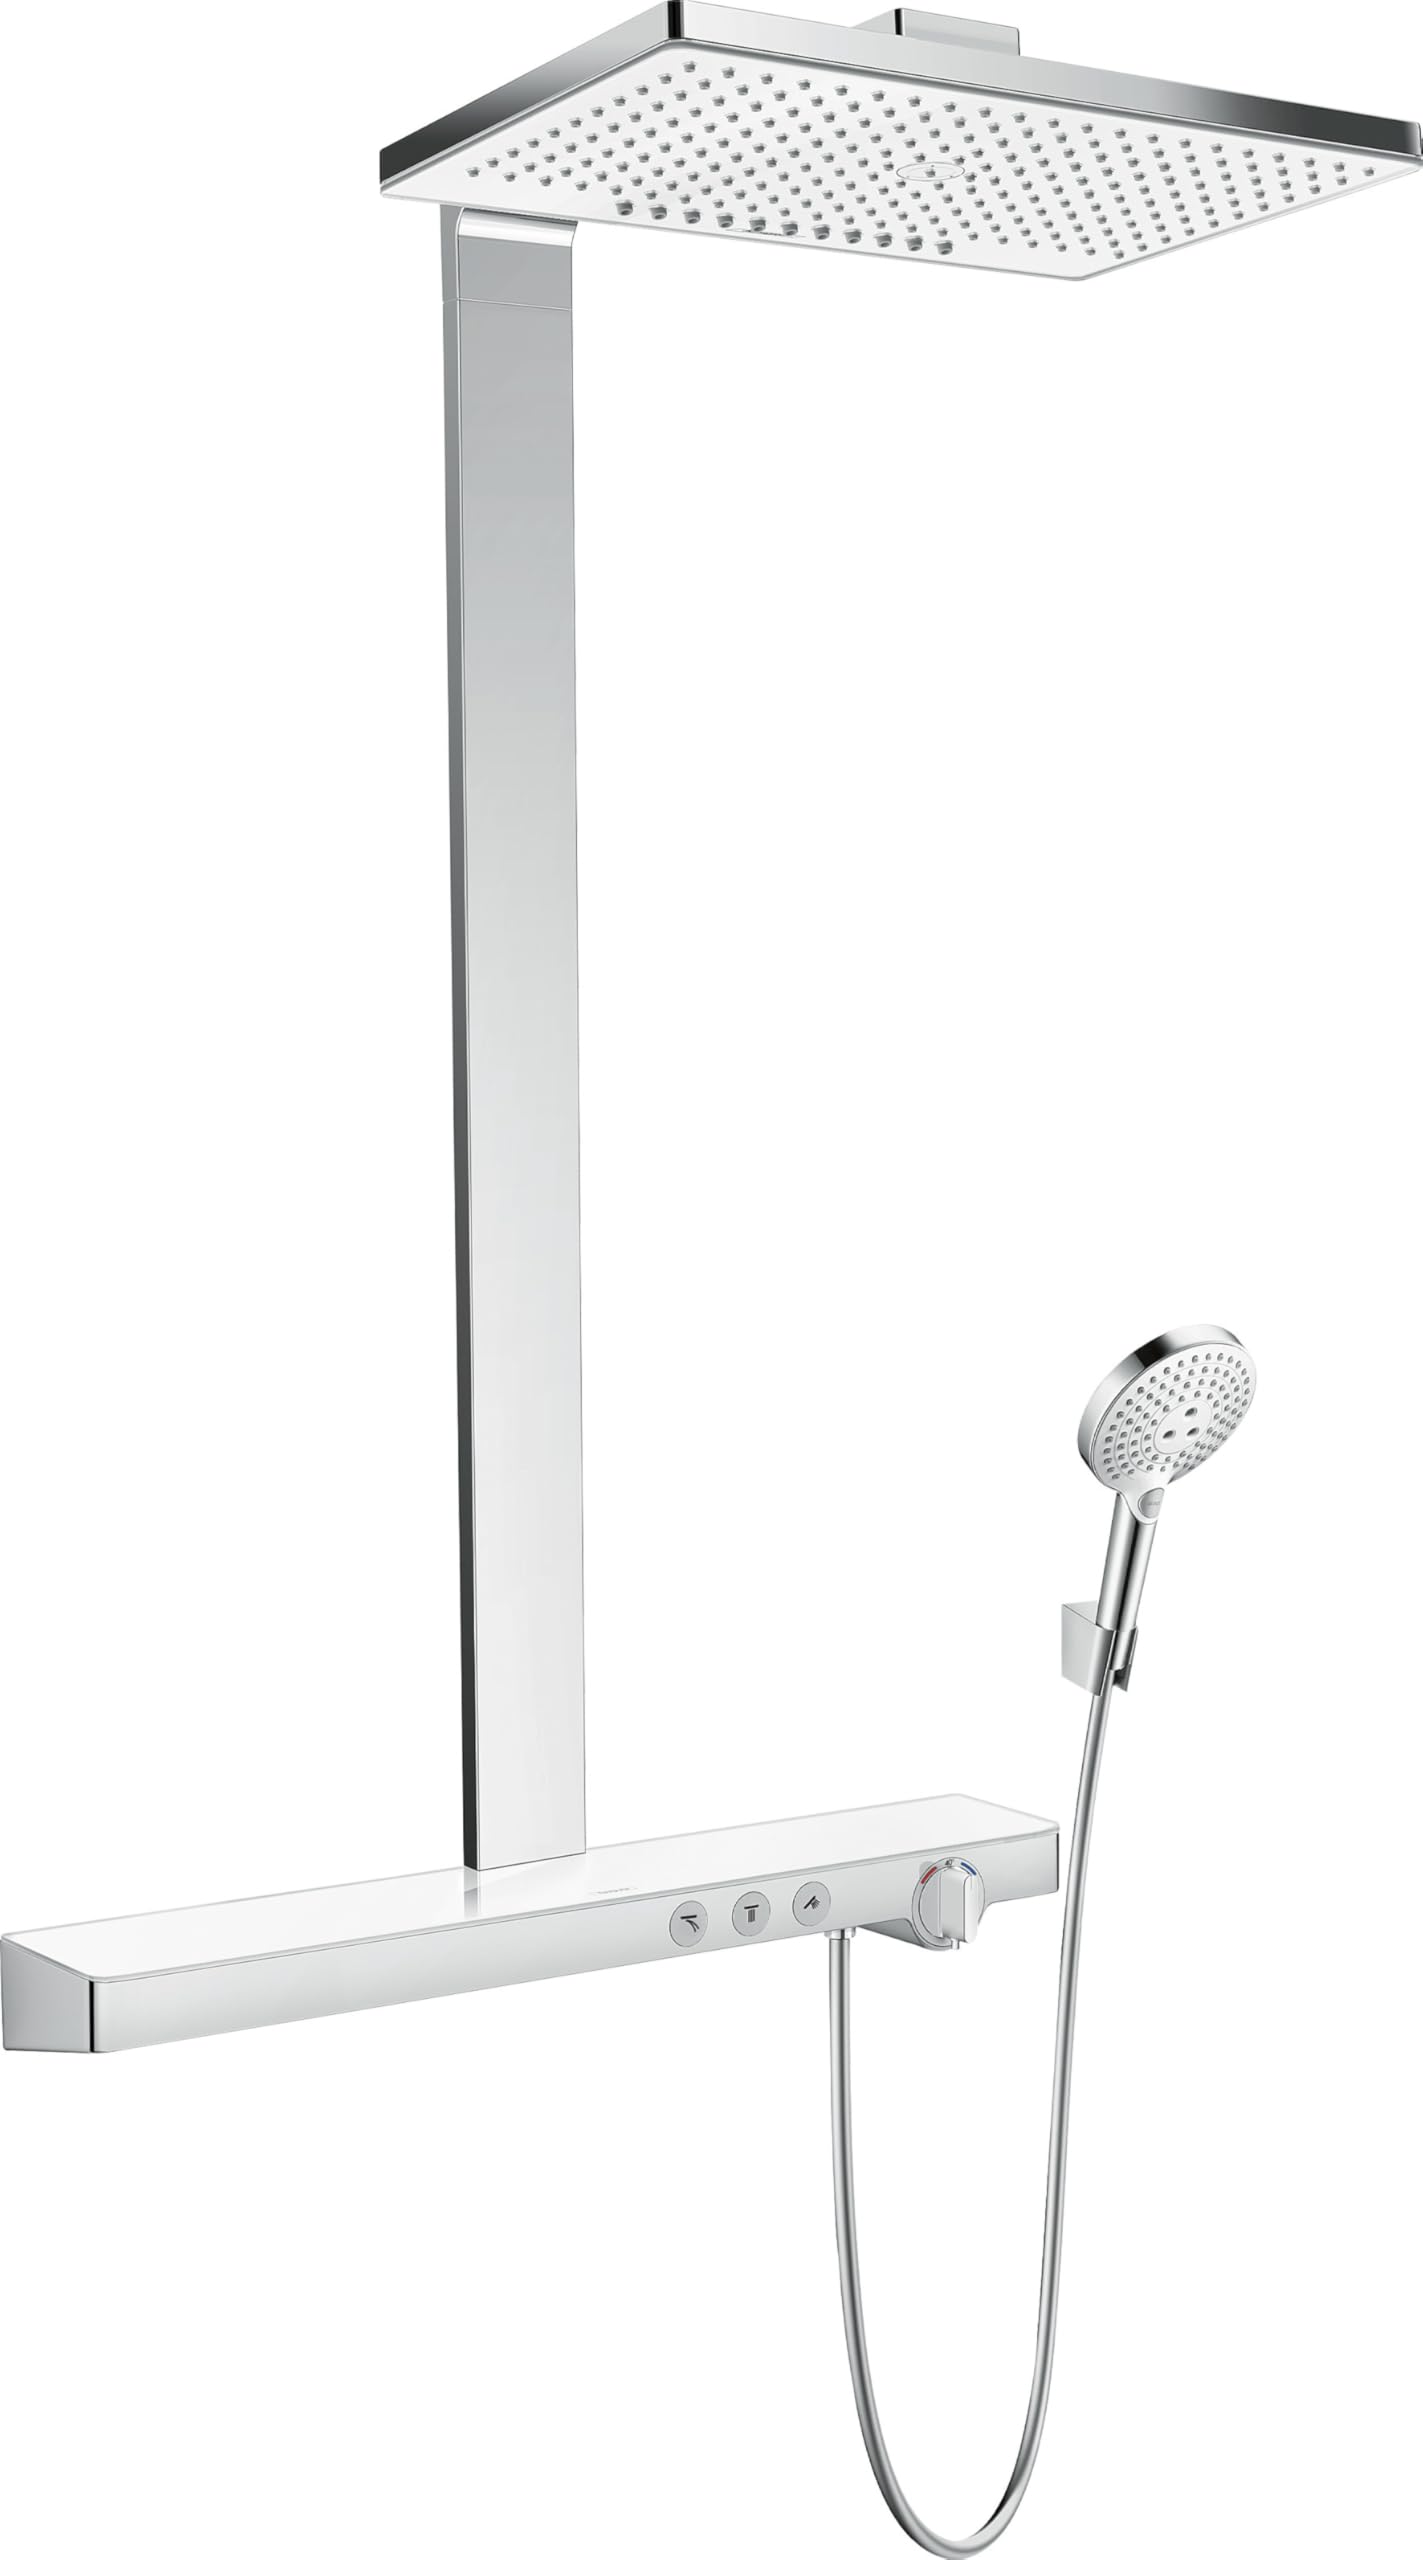
Figure 1: Overview of the hansgrohe Showerpipe Duschsystem Rainmaker Select E 460 2jet EcoSmart. This image displays the complete shower system, including the large square overhead shower, the vertical shower arm, the horizontal thermostat with control buttons and integrated shelf, and the hand shower with its hose and holder.
4. Setup and Installation
This shower system is designed for surface-mounted installation. Professional installation is recommended.
4.1 Pre-installation Checks
- Verify that the water supply lines (hot and cold) are correctly positioned and accessible.
- Ensure the wall surface is suitable for mounting and can support the weight of the shower system.
- Check the connection size (DN15) and thread (G ½) for compatibility.
- Confirm the pitch (distance between hot and cold water inlets) is 150 mm.
4.2 Installation Steps (General Guide)
- Prepare the Wall: Mark the drilling points for the wall brackets according to the provided template.
- Mount Brackets: Drill holes, insert wall plugs, and secure the mounting brackets.
- Connect Water Supply: Attach the thermostat unit to the hot and cold water connections. Ensure proper sealing.
- Mount Thermostat: Secure the thermostat ShowerTablet Select 700 to the wall brackets.
- Install Shower Arm and Overhead Shower: Attach the shower arm to the main unit and then connect the Rainmaker Select 460 2jet overhead shower.
- Connect Hand Shower: Attach the Isiflex shower hose to the thermostat and the Raindance Select S 120 3jet hand shower. Mount the Porter'S shower holder.
- Test for Leaks: Turn on the water supply and check all connections for leaks.
5. Operating Instructions
The Showerpipe system allows for simultaneous use of multiple water outlets.
5.1 Thermostat ShowerTablet Select 700
Figure 2: Detail of the ShowerTablet Select 700 thermostat. This image highlights the horizontal control panel with its temperature dial on the right and the Select buttons for activating the overhead and hand showers.
- Temperature Control: Use the rotary knob on the right side of the thermostat to adjust the water temperature.
- Safety Stop: The thermostat features a safety stop at 40°C (104°F) to prevent accidental scalding. To exceed this temperature, press and hold the safety button while turning the knob.
- Flow Control (Select Button): The system uses Select buttons to control the water flow to the different outlets.
- Press the button marked with the overhead shower icon to activate the Rainmaker Select 460 2jet.
- Press the button marked with the hand shower icon to activate the Raindance Select S 120 3jet.
- Press the button again to turn off the respective outlet.
- Integrated Shelf: The top surface of the thermostat serves as a generous shelf for shower essentials.
5.2 Overhead Shower Rainmaker Select 460 2jet
- Spray Types: The overhead shower offers two spray types:
- Rain: A full, soft shower rain, ideal for rinsing shampoo.
- RainStream: A powerful, concentrated jet for an invigorating shower experience.
- Switching Spray Types: The method for switching between Rain and RainStream is typically integrated into the shower head design or controlled via a separate mechanism on the shower head itself. Refer to the specific overhead shower instructions for details.
- EcoSmart: This technology limits the water flow to 9 l/min for both Rain and RainStream jets, contributing to water and energy savings.
5.3 Hand Shower Raindance Select S 120 3jet EcoSmart
- The hand shower features 3 spray types. These are typically selected by pressing a button on the hand shower itself.
- EcoSmart: The hand shower also incorporates EcoSmart technology, limiting its flow rate to 9 l/min.
6. Maintenance and Cleaning
Regular cleaning and maintenance will ensure the longevity and optimal performance of your hansgrohe Showerpipe.
- Cleaning Surfaces: Clean the chrome and white surfaces with a soft cloth and a mild, non-abrasive cleaning agent. Avoid cleaners containing alcohol, hydrochloric acid, formic acid, acetic acid, or phosphoric acid, as these can damage the finish.
- Cleaning Spray Disc: The white spray disc of the overhead shower is designed to be easy to clean. Regularly wipe the silicone nozzles to remove limescale deposits. For stubborn deposits, the spray disc may be removable for more thorough cleaning (refer to specific overhead shower instructions).
- Limescale Removal: In areas with hard water, limescale can build up. Use a descaling agent specifically designed for bathroom fixtures, following the manufacturer's instructions. Ensure thorough rinsing after descaling.
- Hose Care: Periodically check the shower hose for kinks or damage. Clean the hose with a soft cloth and mild soap.
7. Troubleshooting
| Problem | Possible Cause | Solution |
|---|---|---|
| Low water flow from shower. |
|
|
| Water temperature fluctuates or is incorrect. |
|
|
| Leaks at connections. |
|
|
8. Specifications
- Model: 27028400
- Brand: hansgrohe
- Product Type: Showerpipe Duschsystem
- Overhead Shower Size: 460 x 300 mm
- Overhead Shower Spray Types: Rain, RainStream
- Flow Rate (Overhead Shower, at 3 bar): 9 l/min (EcoSmart)
- Flow Rate (Hand Shower, at 3 bar): 9 l/min (EcoSmart)
- Shower Arm Length: 450 mm
- Thermostat: ShowerTablet Select 700
- Safety Stop: 40°C (adjustable hot water limitation)
- Installation Type: Surface-mounted
- Connection Size: DN15
- Connection Thread: G ½
- Pitch: 150 mm
- Included Components: Shower Arm, Shower Head, Hand Shower, Shower Hose, Shower Holder, Thermostat
- Material: Brass (Handle Material)
9. Warranty and Support
hansgrohe products are manufactured to high-quality standards and come with a manufacturer's warranty. For specific warranty terms and conditions, please refer to the warranty card included with your product or visit the official hansgrohe website.
For technical support, spare parts, or service inquiries, please contact hansgrohe customer service. Contact details can typically be found on the official hansgrohe website or in the product packaging.
Online Resources: www.hansgrohe.com


