
1. Product Overview
The Godox X1R-N is a TTL wireless flash trigger receiver designed for Nikon DSLR cameras. It features multi-channel triggering, stable signal transmission, and sensitive reaction, making it compatible with Nikon i-TTL autoflash systems and cameras equipped with a PC sync socket.

Figure 1: Godox X1R-N Receiver with labeled components.
Key Components:
- Hot Shoe Speedlight Connection: For mounting a speedlight flash.
- LCD Panel: Displays channel, group, and other settings.
- CH Channel Setting Button: Adjusts the wireless channel.
- GR Group Setting Button: Adjusts the wireless group.
- TEST Trigger Button: Manually triggers the flash for testing.
- Power Switch: Turns the receiver ON or OFF.
- Status Indicator Lamp: LED light indicating operational status.
- Micro USB Port: For firmware upgrades.
- 2.5mm Shutter Release Port: For connecting a shutter release cable to control camera shooting.
- Battery Compartment: Holds two AA batteries.
2. Setup
2.1 Battery Installation
- Locate the battery compartment on the underside of the X1R-N receiver.
- Slide the battery compartment cover open.
- Insert two AA batteries, ensuring correct polarity (+/-).
- Close the battery compartment cover securely.

Figure 2: Battery compartment with AA batteries inserted.
2.2 Mounting the Receiver
The X1R-N receiver features a metal base design with a 1/4-inch screw mount, allowing for versatile mounting options.
- On a Light Stand: Attach the receiver directly to a light stand using the 1/4-inch screw mount at its base.
- On a Flash Hot Shoe: The receiver can be mounted onto a flash unit's hot shoe.

Figure 3: The metal base with 1/4-inch screw mount for secure attachment.
2.3 Connecting to a Flash Unit or Camera
The X1R-N receiver can connect to various flash units or control camera shooting.
- For Studio Flashes: Use the provided sync cable to connect the receiver to the sync port of your studio flash.
- For Speedlights: Mount the speedlight directly onto the hot shoe of the X1R-N receiver.
- For Camera Shutter Release: Connect a 2.5mm shutter release cable from the receiver to your camera's shutter release port.
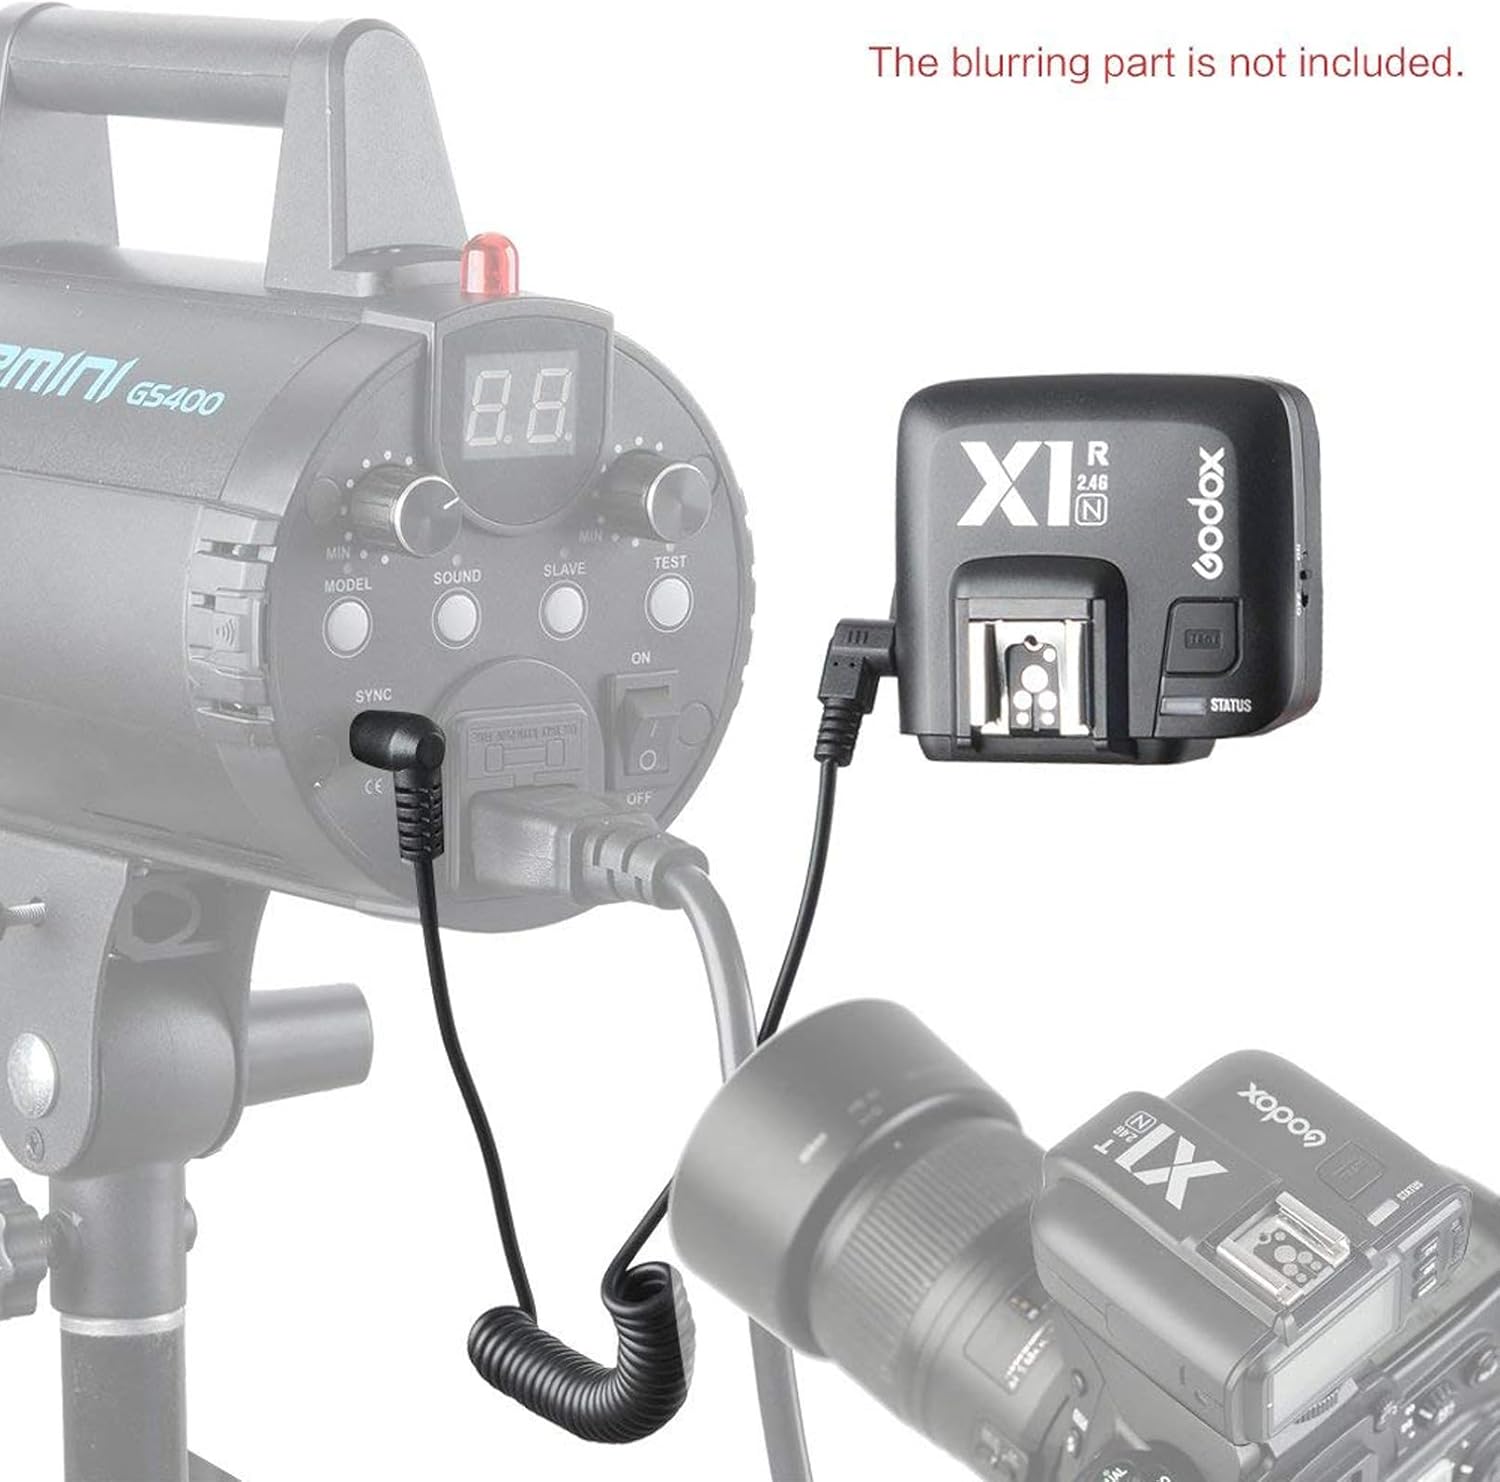
Figure 4: Connecting the X1R-N receiver to a studio flash.
3. Operating Instructions
3.1 Power On/Off
Slide the Power Switch to the 'ON' position to power on the receiver. Slide it to 'OFF' to power off.
3.2 Setting Channels and Groups
The X1R-N supports 5 groups and 32 channels for wireless control.
- Press the CH button to cycle through available channels. Ensure the channel matches your Godox X1T-N/X2T-N/XPro-N/XProII-N/X3N transmitter.
- Press the GR button to cycle through available groups (A, B, C, D, E). Match the group to your transmitter settings for specific flash units.

Figure 5: LCD display for channel and group selection.
3.3 Wireless Flash Triggering
Once the receiver is powered on, connected to a flash, and its channel/group settings match the transmitter, the flash can be triggered wirelessly. The X1R-N supports TTL autoflash, 1/8000s High Speed Sync (HSS), Flash Exposure Compensation (FEC), flash exposure lock, and modeling flash.

Figure 6: X1R-N receiver mounted on a camera.
3.4 Wireless Shutter Release
When connected to a camera via the 2.5mm shutter release port, the receiver can control the camera's shutter remotely through a compatible Godox transmitter.
4. Features
- 2.4G Wireless X System: Provides a stable and reliable wireless connection with a transmission distance of up to 100 meters.
- Multi-Channel & Grouping System: Supports 5 groups and 32 channels for flexible flash control.
- Full TTL Functionality: Compatible with Nikon i-TTL autoflash, including 1/8000s High Speed Sync, Flash Exposure Compensation, and Flash Exposure Lock.
- Large LCD Panel: Clear and easy-to-read display for settings adjustment.
- Synchronization Delay Setting: Allows for precise timing adjustments.
- USB Firmware Upgrade: Micro USB port enables future firmware updates to ensure compatibility and performance enhancements.

Figure 7: The 2.4G Wireless X System offers a transmission range of 0-100 meters.
Compatibility:
The Godox X1R-N receiver is compatible with Nikon DSLR cameras and works seamlessly with Godox X1T-N, X2T-N, XPro-N, XProII-N, and X3N transmitters (sold separately).
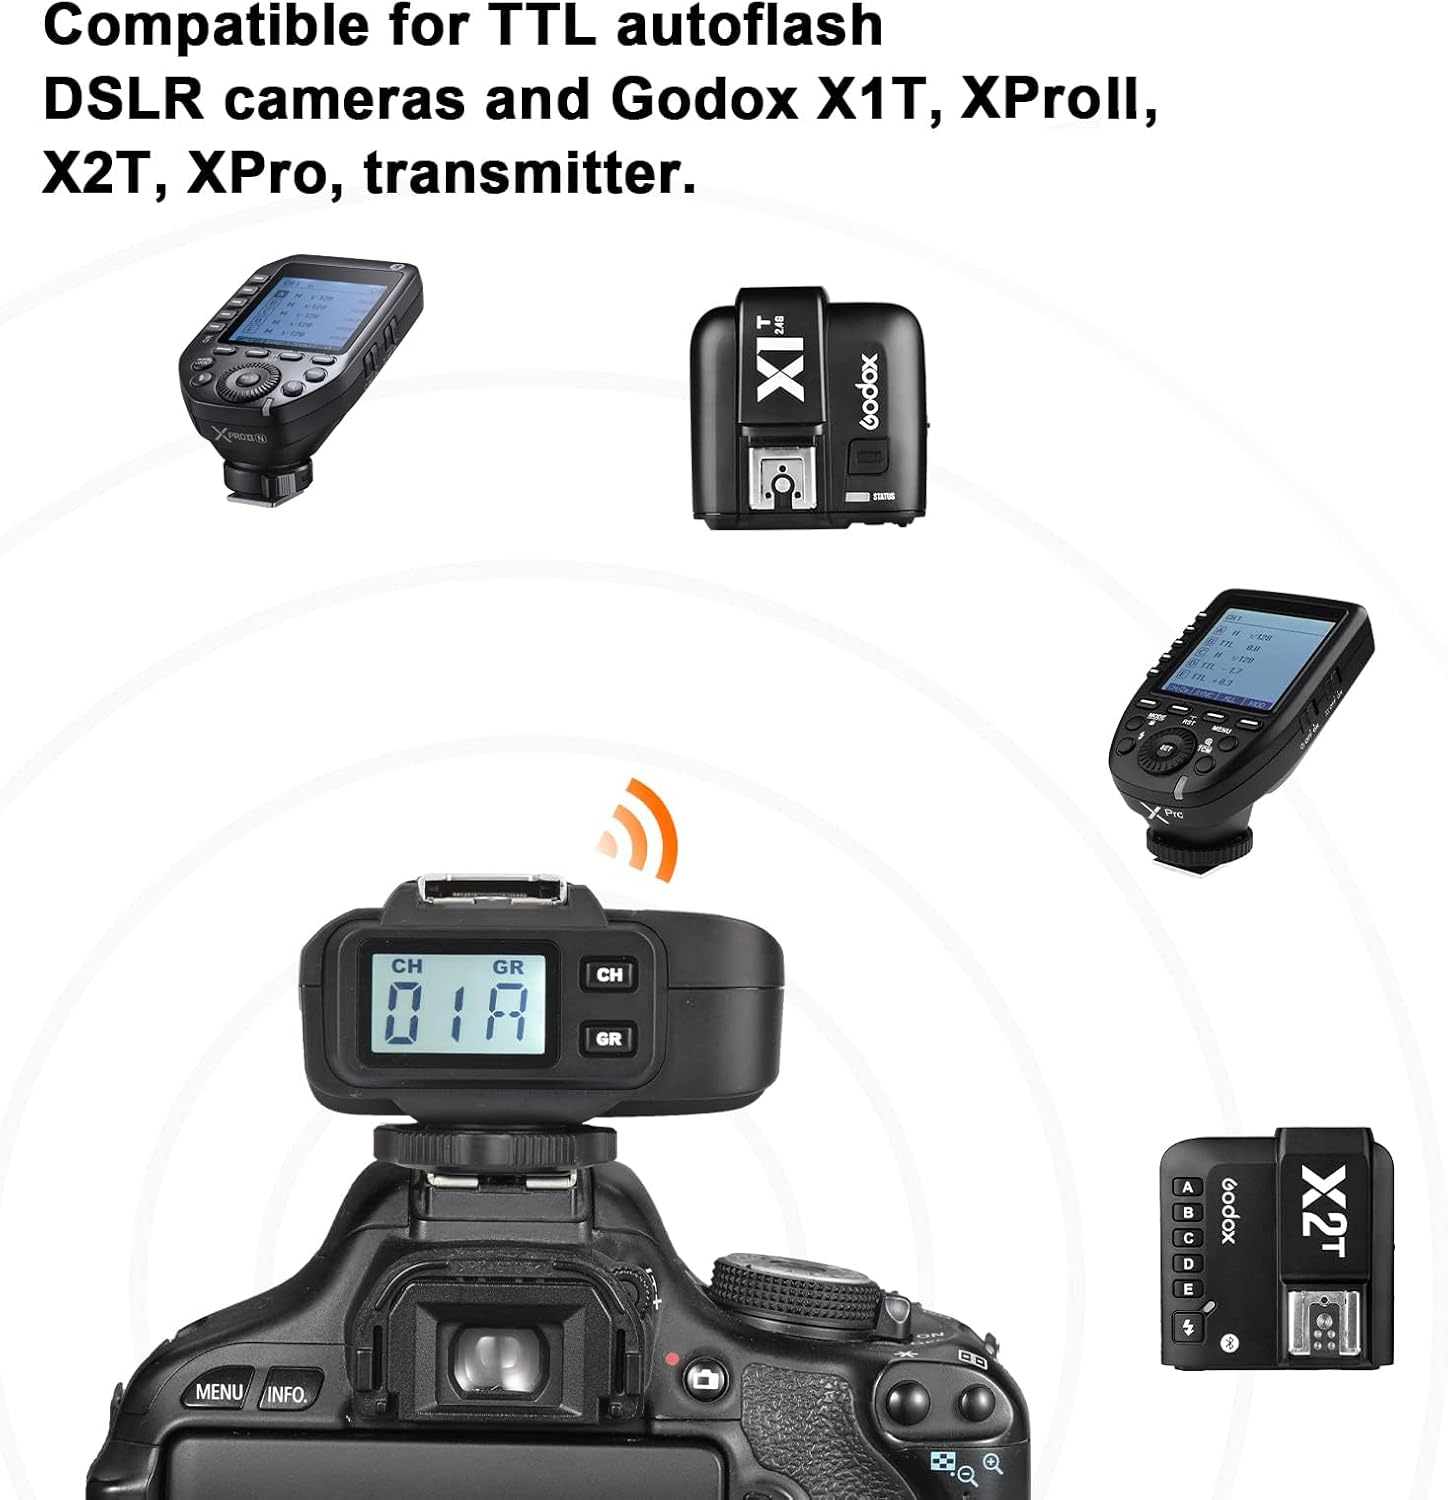
Figure 8: Compatible Godox transmitters for the X1R-N receiver.
5. Maintenance
- Cleaning: Use a soft, dry cloth to clean the exterior of the receiver. Avoid using harsh chemicals or abrasive materials.
- Storage: Store the receiver in a cool, dry place away from direct sunlight and extreme temperatures. Remove batteries if storing for extended periods to prevent leakage.
- Firmware: Periodically check the Godox official website for new firmware updates and follow the instructions for installation via the Micro USB port.

Figure 9: Micro USB port for firmware updates.
6. Troubleshooting
If you encounter issues with your Godox X1R-N receiver, consider the following common solutions:
- No Power: Ensure batteries are correctly inserted and fully charged. Check the power switch position.
- Flash Not Triggering:
- Verify that the receiver and transmitter are set to the same channel and group.
- Check the connection between the receiver and the flash unit.
- Ensure the flash unit is powered on and ready to fire.
- Confirm the transmitter is functioning correctly.
- Inconsistent Triggering: Check for potential interference from other wireless devices. Try changing the channel. Ensure the receiver is within the effective transmission range (up to 100m).
- TTL/HSS Issues: Ensure your camera and flash unit support TTL and HSS functions and are correctly configured.
7. Specifications
| Feature | Detail |
|---|---|
| Model | X1N |
| Compatibility | Nikon DSLR Cameras (i-TTL autoflash) |
| Wireless System | 2.4G Wireless X System |
| Transmission Range | Approx. 100 meters |
| Channels | 32 |
| Groups | 5 (A, B, C, D, E) |
| Sync Mode | High-Speed Sync (up to 1/8000s), First Curtain Sync, Second Curtain Sync |
| Flash Exposure Compensation | Yes |
| Power Supply | 2 x AA Batteries |
| Dimensions | 4.2 x 2.2 x 4.2 inches |
| Weight | 3.52 ounces |
| Firmware Upgrade | Micro USB Port |
8. What's in the Box
The Godox X1R-N package typically includes the following items:
- Godox X1R-N Wireless Flash Trigger Receiver (x1)
- Adapter (x1)
- Shutter Cable (x2)
- Flash Sync Wire (x1)
9. Warranty and Support
For warranty information, technical support, or service inquiries, please refer to the official Godox website or contact your local distributor. Keep your purchase receipt as proof of purchase for warranty claims.


