Introduction
The myTouchSmart Plug-In Indoor/Outdoor Digital Timer is designed to simplify the automation of your lighting and appliances. This weather-resistant timer features two grounded outlets, offering versatile control for landscape, patio, and seasonal lighting. It provides both customizable "My On/Off Time" settings and convenient daily preset options, along with a 24-hour countdown feature. The large LCD screen and blue LED indicators ensure easy programming and monitoring of active programs. Compatible with various light sources including CFL, LED, incandescent, and halogen, this UL listed product is built for convenience and energy efficiency.
Product Features
- Easy-to-set digital timer with two grounded outlets for landscape, patio, and seasonal lights and appliances.
- Features simple daily preset options, fully customizable "My On/Off Time" settings, and a custom, up to 24-hour countdown feature.
- Weather resistant for both outdoor and indoor use. Includes an attached bracket for easy mounting and installation.
- Compatible with CFL, LED, incandescent, and halogen light sources.
- Large LCD screen and blue LED indicators to show active programs.
- Electrical Rating: 125V/60Hz, 15A/1875W General purpose/resistive.
- CSA listed for safety.

Figure 1: Control outdoor or indoor lights with the myTouchSmart timer.

Figure 2: The timer is weather resistant and suitable for outdoor use.
Setup Instructions
- Initial Power-Up: Plug the timer into a standard 125V AC outlet. The LCD screen will illuminate. If the screen is blank or not reading, plug it in for at least one hour to charge the internal battery.
- Set Current Time:
- Press the CLOCK button.
- Use the UP (▲) and DOWN (▼) arrows to adjust the hour.
- Press CLOCK again to move to minutes, then use the arrows to adjust.
- Press CLOCK a third time to confirm and exit time setting.
- Mounting: Use the integrated mounting bracket to securely attach the timer near your desired outlet. Ensure the timer is positioned to prevent water accumulation.

Figure 3: Simple setup involves setting the current time and custom ON/OFF times.
Video 1: An instructional video demonstrating how to set the current time and program ON/OFF times on the myTouchSmart timer.
Operating Instructions
Setting Custom ON/OFF Times ("My On/Off Time")
- Set ON Time:
- Press the MY ON TIME button. The display will show the current ON time setting.
- Use the UP (▲) and DOWN (▼) arrows to adjust the desired ON hour.
- Press MY ON TIME again to move to minutes, then use the arrows to adjust.
- Press MY ON TIME a third time to confirm and save the ON time. The blue LED indicator next to "my on time" will illuminate when active.
- Set OFF Time:
- Press the MY OFF TIME button. The display will show the current OFF time setting.
- Use the UP (▲) and DOWN (▼) arrows to adjust the desired OFF hour.
- Press MY OFF TIME again to move to minutes, then use the arrows to adjust.
- Press MY OFF TIME a third time to confirm and save the OFF time. The blue LED indicator next to "my off time" will illuminate when active.
Using Preset Schedules
The timer offers three convenient preset schedules:
- Evening (5pm-12am): Press the EVENING button.
- Morning (5am-8am): Press the MORNING button.
- All Night (6pm-6am): Press the ALL NIGHT button.
To activate a preset, simply press the corresponding button. The blue LED indicator next to the selected preset will light up.
24-Hour Countdown
To use the countdown feature:
- Press the MY COUNTDOWN button.
- Use the UP (▲) and DOWN (▼) arrows to set the desired countdown duration (up to 24 hours).
- Press MY COUNTDOWN again to start the countdown. The timer will turn ON for the set duration and then turn OFF.

Figure 4: Program custom ON/OFF times or select from convenient preset schedules.
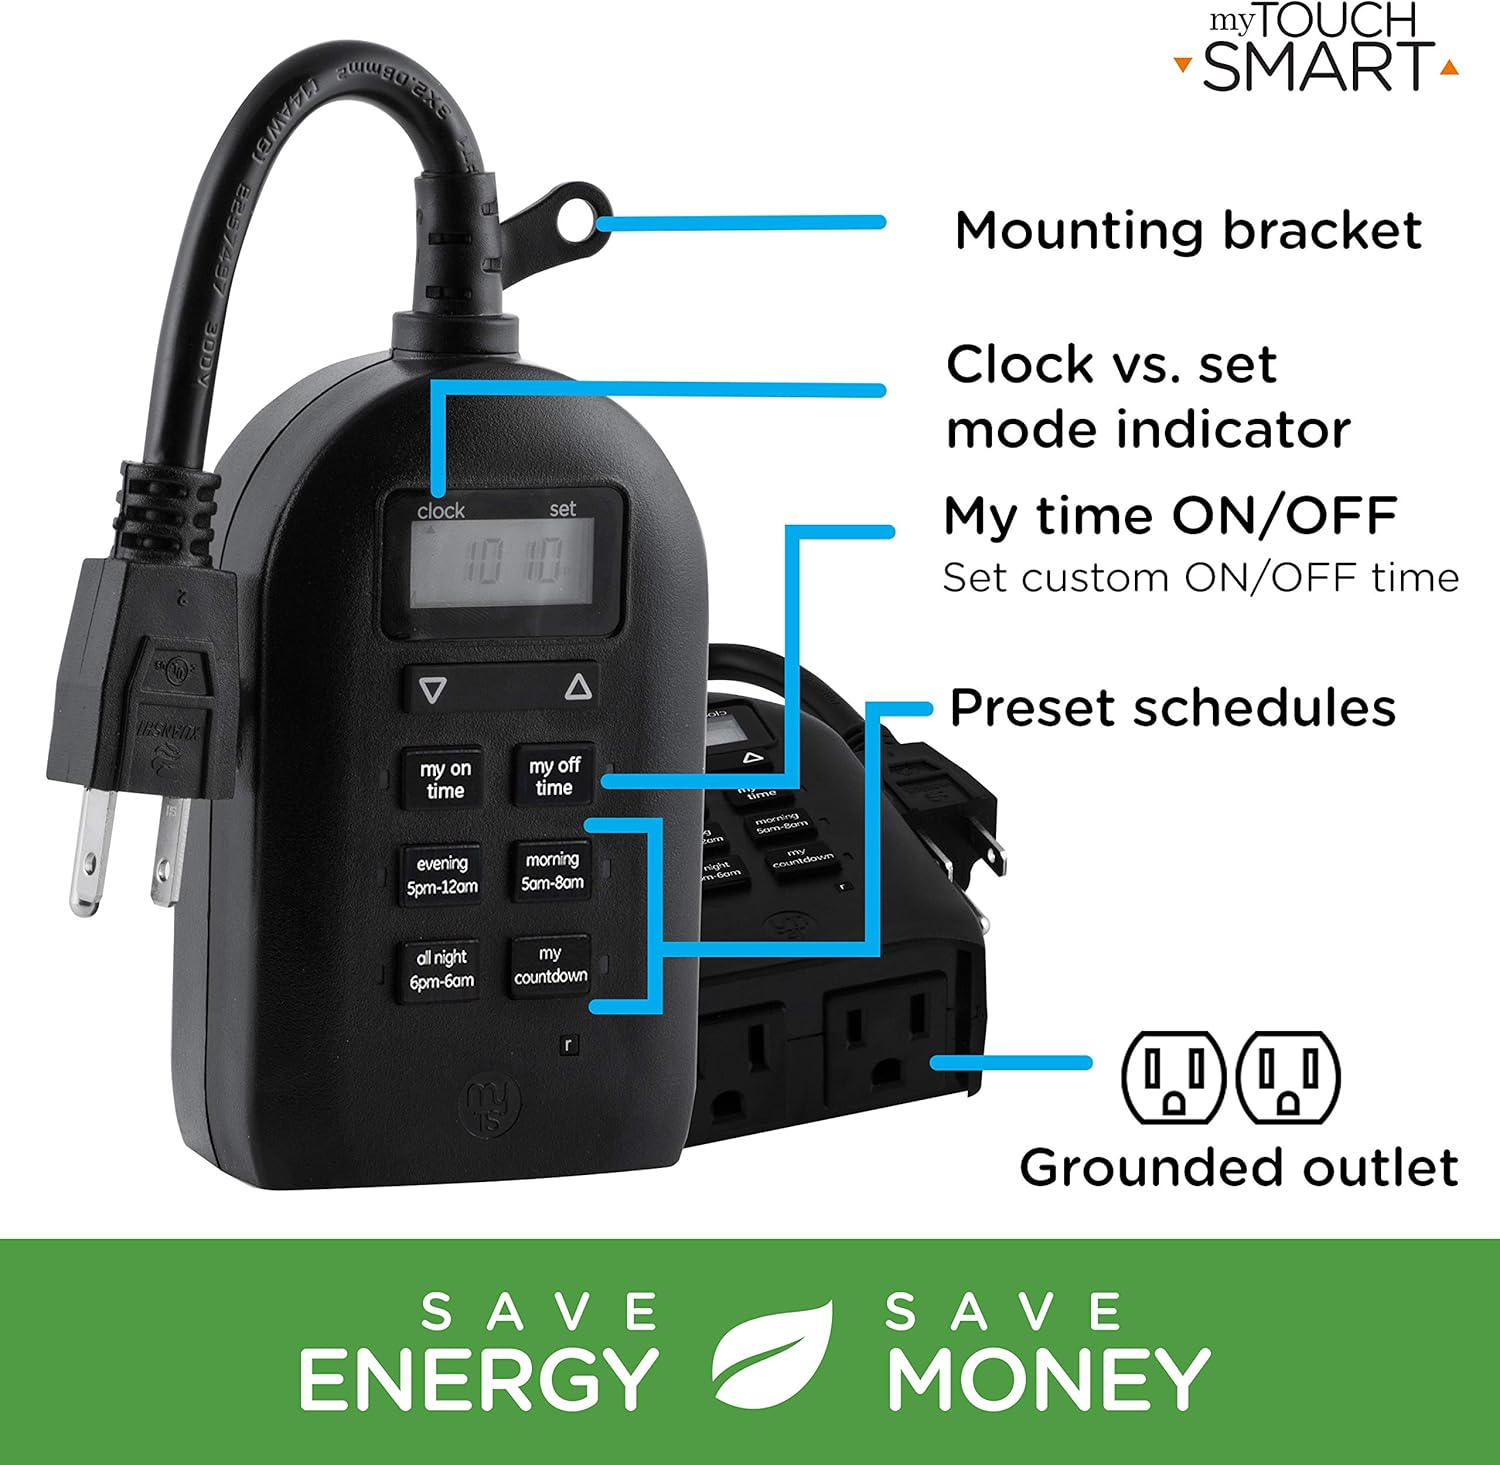
Figure 5: Key features and controls of the myTouchSmart timer.
Maintenance
- Cleaning: Disconnect the timer from the power outlet before cleaning. Wipe the exterior with a soft, damp cloth. Do not use harsh chemicals or abrasive cleaners.
- Storage: When not in use for extended periods, store the timer in a cool, dry place away from direct sunlight and extreme temperatures.
- Internal Battery: The timer contains an internal battery to maintain settings during power outages. If the display is dim or blank, plug the timer into an outlet for at least one hour to recharge the battery.
Troubleshooting
| Problem | Possible Cause | Solution |
|---|---|---|
| Timer display is blank or dim. | Internal battery is low or depleted. | Plug the timer into a live outlet for at least one hour to charge the internal battery. |
| Connected device does not turn ON/OFF. |
|
|
| Timer is not responding to button presses. | Temporary software glitch or low battery. | Unplug the timer from the outlet for a few minutes, then plug it back in. Allow the internal battery to charge if the display was dim. |
Specifications
| Feature | Detail |
|---|---|
| Model Number | 26898-P1 |
| Electrical Rating | 125V AC, 60Hz, 15A, 1875W (General Purpose/Resistive) |
| Outlets | 2 Grounded Outlets |
| Dimensions | 3.2"D x 7"W x 7.5"H (approximate) |
| Item Weight | 9.92 ounces |
| Display Type | LCD |
| Mounting Type | Plug-In Mount |
| Certifications | UL Listed, CSA Listed |
| Internal Battery | Yes (for settings retention) |

Figure 6: Product dimensions for the myTouchSmart timer.
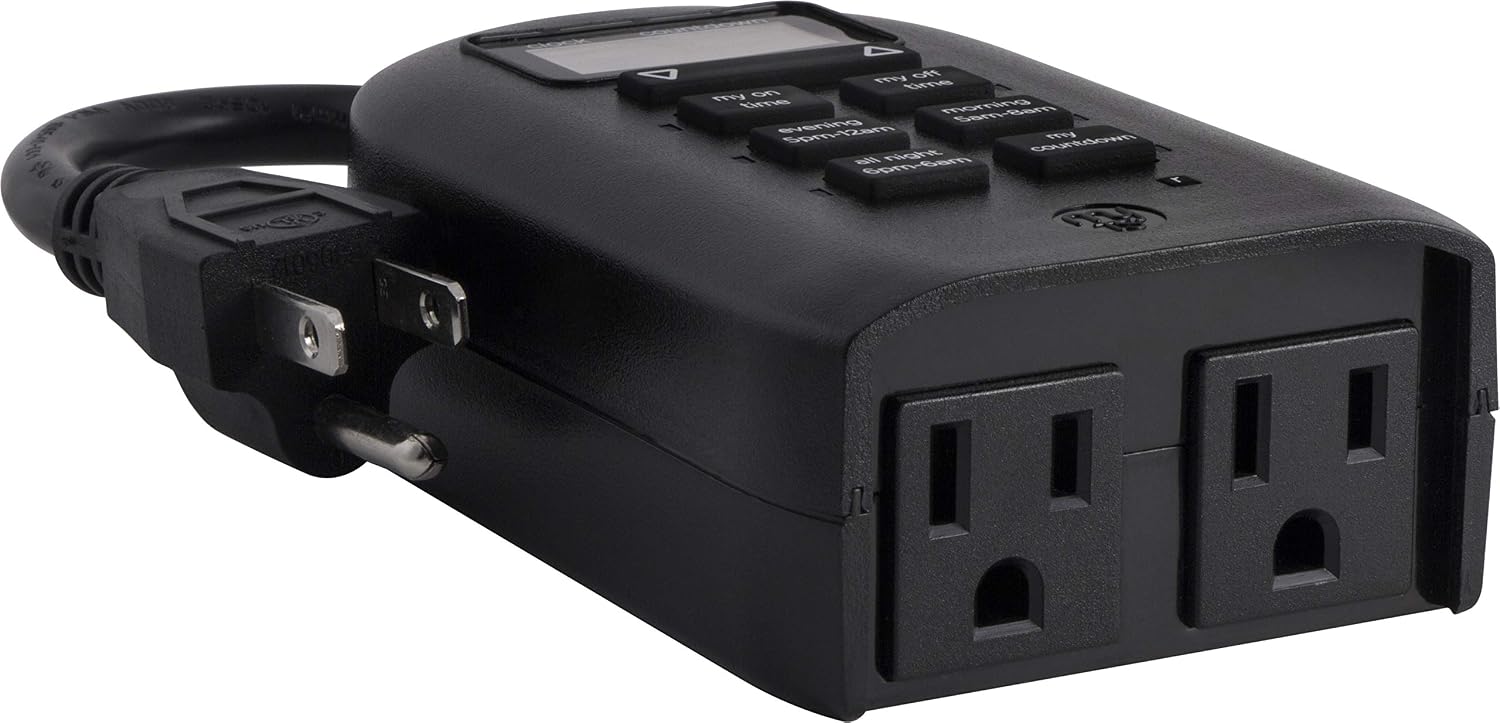
Figure 7: Dual grounded outlets for connecting devices.
Warranty and Support
This myTouchSmart timer is backed by a one-year limited warranty from the date of purchase. For warranty claims or technical support, please refer to the contact information provided with your product packaging or visit the official myTouchSmart website.
For additional resources, you may also refer to the official User Manual (PDF) or Installation Manual (PDF) available online.


