
1. Introduction
This manual provides detailed instructions for the installation, operation, and maintenance of your Elite Screens VMAX2 Electric Projection Screen, model VMAX92UWH2-E30. This 92-inch, 16:9 aspect ratio screen is designed for both ceiling and wall mounting, featuring a durable metal casing and a built-in adjustable vertical limit switch for precise drop and rise settings. Please read this manual thoroughly before installation and use to ensure proper function and longevity of your product.
2. Safety Instructions
- Read all instructions: Before operating the screen, read and understand all safety and operating instructions.
- Installation: Installation should be performed by qualified personnel. Ensure the mounting surface can support the screen's weight.
- Power: Connect the screen to a grounded power outlet. Do not operate with a damaged power cord or plug.
- Moving parts: Keep hands and fingers clear of the screen's path during operation to prevent injury.
- Environment: Do not expose the screen to rain, moisture, or extreme temperatures. Avoid placing near heat sources.
- Cleaning: Disconnect power before cleaning. Use a soft, damp cloth for cleaning the casing. Refer to maintenance for screen surface cleaning.
- Repairs: Do not attempt to repair this product yourself. Refer all servicing to qualified service personnel.
3. Package Contents
Please check to ensure all components are present before proceeding with installation:
- VMAX2 Electric Projection Screen (VMAX92UWH2-E30)
- IR Remote Control
- Wall Box Controller
- Mounting Hardware (screws, anchors)
- User Manual (this document)
4. Setup & Installation
The VMAX2 screen can be installed on a wall or ceiling. Ensure the mounting location is structurally sound and can support the screen's weight (approximately 25.05 lbs).
4.1 Mounting the Screen
Identify the desired mounting points on your wall or ceiling. Use a stud finder to locate wooden studs or ensure you are drilling into solid material. Mark the drilling locations, ensuring they are level and spaced correctly for the screen's casing.
- Drill pilot holes at the marked locations.
- Insert appropriate wall anchors if drilling into drywall.
- Secure the screen's mounting brackets (or directly mount the casing if designed for it) using the provided screws. Ensure the screen is firmly attached and level.
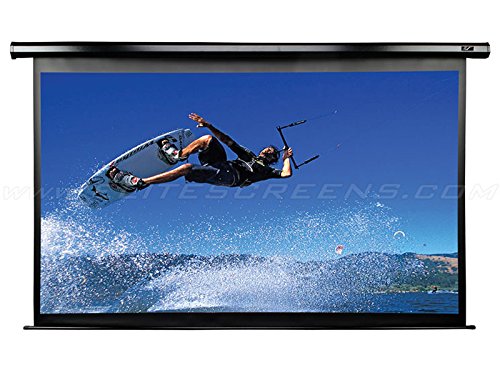
Image 4.1: The Elite Screens VMAX2 Electric Projection Screen, model VMAX92UWH2-E30, shown mounted on a wall. The screen casing is visible at the top, with the white projection surface retracted.
4.2 Electrical Connection
Connect the screen's power cord to a standard grounded electrical outlet. Ensure the power supply matches the screen's requirements (typically 120V AC, 60Hz for North America).
4.3 Adjusting Vertical Limit Switches
The screen features built-in adjustable vertical limit switches to control the screen's fully extended (down) and fully retracted (up) positions. These are typically located on the motor housing or end cap of the screen casing.
- Lower Limit Adjustment: Use the remote or wall switch to fully extend the screen. If the screen extends too far or not far enough, locate the 'down' limit screw (refer to specific diagrams in the full product manual if available). Turn the screw clockwise to decrease the drop distance or counter-clockwise to increase it. Test the adjustment.
- Upper Limit Adjustment: Use the remote or wall switch to fully retract the screen. If the screen retracts too far into the casing or leaves a gap, locate the 'up' limit screw. Turn the screw clockwise to decrease the retraction distance or counter-clockwise to increase it. Test the adjustment.
- Fine-tuning: Repeat adjustments as necessary until the screen stops precisely at your desired upper and lower positions.
5. Operating Instructions
Your VMAX2 screen can be operated using the included IR remote control or the wired wall box controller.
5.1 Using the IR Remote Control
- Ensure the remote has fresh batteries and is pointed towards the IR receiver on the screen casing.
- Press the UP button to retract the screen.
- Press the DOWN button to extend the screen.
- Press the STOP button to halt the screen at any desired position.
5.2 Using the Wall Box Controller
- The wall box controller provides a wired alternative for screen operation.
- Press the UP button to retract the screen.
- Press the DOWN button to extend the screen.
- Press the STOP button to halt the screen at any desired position.
6. Maintenance
Proper maintenance ensures the longevity and optimal performance of your projection screen.
6.1 Cleaning the Screen Surface
The MaxWhite screen material is durable but requires careful cleaning.
- Dust: Gently dust the screen surface with a soft, lint-free cloth or a soft brush.
- Stains: For stubborn spots, lightly dampen a soft cloth with mild soap and water. Gently wipe the affected area. Do not rub vigorously.
- Avoid: Do not use harsh chemicals, abrasive cleaners, or solvents on the screen surface, as this can damage the material.
- Ensure the screen is completely dry before retracting it.
6.2 Cleaning the Casing
The metal casing can be cleaned with a soft, damp cloth. Avoid getting moisture inside the casing or near electrical components. Do not use abrasive cleaners.
7. Troubleshooting
Refer to the following table for common issues and their solutions.
| Problem | Possible Cause | Solution |
|---|---|---|
| Screen does not move. | No power; Remote control batteries dead; IR receiver blocked. | Check power connection; Replace remote batteries; Ensure clear line of sight to IR receiver. |
| Screen stops at incorrect position. | Limit switches require adjustment. | Refer to Section 4.3 for adjusting vertical limit switches. |
| Remote control not working. | Dead batteries; Out of range; IR receiver blocked. | Replace batteries; Move closer to screen; Clear any obstructions to IR receiver. |
| Screen surface appears wrinkled or uneven. | Temperature fluctuations; Screen stored improperly. | Allow screen to hang fully extended for a period in a stable room temperature. If persistent, contact support. |
8. Specifications
Key specifications for the Elite Screens VMAX2 VMAX92UWH2-E30 Electric Projection Screen:
- Model: VMAX92UWH2-E30
- Screen Material: MaxWhite
- Display Dimensions: 92 inches (diagonal)
- Aspect Ratio: 16:9
- Viewing Angle: 160 Degrees
- Mounting Type: Ceiling Mount, Wall Mount
- Operation Mode: Automatic (Electric)
- Enclosure Material: Metal
- Item Weight: 25.05 Pounds
- Manufacturer: ELITE SCREENS
9. Warranty and Support
Elite Screens products are manufactured under the highest quality standards. This product comes with a manufacturer's warranty. For detailed warranty information, including terms and conditions, please refer to the warranty card included with your product or visit the official Elite Screens website.
For technical support, troubleshooting assistance beyond this manual, or to inquire about replacement parts, please contact Elite Screens customer service. Contact information can typically be found on the manufacturer's website or on your product packaging.
Please retain your proof of purchase for warranty claims.


