Introduction
This manual provides detailed instructions for the installation and proper use of the Metra 95-8215S Double DIN Dash Kit. This kit is designed to facilitate the installation of an aftermarket Double DIN car stereo into specific 2005-2010 Toyota Avalon vehicles, ensuring a factory-matched appearance and secure fit.
Safety Information
- Always disconnect the vehicle's negative battery terminal before beginning any electrical installation to prevent short circuits and damage.
- Ensure all connections are secure and properly insulated to prevent electrical hazards.
- Refer to your vehicle's service manual for specific dashboard disassembly and reassembly procedures.
- Wear appropriate personal protective equipment, such as safety glasses, during installation.
- If you are unsure about any part of the installation process, consult a qualified professional installer.
Package Contents
Verify that all components are present before beginning installation:
- Double DIN Dash Bezel (Silver)
- Left Mounting Bracket
- Right Mounting Bracket
- Instruction Manual (this document)

Image 1: Metra 95-8215S Double DIN Dash Bezel. This is the main silver trim piece that will surround your new radio.
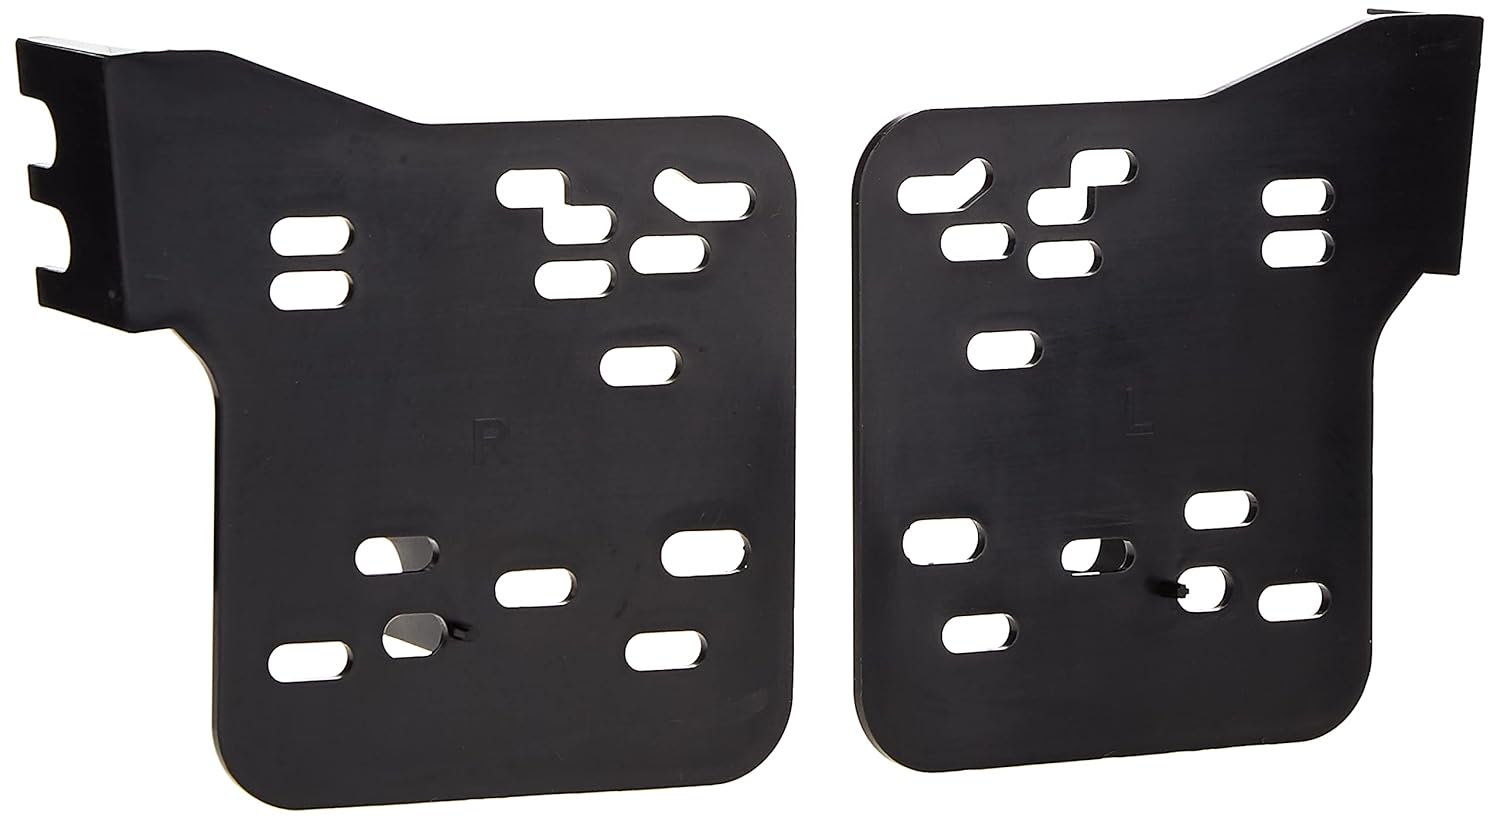
Image 2: Left and Right Mounting Brackets. These black plastic brackets secure the aftermarket radio to the dash kit.
Compatibility
This dash kit is specifically designed for the following vehicles:
- Toyota Avalon: 2005, 2006, 2007, 2008, 2009, 2010
It accommodates ISO Double DIN mount aftermarket radios.
Setup and Installation
Tools Required:
- Panel Removal Tool
- Screwdrivers (Phillips and Flathead)
- Socket Wrench Set
- Wire Strippers/Crimpers (if installing a new wiring harness)
- Electrical Tape or Heat Shrink Tubing
Pre-Installation Notes:
- A separate wiring harness (e.g., Metra 70-1761, TYTO-01) and antenna adapter may be required for your specific vehicle and aftermarket radio. These are not included with this dash kit.
- For 2007+ Toyota Avalon models, the factory radio cannot be permanently removed as it controls the information display. It must be relocated, typically to the trunk, and a separate extension harness (e.g., Metra 70-8215) is needed for this purpose.
Installation Steps:
- Disconnect Battery: Before starting, disconnect the negative terminal of the vehicle's battery.
- Remove Factory Radio/Dash Panels:
- Carefully use a panel removal tool to pry off the trim panels surrounding the factory radio.
- Unscrew and remove the factory radio unit. Disconnect all wiring harnesses and antenna cables.
- For 2007+ Avalon models, if relocating the factory radio, ensure the necessary extension harness is connected and routed.
- Prepare Aftermarket Radio:
- Connect the aftermarket radio's wiring harness to the vehicle's wiring harness (using an adapter if necessary). Ensure all connections are secure.
- Connect the antenna adapter to the aftermarket radio and the vehicle's antenna cable.
- Attach Mounting Brackets to Radio:
- Secure the provided left and right mounting brackets to the sides of your aftermarket Double DIN radio using the screws supplied with your radio. Ensure the radio is centered and flush with the front of the brackets.
- Attach Dash Bezel to Radio Assembly:
- Slide the radio assembly (with brackets attached) into the Metra 95-8215S dash bezel. The brackets should snap or screw into place within the bezel, creating a single unit.
- Verify that the radio sits flush and securely within the dash bezel, creating a "gapless fit."
- Install New Radio Assembly into Dash:
- Connect the prepared wiring harnesses and antenna cable to the aftermarket radio.
- Carefully slide the entire radio and dash kit assembly into the vehicle's dashboard opening.
- Secure the assembly using the factory screws or clips that held the original radio.
- Reassemble Dash Panels: Reattach any removed trim panels, ensuring they snap securely into place.
- Reconnect Battery: Reconnect the negative terminal of the vehicle's battery.
- Test Functionality: Turn on the vehicle and test the new aftermarket radio to ensure all functions (power, audio, balance, fader, radio reception) are working correctly.
Operating
The Metra 95-8215S Dash Kit provides a secure and aesthetically integrated mounting solution for your aftermarket Double DIN radio. Once installed, the operation of your audio system will be controlled entirely by the features and functions of your specific aftermarket radio unit.
Maintenance
- Cleaning: To clean the dash kit, use a soft, damp cloth. Avoid abrasive cleaners or solvents, as these can damage the finish.
- Inspection: Periodically check the dash kit and radio for any signs of looseness or damage. Ensure all mounting screws remain tight.
Troubleshooting
| Problem | Possible Cause | Solution |
|---|---|---|
| Dash kit does not fit correctly or has gaps. | Incorrect vehicle model/year; improper alignment during installation; aftermarket radio dimensions slightly off. |
|
| Aftermarket radio is loose within the dash kit. | Mounting screws not tightened; brackets not properly secured to radio or bezel. |
|
| No power to the aftermarket radio after installation. | Battery disconnected; wiring harness issues; blown fuse. |
|
Specifications
- Model Number: 95-8215S
- Material: High-grade ABS Plastic (Acrylonitrile Butadiene Styrene)
- Color: Silver (Factory matched texture style)
- Compatibility: 2005-2010 Toyota Avalon
- Radio Type: Double DIN (ISO Mount)
- Product Dimensions (L x W x H): Approximately 14 x 7.1 x 1 inches
- Item Weight: Approximately 4.8 ounces
- Manufacturer: Metra Electronics Corp
- UPC: 086429299249
Warranty Information
Metra products are designed for quality and durability. For specific warranty terms and conditions, please refer to the official Metra website or contact Metra customer support. Keep your purchase receipt as proof of purchase.
Support
For technical assistance or further inquiries regarding the Metra 95-8215S Dash Kit, please visit the official Metra website or contact their customer support department. Contact information can typically be found on the manufacturer's website or product packaging.
Note: This manual provides general installation guidelines. Specific vehicle disassembly and reassembly procedures may vary. Always consult your vehicle's service manual for precise instructions.


