Introduction
Welcome to the user manual for your new Landmann Piccolino 31375 Portable Charcoal Grill. This manual provides essential information for the safe and efficient assembly, operation, and maintenance of your grill. Please read all instructions carefully before using the product to ensure optimal performance and safety.
Important Safety Information
WARNING: Failure to follow these safety instructions could result in fire, explosion, or serious injury.
- Outdoor Use Only: This grill is designed for outdoor use only. Do not operate indoors or in enclosed spaces.
- Keep Away from Combustibles: Always place the grill on a stable, non-combustible surface, away from flammable materials such as wood decks, dry leaves, or buildings.
- Children and Pets: Keep children and pets away from the hot grill. The grill surfaces become extremely hot during use.
- Charcoal Safety: Use only charcoal briquettes or lump charcoal as fuel. Do not use gasoline, kerosene, or alcohol to light charcoal. Use a charcoal chimney starter or approved charcoal lighter fluid.
- Ventilation: Ensure adequate ventilation when lighting and operating the grill.
- Hot Ashes: Allow charcoal to cool completely before disposing of ashes. Never dispose of hot ashes in combustible containers.
- Supervision: Never leave a lit grill unattended.
- Handling Hot Components: Always use heat-resistant gloves or barbecue tongs when handling hot grill components.
Product Components
Your Landmann Piccolino grill comes with the following main components:
- Lid with handle and ventilation panel
- Enamelled fire bowl
- Chrome-plated grill rack
- Chrome-plated frame/legs
- Stainless steel barbecue tongs
- Chrome-plated heating rack

Figure 1: The Landmann Piccolino 37cm Portable Charcoal Grill in Azure, showcasing its compact design, lid, handle, and included barbecue tongs.
Setup Instructions
Follow these steps to assemble your Landmann Piccolino grill:
- Unpack Components: Carefully remove all parts from the packaging. Check the contents against the "Product Components" list to ensure all parts are present and undamaged.
- Attach Legs/Frame: Securely attach the chrome-plated frame/legs to the enamelled fire bowl. Ensure all connections are tight and stable.
- Insert Fire Bowl: Place the enamelled fire bowl securely into the assembled frame.
- Place Charcoal Grate: Position the charcoal grate at the bottom of the fire bowl. This grate holds the charcoal.
- Install Cooking Grate: Place the chrome-plated grill rack (cooking grate) on top of the fire bowl, resting on its supports.
- Attach Lid Handle: If not pre-attached, secure the handle to the lid using the provided hardware.
- Lid Latch: The lid features a latch mechanism to secure it to the body for portability. Ensure this mechanism operates smoothly.

Figure 2: Detail of the lid latch mechanism, designed to secure the lid to the grill body for easy transport.
Operating Instructions
1. Charcoal Loading
Place charcoal briquettes or lump charcoal directly onto the charcoal grate at the bottom of the fire bowl. Arrange them in a pyramid shape for easier lighting.
2. Lighting the Charcoal
Use a charcoal chimney starter for the safest and most efficient lighting. Alternatively, use a small amount of approved charcoal lighter fluid, allowing it to soak into the charcoal for a few minutes before lighting. Never add lighter fluid to hot coals.
Once the charcoal is covered with a light grey ash, it is ready for grilling. Spread the coals evenly or arrange them for direct/indirect cooking as desired.
3. Grilling
Place your food on the chrome-plated grill rack. For items requiring less heat or to keep food warm, utilize the chrome-plated heating rack if desired.
4. Temperature Control
The Landmann Piccolino features a ventilation panel on the lid to control airflow, which in turn regulates the cooking temperature. Open the vents for higher temperatures and close them to reduce heat. Adjust gradually to achieve desired results.

Figure 3: The adjustable ventilation panel on the lid, used to control airflow and regulate the internal temperature of the grill.
Care and Maintenance
1. Cleaning
- After Each Use: Once the grill has cooled completely, remove the grill rack and charcoal grate. Scrape off any food residue from the grill rack using a grill brush.
- Fire Bowl: Empty cooled ashes from the fire bowl. Wipe the interior and exterior of the fire bowl with a damp cloth. For stubborn grease, use a mild dish soap solution.
- Grill Rack: The chrome-plated grill rack can be washed with warm, soapy water. Rinse thoroughly and dry completely to prevent rust.
- Lid: Clean the lid with a damp cloth. The ventilation panel should be kept clear of debris.
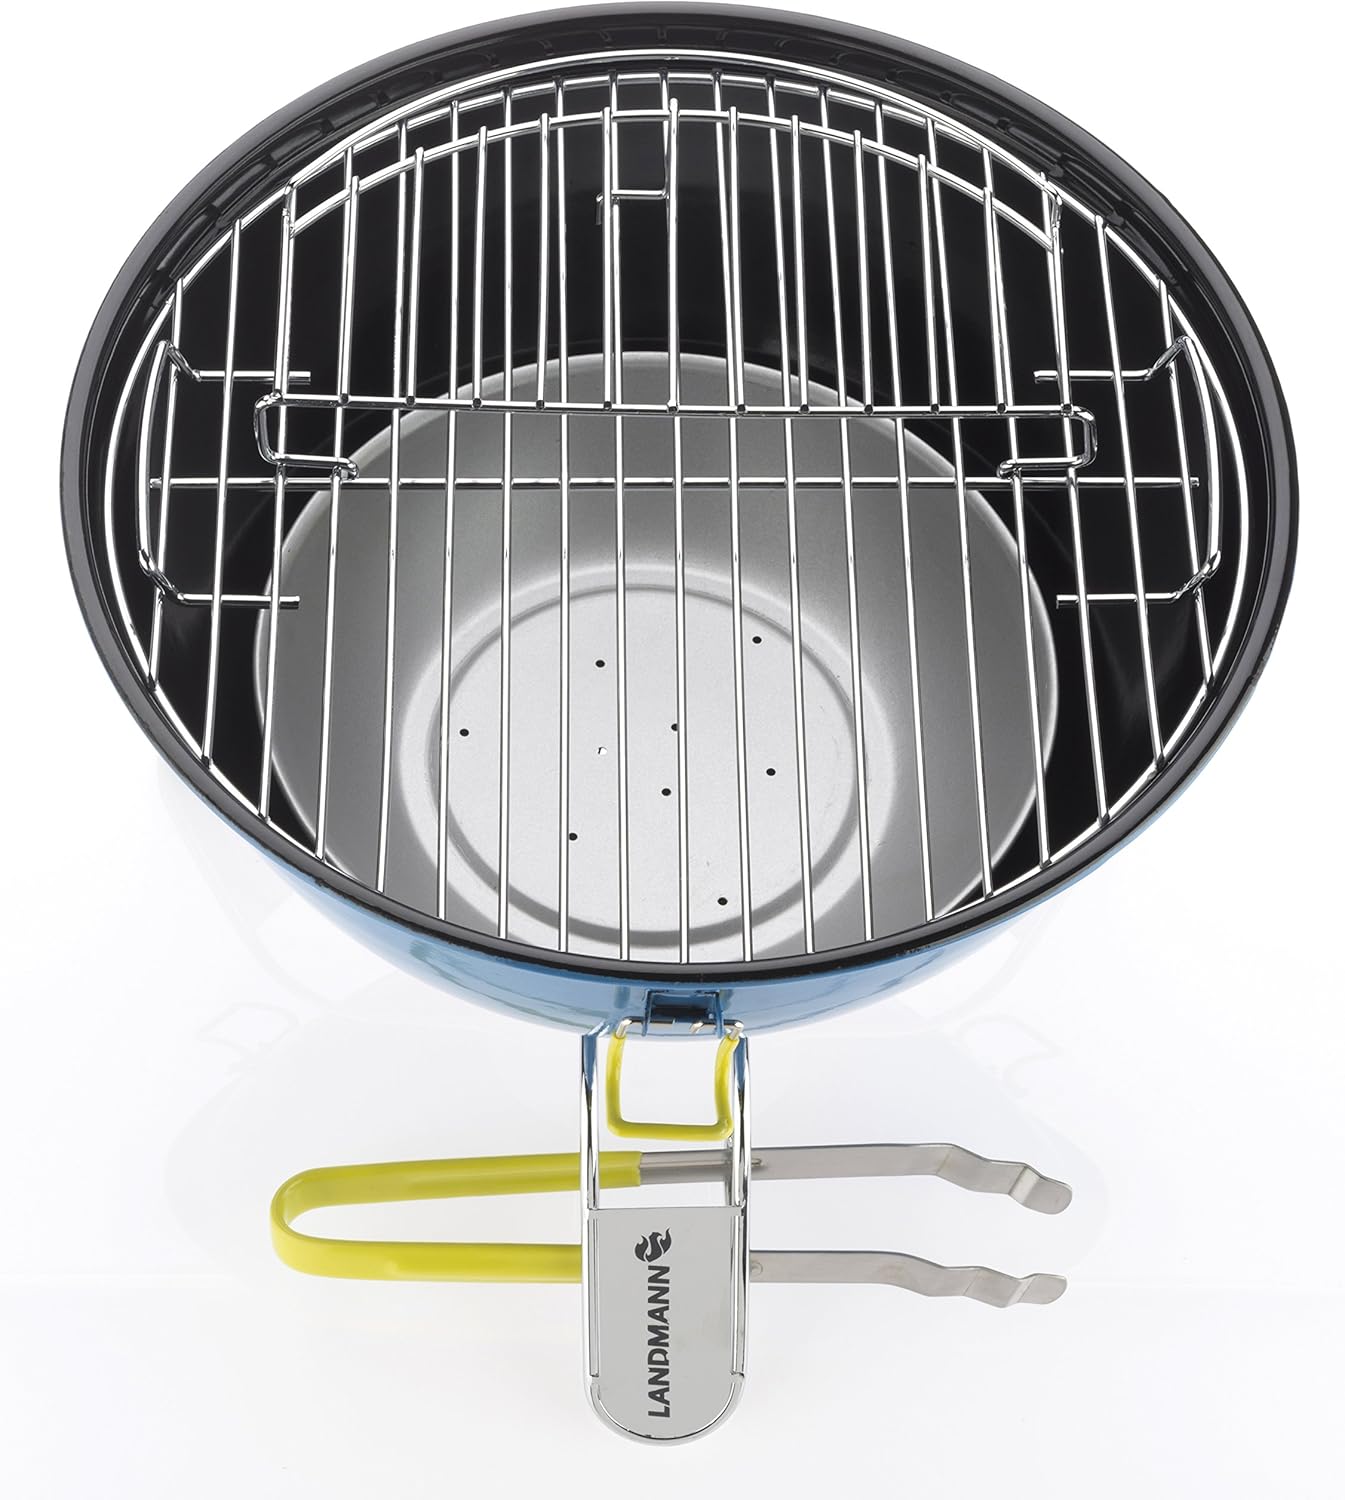
Figure 4: Top-down view of the chrome-plated grill rack and charcoal grate inside the fire bowl, ready for cleaning or use.
2. Storage
Store your grill in a dry, protected area when not in use. If storing outdoors, use a grill cover to protect it from the elements. Ensure the grill is clean and dry before storage to prevent corrosion.
Troubleshooting
| Problem | Possible Cause | Solution |
|---|---|---|
| Charcoal not lighting or staying lit | Insufficient airflow; damp charcoal; not enough charcoal. | Ensure ventilation panel is open. Use dry charcoal. Add more charcoal. Use a chimney starter. |
| Grill not getting hot enough | Vents closed; not enough charcoal; charcoal not fully ignited. | Open ventilation panel fully. Add more charcoal. Allow charcoal to ash over completely before cooking. |
| Food sticking to grill rack | Grill rack not seasoned or cleaned properly; grill not hot enough. | Clean grill rack thoroughly. Lightly oil the grill rack before placing food. Ensure grill is preheated to desired temperature. |
| Excessive smoke | Too much fat dripping onto coals; insufficient airflow. | Trim excess fat from meat. Ensure ventilation panel is open. Avoid overcrowding the grill. |
Technical Specifications
| Model Number | 31375 |
| Product Dimensions (L x W x H) | 38 x 41 x 38 cm |
| Item Weight | 3.5 kg |
| Grill Surface Diameter | 34 cm |
| Material | Stainless Steel (components), Enamelled Steel (fire bowl/lid) |
| Fuel Type | Charcoal |
| Color | Azure |
| Assembly Required | Yes |
Warranty Information
Landmann products are manufactured to high-quality standards. For specific warranty details regarding your Landmann Piccolino grill, please refer to the warranty card included with your purchase or visit the official Landmann website. Keep your proof of purchase for any warranty claims.
Customer Support
If you have any questions, require assistance with assembly, or encounter issues not covered in this manual, please contact Landmann customer support. Contact information can typically be found on the Landmann website or on the product packaging.
For more information, visit the official Landmann website: www.landmann.com


