
GeoVision GV-FE5302
Geovision GV-FE5302 5MP H.264 WDR Fisheye IP Camera User Manual
Model: GV-FE5302
Introduction
This manual provides detailed instructions for the installation, operation, and maintenance of the GeoVision GV-FE5302 5MP H.264 WDR Fisheye IP Camera. The GV-FE5302 is an indoor fisheye camera designed for comprehensive surveillance, offering a wide field of view and advanced monitoring capabilities.
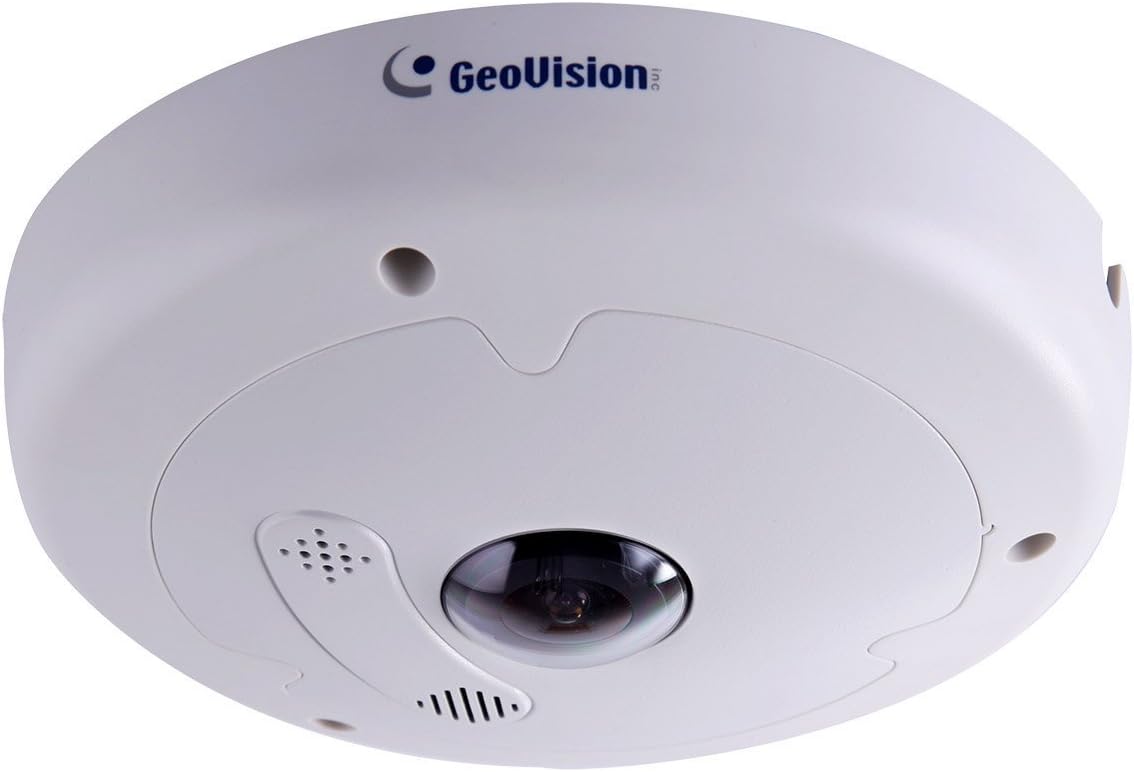
Image: Front view of the Geovision GV-FE5302 Fisheye IP Camera, showing its dome shape and central lens.
Key Features
- High Resolution Imaging: 1/2.5" progressive scan CMOS sensor, 5MP effective video resolution, up to 10 fps at 2560 x 1920.
- Dual Streaming: Supports H.264 and MJPEG dual streams.
- Day and Night Functionality: Equipped with a removable IR-cut filter for optimal performance in varying light conditions.
- Durability: Vandal resistance (IK10+ for metal casing).
- Power over Ethernet (PoE+): IEEE 802.3at compliant for simplified installation.
- Local Storage: Built-in micro SD card slot (SD/SDHC) for local recording.
- Audio Capabilities: Built-in microphone and speaker for two-way audio.
- Wide Dynamic Range (WDR): Enhances image quality in high-contrast lighting.
- Advanced Surveillance Features: Motion detection, privacy mask, alert notification, digital object tracking, defog, tampering alarm, virtual PTZ, auto pan function, visual automation, text overlay.
- Connectivity: ONVIF (Profile S) conformant, Wi-Fi support via Mini USB slot for WiFi Adapter.
- Flexible Viewing: Provides 360° and 180° panorama views, with different angles accessible by multiple users simultaneously.
Setup and Installation
The GV-FE5302 camera is designed for indoor use and can be mounted on ceilings or walls. Ensure proper power and network connectivity during installation.
1. Mounting Options
The camera supports both ceiling and wall mounting. Choose a location that provides the desired field of view and is within reach of power and network connections.
- Ceiling Mount: Ideal for 360° panoramic views of a room.
- Wall Mount: Suitable for 180° panoramic views along a wall.

Image: Geovision GV-FE5302 camera mounted on a ceiling, providing an overhead view.

Image: Geovision GV-FE5302 camera mounted on a wall, capturing a wide horizontal view.
2. Power and Network Connection
The camera supports Power over Ethernet Plus (PoE+, IEEE 802.3at), allowing both power and data to be transmitted over a single Ethernet cable. Alternatively, it can be powered via an AC/DC adapter (not included) and connected to a network via Ethernet or Wi-Fi (using a compatible Wi-Fi adapter in the Mini USB slot).
- Connect an Ethernet cable from a PoE+ enabled switch or injector to the camera's Ethernet port.
- If not using PoE+, connect a compatible AC/DC power adapter to the camera's power input and an Ethernet cable to a network switch or router.
- For Wi-Fi connectivity, insert a compatible Wi-Fi adapter into the Mini USB slot and configure network settings via the web interface.
3. Initial Configuration
Access the camera's web interface using a web browser. Refer to the GeoVision documentation for default IP addresses and login credentials. From the web interface, you can configure network settings, video parameters, motion detection zones, and other advanced features.
Operating the Camera
The GV-FE5302 offers versatile monitoring options through its web interface and integration with GV-System software.
1. Fisheye De-warping and Viewing Modes
The camera captures a hemispherical fisheye image, which can be de-warped into conventional rectilinear projections for easier viewing. Multiple viewing modes are available:
- Fisheye Source Image: The raw, undistorted hemispherical view captured by the camera.
- Single View: A de-warped, rectilinear view focusing on a specific area.
- 180° Panorama View: A wide, horizontal view, typically used when the camera is wall-mounted.
- 360° Panorama View: A full circular panoramic view, ideal for ceiling-mounted cameras.
- Quad View: Divides the screen into four sections, each showing a different de-warped perspective.
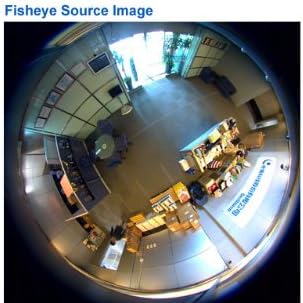
Image: Example of the raw fisheye source image captured by the camera, showing a wide, circular field of view.

Image: A de-warped single view, focusing on a specific area within the camera's field of vision.

Image: A de-warped 180-degree panoramic view, suitable for monitoring along a wall.
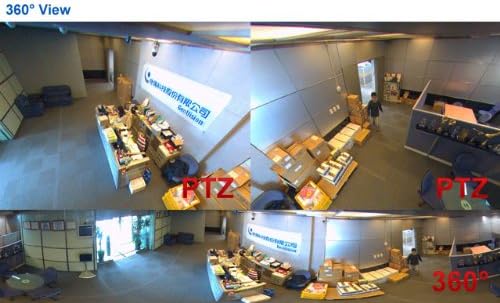
Image: A de-warped 360-degree panoramic view, providing a complete overview of a circular area.
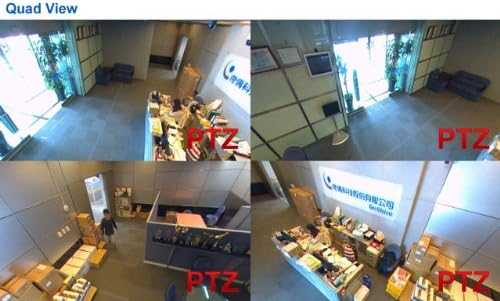
Image: A quad view display, showing four different de-warped perspectives simultaneously from the fisheye camera.
2. Advanced Functions
- Virtual PTZ: Pan, Tilt, and Zoom digitally within the fisheye image without mechanical movement.
- Auto Pan: Configure the camera to automatically cycle through different viewing angles.
- Motion Detection: Set up detection zones to trigger recording or alerts when movement is detected.
- Privacy Mask: Mask out specific areas within the camera's view to protect privacy.
- Alert Notification: Receive notifications via email or other methods when events like motion detection or tampering alarms are triggered.
- Two-Way Audio: Utilize the built-in microphone and speaker for communication.
Maintenance
Regular maintenance ensures optimal performance and longevity of your GV-FE5302 camera.
- Cleaning: Gently clean the camera lens and housing with a soft, dry cloth. Avoid abrasive cleaners.
- Firmware Updates: Periodically check the GeoVision website for firmware updates to ensure the camera has the latest features and security patches.
- Network Security: Ensure your network is secure and change default passwords for the camera's web interface.
- Environmental Conditions: Operate the camera within its specified temperature and humidity ranges.
Troubleshooting
This section addresses common issues you might encounter with the GV-FE5302 camera.
- No Video Feed:
- Check power connection and ensure the camera is receiving power (PoE+ or AC/DC adapter).
- Verify network cable connection and ensure the network is operational.
- Confirm the camera's IP address and network settings are correct.
- Restart the camera and the network switch.
- Poor Image Quality:
- Clean the camera lens for any dust or smudges.
- Check lighting conditions; ensure sufficient illumination or proper WDR settings.
- Adjust video resolution and frame rate settings in the web interface.
- Cannot Access Web Interface:
- Ensure your computer is on the same network segment as the camera.
- Verify the camera's IP address.
- Disable any firewall or antivirus software temporarily to check for interference.
- Try resetting the camera to factory defaults (refer to GeoVision documentation for procedure).
Specifications
| Feature | Detail |
|---|---|
| Model Number | GV-FE5302 |
| Image Sensor | 1/2.5" progressive scan CMOS |
| Effective Video Resolution | 5 MP (2560 x 1920) |
| Frame Rate | Up to 10 fps at 2560 x 1920 |
| Video Compression | H.264, MJPEG |
| Connectivity Technology | Wireless (Wi-Fi via USB), Wired (Ethernet) |
| Connectivity Protocol | ONVIF (Profile S), Wi-Fi |
| Power Source | PoE+ (IEEE 802.3at), AC/DC |
| Mounting Type | Ceiling Mount, Wall Mount |
| Field of View | 360 Degrees (Fisheye) |
| Local Storage | Built-in micro SD card slot (SD/SDHC) |
| Audio | Built-in microphone and speaker (Two-way audio) |
| Special Features | Motion Sensor, WDR, Defog, Tampering Alarm, Virtual PTZ, Auto Pan, Privacy Mask, Digital Object Tracking |
| Vandal Resistance | IK10+ (for metal casing) |
| International Protection Rating | IP67 |
| Material | Metal |
| Dimensions (L x W x H) | 6.6 x 1.9 x 6.6 inches |
| Item Weight | 2.4 Pounds |
Warranty and Support
For warranty information, please refer to the official GeoVision warranty policy available on their website or contact your authorized GeoVision dealer. Technical support and additional resources can be found on the GeoVision official support portal.
Manufacturer: GeoVision
Date First Available: September 25, 2014
Related documentsGV-FE5302


Ask a question about this manual
Ask about setup, troubleshooting, compatibility, parts, safety, or missing instructions. Manuals+ will review the question and use this page’s manual context to help answer it.