
Important Safety Instructions
Read all instructions carefully before using the appliance. Keep this manual for future reference. Always follow basic safety precautions to reduce the risk of fire, electric shock, or injury to persons.
- Ensure the washing machine is properly grounded.
- Do not operate the machine with a damaged power cord or plug.
- Keep children and pets away from the appliance during operation.
- Do not wash items that are soiled with flammable substances.
- Unplug the appliance before cleaning or performing any maintenance.
1. Setup and Installation
1.1 Unpacking
Carefully remove all packaging materials, including the base packaging and any protective foam. Inspect the machine for any damage incurred during transit. Retain packaging for potential future transport.
1.2 Installation Location
Place the washing machine on a firm, level surface. Ensure there is adequate space around the machine for ventilation and access. Avoid direct sunlight or areas with high humidity.
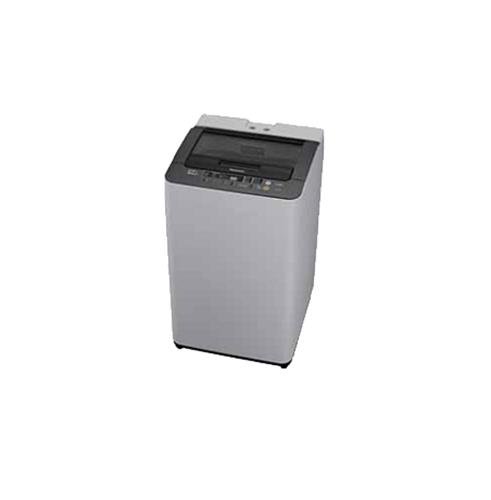
Figure 1: Panasonic NA-F65H3 6.5 Kg Top-loading Washing Machine. This image shows the overall design of the appliance, including the top-loading lid and control panel.
1.3 Water Supply Connection
Connect the inlet hose to a cold water tap with a 3/4-inch thread. Ensure all connections are tight to prevent leaks. Do not overtighten. The water pressure should be between 0.03 MPa and 1 MPa.
1.4 Drainage Hose Setup
Position the drain hose correctly. It should be placed into a standpipe or over the edge of a sink, ensuring it is securely fixed to prevent dislodging during operation. The height of the drain hose should be between 80 cm and 100 cm from the floor.
1.5 Leveling the Machine
Use a spirit level to ensure the machine is perfectly level. Adjust the leveling feet at the bottom of the machine as needed. A level machine reduces vibration and noise during operation.
1.6 Power Connection
Plug the power cord into a grounded electrical outlet. Ensure the voltage and frequency match the specifications listed on the machine's rating label.
2. Operating Instructions
2.1 Control Panel Overview
The control panel, located on the top rear of the machine, features various buttons and indicators for selecting wash programs, water levels, and special functions. Familiarize yourself with the layout before first use.
- Power Button: Turns the machine on/off.
- Start/Pause Button: Initiates or pauses a wash cycle.
- Program Selector: Dial or buttons to choose from 8 wash programs.
- Water Level: Adjusts water level (6 settings available).
- Delay Start: Sets a delayed start time for the wash cycle.
2.2 Loading Laundry
Open the glass lid and load laundry evenly into the Sazanami drum. Do not overload the machine; ensure there is enough space for clothes to move freely. Close the lid securely.
2.3 Adding Detergent and Softener
Add the appropriate amount of detergent to the detergent dispenser, typically located on the top edge of the drum opening. If using fabric softener, add it to the designated softener compartment. Refer to detergent packaging for recommended quantities.
2.4 Selecting a Wash Program
Turn on the machine using the Power button. Select one of the 8 available wash programs based on your laundry type and soil level. Adjust the water level using the Water Level button (6 settings available). Available wash technologies include:
- Foam Wash: Creates fine foam for effective dirt removal.
- Aqua Beat Wash: Powerful water flow for thorough cleaning.
- Dancing Water Flow: Dynamic water movement to prevent tangling.
- Aqua Spin Rinse: Efficient rinsing with minimal water.
- Power Soak: Pre-soak function for heavily soiled items (90/120/150 min options).
2.5 Starting a Wash Cycle
Once the program and settings are selected, press the Start/Pause button to begin the wash cycle. The machine will automatically proceed through the wash, rinse, and spin phases. The new auto re-start feature (with LED indicator) will resume operation after a power outage.
3. Maintenance and Care
3.1 Cleaning the Lint Filter
The big lint filter, typically located inside the drum near the top rim, should be cleaned regularly, ideally after every few washes, to maintain optimal performance. Remove the filter, clean out accumulated lint under running water, and reinsert it securely.
3.2 Cleaning the Washing Machine
Wipe the exterior of the machine with a soft, damp cloth. Clean the detergent dispenser periodically to prevent residue buildup. For the drum, run a 'Tub Clean' or 'Self Clean' cycle if available, or a hot wash with a washing machine cleaner. The anti-bacterial coating helps maintain hygiene.
3.3 Winterization and Storage
If storing the machine in an unheated area or during freezing temperatures, drain all water from the hoses and pump to prevent damage. Disconnect water supply and power, and store in a dry place.
4. Troubleshooting
Before contacting service, refer to the following table for common issues and their solutions.
| Problem | Possible Cause | Solution |
|---|---|---|
| Machine does not start | Power cord unplugged; Lid not closed; Power outage. | Check power connection; Ensure lid is fully closed; Wait for power to resume (auto re-start feature). |
| Water not draining | Drain hose kinked or blocked; Lint filter clogged. | Straighten drain hose; Clean the lint filter. |
| Excessive vibration/noise | Machine not level; Laundry unevenly distributed; Transit bolts not removed. | Adjust leveling feet; Redistribute laundry; Ensure all transit bolts are removed during installation. |
| Poor wash results | Overloading; Insufficient detergent; Incorrect program selection. | Reduce load size; Use correct amount of detergent; Select appropriate wash program. |
5. Specifications
| Brand | Panasonic |
| Model | NA-F65H3 |
| Type | Fully-automatic Top-loading Washing Machine |
| Capacity | 6.5 kg |
| Wash Programs | 8 |
| Water Level Settings | 6 |
| Drum Type | Sazanami Drum |
| Special Features | Glass Lid, Anti-bacterial Filter, Anti-bacterial Coating, Power Soak (90/120/150 min), Foam Wash, Aqua Beat Wash, Dancing Water Flow, Aqua Spin Rinse, Big Lint Filter, Auto Re-start (with LED indicator) |
| Color | White and Grey |
6. Warranty and Support
6.1 Warranty Information
This Panasonic NA-F65H3 washing machine comes with a 2-year warranty on the product from the date of purchase. Please retain your purchase receipt as proof of warranty. The warranty covers manufacturing defects under normal use conditions. For detailed terms and conditions, refer to the warranty card provided with your appliance.
6.2 Customer Support
For technical assistance, service requests, or inquiries regarding your Panasonic washing machine, please contact Panasonic customer support. You can find contact details on the official Panasonic website or in the warranty documentation.
When contacting support, please have your model number (NA-F65H3) and serial number ready to expedite the service process.


