Product Overview
This manual provides essential information for the installation, operation, and maintenance of your Dometic Waeco Cooling Unit CU-55 and L Evaporator VD-01. This system is designed to provide efficient cooling for various applications, ensuring optimal performance and longevity when properly used and maintained.
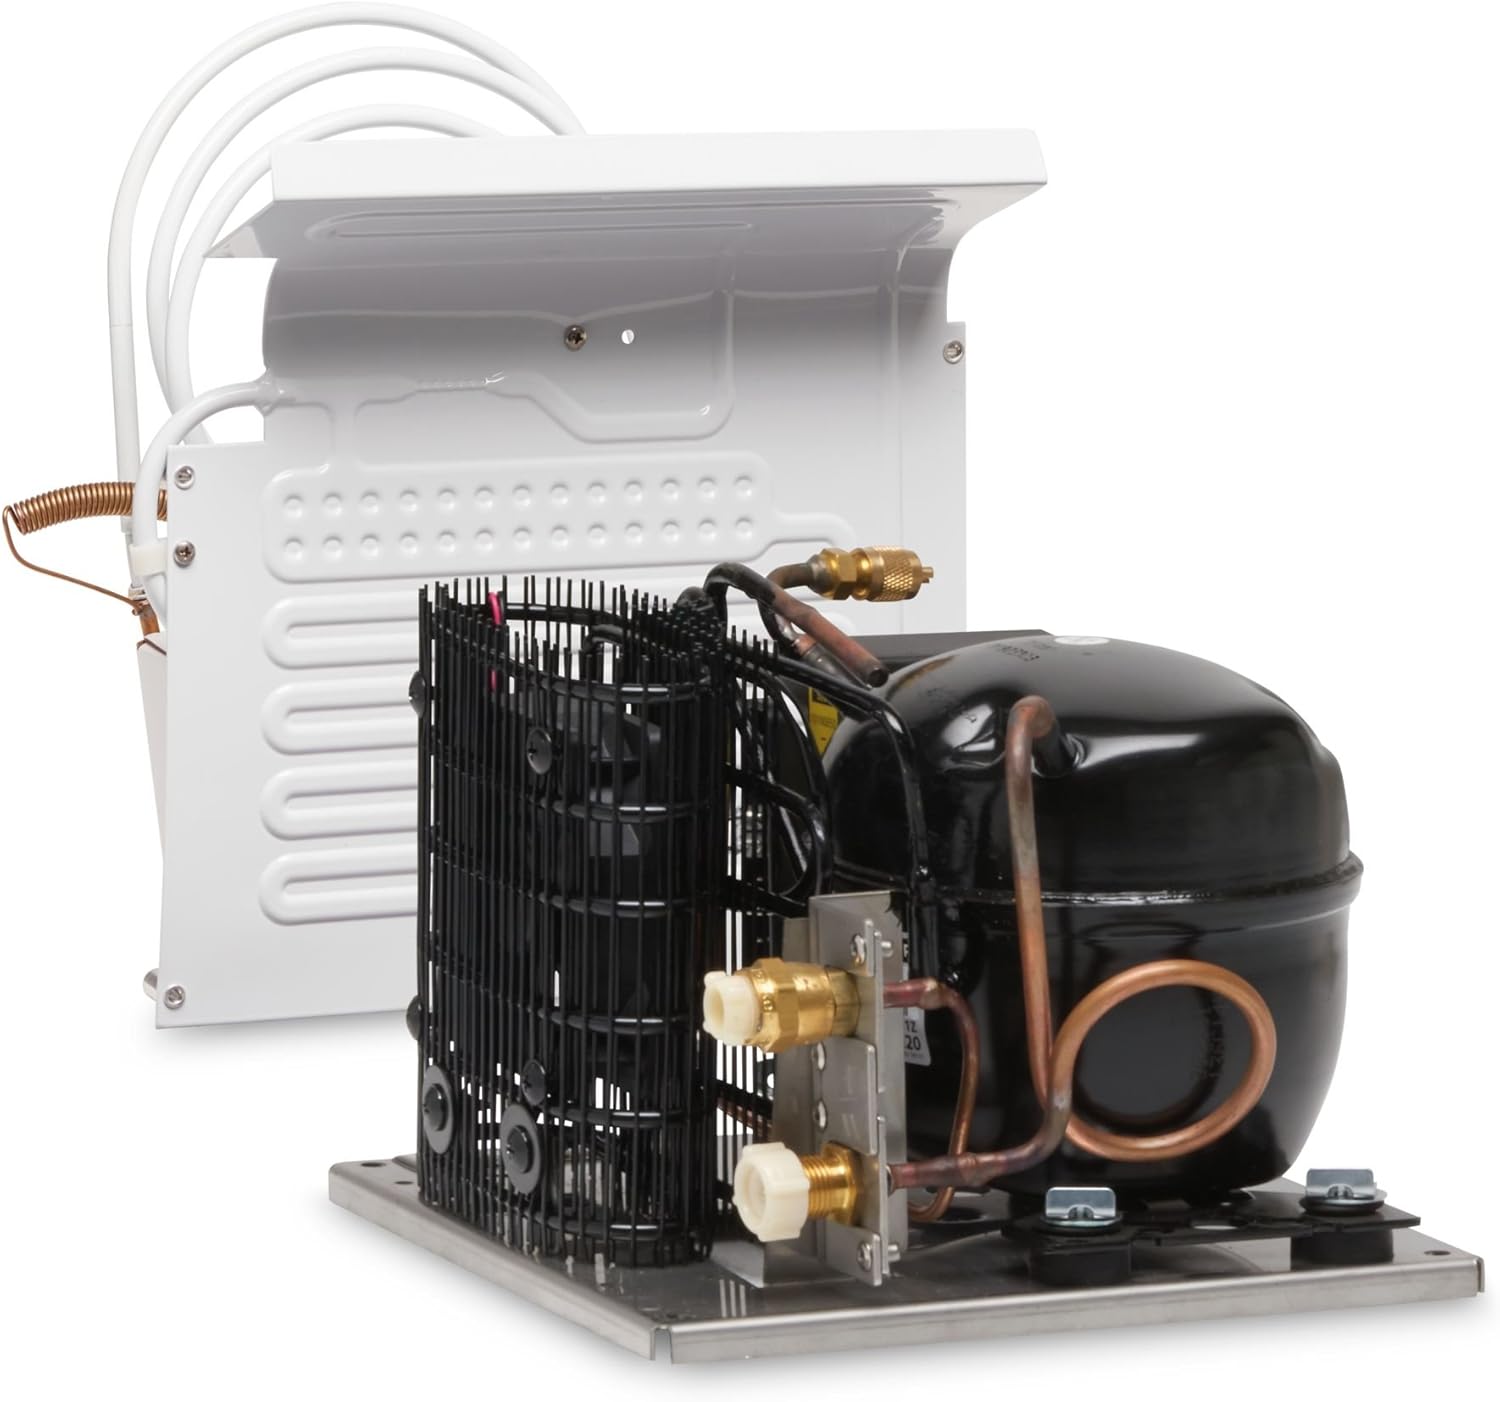
Image Description: This image displays the Dometic Waeco Cooling Unit CU-55 and L Evaporator VD-01. The cooling unit, featuring a black compressor and a metal base, is visible in the foreground. Behind it, the white L-shaped evaporator with its coiled tubing is shown, indicating the complete refrigeration system.
Setup and Installation
Proper installation is crucial for the efficient operation of your cooling unit. It is recommended that installation be performed by a qualified technician.
- Unpacking: Carefully remove all components from the packaging. Inspect for any signs of damage during transit.
- Mounting the Cooling Unit (CU-55):
- Choose a well-ventilated location, away from direct heat sources.
- Ensure the mounting surface is stable and capable of supporting the unit's weight (approx. 9 kg).
- Secure the unit using appropriate fasteners through the designated mounting points.
- Mounting the Evaporator (VD-01):
- Install the evaporator inside the insulated compartment (e.g., refrigerator box).
- Ensure proper air circulation around the evaporator for optimal cooling performance.
- The L-shape of the VD-01 evaporator is designed for flexible placement within the cooling space.
- Connecting Refrigerant Lines:
- Connect the pre-charged refrigerant lines from the CU-55 to the VD-01 evaporator. Follow the manufacturer's instructions for sealing and securing these connections to prevent leaks.
- Ensure all connections are tight and secure.
- Electrical Connection:
- Connect the unit to a 12 Volts DC power supply.
- Ensure the power supply is stable and provides adequate current for the unit's operation.
- Observe correct polarity (+/-) to avoid damage.
- Initial Check: After installation, perform a visual inspection to ensure all components are correctly installed and connections are secure.
Operating Instructions
Once installed, operating the Dometic Waeco Cooling Unit is straightforward.
- Power On: Connect the unit to the 12V DC power source. The unit should begin operation automatically or via an external switch if one is integrated into your system.
- Temperature Control: The cooling unit typically operates based on a thermostat. Adjust the thermostat setting to achieve the desired temperature within the refrigerated compartment. Refer to your specific thermostat's manual for detailed adjustment instructions.
- Monitoring Performance: Allow sufficient time for the unit to reach the set temperature. Factors like ambient temperature, insulation quality, and compartment size will affect cooling time.
- Power Off: To turn off the unit, disconnect it from the 12V DC power source or use the integrated power switch.
Important Notes:
- Avoid frequently opening the refrigerated compartment to maintain stable temperatures and conserve energy.
- Do not block the air vents around the cooling unit or evaporator.
- Ensure the unit is always supplied with the correct voltage (12V DC).
Maintenance
Regular maintenance ensures the longevity and efficiency of your Dometic Waeco cooling system.
- Cleaning the Condenser: Periodically clean the condenser fins of the CU-55 unit to remove dust and debris. A soft brush or vacuum cleaner can be used. Ensure the unit is powered off before cleaning.
- Evaporator Cleaning: Clean the evaporator (VD-01) inside the compartment as needed. Use a damp cloth and mild detergent. Do not use abrasive cleaners.
- Check Electrical Connections: Annually inspect all electrical connections for tightness and corrosion.
- Inspect Refrigerant Lines: Periodically check the refrigerant lines for any signs of damage or leaks. If a leak is suspected, contact a qualified technician immediately.
- Defrosting (if applicable): If ice builds up on the evaporator, defrost the unit. Turn off the unit and allow the ice to melt naturally. Collect and dispose of melted water.
Troubleshooting
Before contacting service, please refer to the following table for common issues and their solutions.
| Problem | Possible Cause | Solution |
|---|---|---|
| Unit does not turn on. | No power supply; Blown fuse; Incorrect wiring. | Check 12V DC power connection; Inspect and replace fuse if necessary; Verify wiring polarity. |
| Insufficient cooling. | Blocked condenser fins; Poor ventilation; Too much load; Refrigerant leak. | Clean condenser; Ensure adequate airflow around unit; Reduce contents; Contact technician for leak check. |
| Unit runs continuously. | Thermostat set too low; Poor insulation of compartment; Door left open. | Adjust thermostat; Improve compartment insulation; Ensure door is sealed properly. |
| Unusual noise. | Loose mounting; Fan obstruction; Compressor issue. | Check mounting screws; Clear fan area; If compressor noise, contact technician. |
If the problem persists after attempting these solutions, please contact a qualified service technician.
Specifications
| Feature | Detail |
|---|---|
| Product Name | Dometic Waeco Cooling Unit CU-55 + L Evaporator VD-01 |
| Brand | Waeco |
| Manufacturer | Dometic Waeco International GmbH |
| Model Number (CU-55) | 9105305543 |
| Model Name (from specs) | PL478105 |
| Item Weight | 9 Kilograms |
| Product Dimensions (L x W x H) | 3.55 x 3.4 x 4.1 cm |
| Special Feature | Portable |
| Voltage | 12 Volts (DC) |
| ASIN | B00LAYXT3U |
| First Available Date | March 23, 2015 |
| Color | Standard |
| Components Included | Cooling Unit CU-55, L Evaporator VD-01 |
| International Article Code | 04015704212747 |
Warranty and Support
For warranty information, please refer to the documentation provided with your purchase or contact your retailer. For technical support or service inquiries, please contact Dometic Waeco customer service or an authorized service center. Contact details can typically be found on the manufacturer's official website or through your point of purchase.
Please retain your proof of purchase for warranty claims.


