
1. Product Overview
This instruction manual provides detailed guidance for assembling the Tamiya 14129 1:12 scale model of the Ducati 1199 Panigale S. This model kit allows enthusiasts to construct a highly detailed replica of the iconic motorcycle. The kit features meticulously designed components, including removable side cowlings for a realistic appearance and accurately depicted tire tread patterns. The finished model has an approximate length of 173 mm and is constructed from high-quality plastic parts.

Image 1.1: The packaging for the Tamiya 14129 Ducati 1199 Panigale S model kit, showcasing the finished model.
2. Components and Required Materials
The model kit includes various plastic sprues containing all necessary parts for assembly. These parts are molded in different colors, typically black, gray, and clear, to represent various motorcycle components. An instruction booklet with detailed diagrams is also included.
2.1. Kit Contents:
- Multiple plastic sprues with molded parts (e.g., frame, engine, wheels, fairings).
- Rubber tires.
- Metal screws and small springs (for suspension and removable parts).
- Decal sheet for markings and details.
- Instruction manual.
2.2. Materials Required (Sold Separately):
- Plastic model cement/glue.
- Hobby knife or sprue cutters.
- Small files or sandpaper for cleaning parts.
- Model paints (acrylic or enamel, as recommended in the manual).
- Paintbrushes or airbrush.
- Tweezers for small parts and decals.
- Screwdrivers (small Phillips head).
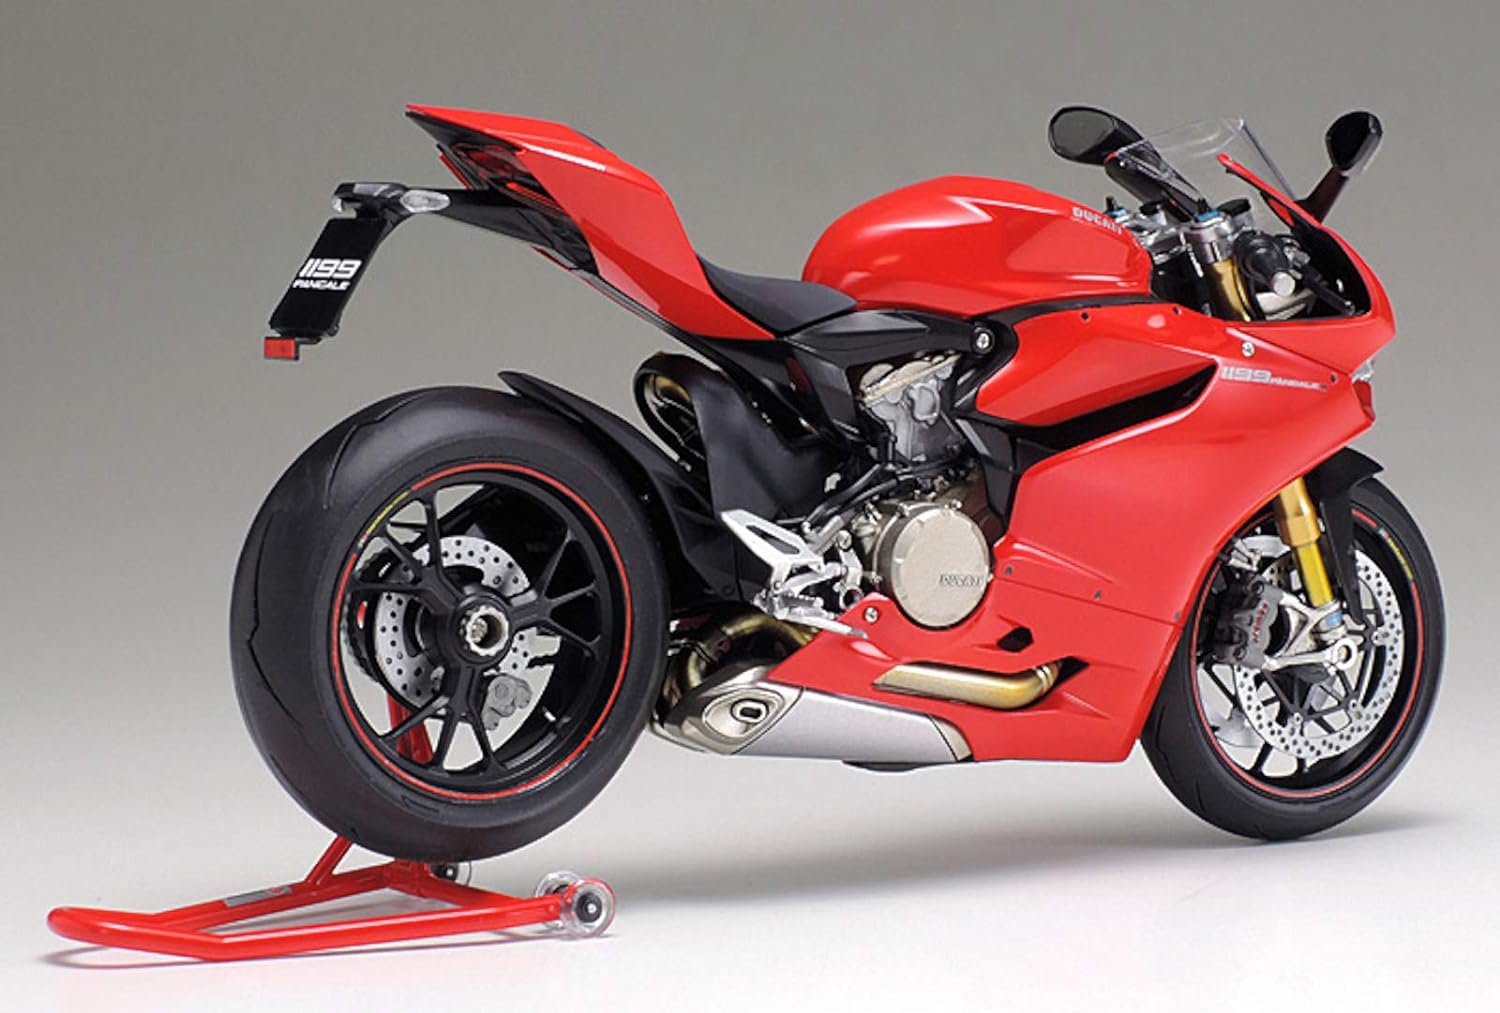
Image 2.1: A rear view of the fully assembled and painted Tamiya Ducati 1199 Panigale S model, highlighting its detailed construction.
3. Assembly Instructions
Follow the included instruction manual carefully, referring to the diagrams for each step. It is recommended to read through the entire manual before beginning assembly.
3.1. Preparation:
- Carefully remove parts from the sprues using a hobby knife or sprue cutters.
- Clean any excess plastic (flash) from the parts using a hobby knife or small file.
- Test fit parts before applying glue to ensure proper alignment.
- Paint parts as indicated in the instruction manual before assembly, especially those that will be difficult to reach later.
3.2. Step-by-Step Assembly:
The assembly process typically begins with the engine and frame, followed by the suspension, wheels, and finally the bodywork and details. Pay close attention to the part numbers and orientation shown in the diagrams.
- Engine Assembly: Construct the detailed engine components as per the instructions.
- Frame and Suspension: Attach the engine to the frame. Assemble the front forks and rear suspension, ensuring all moving parts (if any) function correctly.
- Wheel Assembly: Assemble the wheels and tires, paying attention to the realistic tread patterns.
- Bodywork and Fairings: Attach the main body panels. The side cowlings are designed to be attached with small screws, allowing them to be removed even after assembly is complete for viewing internal details.
- Detailing: Apply decals and attach smaller components such as mirrors, handlebars, and exhaust pipes.

Image 3.1: A side view of the Tamiya Ducati 1199 Panigale S model chassis, showing the engine and frame assembly before the outer fairings are attached.
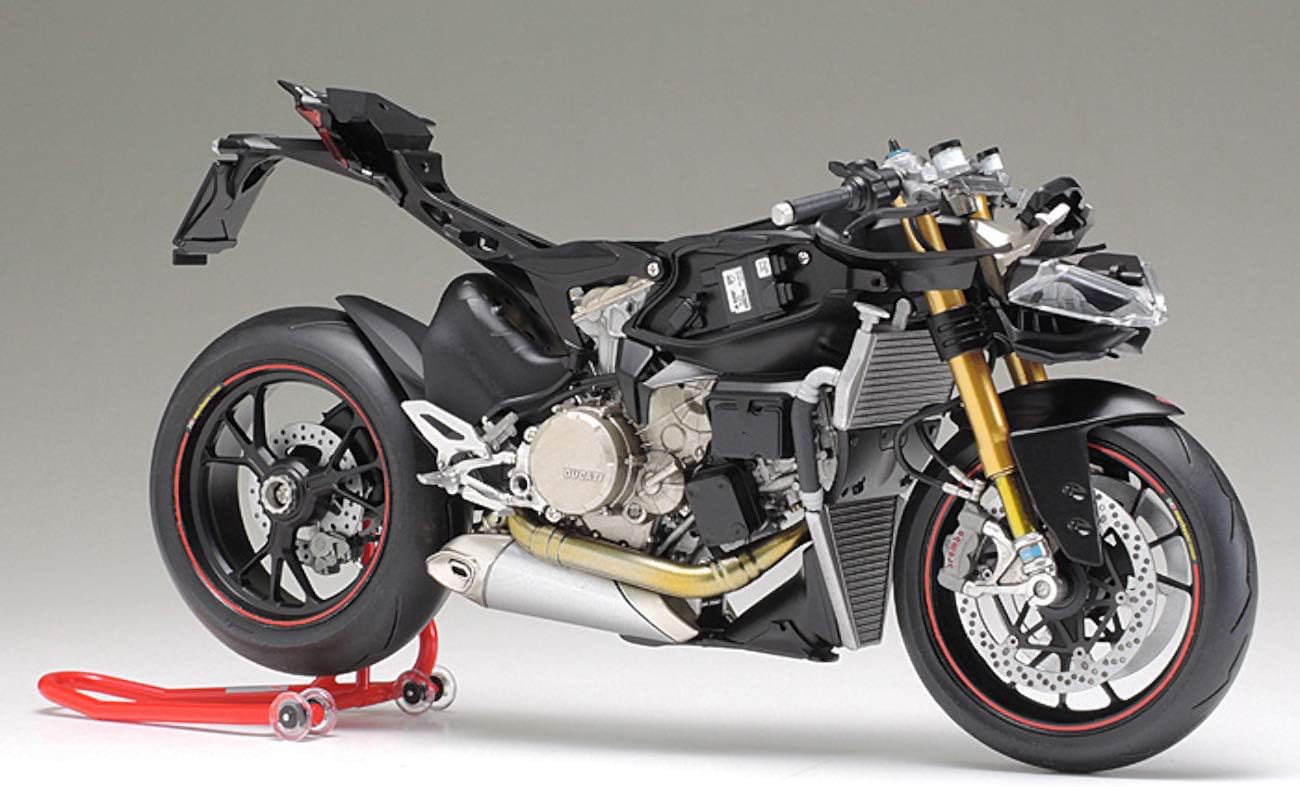
Image 3.2: A front-side view of the Tamiya Ducati 1199 Panigale S model chassis, detailing the front suspension, radiator, and engine components.

Image 3.3: A close-up view of the engine and exhaust system of the Tamiya Ducati 1199 Panigale S model, highlighting intricate details.

Image 3.4: A detailed view of the cockpit and handlebars of the Tamiya Ducati 1199 Panigale S model, showing the instrument panel and controls.
3.3. Assembly Overview Video:
Video 3.1: An official product overview video demonstrating the unboxing and initial components of the Tamiya 14129 1:12 Ducati 1199 Panigale S model kit. This video provides a visual guide to the parts included and a general sense of the assembly process.
4. Specifications
| Feature | Detail |
|---|---|
| Brand | TAMIYA |
| Model Name | Ducati 1199 Panigale S |
| Model Number | 14129 |
| Scale | 1:12 |
| Approximate Length | 173 mm (6.8 inches) |
| Material Type | Plastic |
| Item Weight | 0.2 Kilograms |
| Recommended Age Range | 14 years and above |
| Additional Features | Removable side cowlings, realistic tire tread pattern |
5. Safety Information
- Age Restriction: This model kit is not suitable for children under the age of 14 years due to small parts and the use of sharp tools and adhesives.
- Small Parts: Keep small parts away from young children to prevent choking hazards.
- Sharp Tools: Exercise caution when using hobby knives, sprue cutters, and other sharp tools. Always cut away from your body.
- Adhesives and Paints: Use plastic model cement and paints in a well-ventilated area. Avoid inhaling fumes. Refer to the safety instructions provided with your chosen adhesives and paints.
- Eye Protection: Consider wearing eye protection during assembly, especially when cutting or sanding parts.
6. Maintenance
Once assembled, your Tamiya Ducati 1199 Panigale S model requires minimal maintenance to preserve its appearance.
- Cleaning: Dust the model regularly with a soft, dry brush or a microfiber cloth. Avoid using harsh chemicals or abrasive cleaners, as these can damage the paint or plastic.
- Display: Display the model in a stable location away from direct sunlight, extreme temperatures, and high humidity to prevent discoloration or warping of plastic parts.
- Handling: Handle the model carefully to avoid breaking delicate parts.
7. Troubleshooting
- Parts Not Fitting: If parts do not fit together smoothly, check for excess plastic (flash) on the edges and carefully trim or sand it away. Ensure you are using the correct parts for the step.
- Decal Application Issues: If decals do not adhere properly or show silvering, ensure the surface is clean and smooth. Use decal setting solutions to help them conform to irregular surfaces and eliminate air bubbles.
- Paint Adhesion Problems: Ensure parts are clean and free of mold release agents before painting. A primer coat can improve paint adhesion and provide a uniform base color.
- Missing or Damaged Parts: In the event of missing or damaged parts, contact Tamiya customer support or the retailer where the kit was purchased.
8. Warranty and Support
Specific warranty information for this Tamiya model kit is not provided within the product data. For details regarding warranty, replacement parts, or technical support, please refer to the contact information provided on the product packaging or visit the official Tamiya website.


