
Introduction
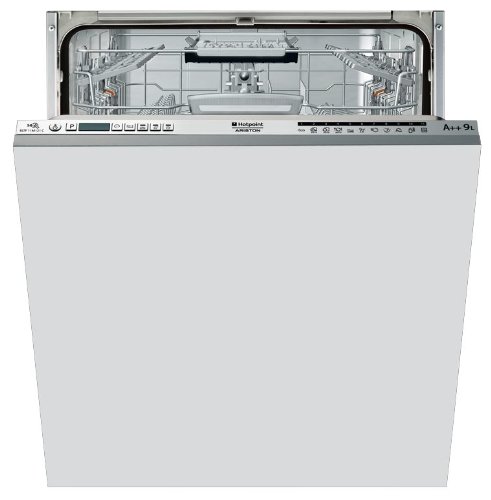
This manual provides essential information for the safe and efficient use of your Hotpoint ELTF 11M121 CL EU fully integrated dishwasher. Please read these instructions carefully before installation and operation to ensure optimal performance and longevity of your appliance.
Safety Information
Always observe basic safety precautions when using electrical appliances to reduce the risk of fire, electric shock, or injury.
- Read all instructions thoroughly before operating the appliance.
- Keep this manual in a safe place for future reference.
- Ensure the dishwasher is properly installed and grounded by a qualified technician.
- Do not allow children to play with, on, or inside the dishwasher.
- Use only detergents and rinse aids specifically designed for automatic dishwashers.
- Avoid opening the dishwasher door during operation, as hot water and steam may escape.
- In case of a malfunction, disconnect the appliance from the power supply and contact authorized service personnel.
Setup and Installation
The Hotpoint ELTF 11M121 CL EU is a fully integrated dishwasher, designed to be seamlessly built into your kitchen cabinetry.
Unpacking
Carefully remove all packaging materials. Inspect the dishwasher for any signs of damage that may have occurred during transit. Report any damage immediately to your retailer.
Dimensions
Ensure your kitchen cabinet opening meets the required dimensions for proper installation. Refer to the diagram below for detailed measurements.
This diagram illustrates the minimum and maximum dimensions for installing the Hotpoint ELTF 11M121 CL EU dishwasher. Key dimensions include a minimum cabinet width of 600 mm, a minimum depth of 570 mm, and an adjustable height range of 820-900 mm for the appliance. The dishwasher itself measures 595 mm in width and 570 mm in depth. Specific clearances for the plinth are also shown, with a minimum height of 100 mm and a depth of 49 mm, and a total plinth cut-out of 131 mm.
- Appliance Dimensions (W x D x H): 59.51 x 57 x 89.99 cm
- Minimum Cabinet Width: 600 mm
- Minimum Cabinet Depth: 570 mm
- Adjustable Height: 820-900 mm
Water Connections
Connect the water inlet and drain hose according to local plumbing regulations. Ensure the provided drain hose is securely attached to prevent leaks.
Electrical Connection
Connect the appliance to a properly grounded electrical outlet. Refer to the rating label on the appliance for specific power requirements.
Operating Instructions
Your dishwasher features intuitive button controls for program selection and operation.
Loading the Dishwasher
Load dishes, cutlery, and glassware according to the recommended guidelines to ensure optimal cleaning and drying. Avoid overcrowding to allow water and detergent to reach all surfaces.
Adding Detergent and Rinse Aid
Fill the detergent dispenser with the appropriate amount of dishwasher detergent. Check the rinse aid indicator and refill the rinse aid dispenser as needed for streak-free drying results.
Program Selection
Select a wash program suitable for your load. Available programs include:
- Automatic: Automatically adjusts the wash cycle based on the soil level of the dishes.
- Intensive: Recommended for heavily soiled dishes, pots, and pans.
- Normal: Standard program for daily loads with average soil.
- Rapid: A quick wash cycle for lightly soiled dishes.
Special Functions
- Delayed Start: Allows you to postpone the start of the wash cycle by 1 to 12 hours.
- Program Selection Sensor: Automatically detects and suggests the optimal program based on load conditions.
- Self-cleaning Filter: Helps maintain hygiene and performance by continuously cleaning the filter.
- Rinse Aid Indicator: Alerts you when the rinse aid dispenser needs refilling.
- Salt Indicator: Alerts you when the dishwasher salt dispenser needs refilling.
- Water Overflow Protection System: A safety feature designed to prevent water leaks.
Starting a Wash Cycle
After selecting your desired program, close the dishwasher door firmly. Press the start button to begin the wash cycle.
Maintenance
Regular maintenance ensures the long-term efficiency and performance of your dishwasher.
Cleaning the Filters
Periodically inspect and clean the self-cleaning filter system to prevent blockages and ensure effective washing. Refer to the detailed instructions in the full product manual for filter removal and cleaning procedures.
Refilling Salt and Rinse Aid
Monitor the salt and rinse aid indicators on the control panel. Refill the respective dispensers with dishwasher-specific salt and rinse aid when indicated.
Exterior and Interior Cleaning
Wipe the exterior surfaces with a soft, damp cloth. Clean the interior periodically to remove any food residue or mineral deposits. Do not use abrasive cleaners.
Troubleshooting
Before contacting customer service, please consult this section for solutions to common issues.
- Dishwasher not starting: Check if the power cord is securely plugged in, the door is fully closed, and a wash program has been selected.
- Dishes not clean: Ensure dishes are loaded correctly, detergent dispenser is filled, and spray arms are not blocked.
- Water not draining: Check for blockages in the filter system or the drain hose.
- Unusual noises: May indicate improper loading of dishes or the presence of foreign objects inside the dishwasher.
Technical Specifications
| Feature | Specification |
|---|---|
| Brand | Hotpoint |
| Model Name | ELTF 11M121 CL EU |
| Product Model Number | ELEXIA S A++Z 51 |
| Installation Type | Fully Integrated |
| Place Settings | 14 |
| Energy Efficiency Class | A++ |
| Noise Level | 41 Decibels |
| Water Consumption per Cycle | 9 Liters |
| Product Dimensions (W x D x H) | 59.51 x 57 x 89.99 cm |
| Product Weight | 34.21 Kilograms |
| Control Type | Buttons (Fully Integrated) |
| Special Features | Self-cleaning filter, Rinse aid indicator, Salt indicator, Delayed start, Program selection sensor, Water overflow protection system |
| Included Components | Drain hose |
Warranty and Support
For detailed warranty information and customer support, please refer to the documentation provided with your purchase or visit the official Hotpoint website. Retain your proof of purchase for any warranty claims.
In case of technical issues or questions not covered in this manual, please contact Hotpoint customer service for assistance.


