
1. Introduction
This manual provides detailed instructions for the installation, operation, maintenance, and troubleshooting of the HP Compaq 513426-001 Motherboard. This motherboard, also known as the Pegatron M2N68-LA Narra5-GL6 Rev:5.0, is designed for use in HP Pavilion P6000 series desktop computers. Please read this manual thoroughly before proceeding with any installation or configuration to ensure proper functionality and system stability.
2. Product Overview
The HP Compaq 513426-001 Motherboard is a core component for your desktop system, supporting AMD processors with AM2+ and AM2 sockets. It features multiple expansion slots, memory slots, and connectivity options to build or upgrade a personal computer.

Figure 2.1: Angled view of the HP Compaq 513426-001 Motherboard, showing various components including the CPU socket, RAM slots, and I/O ports.
Key features include:
- CPU Socket: AM2+/AM2 for compatible AMD processors.
- Memory Slots: 5 slots supporting up to 32 GB of RAM.
- Storage Connectivity: 6 SATA ports for hard drives and solid-state drives.
- Integrated Graphics: Onboard video output ports.
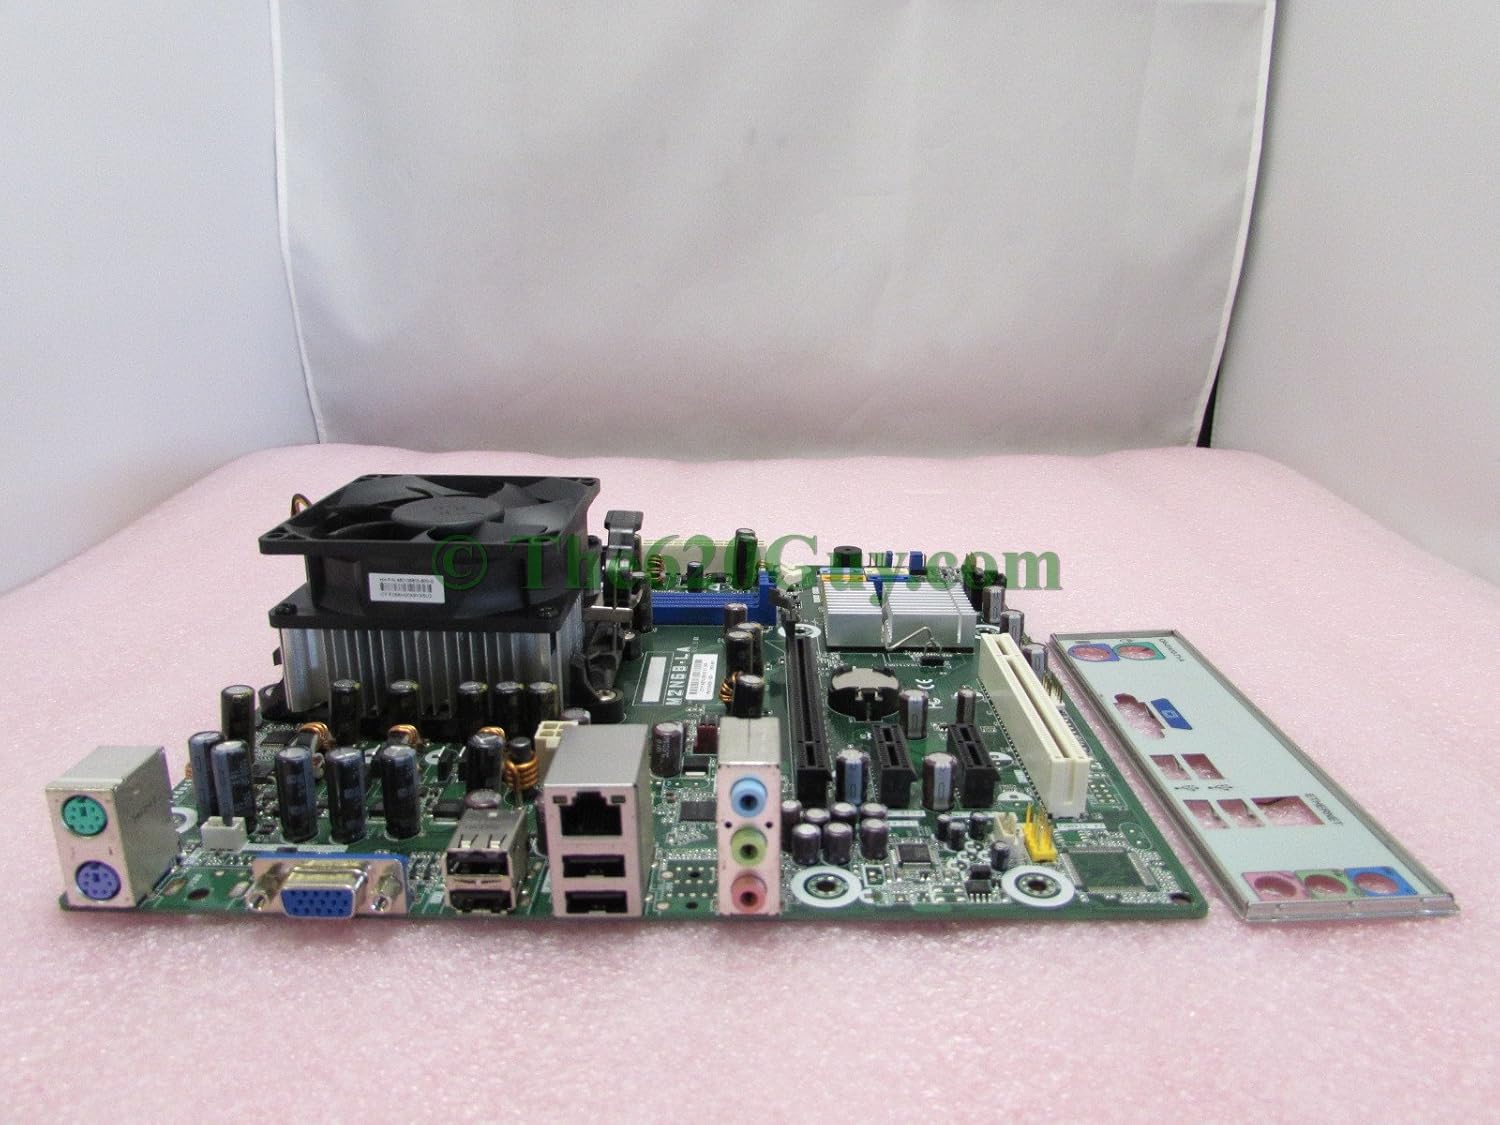
Figure 2.2: Side view of the motherboard, illustrating the CPU heatsink and fan assembly, along with the rear I/O panel.

Figure 2.3: Overhead view of the motherboard, clearly showing the layout of components, expansion slots, and the included I/O shield.

Figure 2.4: Another angled perspective of the motherboard, highlighting the CPU cooler installation area and the various ports on the I/O panel.
3. Setup and Installation
Before beginning installation, ensure your computer is powered off and unplugged from the wall outlet. Wear an anti-static wrist strap to prevent electrostatic discharge (ESD) damage to components.
3.1. CPU Installation
- Locate the AM2+/AM2 CPU socket on the motherboard.
- Gently lift the retention lever on the side of the CPU socket.
- Align the CPU with the socket, ensuring the gold triangle on the CPU matches the triangle on the socket. Do not force the CPU into place.
- Once seated, lower the retention lever to secure the CPU.
- Apply a thin, even layer of thermal paste to the top of the CPU (if not pre-applied to the cooler).
- Install the CPU cooler according to its manufacturer's instructions, ensuring it makes firm contact with the CPU.
3.2. Memory (RAM) Installation
- Locate the 5 memory slots on the motherboard.
- Open the clips at both ends of the memory slot.
- Align the memory module with the slot, ensuring the notch on the module matches the key in the slot.
- Press down firmly on both ends of the memory module until the clips snap into place.
3.3. Storage Device Connection
- Connect SATA data cables from your hard drives or SSDs to the 6 SATA ports on the motherboard.
- Ensure power cables from the power supply are connected to your storage devices.
3.4. Expansion Card Installation
- Identify the appropriate PCI Express (PCIe) or PCI slot for your expansion card (e.g., graphics card, network card).
- Remove the corresponding metal bracket from your computer case.
- Align the card with the slot and press down firmly until it is fully seated.
- Secure the card with a screw or retention clip from your computer case.
3.5. Power Supply and Front Panel Connections
- Connect the main 24-pin ATX power connector from your power supply to the motherboard.
- Connect the 4-pin or 8-pin CPU power connector to the motherboard.
- Connect the front panel headers (power button, reset button, HDD LED, power LED, front USB, front audio) to their respective pins on the motherboard. Refer to your computer case manual for specific pin assignments.
3.6. Mounting the Motherboard
- Install standoffs in your computer case that align with the screw holes on the motherboard.
- Carefully place the motherboard onto the standoffs, ensuring the rear I/O ports align with the I/O shield in the case.
- Secure the motherboard with screws. Do not overtighten.
4. Operating System and BIOS Configuration
4.1. Initial Boot-Up
After all components are installed and connected, plug in your computer and power it on. The system should perform a Power-On Self-Test (POST). If successful, you will see a display on your monitor.
4.2. BIOS/UEFI Access and Configuration
To access the BIOS (Basic Input/Output System) setup utility, press the designated key (commonly DEL, F2, F10, or F12) repeatedly during the initial boot sequence. Within the BIOS, you can configure settings such as:
- Boot order (to install an operating system from a USB drive or DVD).
- System date and time.
- CPU and memory settings.
- Integrated peripheral settings.
4.3. Operating System Installation
Once the BIOS is configured, you can proceed with installing your preferred operating system. The motherboard is compatible with various operating systems, including Linux, as indicated in its specifications. Follow the installation instructions provided with your operating system.
5. Maintenance
Regular maintenance helps ensure the longevity and stable operation of your motherboard and system.
5.1. Dust Removal
Dust accumulation can lead to overheating and component failure. Periodically (e.g., every 6-12 months), open your computer case and use compressed air to gently remove dust from the motherboard, CPU cooler, and other components. Ensure the system is powered off and unplugged before cleaning.
5.2. Cable Management
Ensure internal cables are neatly routed and do not obstruct airflow. Proper cable management improves cooling efficiency and makes future maintenance easier.
5.3. BIOS Updates
Occasionally, the manufacturer may release BIOS updates to improve compatibility, stability, or add new features. Check the official HP support website for your specific system model (HP Pavilion P6000 series) for available BIOS updates and follow their instructions carefully. Incorrect BIOS updates can render your motherboard inoperable.
6. Troubleshooting
If you encounter issues, refer to the following common troubleshooting steps:
6.1. No Power / System Not Turning On
- Verify that the power supply is connected to the wall outlet and switched on.
- Check all power connections to the motherboard (24-pin ATX and CPU power).
- Ensure the front panel power button cable is correctly connected to the motherboard header.
- Test the power supply with another system or a power supply tester if available.
6.2. No Display / Blank Screen
- Ensure the monitor is powered on and connected to the correct video output port on the motherboard or graphics card.
- Reseat the graphics card (if applicable) and memory modules.
- Try booting with only one memory module installed.
- If using a dedicated graphics card, try connecting the monitor to the integrated graphics port (if available) to rule out the card as the issue.
6.3. System Instability / Crashes
- Check CPU and system temperatures using monitoring software. Overheating can cause instability.
- Run memory diagnostic tools to check for faulty RAM modules.
- Ensure all drivers for your operating system are up to date.
- Check for loose connections for power or data cables.
6.4. Beep Codes
If your system emits a series of beeps during startup, these are diagnostic codes indicating a specific hardware issue. Refer to the HP or Pegatron documentation for a list of beep codes specific to the Narra5-GL6 motherboard to diagnose the problem.
7. Specifications
| Feature | Specification |
|---|---|
| Brand | Compaq |
| Model Number | 513426-001 |
| CPU Socket | AM2+/AM2 |
| Compatible Devices | Personal Computer |
| Memory Slots Available | 5 |
| Memory Storage Capacity (Max) | 32 GB |
| Total SATA Ports | 6 |
| Platform | Linux (Compatible) |
| Manufacturer | Compaq |
| UPC | 787322305937 |
| Parcel Dimensions | 25.4 x 25.4 x 2.54 cm |
| Weight | 1.36 kg |
8. Warranty and Support
For warranty information and technical support, please refer to the documentation provided with your original HP Pavilion P6000 series desktop computer or contact HP customer support directly. Keep your proof of purchase for warranty claims. Specific warranty terms may vary by region and purchase date.


