
Canmore GP-102+
Canmore G-Porter GP-102+ Multifunction GPS Device User Manual
Model: GP-102+
1. Introduction
The Canmore G-Porter GP-102+ is a compact and versatile GPS device designed for outdoor and sports enthusiasts. It functions as a GPS tracker, data logger, and sports analyzer, offering a range of features for navigation, route planning, and activity monitoring.
Key functionalities include real-time location tracking, back-track navigation, point of interest (POI) marking, and various sport modes. The device is equipped with a SIRF-IV low-power chipset, a built-in rechargeable battery, and flash memory for extensive waypoint storage. Its water-resistant design (IPX6) ensures durability in diverse outdoor conditions.
2. Safety Information
- Do not attempt to open or modify the device. This may void the warranty and cause damage.
- Keep the device away from extreme temperatures, direct sunlight, and moisture.
- Use only the specified charging cable and power adapter to prevent damage to the battery.
- Dispose of the device and its battery according to local regulations. Do not incinerate.
- While the device is water-resistant (IPX6), it is not designed for submersion. Avoid prolonged exposure to heavy rain or water.
3. Package Contents
Verify that all items are present in your package:
- Canmore G-Porter GP-102+ GPS Device
- USB Charging/Data Cable
- User Manual (this document)
- Lanyard or wrist strap (may vary by package)
4. Device Overview
The GP-102+ features a compact design with a clear display and intuitive controls.
A detailed view of the Canmore G-Porter GP-102+ GPS device, featuring its blue and black casing, display screen, and control buttons. This image provides a clear look at the device's physical design.
The device typically includes a power button, navigation buttons (up/down/select), and a mini-USB port for charging and data transfer. The monochrome LCD provides essential information clearly.

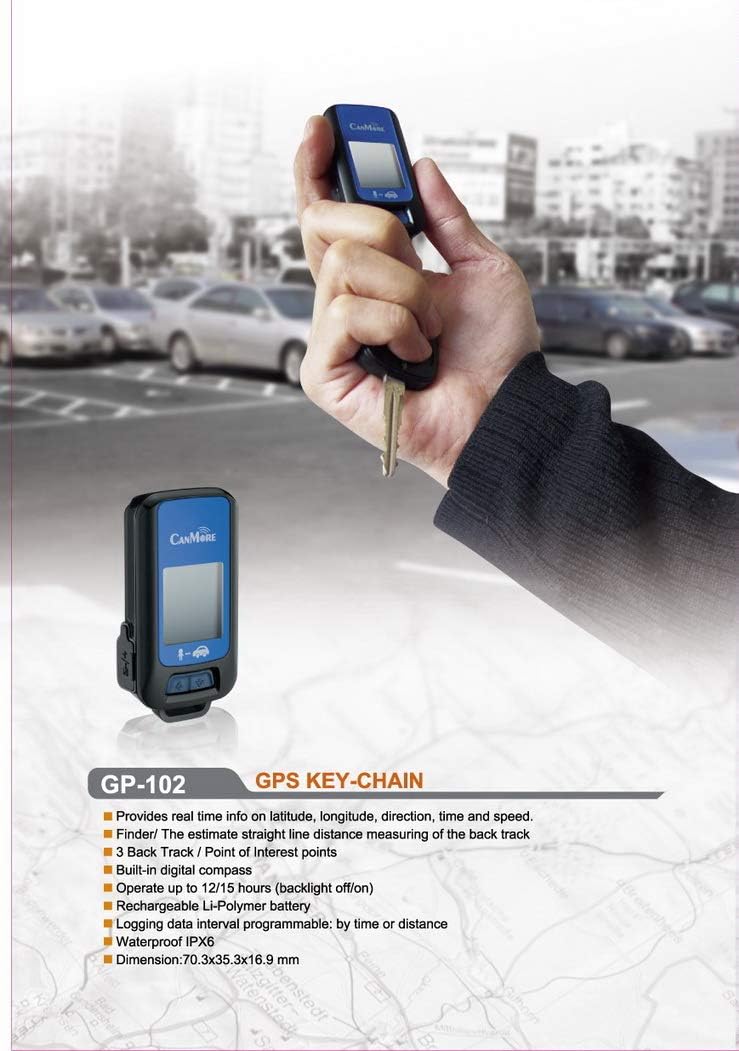
This image shows the Canmore G-Porter GP-102+ GPS device being held in a user's hand, highlighting its small form factor and ease of handling. The device is designed for portability and can be easily carried during outdoor activities.
5. Setup
5.1. Charging the Battery
Before first use, fully charge the device. Connect the supplied USB cable to the device's mini-USB port and the other end to a USB power adapter or a computer's USB port. The charging indicator will show the charging status. A full charge typically takes a few hours and provides 17-20 hours of operation.
5.2. Powering On/Off
- To Power On: Press and hold the Power button until the display illuminates.
- To Power Off: Press and hold the Power button until the device prompts you to shut down, then confirm.
5.3. Acquiring GPS Signal
For accurate positioning, the device needs to acquire a GPS signal. Perform this outdoors with a clear view of the sky. The first acquisition may take a few minutes. Once a signal is acquired, the GPS indicator on the display will stabilize.
6. Operating Instructions
The GP-102+ offers various modes for tracking, navigation, and data analysis.

This image illustrates the key functionalities of the G-Porter GP-102+ through a series of icons, including travel and sport logging, geotagging, digital compass, travel planning, barometer, weather station, pedometer, and IPX6 waterproofing. Three different color variations of the device are also shown.
6.1. Basic Navigation (Back Track & POI)
- Marking a Point of Interest (POI): While at a location you wish to save, navigate to the POI menu and select 'Mark POI'. The device will record the coordinates.
- Returning to a POI or Start Point (Back Track): Select the desired POI or the start of your recorded track from the navigation menu. The device will display a directional arrow and distance to guide you back.
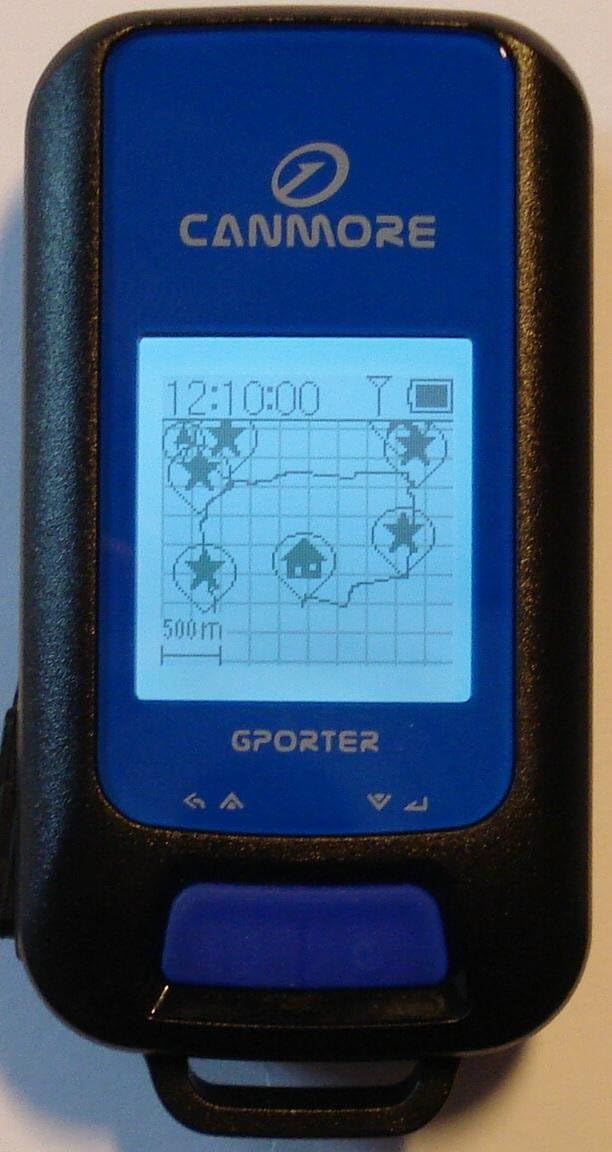
The device's screen is shown displaying a graphical representation of a recorded track or route. The display includes several waypoints marked with stars and a home icon, indicating navigation or tracking in progress.

This image captures the device's screen indicating navigation towards a specific point of interest, 'Siegessäule'. It displays the direction using an arrow, the remaining distance in kilometers, and the current altitude.
6.2. Sport Modes and Data Logging
The GP-102+ supports various sport modes for tracking activities like running, cycling, or hiking. In these modes, the device logs data such as distance, speed, altitude, and time. The logging interval can be programmed by time or distance.
- Starting a Sport Mode: Navigate to the 'Sport' menu, select your desired activity, and press 'Start'.
- Stopping/Pausing: Use the designated button (often the Power button or a specific function button) to pause or stop the recording.
- Pedometer: If enabled, the pedometer function counts steps taken during your activity.
6.3. Digital Compass and Weather Functions
The built-in digital compass provides directional information. The device may also offer basic weather-related data such as barometer readings, depending on the specific firmware version.
6.4. Connecting to a Computer and Using CanWay Software
To transfer recorded data and manage routes, connect the GP-102+ to your computer using the USB cable. The device is compatible with CanWay software (e.g., CanWay-Konstantin, CanWay Planner) for detailed analysis and route management.
- Software Installation: Install the CanWay software on your computer (refer to the software's documentation for installation instructions).
- Data Transfer: Once connected, the software should detect the device, allowing you to download track logs and upload planned routes.
- Route Planning: Use CanWay Planner to create and manage routes, which can then be uploaded to your GP-102+ for navigation.
- Data Analysis: CanWay-Konstantin allows for detailed analysis of recorded tracks, including speed, distance, and altitude profiles, and visualization on maps like Google Maps.
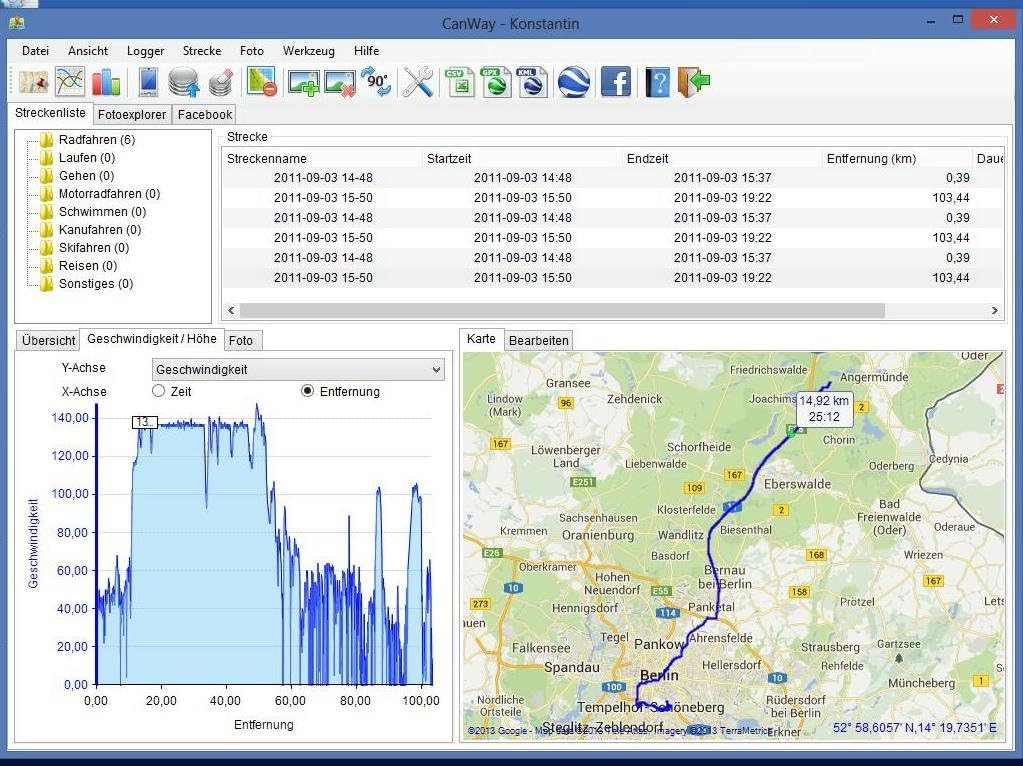
A screenshot of the CanWay-Konstantin software interface, demonstrating its capability to display recorded GPS track data. The interface includes a track list, a graphical representation of speed and distance over time, and a map showing the recorded route.

This image displays the CanWay Planner software, illustrating its route planning functionality. A route is shown overlaid on a map of London, with several marked points of interest (POIs) along the path.

Another screenshot of the CanWay Planner software, this time showing a planned route on a map of Berlin. Similar to the London map, this image highlights the software's ability to visualize routes and POIs in different geographical locations.

A screenshot of the CanWay Planner software, showcasing a GPS track plotted on a satellite map of a mountainous region. This demonstrates the software's utility for analyzing routes in challenging outdoor environments.
7. Maintenance
- Cleaning: Wipe the device with a soft, damp cloth. Do not use harsh chemicals or abrasive cleaners.
- Battery Care: For optimal battery life, avoid fully discharging the battery frequently. If storing the device for an extended period, charge it to about 50% and store in a cool, dry place. Recharge every few months.
- Water Resistance: Ensure the USB port cover is securely closed to maintain IPX6 water resistance.
8. Troubleshooting
- Device not powering on: Ensure the battery is charged. Connect to a power source and try again.
- No GPS signal: Move to an open outdoor area with a clear view of the sky. Wait a few minutes for signal acquisition.
- Computer not detecting device: Ensure the USB cable is properly connected. Try a different USB port or cable. Verify that CanWay software is installed and running.
- Inaccurate readings: Ensure the device has a strong GPS signal. Calibrate the digital compass if available and necessary (refer to device settings).
9. Specifications
| Feature | Detail |
|---|---|
| Model Name | GP-102+ |
| Brand | GPORTER (Canmore) |
| Connectivity Technology | GPS |
| Supported Satellite Navigation System | GPS |
| Screen Size | 1 Inches |
| Display Type | LCD |
| Human-Interface Input | Buttons |
| Control Method | Touch |
| Touch Screen Type | Capacitive |
| Special Features | Route Planning, Water Resistance (IPX6), Digital Compass, Pedometer, Barometer, Weather Station |
| Battery Life | 17-20 Hours (Rechargeable Li-Polymer) |
| Flash Memory | Up to 300,000 waypoints |
| Item Weight | 23 g |
| Mounting Type | Wrist Mount |
| Manufacturer | Canmore |
| UPC | 759119908195 |
10. Warranty and Support
For warranty information and technical support, please refer to the documentation provided with your purchase or visit the official Canmore website. Keep your proof of purchase for warranty claims.
Related documentsGP-102+


Ask a question about this manual
Ask about setup, troubleshooting, compatibility, parts, safety, or missing instructions. Manuals+ will review the question and use this page’s manual context to help answer it.