
1. Introduction
This manual provides essential information for the safe and effective operation, assembly, and maintenance of your Varo Powerplus POW8561 Table Saw. Please read these instructions thoroughly before using the machine to ensure your safety and prolong the life of the tool. Keep this manual for future reference.
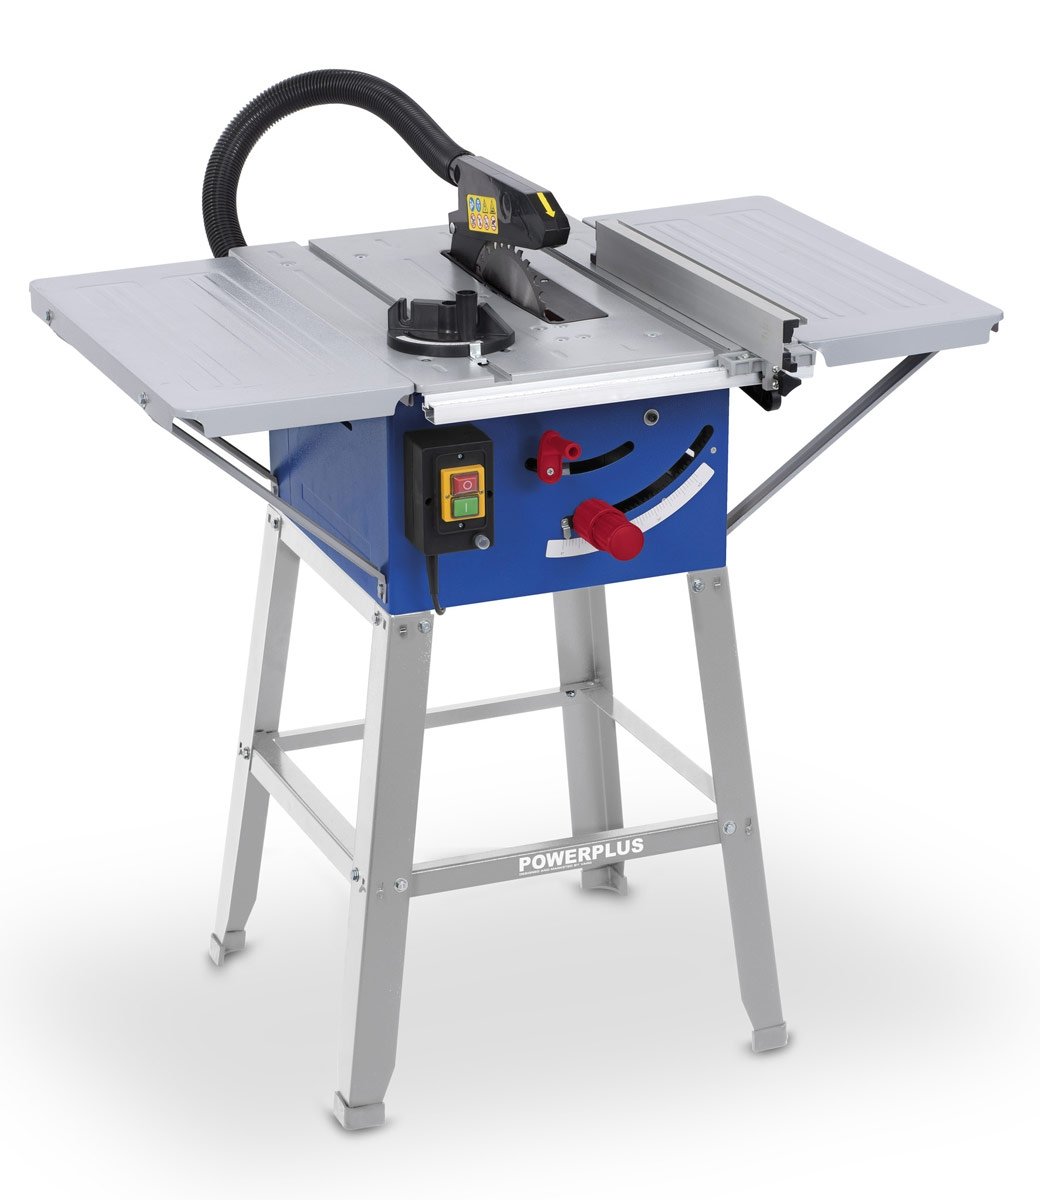
Image 1.1: Overview of the Varo Powerplus POW8561 Table Saw. This image displays the complete table saw unit, including the main table, saw blade with guard, motor housing, control panel, and the supporting stand.
2. General Safety Instructions
Always observe basic safety precautions to reduce the risk of fire, electric shock, and personal injury. Familiarize yourself with all safety warnings and instructions.
2.1. Work Area Safety
- Keep the work area clean and well-lit. Cluttered or dark areas invite accidents.
- Do not operate power tools in explosive atmospheres, such as in the presence of flammable liquids, gases, or dust. Power tools create sparks which may ignite the dust or fumes.
- Keep children and bystanders away while operating a power tool. Distractions can cause you to lose control.
2.2. Electrical Safety
- Power tool plugs must match the outlet. Never modify the plug in any way.
- Avoid body contact with earthed or grounded surfaces such as pipes, radiators, ranges, and refrigerators. There is an increased risk of electric shock if your body is earthed or grounded.
- Do not expose power tools to rain or wet conditions. Water entering a power tool will increase the risk of electric shock.
2.3. Personal Safety
- Always wear appropriate personal protective equipment (PPE), including safety glasses, hearing protection, and a dust mask.
- Dress properly. Do not wear loose clothing or jewelry. Keep your hair, clothing, and gloves away from moving parts.
- Stay alert, watch what you are doing, and use common sense when operating a power tool.
- Use clamps or other practical ways to secure and support the workpiece to a stable platform. Holding the work by hand or against your body is unstable and may lead to loss of control.
2.4. Table Saw Specific Safety
- Always use the blade guard and splitter when operating the saw.
- Use a push stick or push block when making narrow cuts.
- Ensure the blade is sharp and clean. Dull blades can cause kickback.
- Never reach over or behind the rotating saw blade.
- Support long workpieces to prevent tipping and loss of control.
- Disconnect power before changing blades or performing maintenance.
3. Components Overview
Familiarize yourself with the various parts of your table saw before operation.

Image 3.1: Close-up of the control panel and blade adjustment mechanisms. This image highlights the power switch (green for ON, red for OFF), the red knob for blade height adjustment, and the red lever for blade bevel angle adjustment, along with the angle scale.
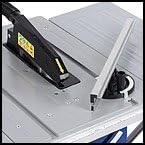
Image 3.2: Detail of the blade guard and rip fence. This view shows the transparent blade guard covering the saw blade, the splitter behind the blade, and the adjustable rip fence positioned on the table surface.

Image 3.3: Included accessories for the table saw. This image displays the dust extraction hose, a push stick, wrenches for blade changes, and components for the rip fence and miter gauge.
Key Components:
- Saw Blade: The cutting tool.
- Blade Guard: Transparent cover over the blade for safety.
- Splitter/Riving Knife: Prevents kickback by keeping the kerf open.
- Table: The work surface.
- Rip Fence: Adjustable guide for making parallel cuts.
- Miter Gauge: Guide for making accurate crosscuts and angled cuts.
- On/Off Switch: Controls power to the motor.
- Blade Height Adjustment: Knob to raise or lower the blade.
- Blade Bevel Adjustment: Lever to tilt the blade for angled cuts.
- Dust Extraction Port: Connection point for a dust collection system.
- Push Stick: Safety device for feeding small workpieces.
4. Setup and Assembly
Carefully follow these steps to assemble your table saw before first use.
4.1. Unpacking
- Remove all components from the packaging.
- Check the contents against the packing list to ensure all parts are present and undamaged.
- Dispose of packaging materials responsibly.
4.2. Assembling the Stand
The table saw typically comes with a separate stand that requires assembly.
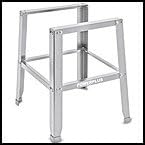
Image 4.1: The disassembled stand components. This image shows the metal frame parts of the table saw stand, ready for assembly.
- Identify the leg frames and cross braces.
- Securely attach the cross braces to the leg frames using the provided hardware. Ensure all bolts are tightened.
- Verify the stand is stable and level.
4.3. Mounting the Table Saw to the Stand
- Carefully place the table saw unit onto the assembled stand.
- Align the mounting holes on the saw base with those on the stand.
- Secure the saw to the stand using the appropriate bolts, washers, and nuts. Tighten all fasteners firmly.
4.4. Installing/Checking the Saw Blade
- Ensure the saw is unplugged from the power source.
- Remove the throat plate (if installed) to access the blade arbor.
- Use the provided wrenches to loosen the arbor nut and remove the outer flange.
- Place the saw blade onto the arbor, ensuring the teeth are pointing towards the front of the saw (upwards at the front of the table).
- Reinstall the outer flange and arbor nut. Tighten the nut securely with the wrenches.
- Replace the throat plate.
4.5. Attaching Guards and Dust Extraction
- Ensure the blade guard and splitter are correctly installed and move freely.
- Connect the dust extraction hose to the dust port on the saw. If using an external dust collector, connect it to the hose.
4.6. Adjusting the Rip Fence and Miter Gauge
- Rip Fence: Position the rip fence parallel to the saw blade. Lock it in place and check for squareness with a square. Adjust if necessary.
- Miter Gauge: Insert the miter gauge into the table slot. Adjust it to the desired angle (e.g., 90 degrees for crosscuts) and lock it.
5. Operation
Follow these guidelines for safe and effective operation of your table saw.
5.1. Pre-Operation Checks
- Ensure all guards are in place and functioning correctly.
- Verify the blade is clean, sharp, and securely fastened.
- Check that the work area is clear of obstructions and the floor is free of slip hazards.
- Confirm the power cord is in good condition and properly connected.
5.2. Adjusting Blade Height and Bevel
- Blade Height: Rotate the blade height adjustment knob (red knob, Image 3.1) to raise or lower the blade. For most cuts, the blade should extend no more than 1/8 inch (3mm) above the workpiece.
- Blade Bevel: Loosen the blade bevel adjustment lever (red lever, Image 3.1) and tilt the blade to the desired angle. Tighten the lever firmly before cutting.
5.3. Making Cuts
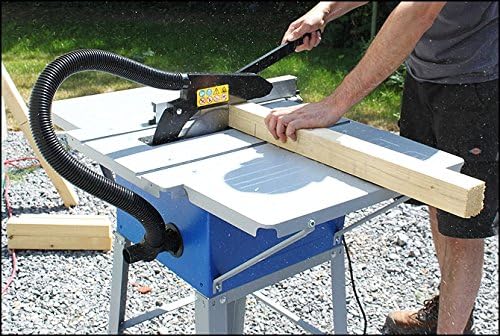
Image 5.1: Table saw in use, demonstrating a cutting operation. This image shows a user guiding a wooden workpiece through the saw blade, with the dust extraction hose visible and sawdust being produced.
- Rip Cuts (Parallel to grain): Use the rip fence. Set the fence to the desired width. Hold the workpiece firmly against the fence and the table. Feed the material slowly and steadily into the blade. Use a push stick for the last portion of the cut, especially for narrow pieces.
- Cross Cuts (Across the grain): Use the miter gauge. Set the miter gauge to the desired angle. Hold the workpiece firmly against the miter gauge. Feed the material slowly and steadily. Never use the rip fence and miter gauge simultaneously for a crosscut, as this can cause kickback.
- Dust Extraction: Always use a dust collection system or vacuum connected to the dust port to minimize airborne dust and keep the work area clean.
6. Maintenance
Regular maintenance ensures optimal performance and extends the life of your table saw.
6.1. Cleaning
- Always unplug the saw before cleaning.
- Remove sawdust and debris from the table, blade guard, and motor housing using a brush or vacuum.
- Clean the saw blade regularly to remove pitch and resin buildup, which can affect cutting performance and increase the risk of kickback.
- Wipe down metal surfaces with a clean cloth.
6.2. Blade Inspection and Replacement
- Inspect the saw blade before each use for dullness, cracks, or missing teeth. Replace damaged blades immediately.
- To replace the blade, follow the steps outlined in Section 4.4. Always use blades of the correct diameter and arbor size for your saw.
6.3. General Checks
- Check all fasteners and bolts periodically and tighten if necessary.
- Inspect the power cord for any signs of damage. Replace if frayed or cut.
- Ensure the blade height and bevel adjustment mechanisms operate smoothly.
7. Troubleshooting
This section addresses common issues you might encounter with your table saw.
7.1. Saw Does Not Start
- Check Power Connection: Ensure the saw is properly plugged into a functional outlet.
- Circuit Breaker: Check if the circuit breaker has tripped.
- On/Off Switch: Verify the switch is in the 'ON' position.
- Safety Key/Lockout: Some models have a safety key or lockout switch. Ensure it is engaged.
7.2. Blade Not Cutting Cleanly or Burning Wood
- Dull Blade: Replace or sharpen the saw blade.
- Pitch Buildup: Clean the blade to remove resin and pitch.
- Incorrect Blade Type: Ensure you are using the correct blade for the material being cut (e.g., fewer teeth for ripping, more teeth for crosscutting).
- Slow Feed Rate: Adjust your feed rate to be consistent and appropriate for the material.
7.3. Excessive Vibration
- Loose Blade: Ensure the saw blade is securely tightened on the arbor.
- Damaged Blade: Inspect the blade for damage or warping. Replace if necessary.
- Loose Components: Check that the saw is securely mounted to the stand and all bolts are tight.
7.4. Kickback Occurs
- Splitter/Riving Knife: Ensure the splitter is correctly installed and aligned with the blade.
- Dull Blade: Replace or sharpen the blade.
- Improper Feed: Maintain a consistent feed rate and keep the workpiece firmly against the fence/miter gauge.
- Binding: Avoid cutting warped or twisted wood that can bind the blade.
8. Specifications
| Specification | Value |
|---|---|
| Brand | Varo |
| Model Number | POW8561 (VR-POW8561) |
| Power (Watts) | 1800 Watts |
| ASIN | B00E3CT5AC |
| Manufacturer | Powerplus |
9. Warranty and Support
For warranty information, technical support, or service inquiries, please refer to the warranty card included with your product or contact your retailer or the manufacturer directly. Keep your purchase receipt as proof of purchase.
