Introduction
This instruction manual provides detailed guidance for assembling the Tamiya Porsche 934 Jaegermeister 1:24 Scale Model Kit. This kit allows enthusiasts to recreate the iconic racing car with meticulous detail. Please read all instructions carefully before beginning assembly.
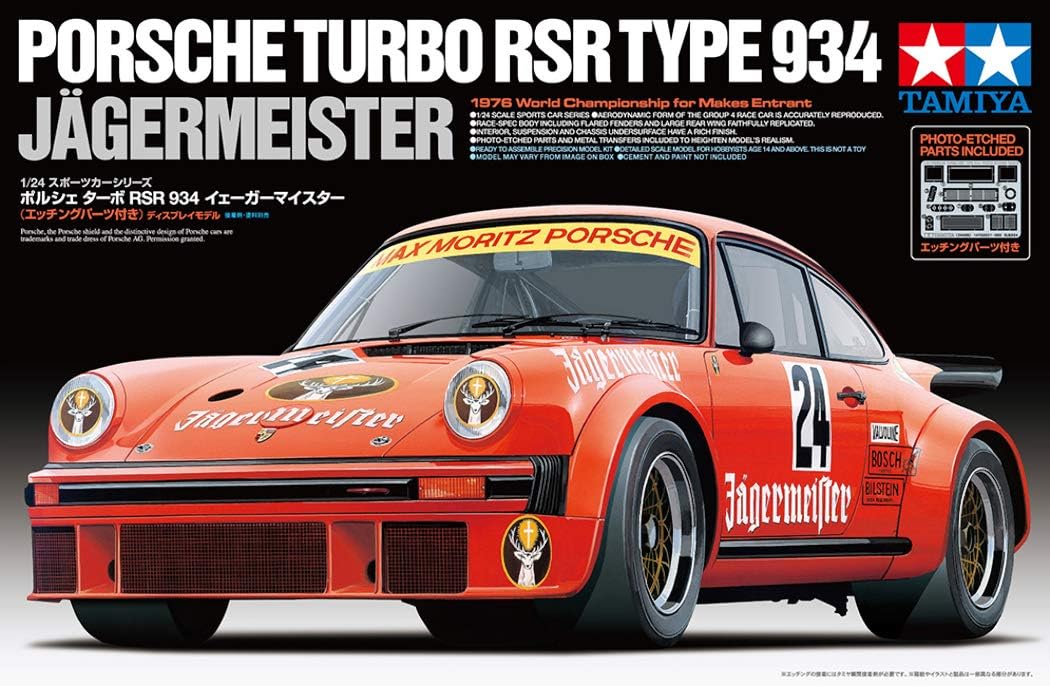
Image: The box art for the Tamiya Porsche 934 Jaegermeister 1:24 Scale Model Kit, showcasing the finished model in its distinctive orange livery with racing decals.
Safety Information
WARNING: This product contains small parts and is not suitable for children under 14 years of age due to potential choking hazards. Adult supervision is recommended during assembly.
- Always use tools carefully to avoid injury.
- Ensure proper ventilation when using paints, glues, and thinners.
- Keep all components and tools out of reach of small children and pets.
- Dispose of waste materials responsibly.
Setup and Preparation
1. Unpacking the Kit
Carefully open the kit box and remove all contents. Verify that all parts are present and undamaged by comparing them with the parts list in the included manual (not provided here). The kit includes various sprues with plastic parts, clear parts, rubber tires, and photo-etched components.

Image: An overview of the Tamiya Porsche 934 Jaegermeister model kit contents, showing various sprues with orange and black plastic parts, clear parts, rubber tires, and chrome-plated wheels.
2. Recommended Tools
The following tools are recommended for optimal assembly. Ensure you have these readily available before starting.
- Angled Tweezers (Pinzette abgewinkelt)
- Cutter Knife (Cutter-Messer)
- Decal Scissors (Decal-Schere)
- Side Cutters for Plastic (Seitenschneider Spitz für Kunststoff)
- Brush Set (Pinsel-Set "Basic")
- Masking Tape 10mm with Dispenser (Masking Tape 10mm mit Abroller)
- Plastic Cement 40ml Tamiya (Plastikkleber 40ml Tamiya)
- Plastic Cement 40ml Extra Thin Tamiya (Plastikkleber 40ml extradünn Tamiya)
- Mark Fit (Strong) Decal Softener 40ml (Dekorweichmacher 40ml)
- Decal Adhesive Soft/Hard 10ml (Haftmittel 10ml)

Image: A visual guide to recommended tools for model assembly, including tweezers, a hobby knife, scissors, side cutters, paint brushes, masking tape, and various types of plastic cement and decal solutions.
3. Paints Required
Achieving the authentic look of the Porsche 934 Jaegermeister requires specific paint colors. Refer to the list below for recommended Tamiya XF (flat acrylic), X (gloss acrylic), and TS (spray for plastics) paints.

Image: A chart detailing the required Tamiya XF-Acrylic (flat), X-Acrylic (gloss), and TS-Spray (for plastics) paints, along with their article numbers and descriptions, essential for painting the model.
| Art. Nr. | Description |
|---|---|
| 300081301 | XF-1 Schwarz matt 23ml (Flat Black) |
| 300081316 | XF-16 Aluminium matt 23ml (Flat Aluminum) |
| 300081356 | XF-56 Metallic Grau matt 23ml (Metallic Grey) |
| 300081007 | X-7 ROT glänzend 23ml (Gloss Red) |
| 300081010 | X-10 GUN METALL glänzend 23ml (Gun Metal) |
| 300081011 | X-11 CHROM SILBER glänzend 23ml (Chrome Silver) |
| 300081012 | X-12 Blatt-Gold glänzend 23ml (Leaf Gold) |
| 300081018 | X-18 Schwarz seidenmatt 23ml (Semi-Gloss Black) |
| 300081026 | X-26 Klar-Orange glänzend 23ml (Clear Orange) |
| 300081027 | X-27 Klar-Rot glänzend 23ml (Clear Red) |
| 300081020 | X-20A Verdünner 23ml Acryl (Thinner) |
| 300085012 | TS-12 Orange glänzend 100ml (Gloss Orange Spray) |
Assembly Instructions
Follow the step-by-step diagrams in the original kit manual for precise assembly. The general process involves cutting parts from sprues, cleaning mold lines, painting, gluing, and applying decals. Pay close attention to the photo-etched parts for enhanced detail.
1. Body and Chassis Assembly
Begin by assembling the main body and chassis components. Ensure all parts are properly aligned before applying cement. The kit features a detailed racing body with ventilation grilles and an accurately recreated underbody.

Image: A detailed rear view of the assembled Porsche 934 model, showing the wide fenders, rear wing, and engine grille. The model has a total length of 179mm, and its glamorous form with wide fenders and a rear wing is a key visual feature.
2. Interior and Engine Details
Assemble the interior components, including the dashboard, seats, and roll cage. The kit provides intricate details for a realistic cockpit. For the undercarriage, assemble the chassis and BBS alloy wheels. The 3-liter boxer engine details are also included for an authentic representation.
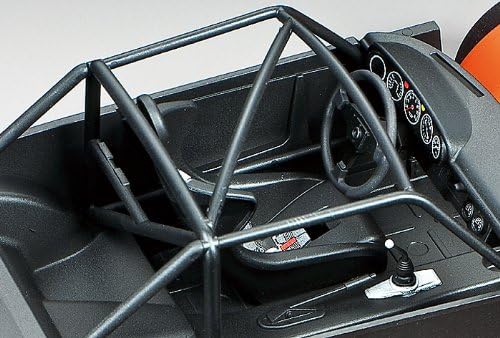
Image: A close-up of the model's interior, featuring the detailed roll cage, racing seat, and dashboard instrumentation.
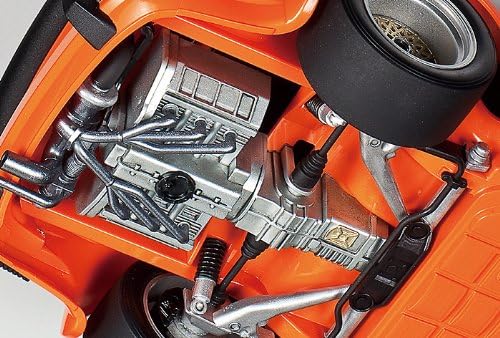
Image: A view of the model's undercarriage, showcasing the detailed engine, transmission, and suspension components.
3. Photo-Etched Parts and Decals
The kit includes photo-etched parts to enhance the realism of certain details, such as grilles and emblems. Carefully cut and attach these parts using appropriate adhesive. Apply the decals according to the placement guide in the main manual, using decal softener for a seamless finish.

Image: A sheet of photo-etched parts for the Porsche 934 model, including various grilles and small detail components. These etched parts enhance the precision of details and include inlet marks for mirrors.
Display and Handling
Once assembled, your Tamiya Porsche 934 Jaegermeister model is ready for display. Handle the model with care to prevent damage to delicate parts. It is recommended to display the model in a stable, dust-free environment away from direct sunlight and extreme temperatures to preserve its finish and structural integrity.
Maintenance
To maintain the appearance of your model, dust it regularly with a soft, dry cloth or a soft brush. Avoid using harsh chemicals or abrasive cleaners, as these can damage the paint and plastic surfaces. For stubborn dust in crevices, a soft, dry paintbrush can be used.
Troubleshooting Common Issues
- Parts not fitting: Ensure you are using the correct parts for each step. Sometimes, a small amount of sanding or trimming may be required for a perfect fit.
- Decals not adhering: Make sure the surface is clean and smooth. Use decal setting solution (like Tamiya Mark Fit) to help decals conform to irregular surfaces and adhere better.
- Paint issues: If paint appears uneven or clumpy, ensure it is properly thinned and applied in thin coats. Allow sufficient drying time between coats.
- Missing parts: Double-check the sprues and packaging. If a part is genuinely missing, contact Tamiya customer support or your retailer.
Specifications
| Feature | Detail |
|---|---|
| Model Name | Porsche Turbo 934 Jägermeister |
| Model Number | 300024328 |
| Brand | TAMIYA |
| Scale | 1:24 |
| Length (assembled) | 179 mm (7.05 inches) |
| Width (assembled) | 83 mm (3.27 inches) |
| Material | Plastic, Photo-etched metal, Rubber |
| Recommended Age | 14 years and up |
Product Overview Video
Watch this official product overview video to get a closer look at the Tamiya Porsche 934 Jaegermeister model kit and its components.
Video: An official product overview from Amazon Product Imaging, showcasing the unboxing and key features of the Tamiya Porsche 934 Jaegermeister 1:24 Scale Model Kit.
Warranty and Support
For specific warranty information or technical support regarding your Tamiya model kit, please refer to the documentation included in your product packaging or visit the official Tamiya website. For general inquiries, you may also contact your retailer.


